sparcost3
Member
Registered: 21st Sep 09
Location: Stafford, Staffordshire
User status: Offline
|
how the car is looking recently now the cage is repainted smooth silver and in 


[Edited on 21-09-2011 by sparcost3]
|
bigron1988
Member
Registered: 29th Aug 09
Location: Southport, Merseyside
User status: Offline
|
much better siler , anyone else have problems loading up page 2 on here the pics dont like to load for me
|
sparcost3
Member
Registered: 21st Sep 09
Location: Stafford, Staffordshire
User status: Offline
|
yeah definatley better silver, having trouble doing anythin as i have really bad conection this week for some reason, can't get any of the pics on second page either :/
saw a real carbon gsi front bumper the other day when searchin the web, be nice on the carbon clad beast 
would be a shame to cut up tho!
|
DansCorsaSXi
Organiser: Yorkshire
Premium Member
 Registered: 13th Jan 10
Location: Worksop
User status: Offline
|
Looking good fella!
Good progress on the engine,looking good all painted up and clean.
Cage looks awesome,the car looks awesome!!!  
Star silver C20XE SXi Project thread
Smoke Grey Corsa GSi Project thread
|
bigron1988
Member
Registered: 29th Aug 09
Location: Southport, Merseyside
User status: Offline
|
quote:
Originally posted by sparcost3
yeah definatley better silver, having trouble doing anythin as i have really bad conection this week for some reason, can't get any of the pics on second page either :/
saw a real carbon gsi front bumper the other day when searchin the web, be nice on the carbon clad beast
would be a shame to cut up tho!
yes mate have seen that to but like you say i would be cutting most of it up , and quite like the red bumper on mine
|
sparcost3
Member
Registered: 21st Sep 09
Location: Stafford, Staffordshire
User status: Offline
|
now for stripping the front interior 
1. seats back out, bye bye carpet and horrible brown deadening foam!

2. all gone, trial fit of floor matt check plate ( lightweight ally)


3. now for the messy bit. i heat gunned and removed all the tar/bitchumen like crud off the car floor as i did in the rear and removed excess joint sealant were i could ( the yellow foam like stuff) all has a perpous in the everyday corsa, but not for me thankyou

4. big box full of removed crud, suprisingly heavy!!

5. now removing all that horrible left over crud using spirits! to leave a nice clean floor ready for painting


6. nice little delivery today, now you may think these are for my bonnet as there bonnet pins lol but im actually going to use them for my gsi bumper to try and pull in the gaps between the wing were the standard big plastic fixings that dont work are atm - not sure if it will work, i hope so!

7. now its time to say goodbye to any un needed wiring loom and to hide any wiring on sight.
bye to rear wiper and all the other rubish that makes up half the unneeded wiring !

8. all the wire ive removed

9. re insulated in red - to try and put it out of sight, cable is run through the inside of the shell so its not on desplay as much as possible

10. box relocated under the dash (pas side) still not thought how to cover ecu on drivers side. thiking of making a cover to fit over and painting it red to blend in


11. now for painting the floor red - half done


12. here is the floor fully stripped, painted and ready for the finishing touches before refitting the seats


thanks for looking, hope you enjoy and like it as much as i do more to come soon!
[Edited on 21-09-2011 by sparcost3]
|
sparcost3
Member
Registered: 21st Sep 09
Location: Stafford, Staffordshire
User status: Offline
|
quote:
Originally posted by DansCorsaSXi
Looking good fella!
Good progress on the engine,looking good all painted up and clean.
Cage looks awesome,the car looks awesome!!!
cheers mate really apriciate it nice to see people intrested
|
sparcost3
Member
Registered: 21st Sep 09
Location: Stafford, Staffordshire
User status: Offline
|
quote:
Originally posted by bigron1988
quote:
Originally posted by sparcost3
yeah definatley better silver, having trouble doing anythin as i have really bad conection this week for some reason, can't get any of the pics on second page either :/
saw a real carbon gsi front bumper the other day when searchin the web, be nice on the carbon clad beast
would be a shame to cut up tho!
yes mate have seen that to but like you say i would be cutting most of it up , and quite like the red bumper on mine
yeah the carbon bumper may be over kill red does look awesome, and with it being 1 of 2 made (aparently) it would be a shame to cut and for 500 quid its highly expensive lol ( if thats an issue for you  ) )
|
sparcost3
Member
Registered: 21st Sep 09
Location: Stafford, Staffordshire
User status: Offline
|
definatley in need of a full 5 set carbon door cards, those door pockets look so gash and ruin my car  also need a gauges pod ( the 3 gauge 1) and some carbon on the roof to get rid of sunroof also need a gauges pod ( the 3 gauge 1) and some carbon on the roof to get rid of sunroof
|
sparcost3
Member
Registered: 21st Sep 09
Location: Stafford, Staffordshire
User status: Offline
|
got bored after work tonight so couldnt resist painting up engine mounts and ignition amp plate in smooth silver

|
Alex_Rally
Member
Registered: 6th Sep 09
Location: Tyne and Wear, gateshead
User status: Offline
|
how did u manage to move the wiring up behind the dash ? did u have to extend the length of the woring , as mine wasnt long enough to put behind the dash.
|
sparcost3
Member
Registered: 21st Sep 09
Location: Stafford, Staffordshire
User status: Offline
|
quote:
Originally posted by geordie_corsa
how did u manage to move the wiring up behind the dash ? did u have to extend the length of the woring , as mine wasnt long enough to put behind the dash.
Yes mate had to chop 2 wires and solder in an extra 6 inches and re insulate, checked everything after and it all work fine as it should
|
Ingham
Banned
Registered: 9th May 08
Location: Burnley, Lancashire
User status: Offline
|
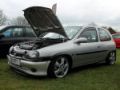
That 106 is my mate Ryan's
|
Jed D
Member
Registered: 15th Mar 11
Location: Durham
User status: Offline
|
A* on this, love it, the floor looks mint painted up
like the bumper pin idea aswell. how much were the pins??
|
sparcost3
Member
Registered: 21st Sep 09
Location: Stafford, Staffordshire
User status: Offline
|
quote:
Originally posted by JedDy
A* on this, love it, the floor looks mint painted up
like the bumper pin idea aswell. how much were the pins?? [/quot
Under 6 quid posted off eBay mate red anodised aluminium dead light to
|
sparcost3
Member
Registered: 21st Sep 09
Location: Stafford, Staffordshire
User status: Offline
|
nice bits arived today, pics to folllow soon
|
sparcost3
Member
Registered: 21st Sep 09
Location: Stafford, Staffordshire
User status: Offline
|
lots of pics to come later today!
|
M Sutton
Member
Registered: 11th Jan 03
Location: Northamptonshire
User status: Offline
|
What did you use to paint the floor, rattle cans, a spray gun or brushed on?i carnt tell from the pictures! looks awesome tho
|
Sean
Member
Registered: 14th Sep 10
Location: Eastbourne, BN23 7AZ
User status: Offline
|
looking lavvly! also would like to know what you painted the floor with as im doing mine soon looks sweet though!
|
sparcost3
Member
Registered: 21st Sep 09
Location: Stafford, Staffordshire
User status: Offline
|
its just red hamerite guys rollered on with a foam roller.. came out well and only 9 pounds a tin for 1l on offer
|
Jed D
Member
Registered: 15th Mar 11
Location: Durham
User status: Offline
|
take your time fitting the bonnet pins, you'll need a dremel or summit
coming along nicely
|
sparcost3
Member
Registered: 21st Sep 09
Location: Stafford, Staffordshire
User status: Offline
|
ok been a while since i updated.. heres some more progress
i next fixed my floor mats down and re-fitted my cobra seats nice and low on custom made subframes i made myself and painted up in black.
here is the 1st 1 trial fitted

then i stripped down the xe to rebuild.... here are a few of the parts i gathered up..
mount been filled and also i put some metal rods in for extra strength

new hub and intake setup which i made my self using a silicon 45 degree elbow from auto silicon hoses (ASH) and pressing out a hole for the sensor and finishing off with an ASH cone filter all for £30

picked up a new lambda sensor and an ignition amp

painted up the manifold with high temp paint and fitted lambda

now ive painted up some of the components, starter motor, brackets, plates, bottom pulley etc.. just to tidy up a little
also i bought a full set of bits to rebuild the engine which came to 250 quid! from autovaux.. cheers guys
Full Top end gasket set £35.51 + vat (42.61)
Full bottom end gasket set £25.49 + vat (30.59)
head bolts £9 + vat set of 10 (10.80 inc vat set)
main and big end bolts, Main bolts £1.54 each + vat (1.85 inc) x8 (14.72)
Big end bolts £2.93 each + vat (3.52 inc) 10 x required (35.20)
sump set with baffle plate £33.62 + vat (40.34 inc)
flywheel bolts £0.65 each + vat (0.78 each inc) 8 x required (6.24)
piston rings £11.87 + vat per piston (14.24 each inc) x4 (56.96)
big end bearings

then it was a quick coat of paint for the other side of the bay...


engine block sent off to be honed and new cylinder head thats been skimmed and pressure tested bought for 60 posted

then off with the bumper so it will fit on the trailor!!

new finishing touch to the bumper...
gsi badge

heres a few pics on the way to my mates


time to say goodbye to the 8 valver... it has served me well R.I.P
out with the old....


in with the new.....


and compleate......


job done
i have also fitted a decat pipe made from stainless steel and flexi
i have fully undersealed the car underneath and all 5 arches and the front pannel
also i bought a strutbrace for a bargain 20 quid (sabelt 1) IN REALLY GOOD CONDITION - so very pleased with that
pics of the above to follow soon
thanks for following the project, more to come soon
steve,
|
sparcost3
Member
Registered: 21st Sep 09
Location: Stafford, Staffordshire
User status: Offline
|
heres my strutbrace that just arived and a few pics i found of me working on the engine before it was fitted


if anyone has any carbon fibre door cards im desperatley looking for some expecially fronts!!
or a sheet of carbon that will fit over sunroof hole that i can use to rivet and seal to reduce weight please u2u me or email me, cheers
sparcost3@corsasport.co.uk
|
sparcost3
Member
Registered: 21st Sep 09
Location: Stafford, Staffordshire
User status: Offline
|
.
|
Darryl H
Organiser: South Central
Premium Member
 Registered: 19th Nov 09
Location: Camberley Drives: Porsche 944
User status: Offline
|
Great work buddy! Bay looks tidy although i'd get a cold air feed for your cone and shield off so it doesn't soak in much heat but other than that it looks spot on
|My Corsa|SC|My Instagram|
|


