DaveB
Member
Registered: 29th Dec 00
Location: Huddersfield
User status: Offline
|
Keep getting a lot of link-backs to my thread on MIG, so thought I'd copy it across on to here. Each post on MIG'll just get copied over, so sorry if the first few lines of each post don't make any sense.
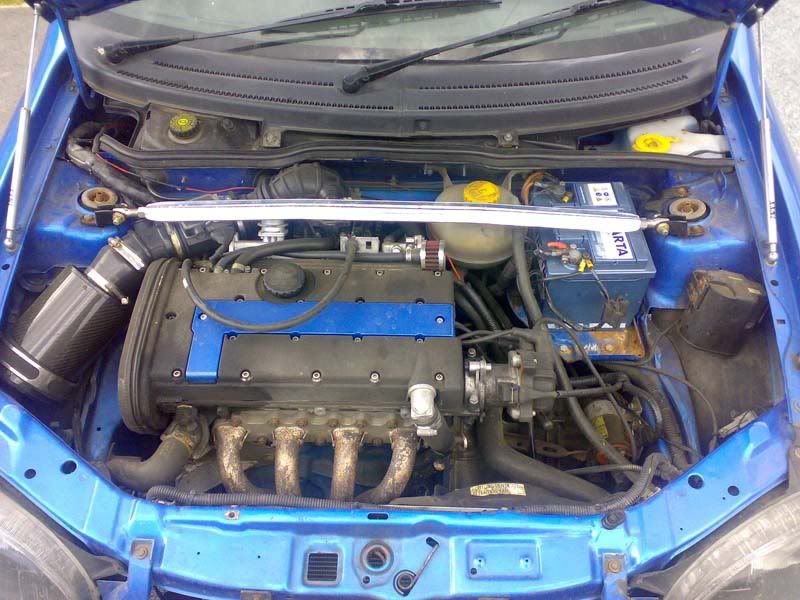
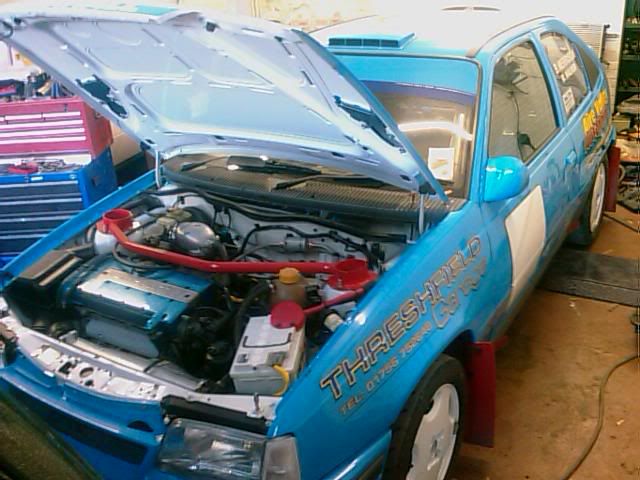
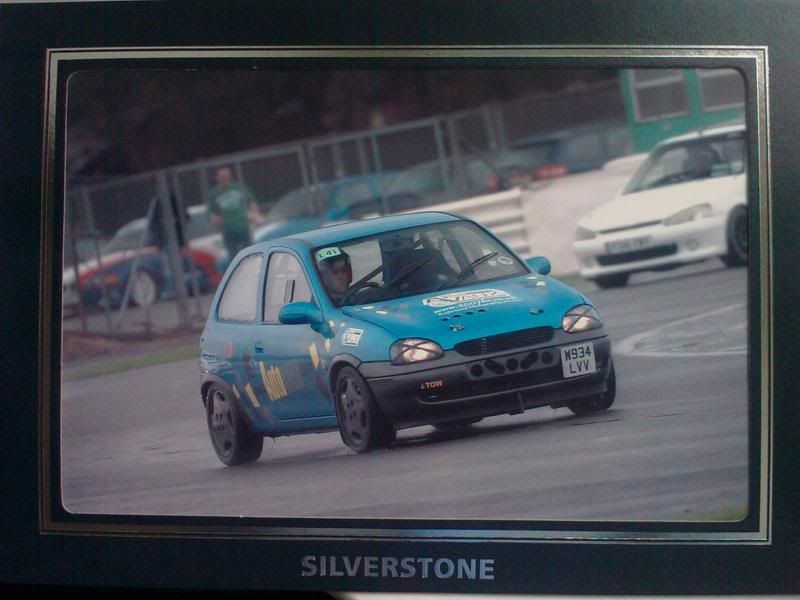
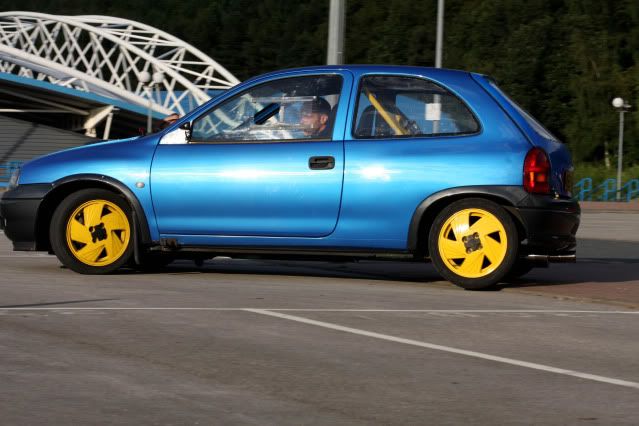
Thread has run for a period of 2.5years currently (since August 2007) and the car started as a stripped out XE'd Corsa club, and is now a 200bhp+ animal lol
Enjoy 
Well, the Integra went a couple of weeks ago and I was carless for a few weeks; bus travel royally sucks.
Last weekend the MD at work offered me a company car; after 24hours consideration I accepted, and on Monday took delivery of a Mk5 Tdi Golf; lovely daily hack IMO 
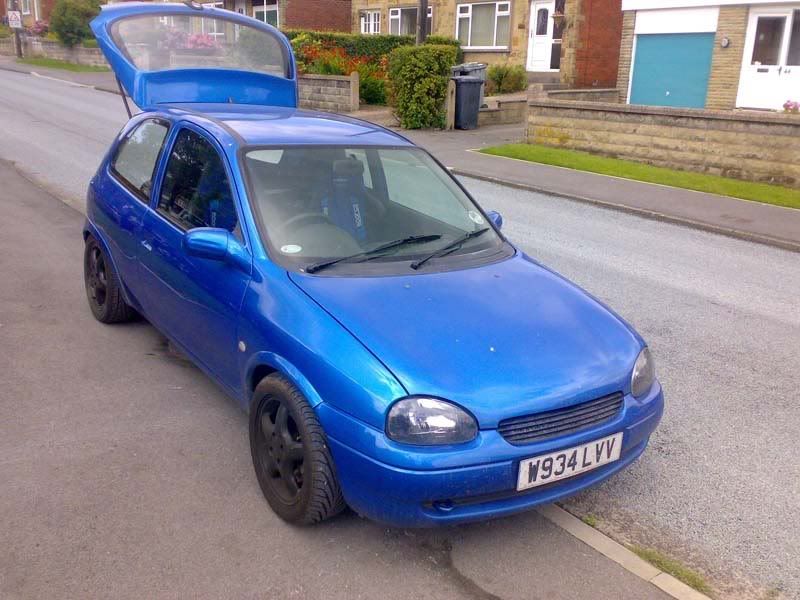
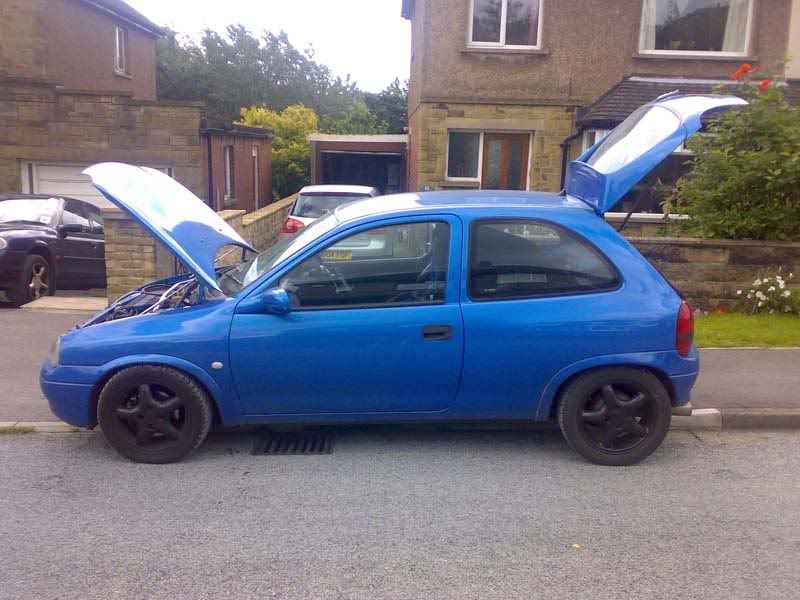
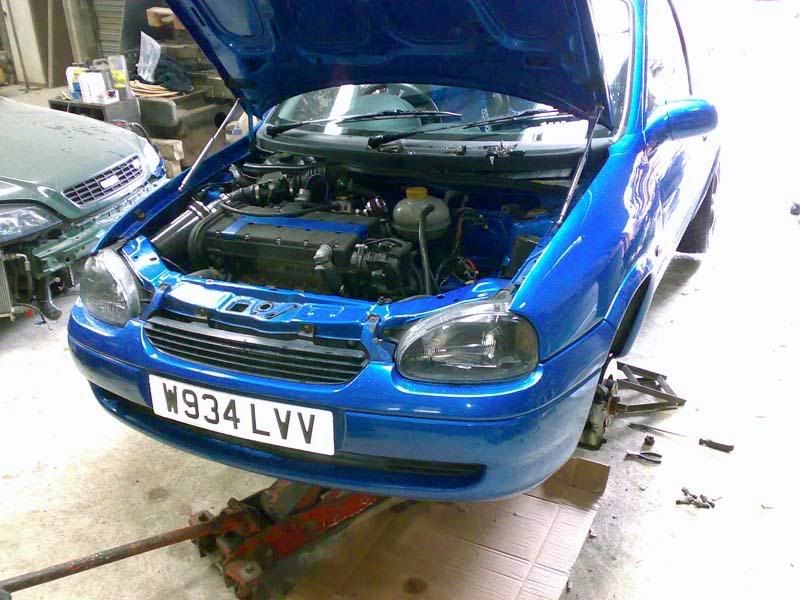
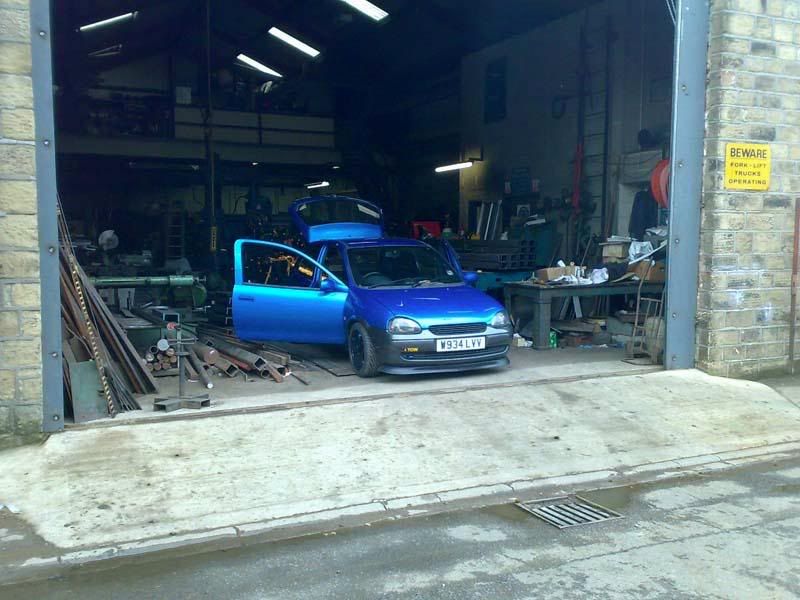
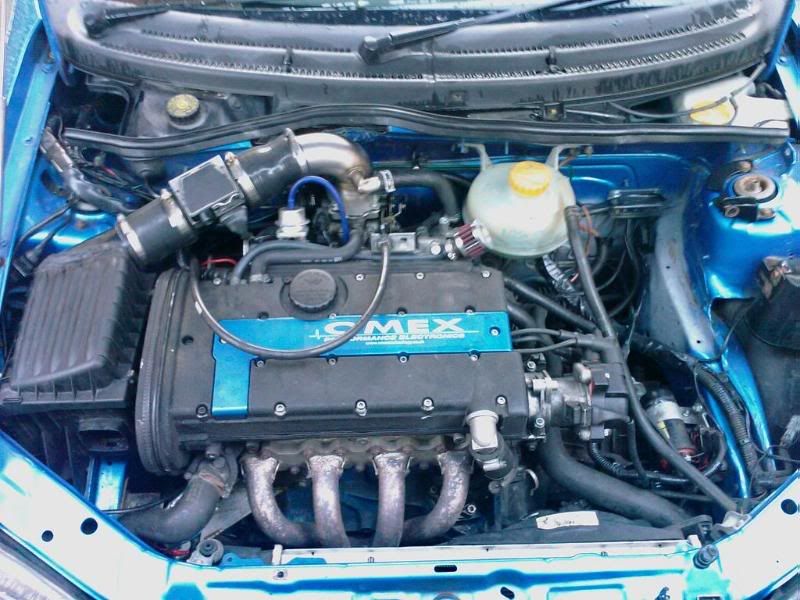
My decision then was whether to try and aim for a straight line/highpowered LET car or for a more rounded fast road/track car. I opted for the latter, and my search began for an XE converted mk3/corsa.
I spent hours each day scanning the forums, and sent numerous PMs and U2Us out. After seeing a bargain XE corsa turn up over on CS I called to look on my way back from being on-site with work; the chap lived in deepest darkest Norfolk.
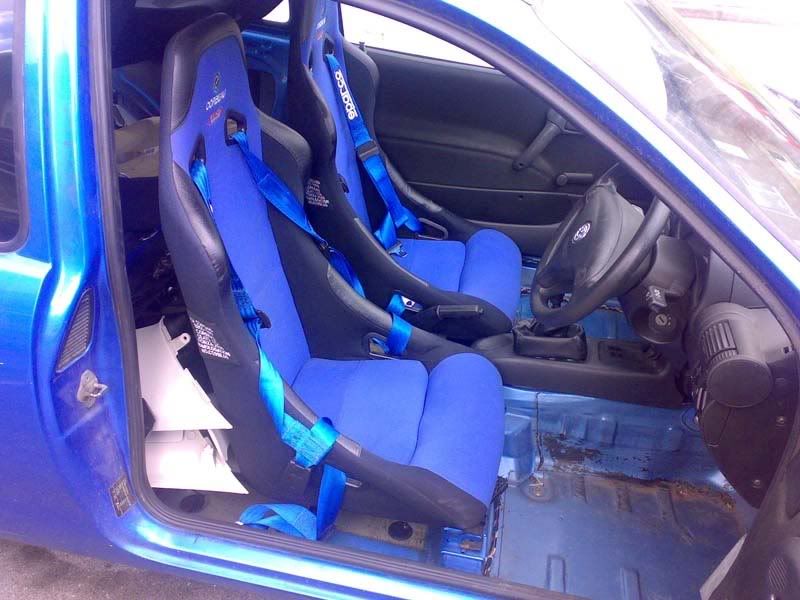
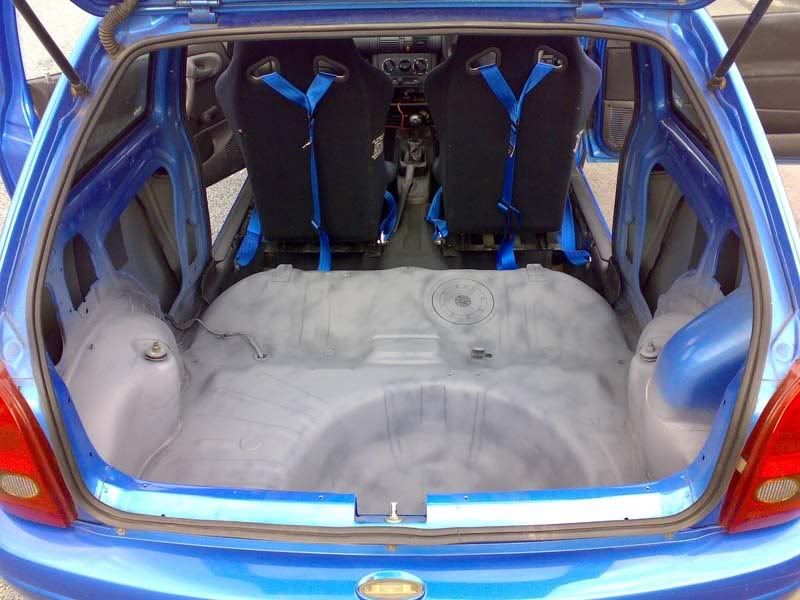
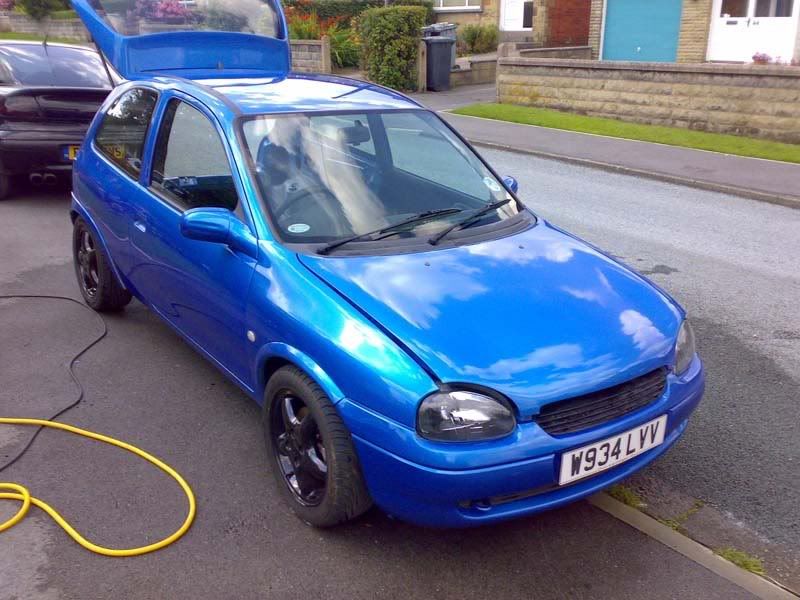
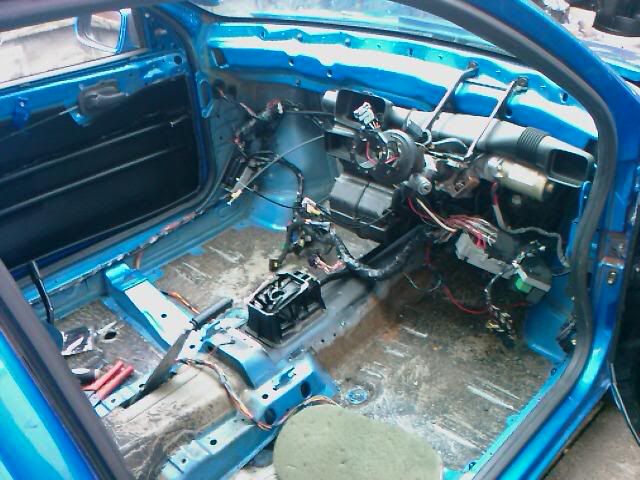
It was pretty dark when I arrived but the car looked tidy enough; very 'used'. The interior was totally stripped bar a dashboard, 2 buckets and pair of harnesses. Off we went on the test drive; I was very impressed...more so when he proceeded to aim for the limiter in 5th lmao
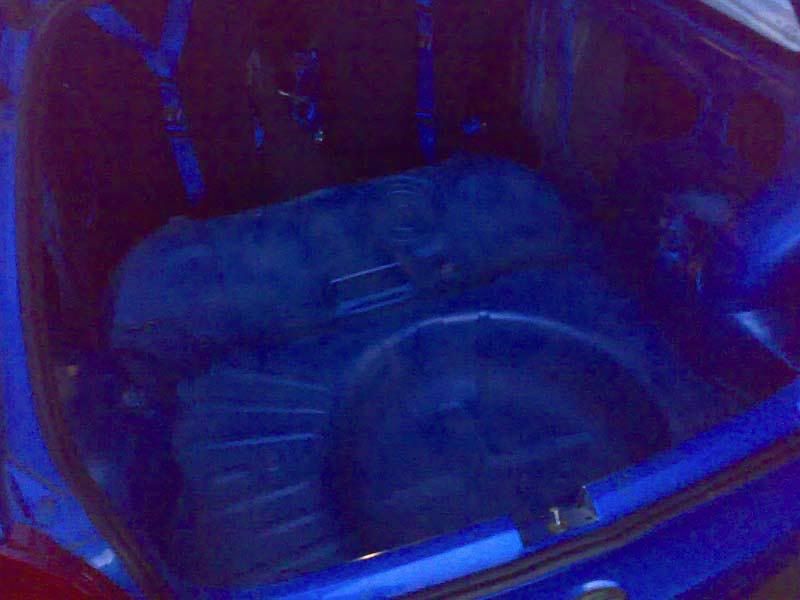
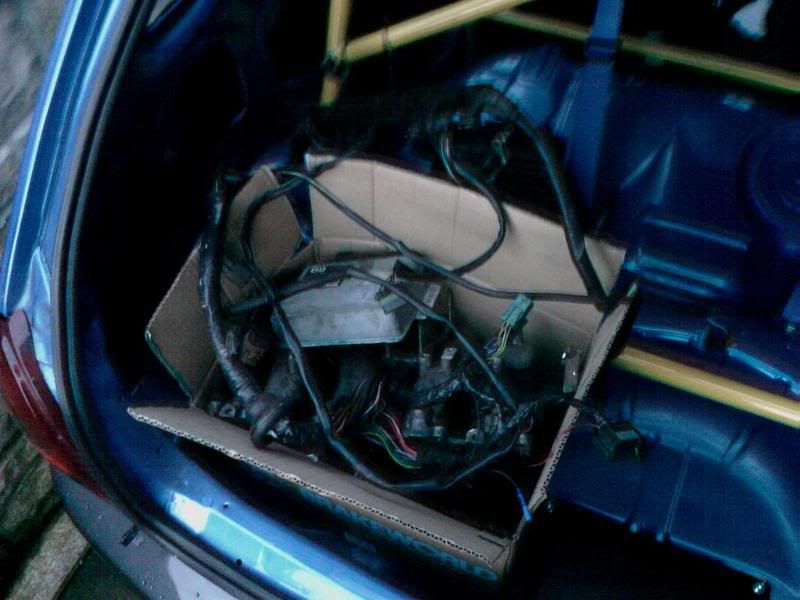
A deposit was left, and a deal done. I returned on saturday morning and collected the car; the interior that had been removed from the car was stuff in the 'boot'
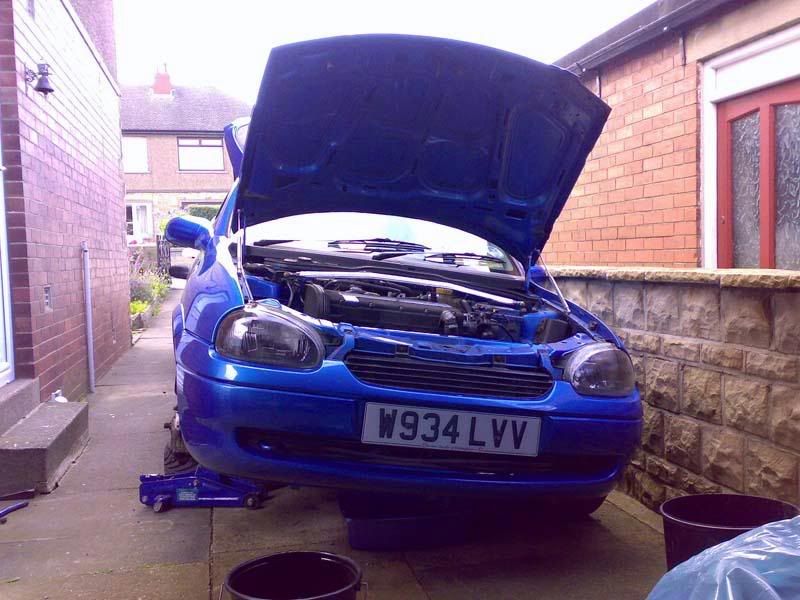
I drove home with a massive grin on my face; sunday would be spent cleaning. The car had been stood for some 2-3months, and on a farmyard so the exterior wasn't at its best.
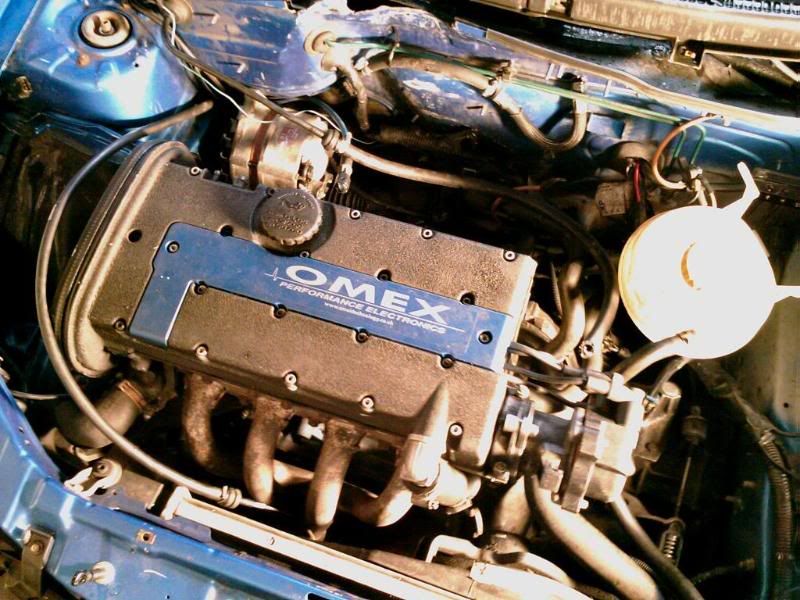
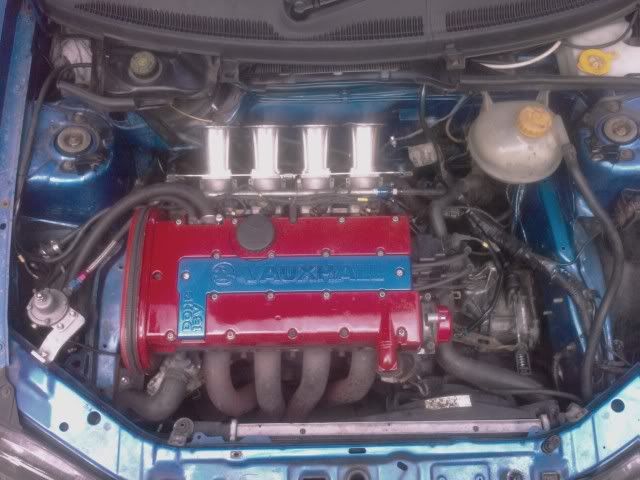
How it Started
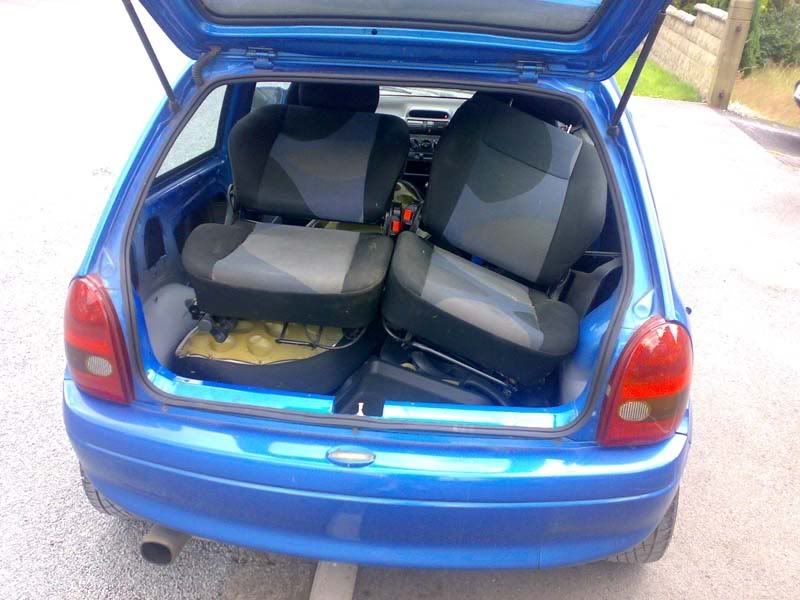
Boot Emptied
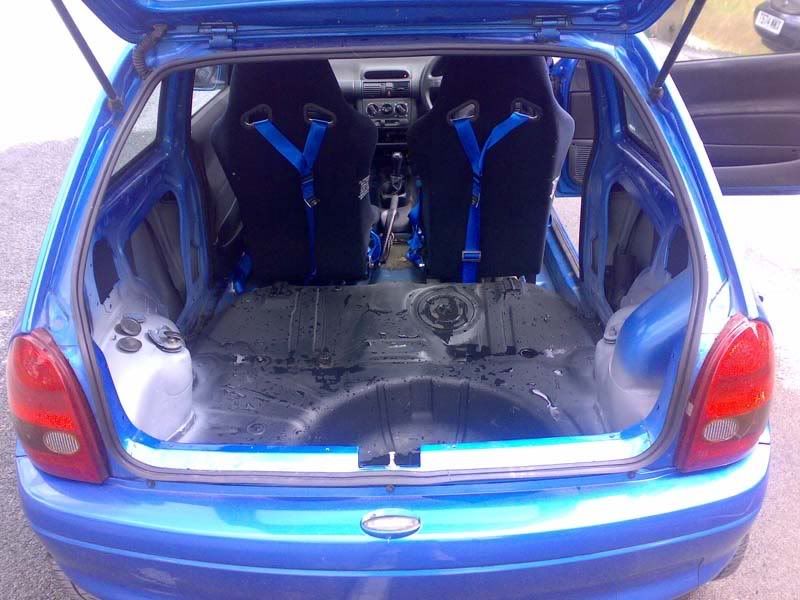
Seats Out
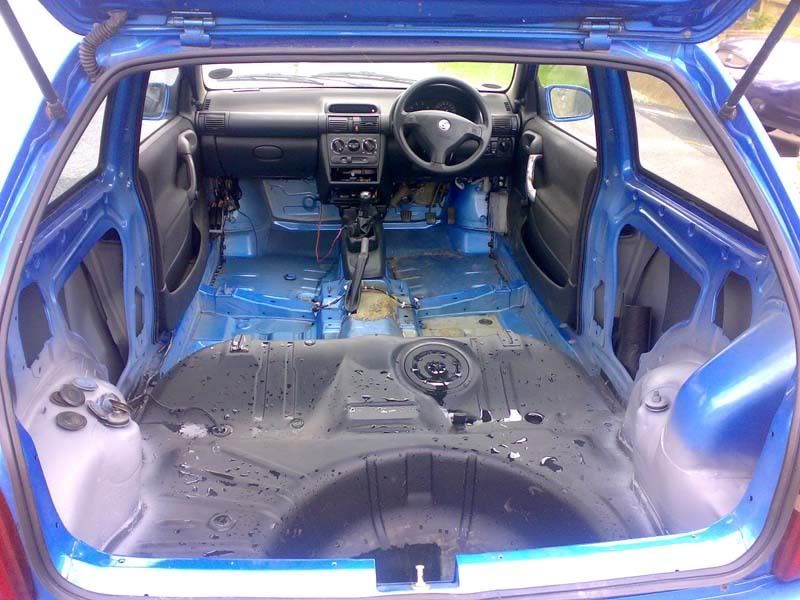
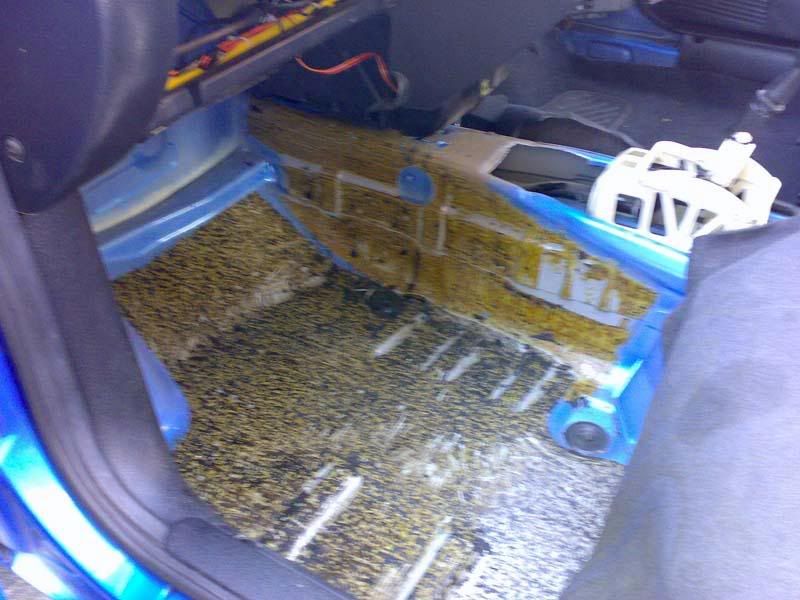
Started Removing the Remaining Sound Deadening
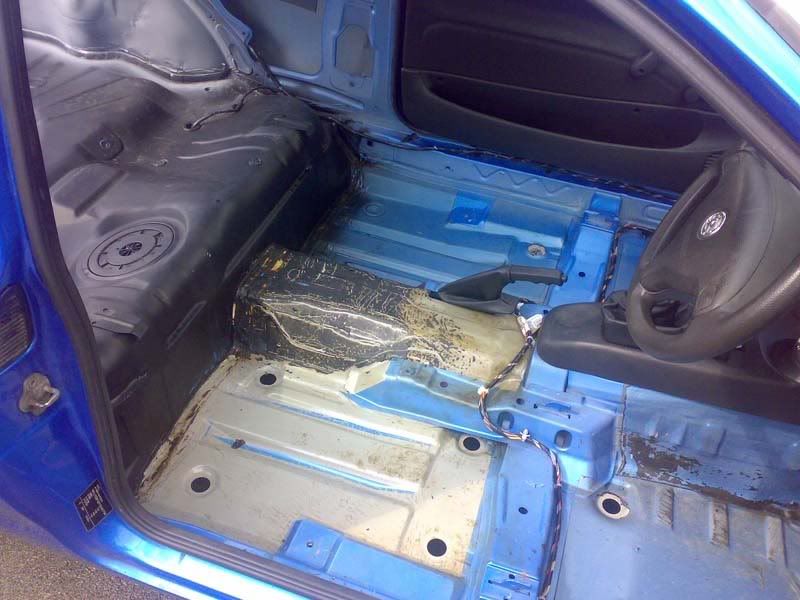
<don't have any further pics of the floor with no sound deadening> As cool as no carpets are; I'd rather have some carpet under my feet for when the car is used in wet weather; so once the inside had all been washed down, the front carpet went back in.

The inside will be painted Arden Blue, so I sanded down the back and primered it all ready for paint
Now the inside was something like, I started on the outside:
SnowFoamed
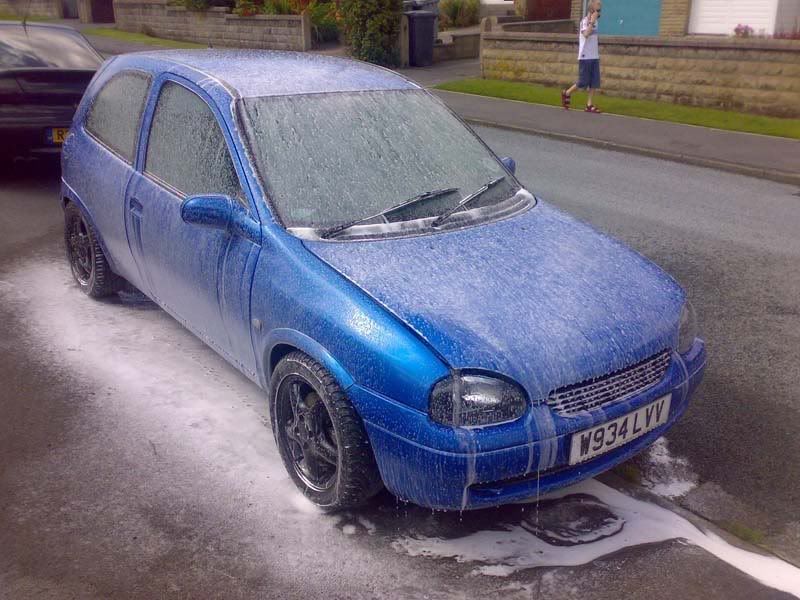
Dried Off
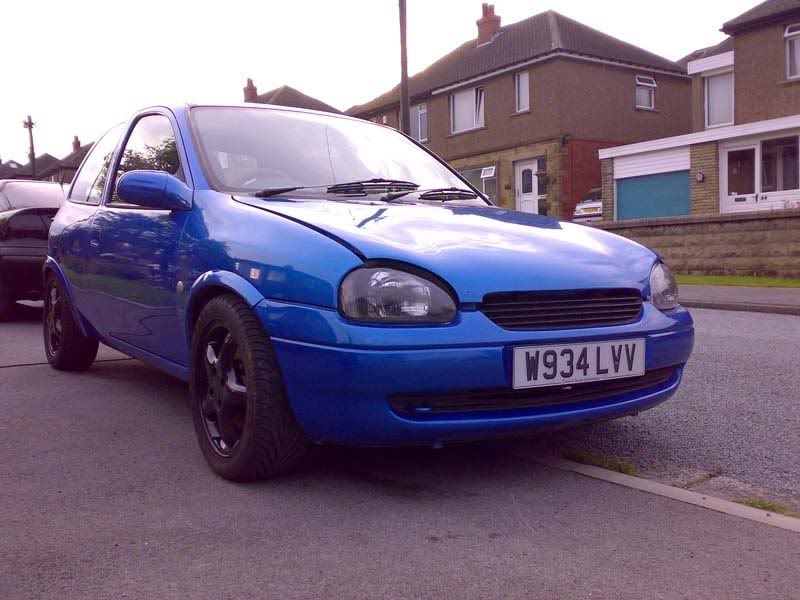
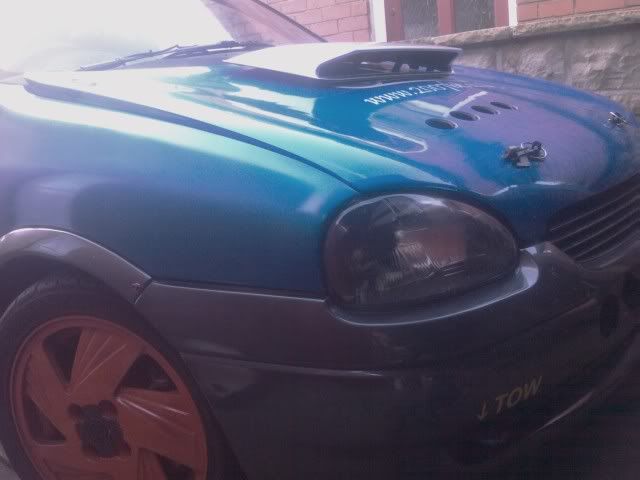
End Result after Claying and PCing (bonnet isn't shut before anyone starts)
Sooo, all was good. Absolutley loving valver power in a little car, and successfully popped the limiter in 5th last night on the M62 lmao
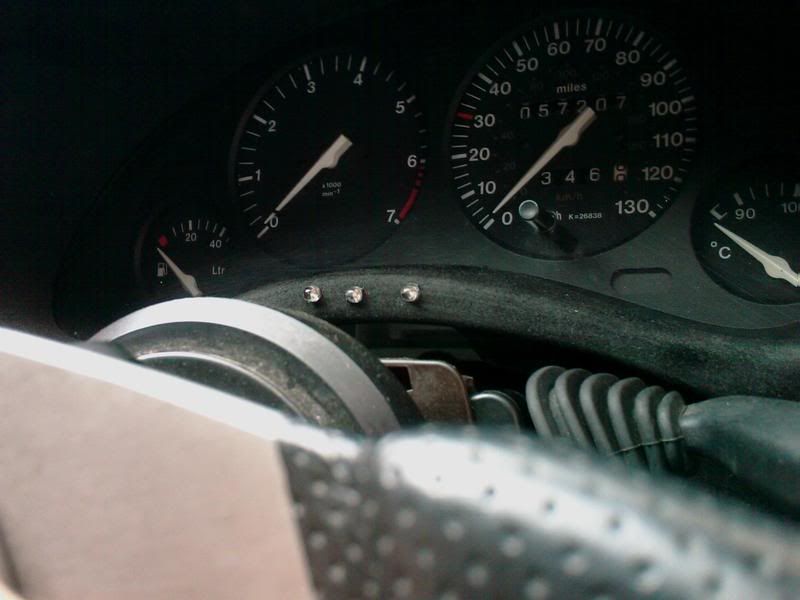
Anyway, so that brings us on to tonight. I set off to run over to Wazpazs to pick up some servicing items from Autovaux. Coming up to one of my favourite roads when there's a misfire, the rev counter reads zero :confused:
Another misfire the management light is on, I pull over.
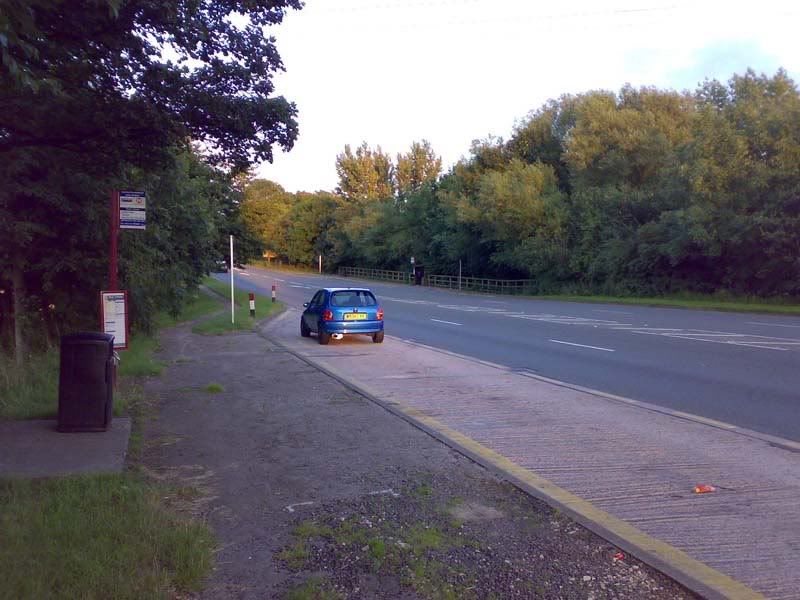
Everytime the car is revved the management light comes on. A call to wazpaz and we both reckon crank sensor is the fault. Waz turns up in his 12v workhorse corsa full of spares.
We change the crank sensor - car won't start
We change it for another one - car won't start
Check for fuel - yup
Check for spark - yup
Dry the plugs off - now it starts again :confused:
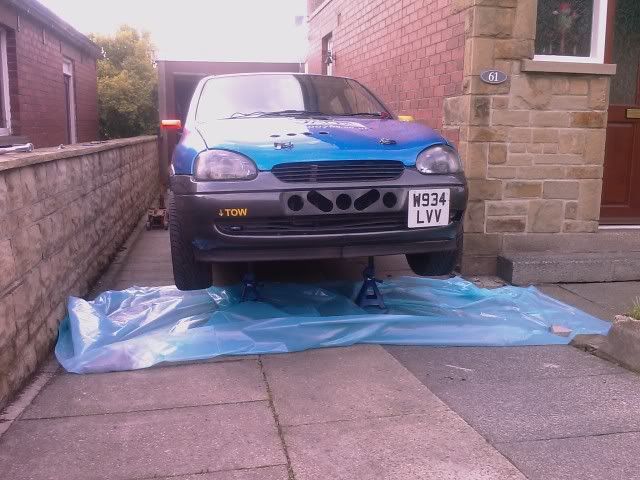
ECU light constantly on. Somewhere in the middle of that was a phonecall to JFisher Vauxhall support  and the RAC. I was getting bored playing with it at the side of the road, so the RAC sent someone to tow me home. and the RAC. I was getting bored playing with it at the side of the road, so the RAC sent someone to tow me home.
We waited....
...and waited some more...
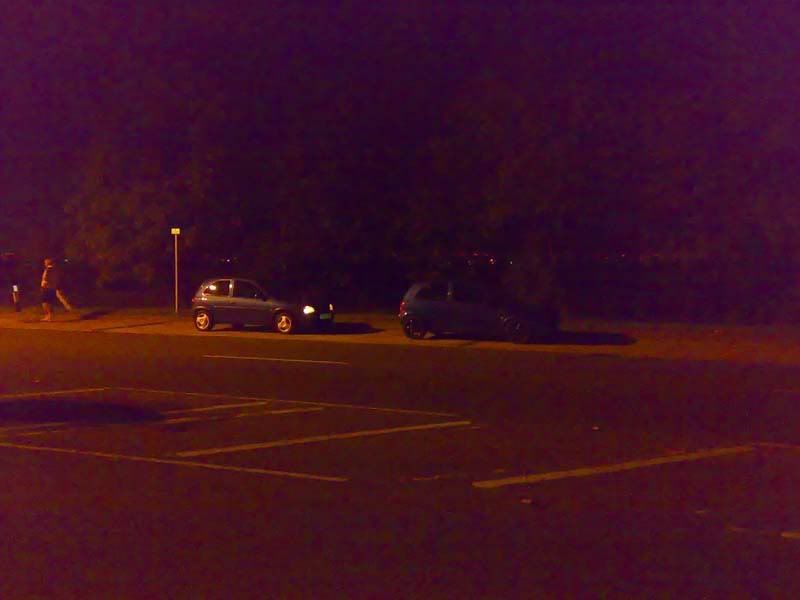
..and my evening ended like this:

lmao...so i've broke my new car within 48hours  
Car now starts on the button but ECU light is on all the time; I'll read the codes off in the morning and get it up and running ready for some abuse over the weekend.
Well, tonight was going to be a fault finding exercise.
I wanted to change the oil/filter on the car anyway so figured I'd make a night of it - I started at 7.30pm and finished at 11.55pm
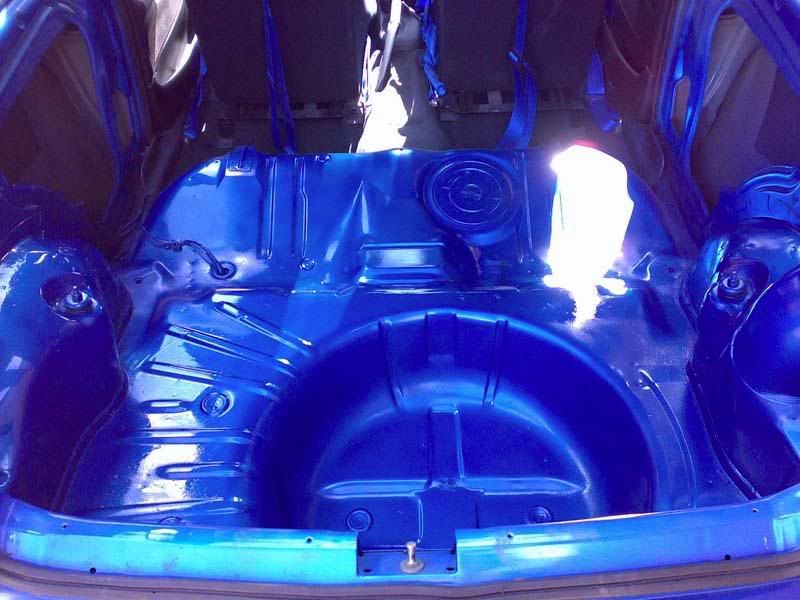
First job was to throw the first coat of paint in the back of the car. I used a full car, and thinking back should have concentrated on one area rather than sporadically painting everywhere. Nevermind, will buy a few more cans tomorrow and make sure it looks all spanking for the weekend
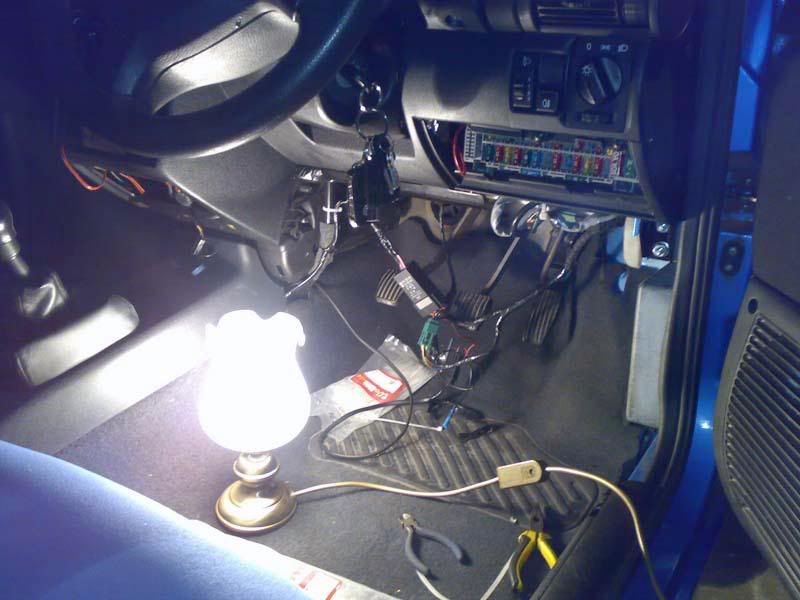
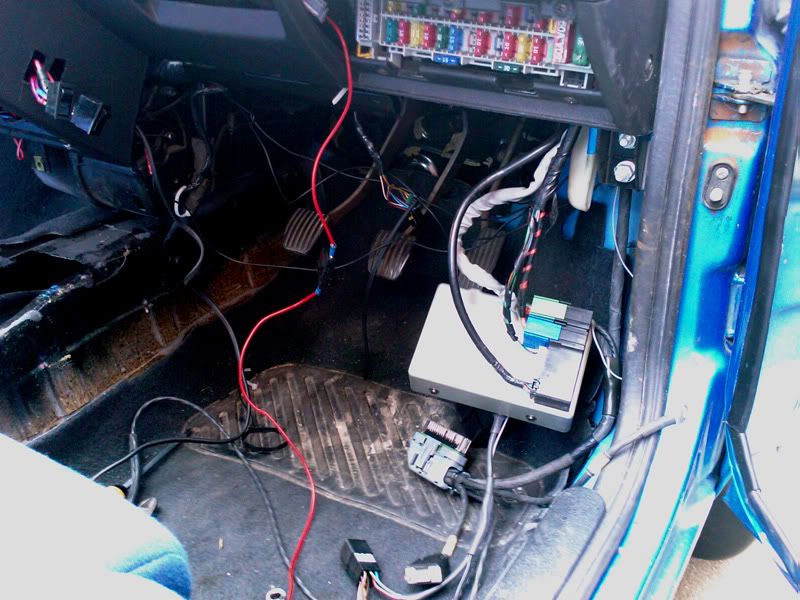
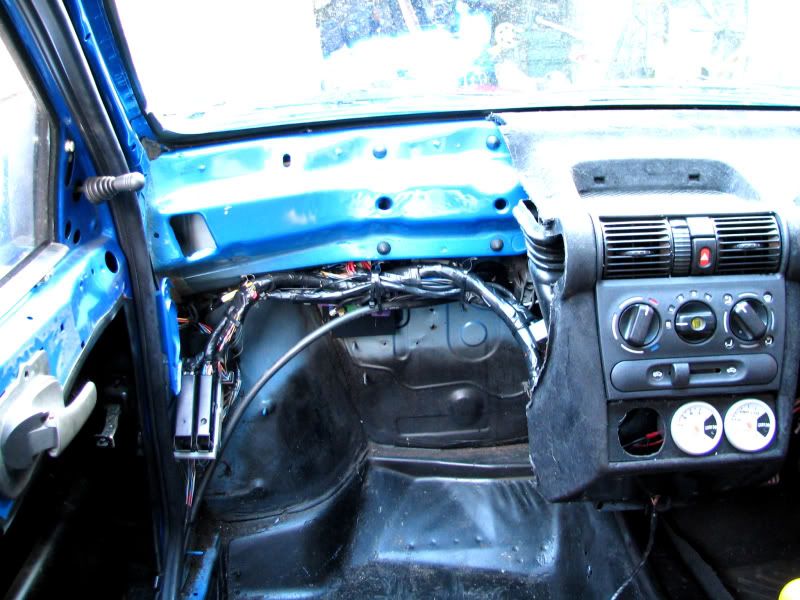
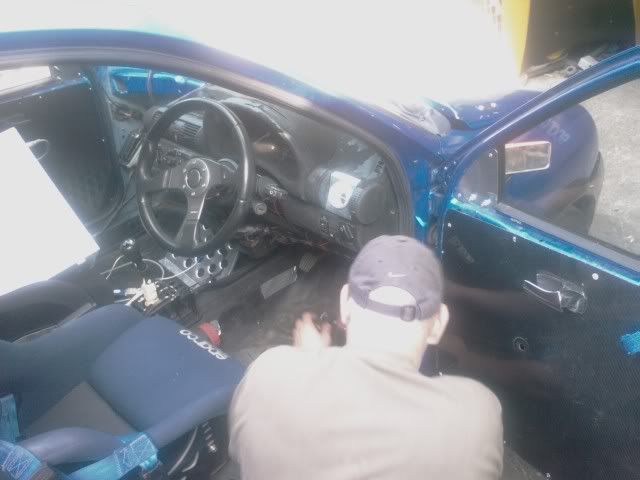
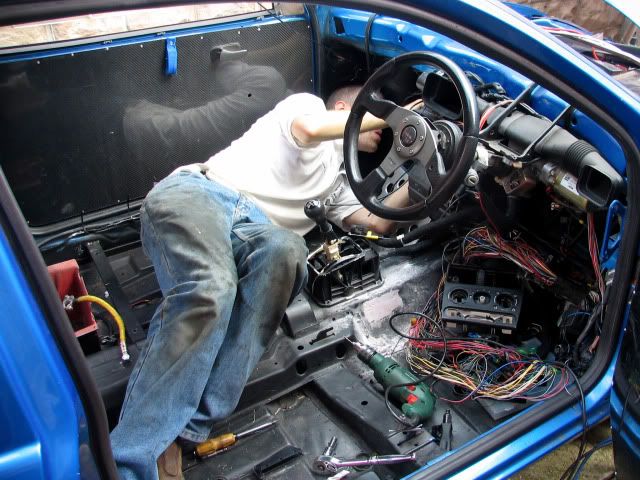
The next job was to read of the ECU fault codes. Obviously this is normally an easy task in a car that's meant to have an XE fitted to it; or alternatively if you've done the conversion yourself-then generally you wire things in/put things in a place that makes it easier to access at a later date.
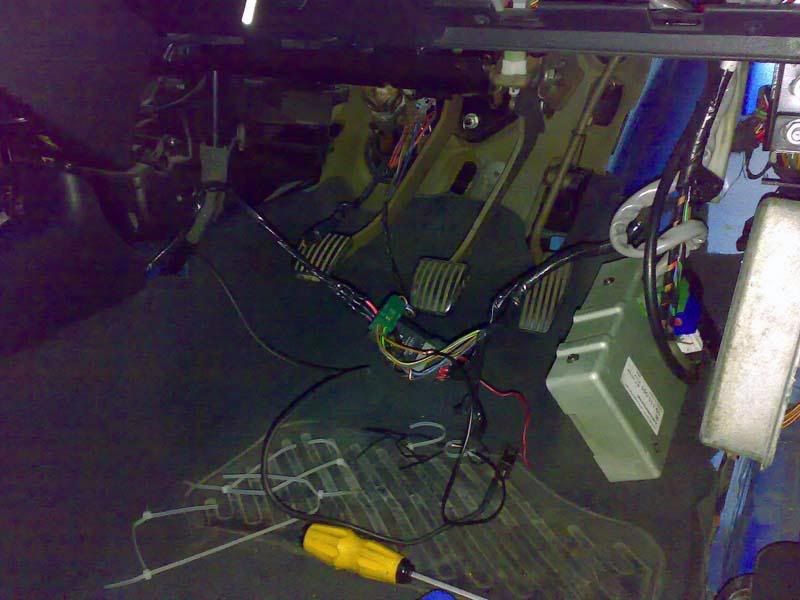
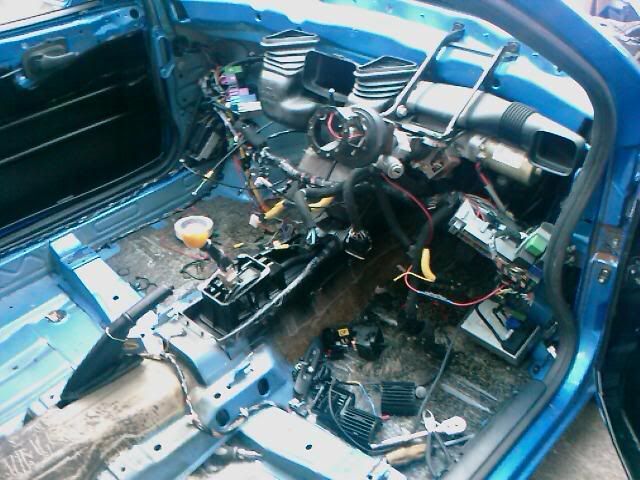
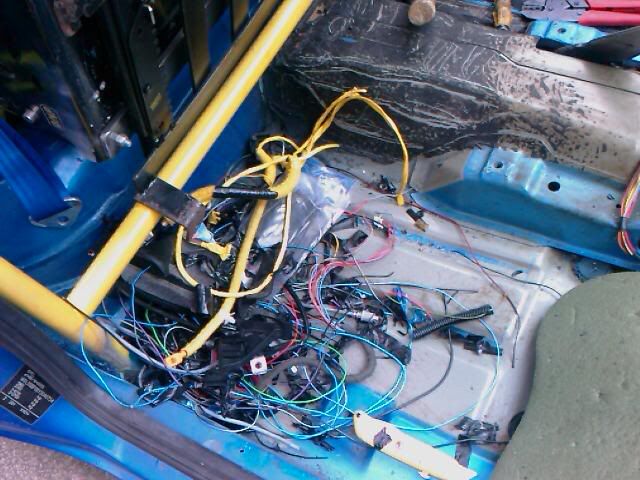
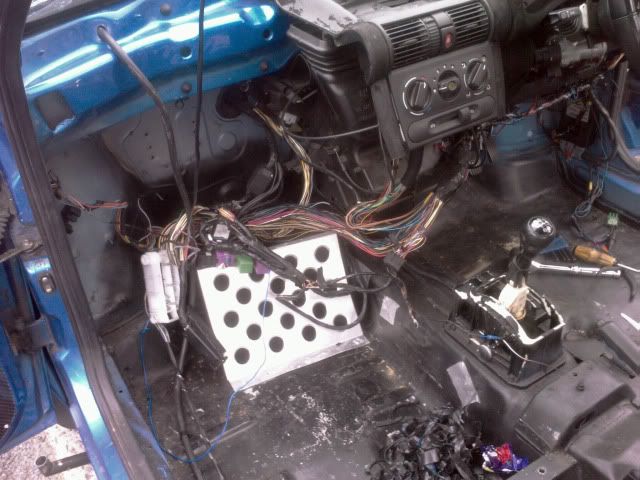
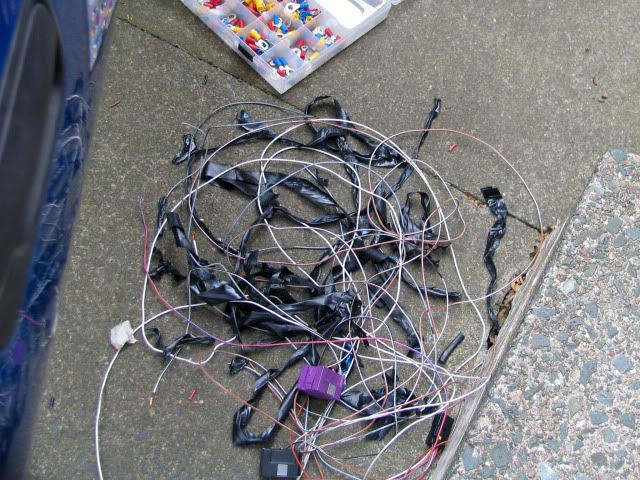
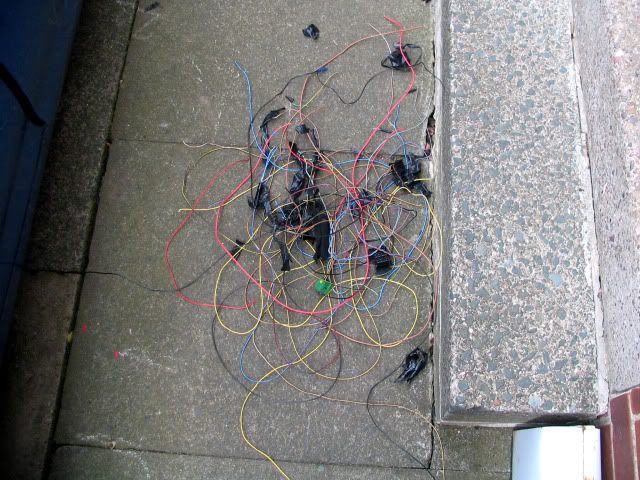
The wiring on the car has been carried out to a high standard, however I couldn't for the life of me trace where the damned brown/yellow wire went behind the fuse board - so I tore down all the wires from under the dashboard:
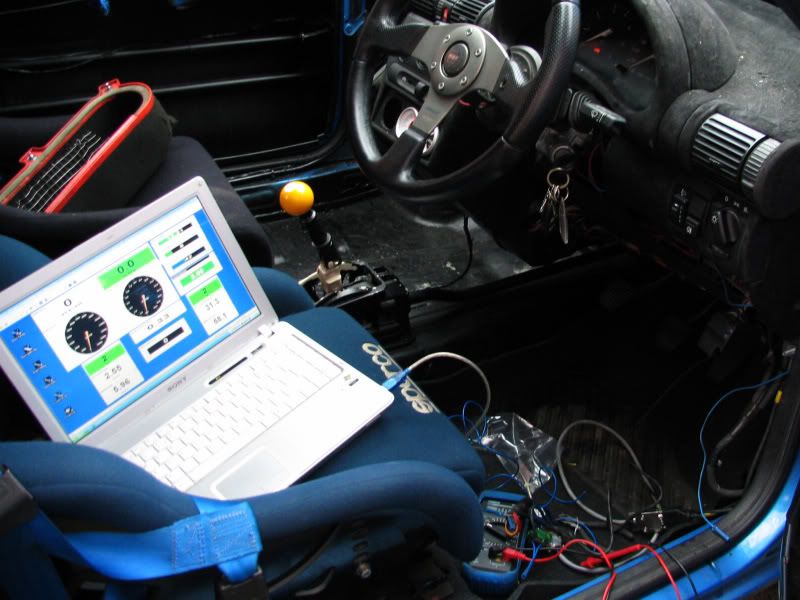
A quick call to JFisher Vauxhall Support and I began to read off the fault codes:
15 - CTS sensor voltage high
31 - crank sensor, no signal
66 - c02 potentiometer
93 - hall sensor
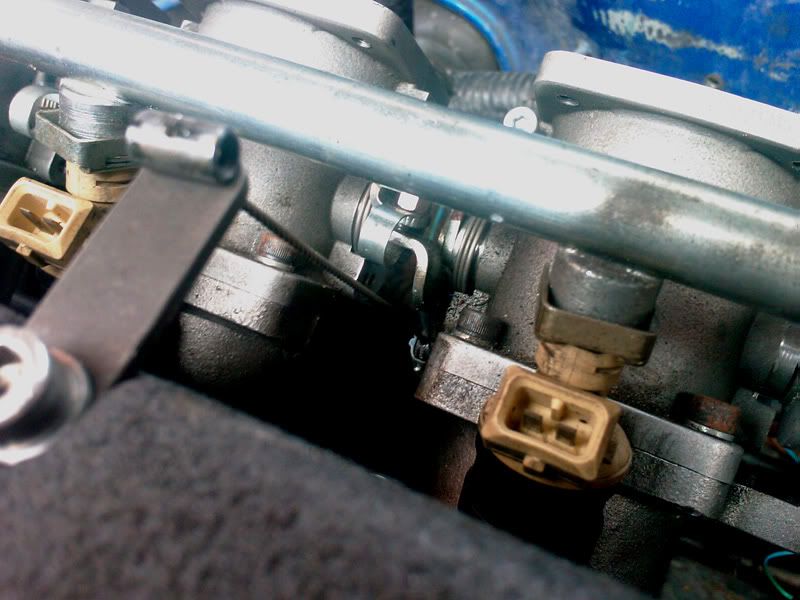
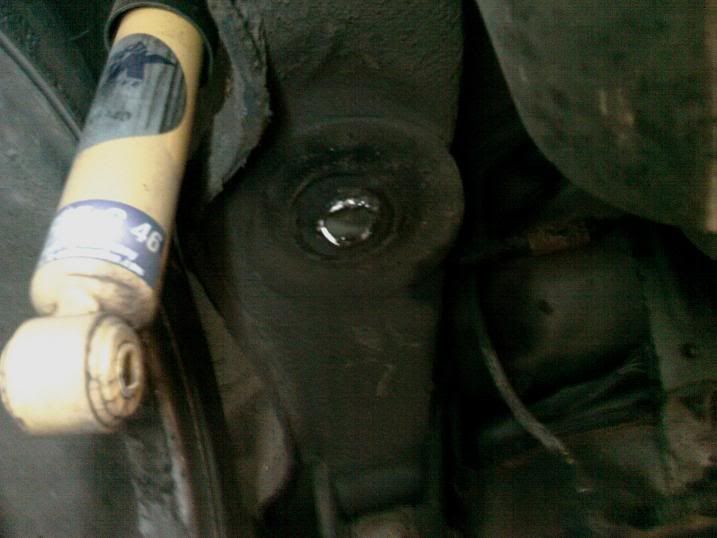
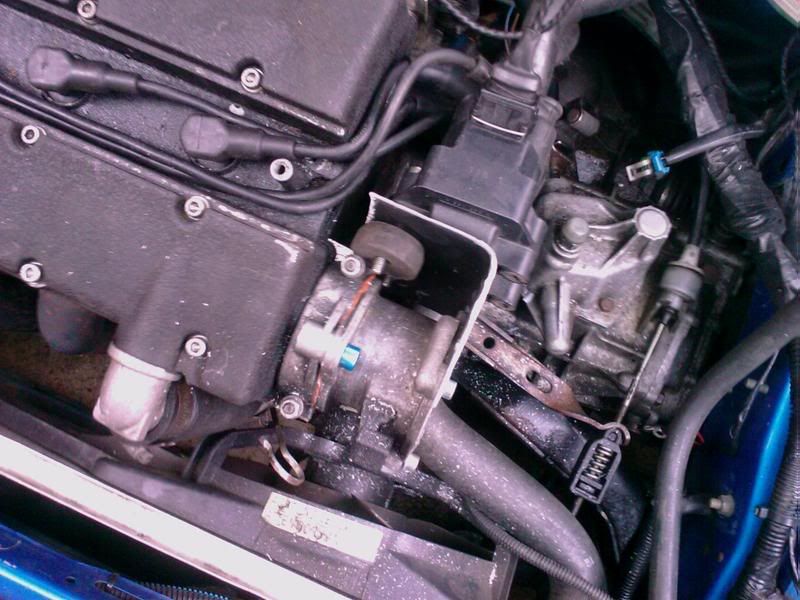
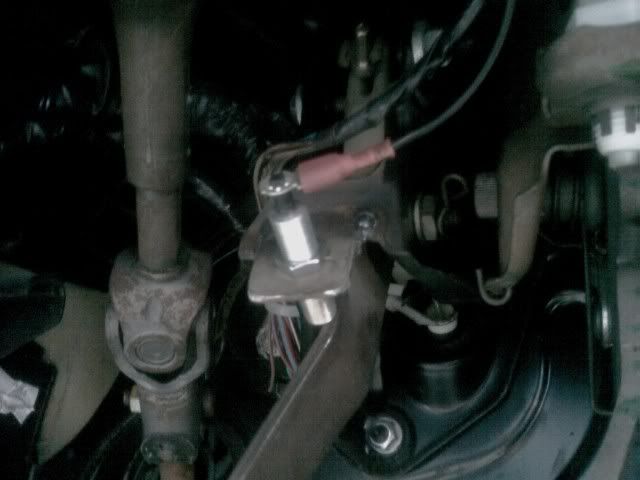
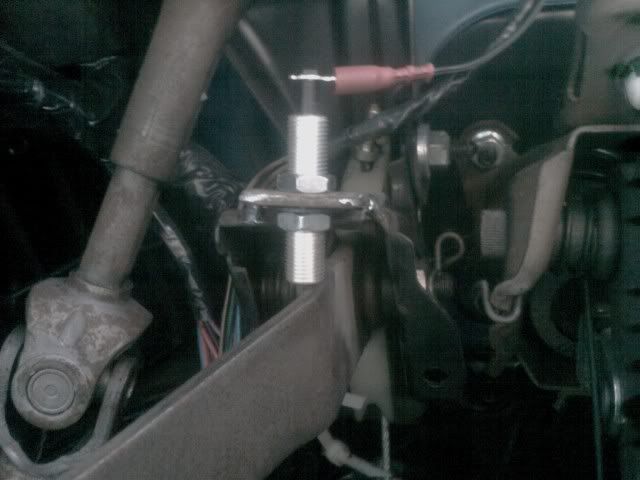
I mentioned to JF that when buying the car I was told the CTS needed replacing, so discounted that for the moment. JF wasn't convinced that there was a sensor problem; he said it sounds like a dodgy ground. I went straight to the fuel rail grounds and this is what they looked like:
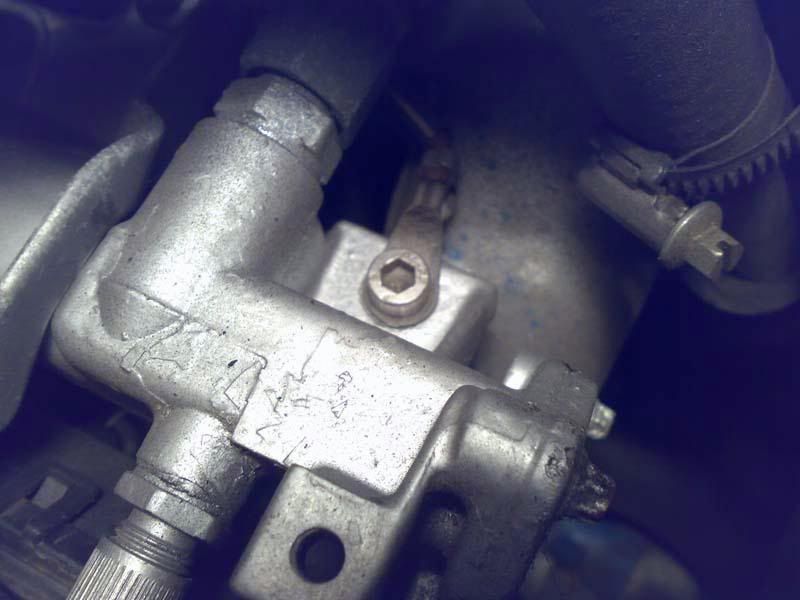
Look pretty normal? Well not really - they were both finger tight for a start, and the fuel rail has been painted with silver hammerite, everywhere. I removed the grounds and scratched the paint away from around where the grounding bolt goes. I then roughed up the surface with some wet/dry paper, and refitted the grounds.
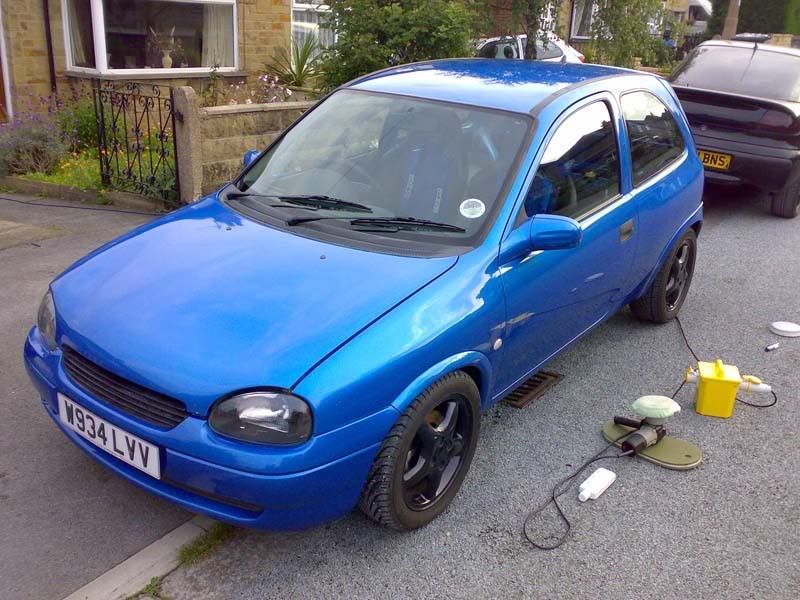
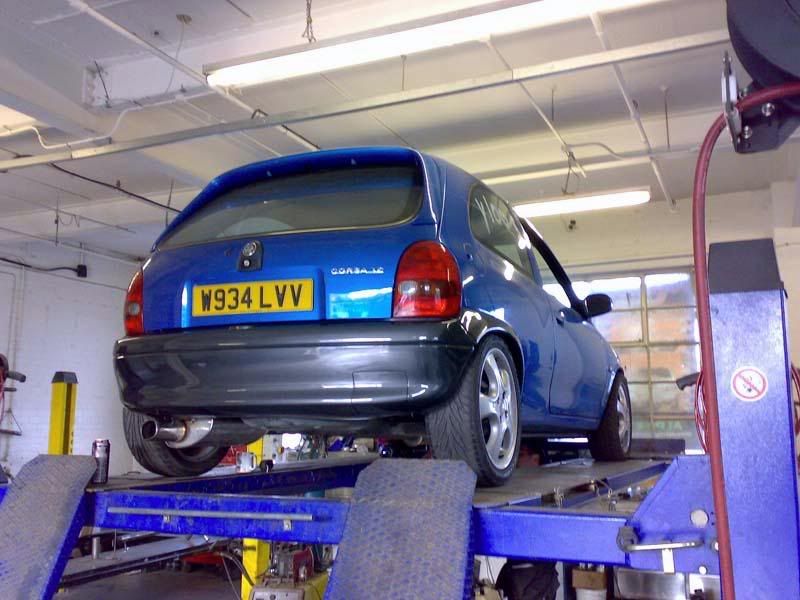
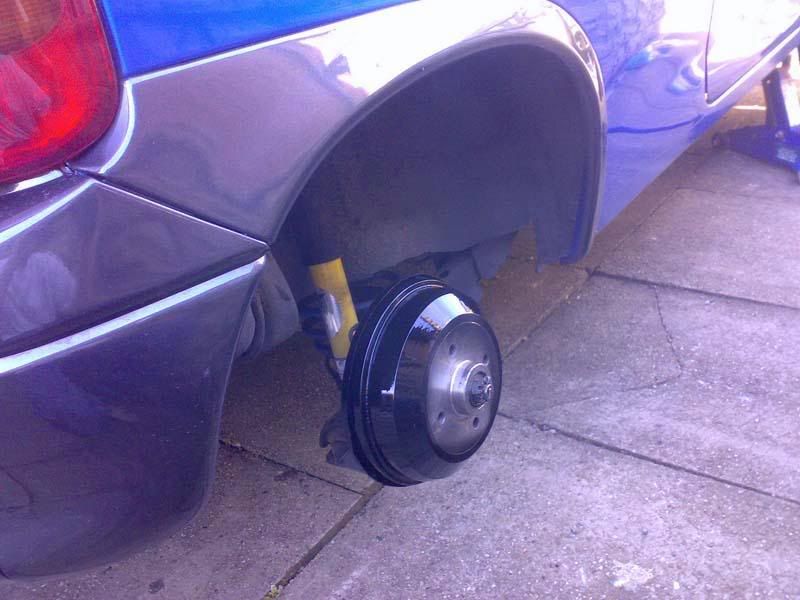
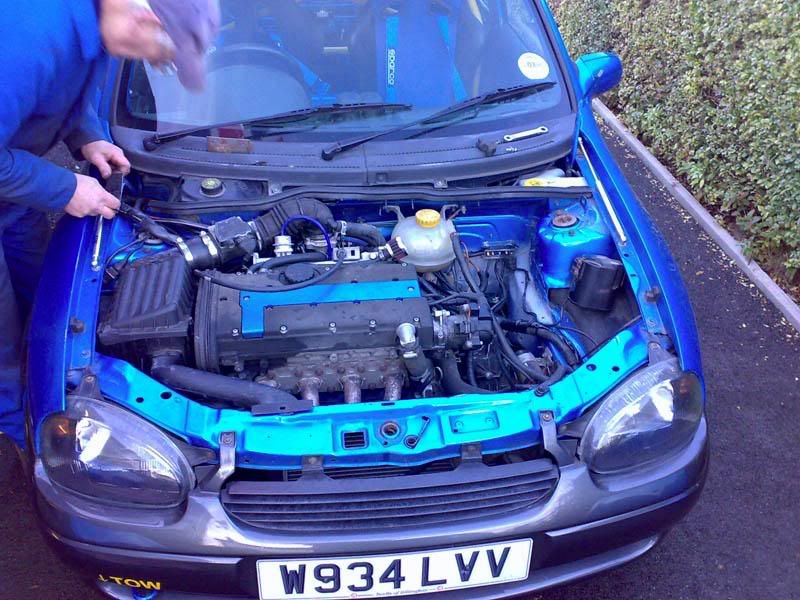
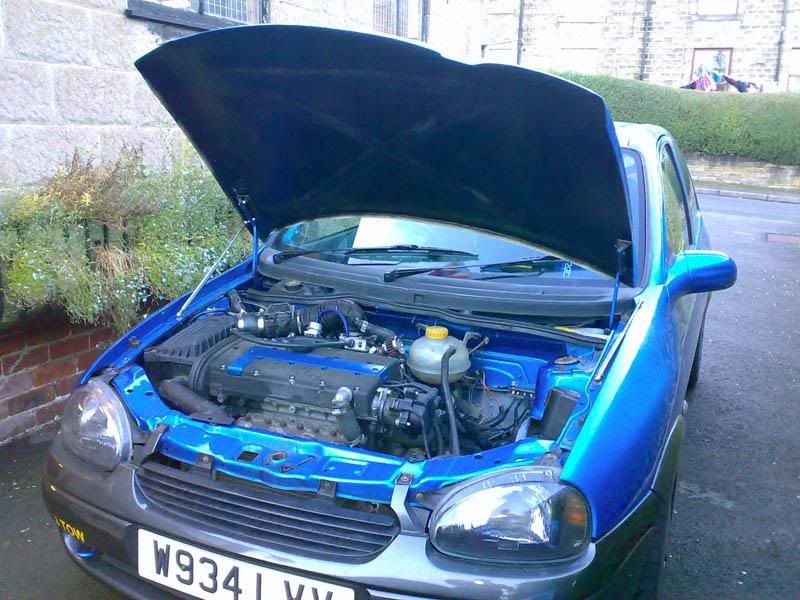
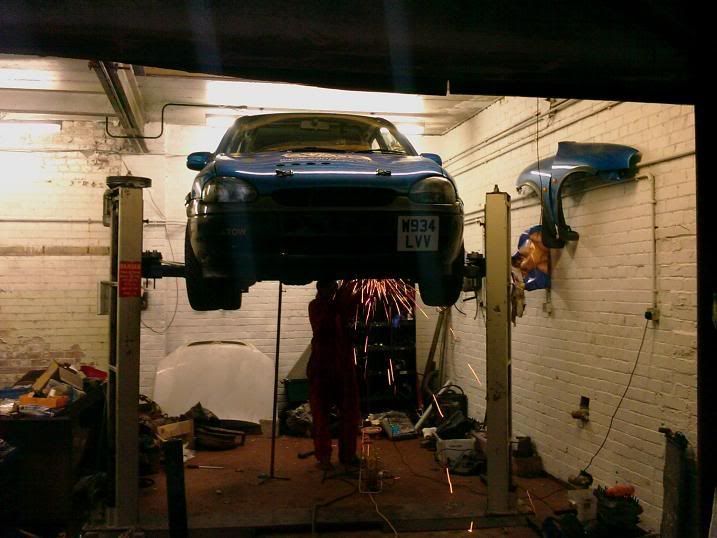
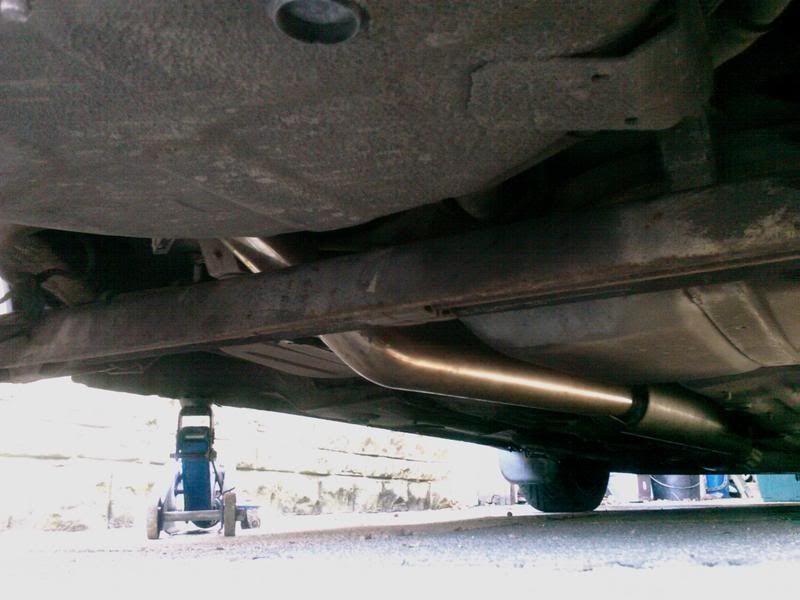
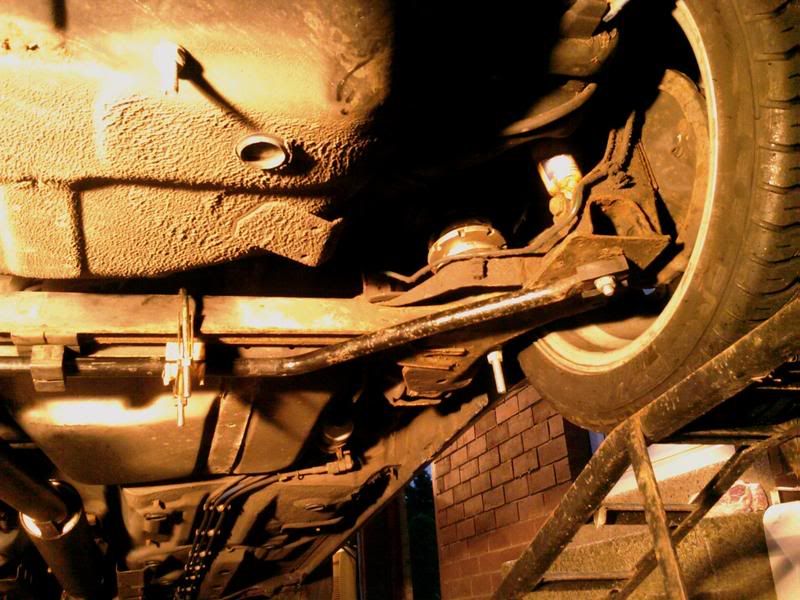
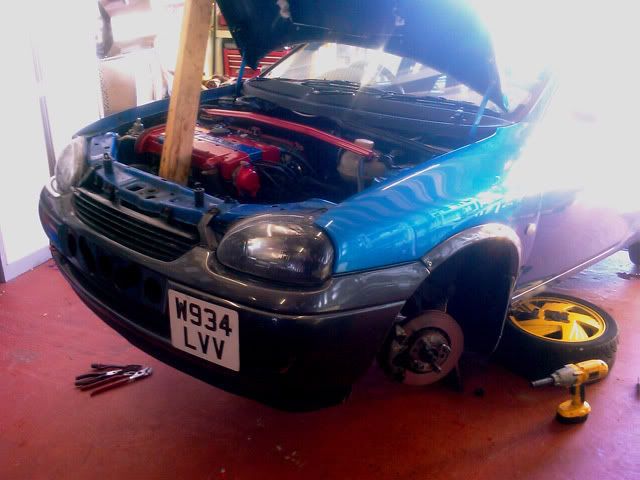
While it was still light I then decided to start the service; so up it comes...
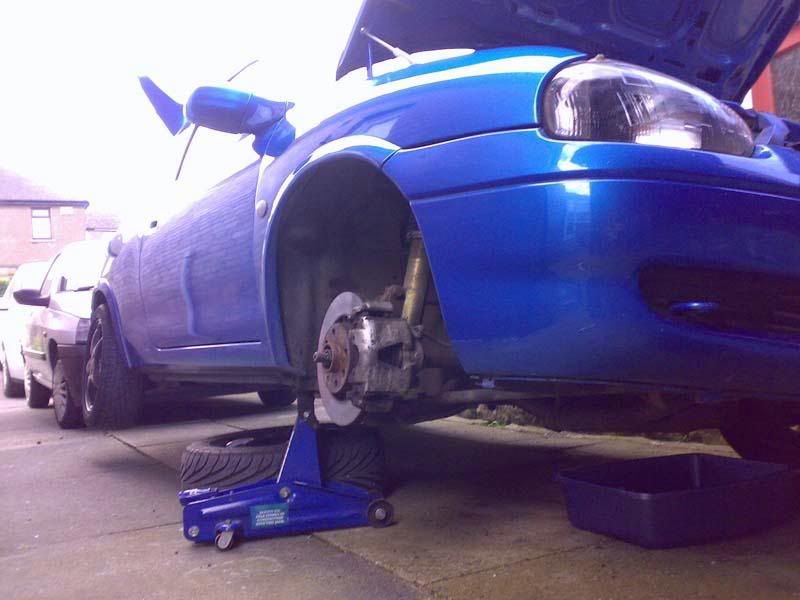
..damn low corsas really; didn't expect the back wheel to come up that high either lmao
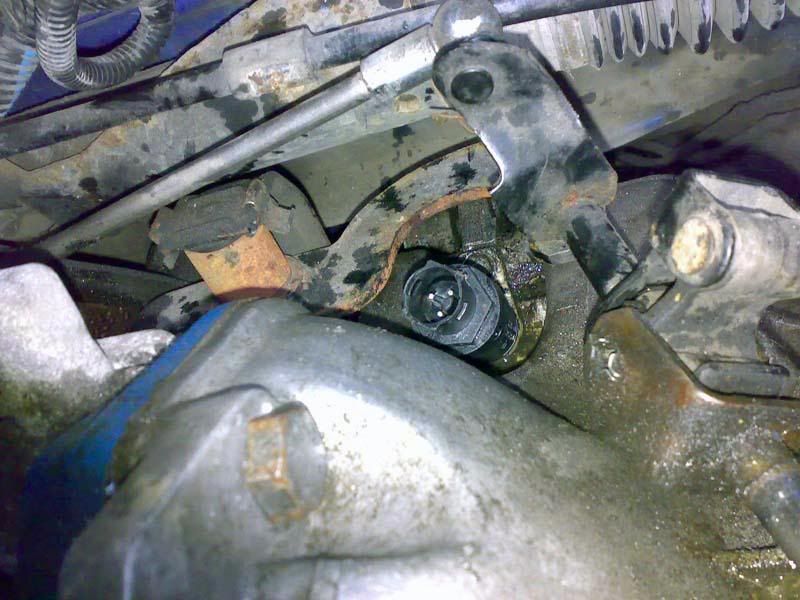
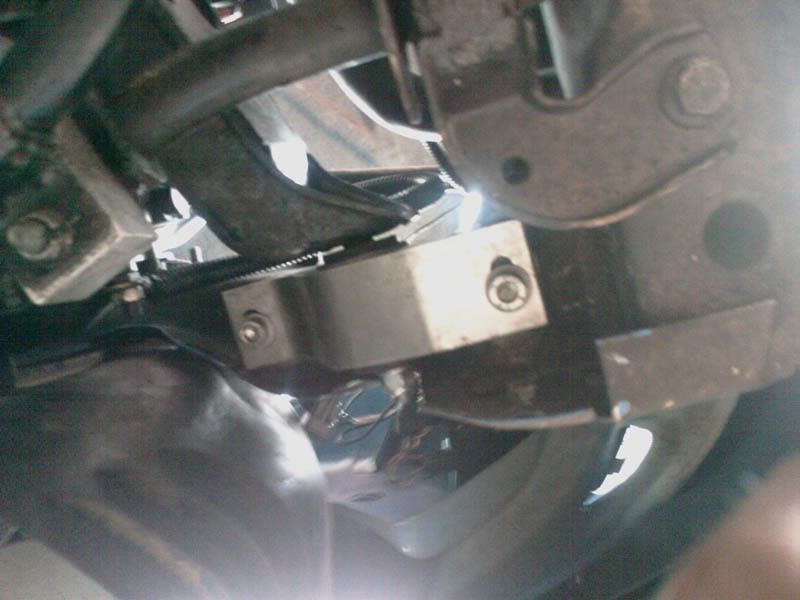
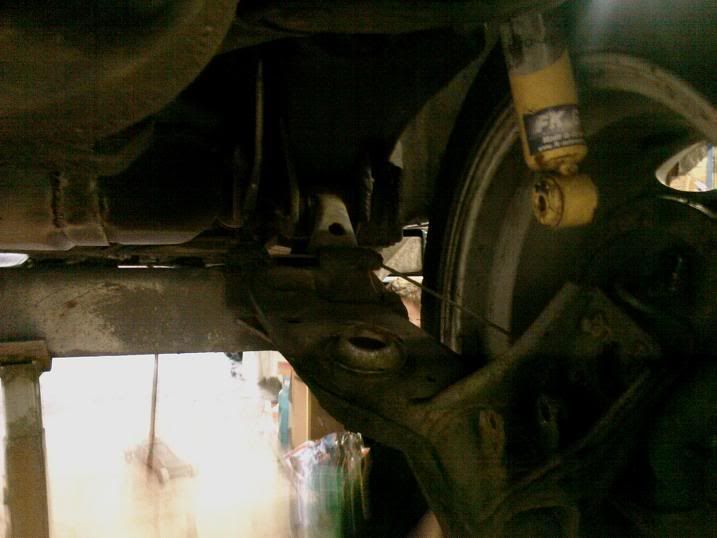
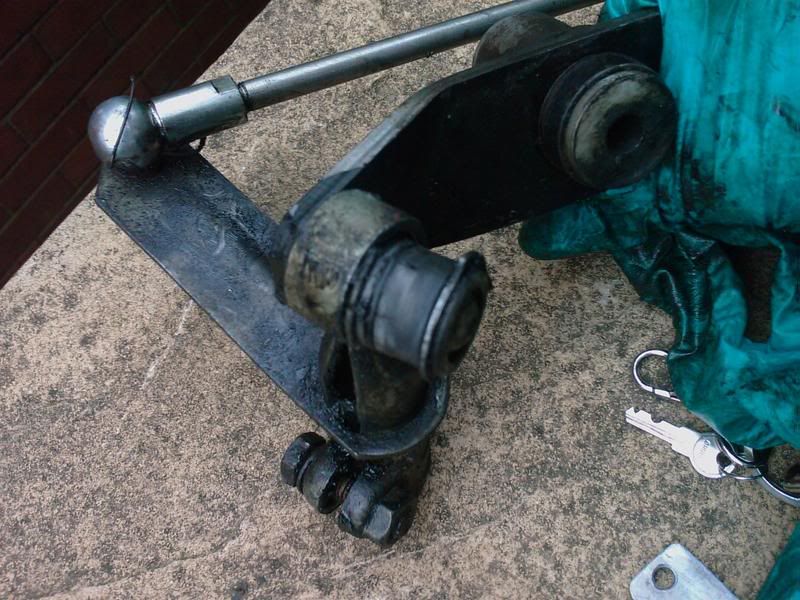
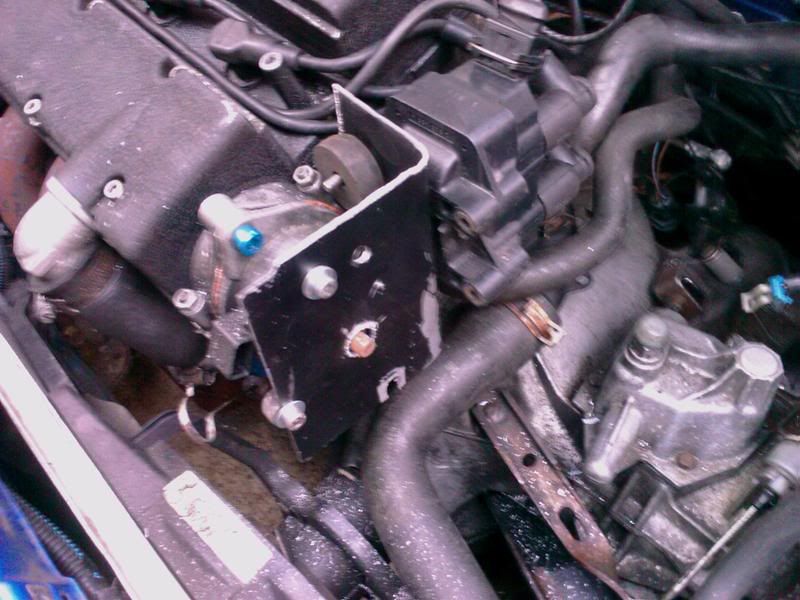
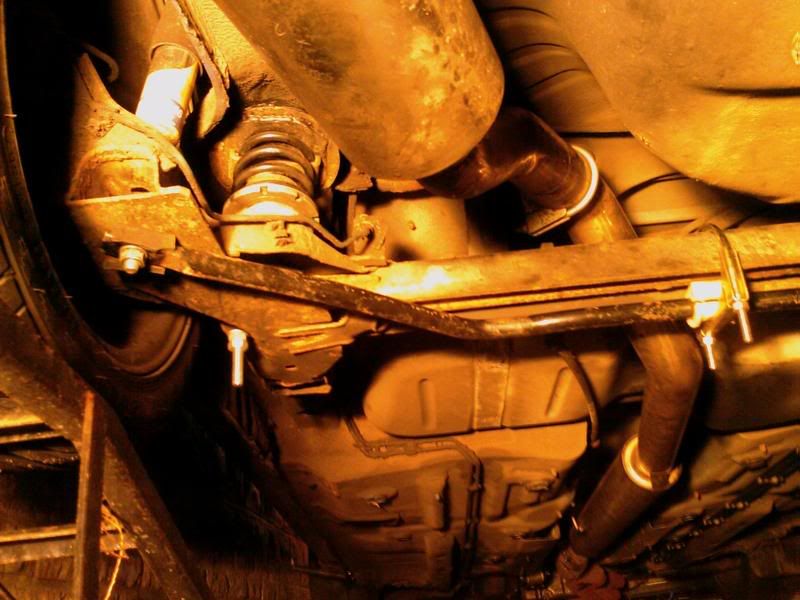
Since buying the car its had a terrible rattle at 2k-2.5k rpm...I very very bad rattle. I knew it wasn't inside the engine, so wasn't worried too much but it was soo annoying. While the car was in the air I slid under and had a look for anything that could be catching. Low and behold I find the manifold support bracket still bolted (all be it loosely) to the manifold.
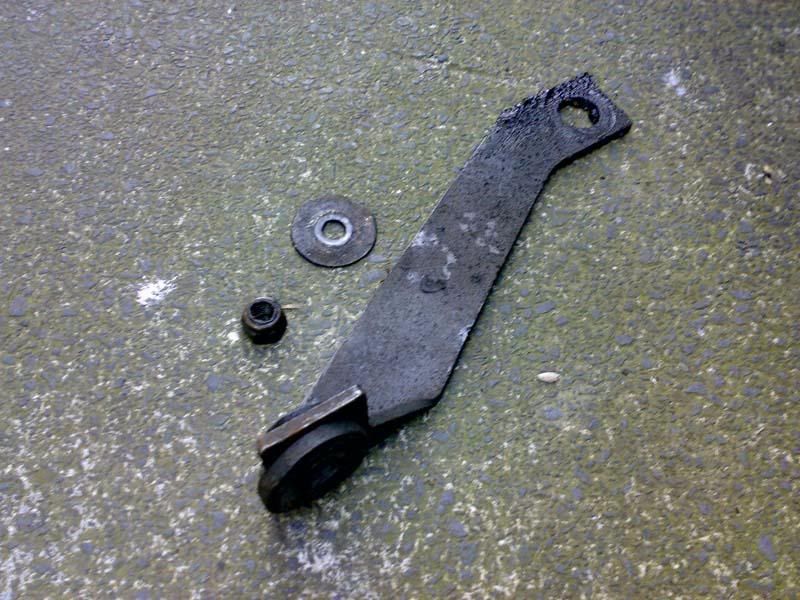
I remove the offending item, and throw it away- happy that I'll have both cured my rattle, and saved some weight 
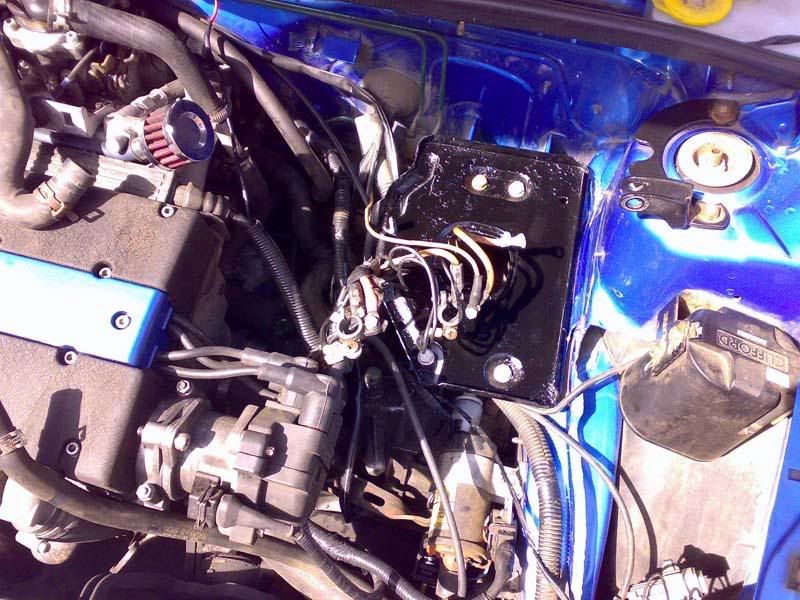
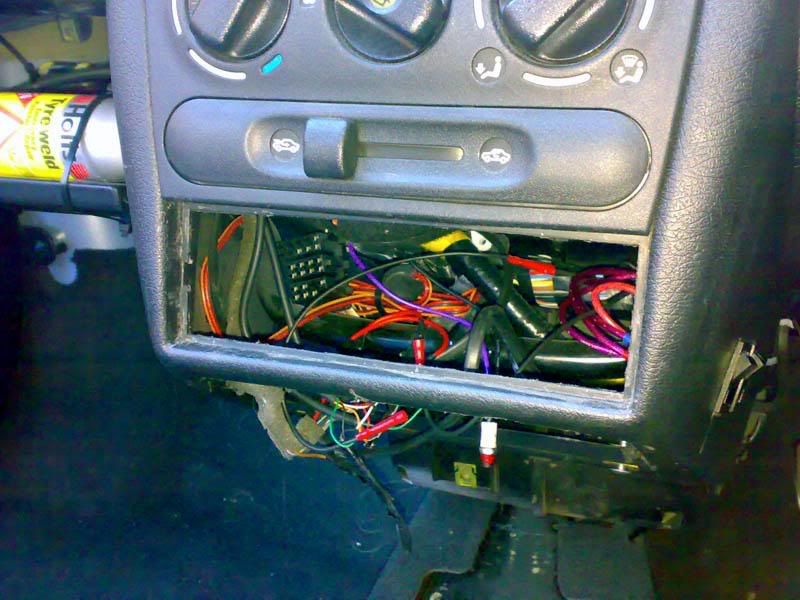
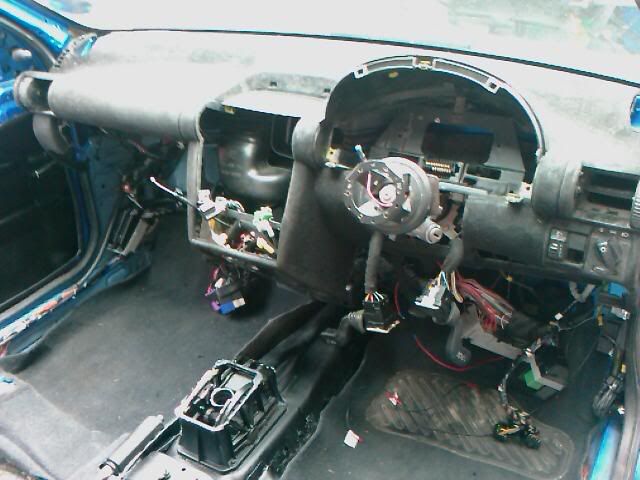
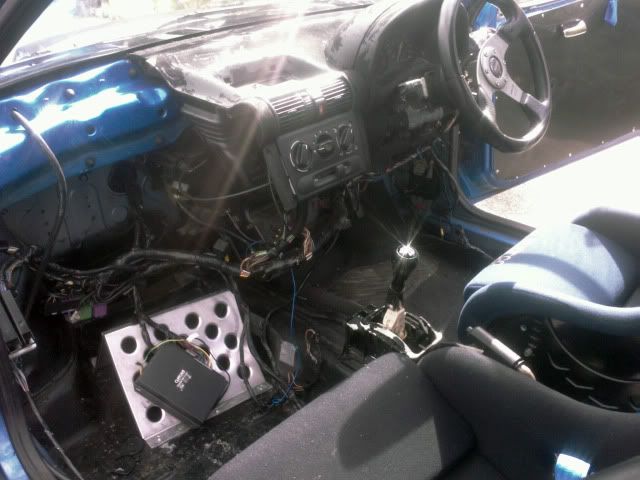
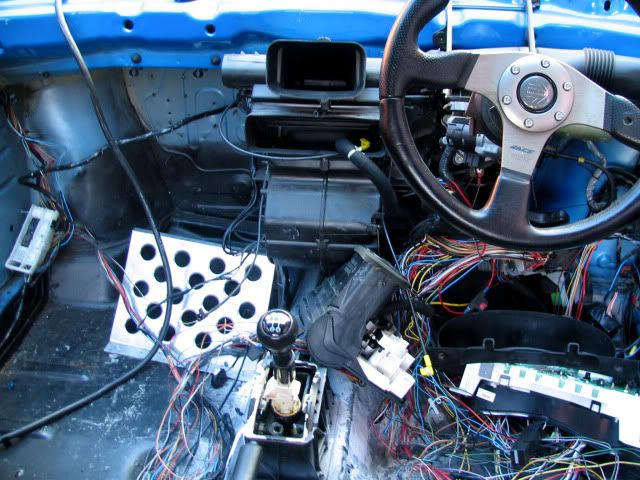
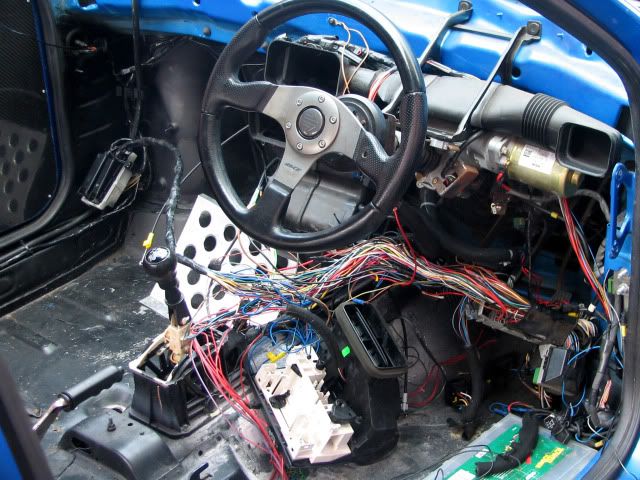
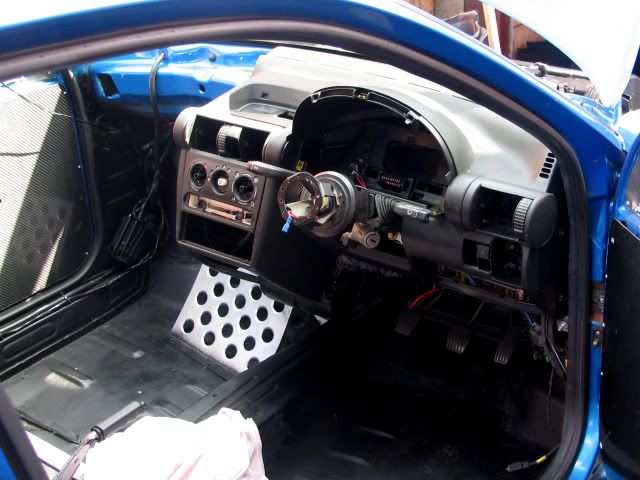
So, back we go inside the car. The wire that I've put on the brown/yellow to now read codes off gets put infront of the fusebox for easy access in future I then spent the best part of 2hours routing, and re-routing the cables above the drivers footwell - to keep the power steering working the standard 1.0 12v ECU is also up there, meaning space is minimal, and unfortunately leaves only one place for the XE ECU to go, and means its on show
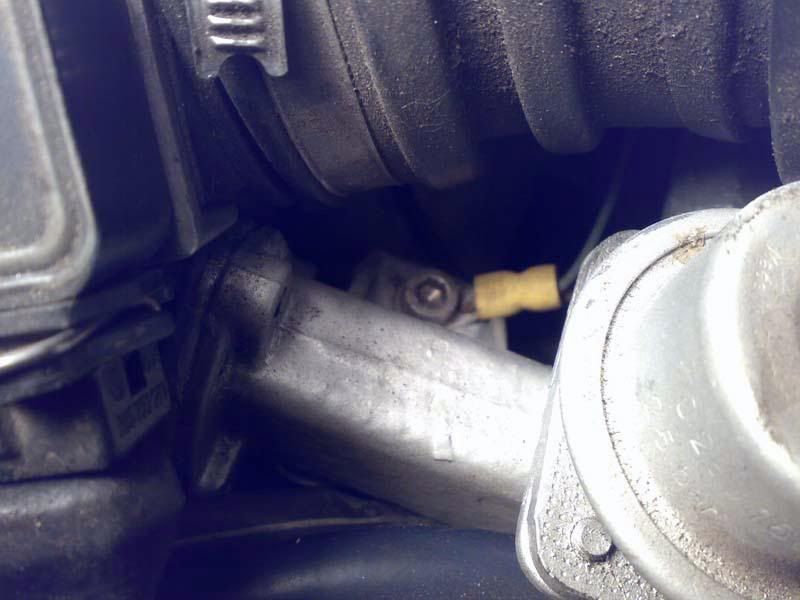
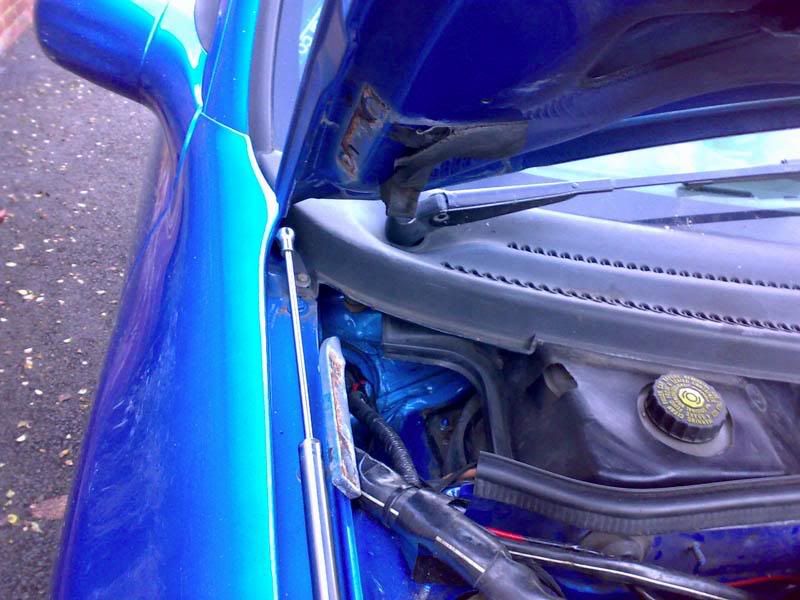
Back under the bonnet and I start putting the few inlet bits back on when I notice a split in the vacumn hose from the FPR to the throttle body. The split went down the entireity of the connector, although the picture doesn't show that too clearly.
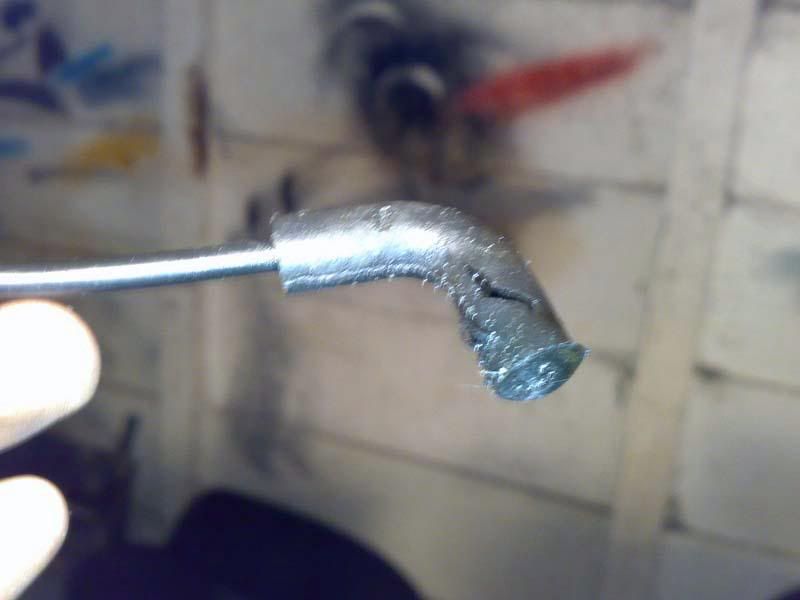
A quick route through the garage and I found some dump valve silicone hose that I had lying about after my brief RST experience  . I fitted that as a replacement: . I fitted that as a replacement:
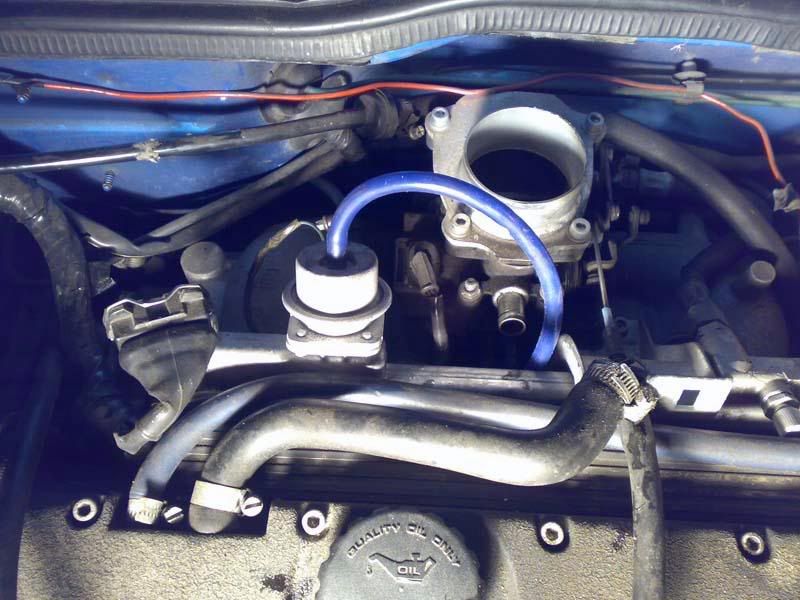
..and that's where I called it a day. I still need to get a new CTS (might aswell as they're only a few quid) and check the wiring for it. I'm pretty confident that when I turn the key tomorrow evening though it'll fire up into life
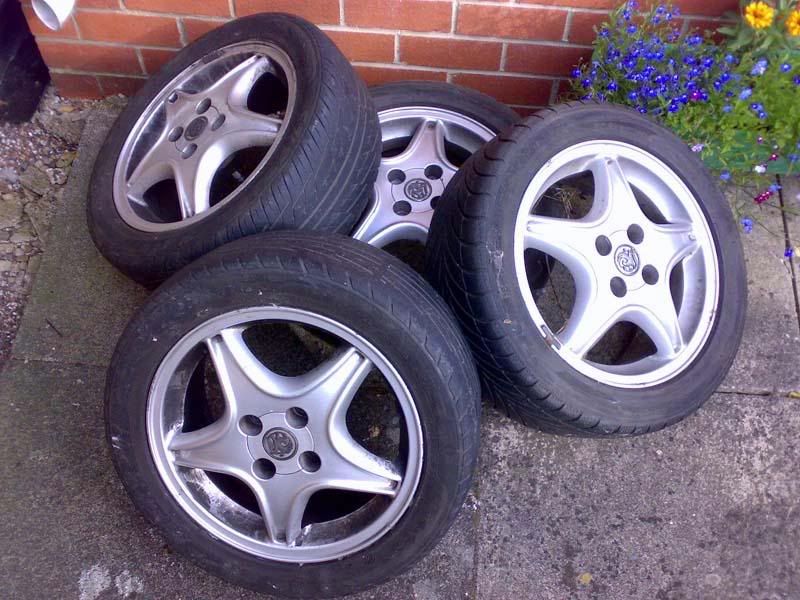
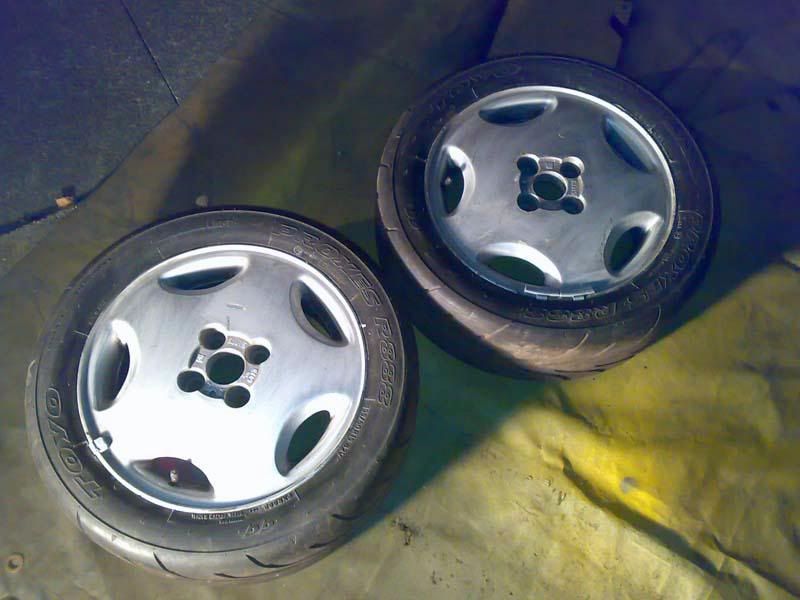
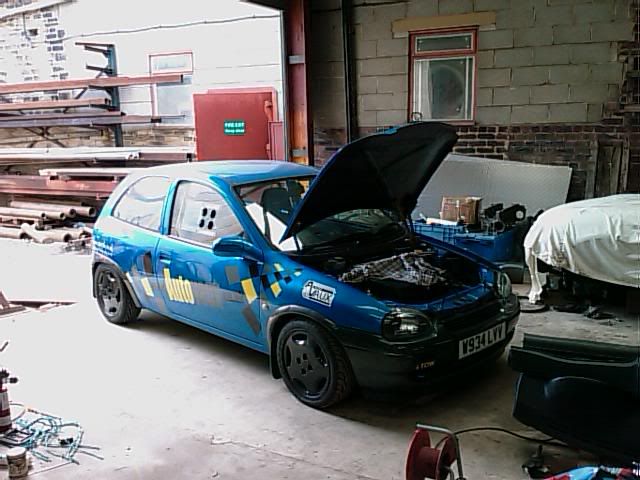
On Thursday night I went down to Leicester to pick up some new wheels:
Had the day off work on Friday so cracked on with the corsa. First job was to run over to autovaux to pick up some bits:
CTS
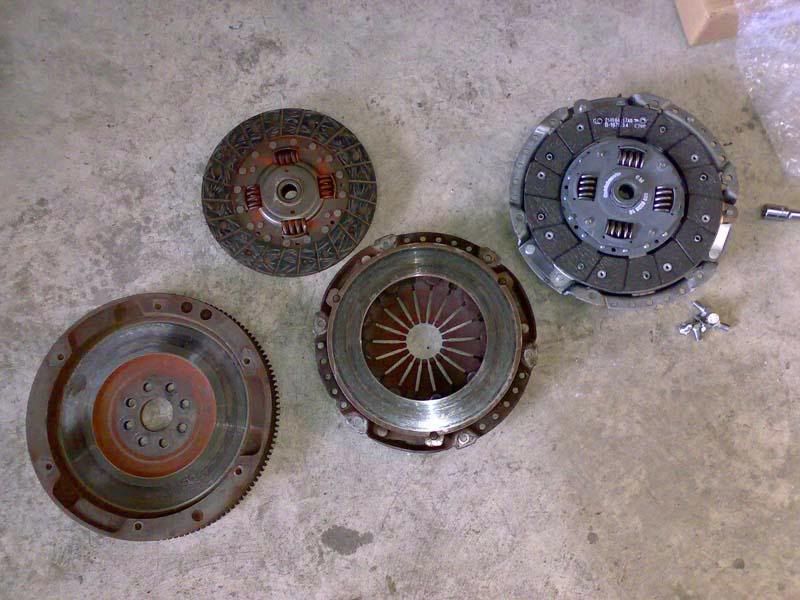
Clutch
Clutch Cable
Electric Transducer for Gearbox (speedo)
Flywheel Bolts
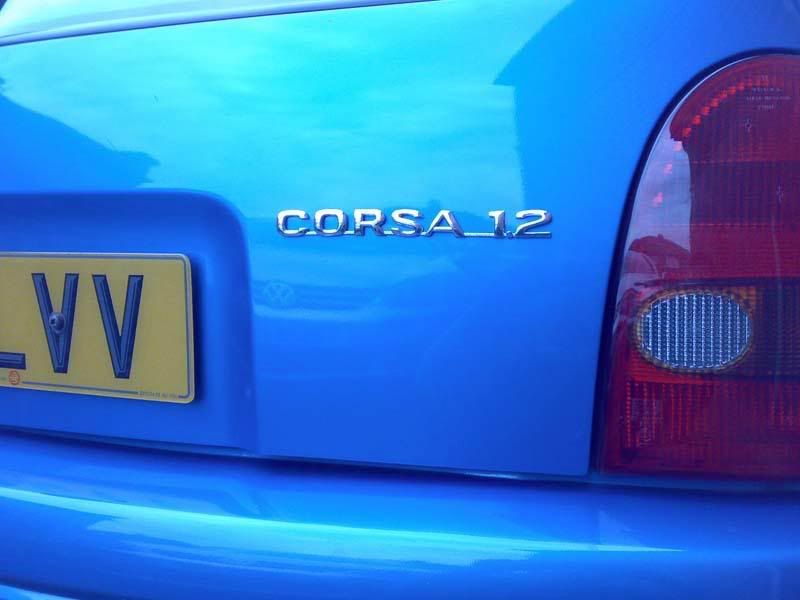
Badge
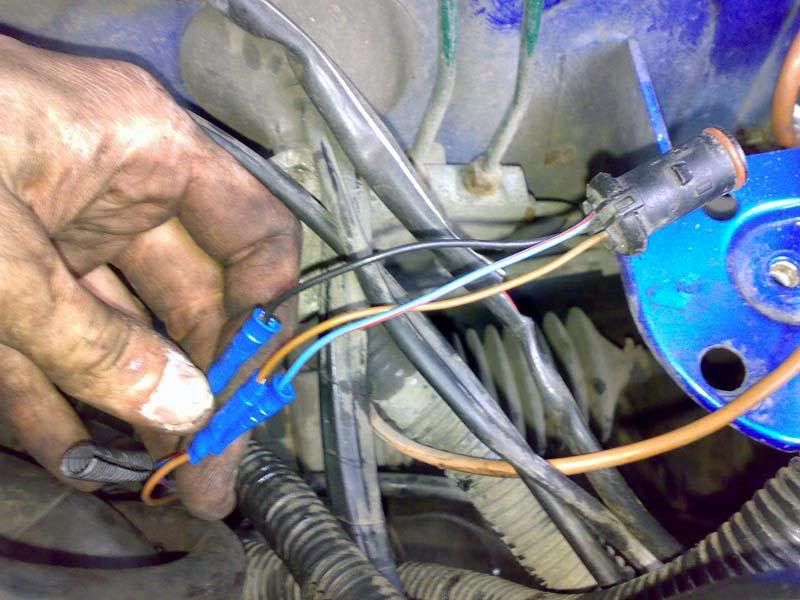
Door Pins
My first target was to fix the coolant temperature sensor, and replace the current from for a genuine one.
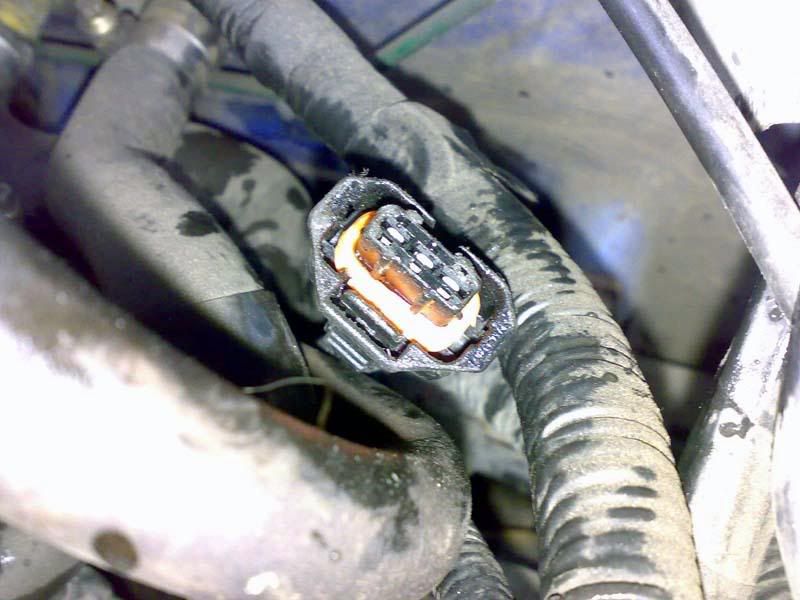
After pulling off the wires on the CTS I found this:
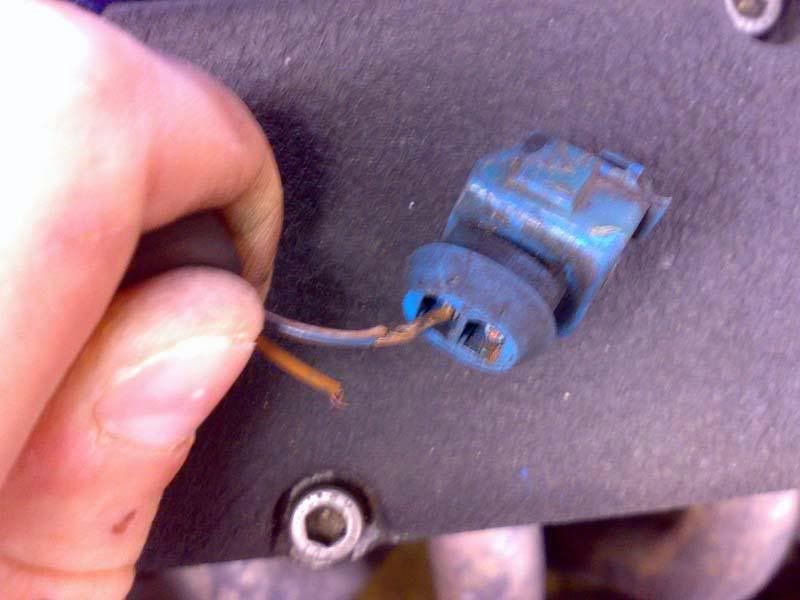
That'll be probably why it's overfuelling then That was fixed and replaced with a new connector and the wires were soldered on.
I then replaced the sensor for a genuine one. hmmmmm boschness

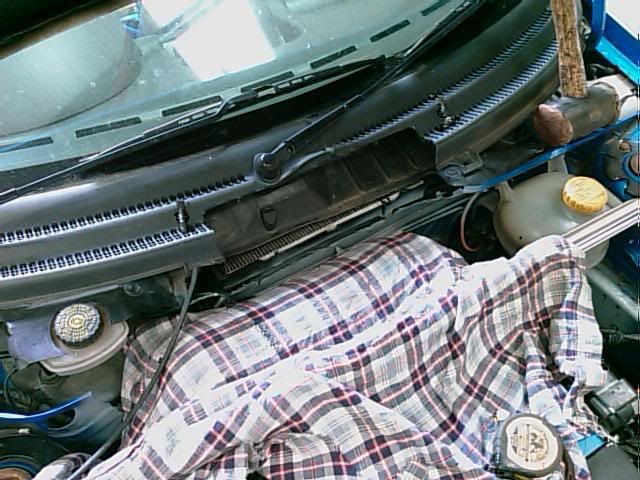
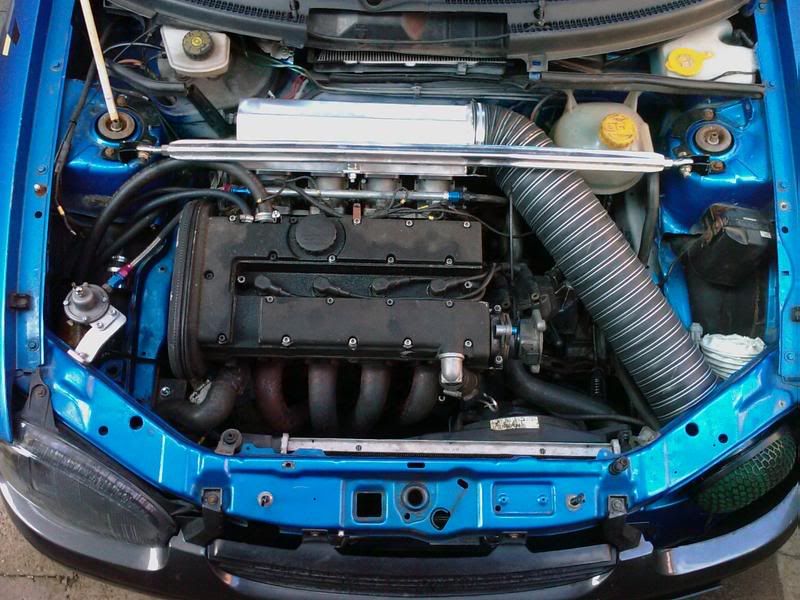
I turned the key and the car fired up, and purred...for a few seconds. Then the revs started to hunt, so I went under the bonnet and moved some pipes around. When moving the airflow meter it kept 'coughing'. So I turned off the engine and dismantled all the air inlet pipes.
I find this:
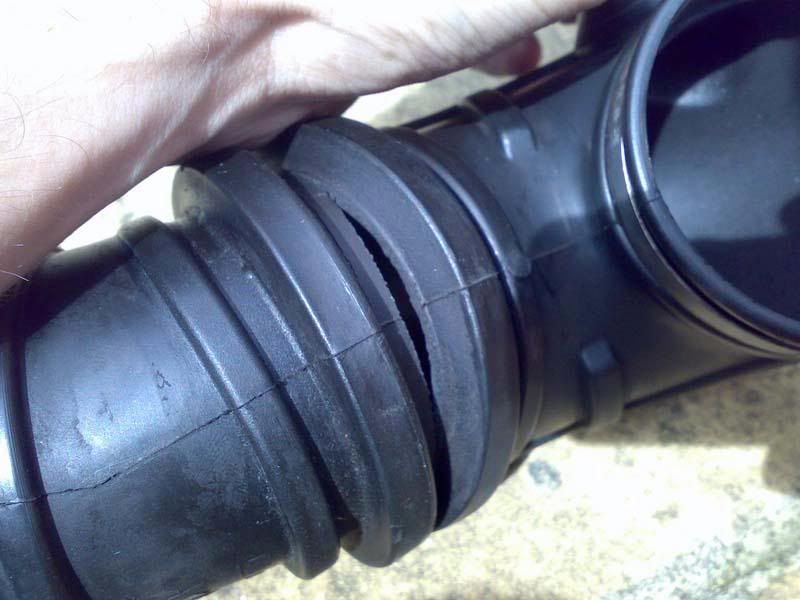
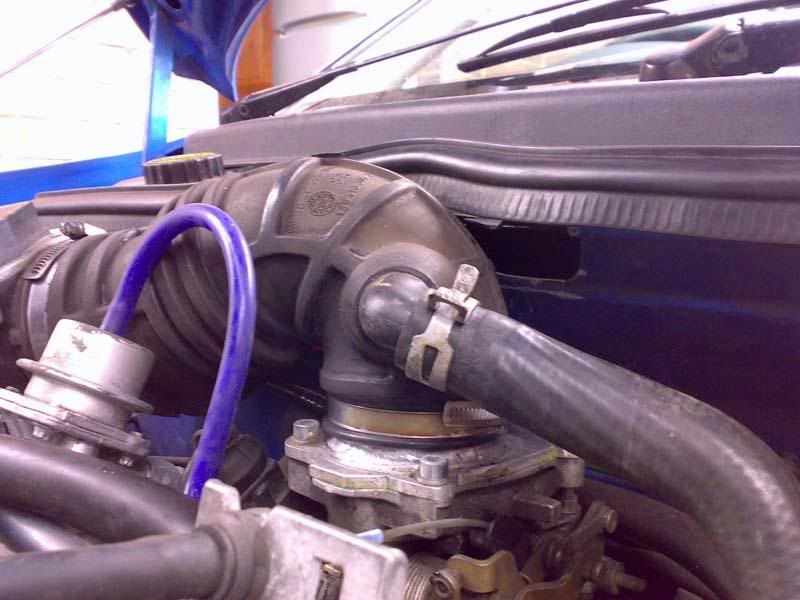
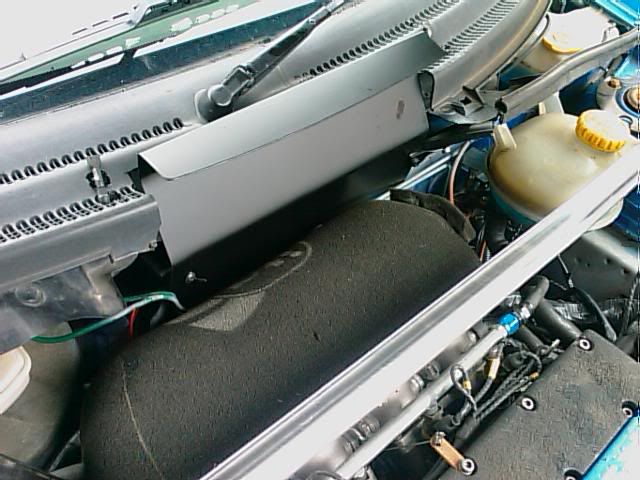
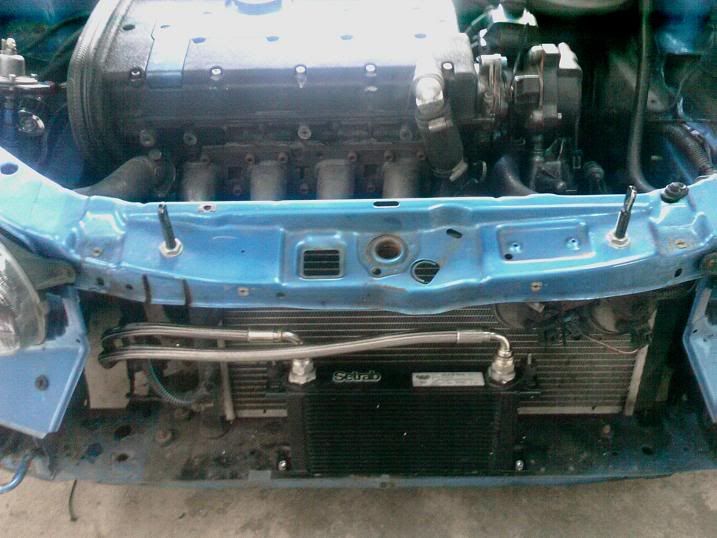
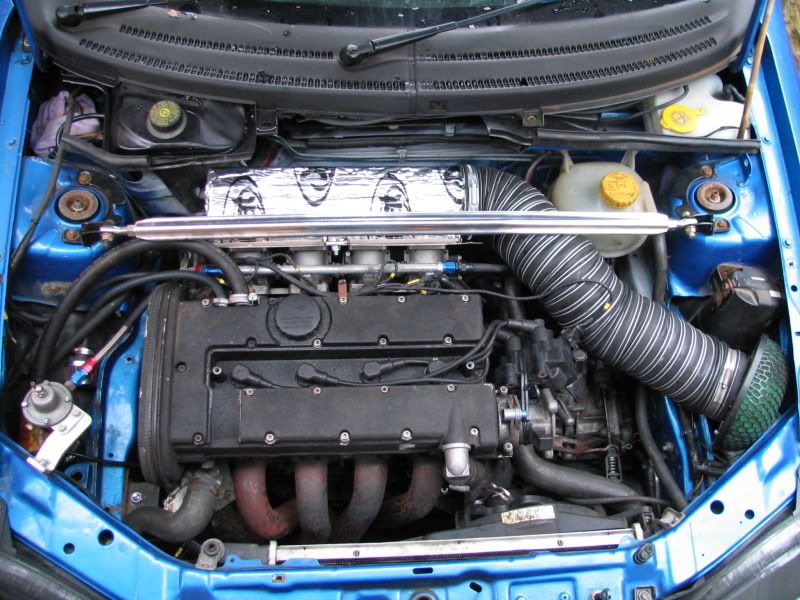
Bugger. Down to the local scrapyard to see what I can find, unfortunately there were no early ecotecs in, only an omega - so I took the inlet hose off that. When I was down at the scrapyard the hoses looked the same, however upon getting home it turns out the omega one is noticeably bigger than the other:

It was fouling the bulkhead when fitted, so out came the grinder
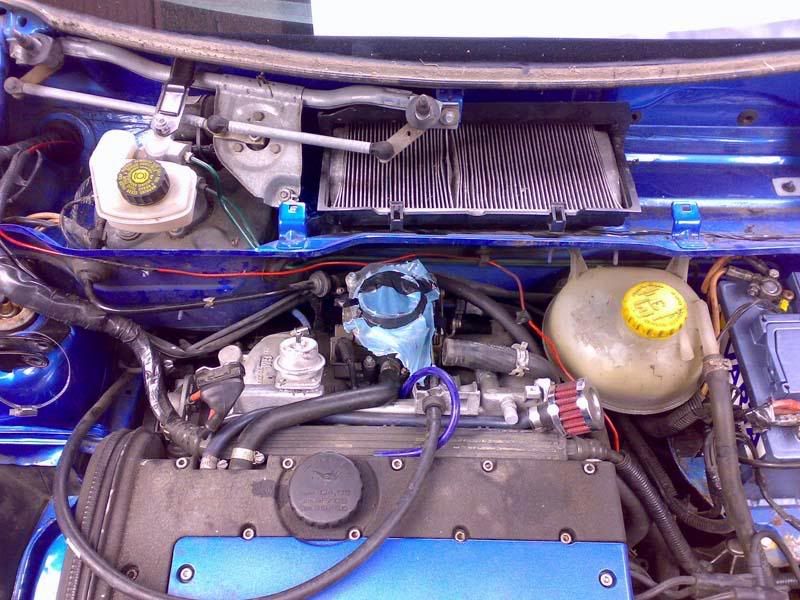
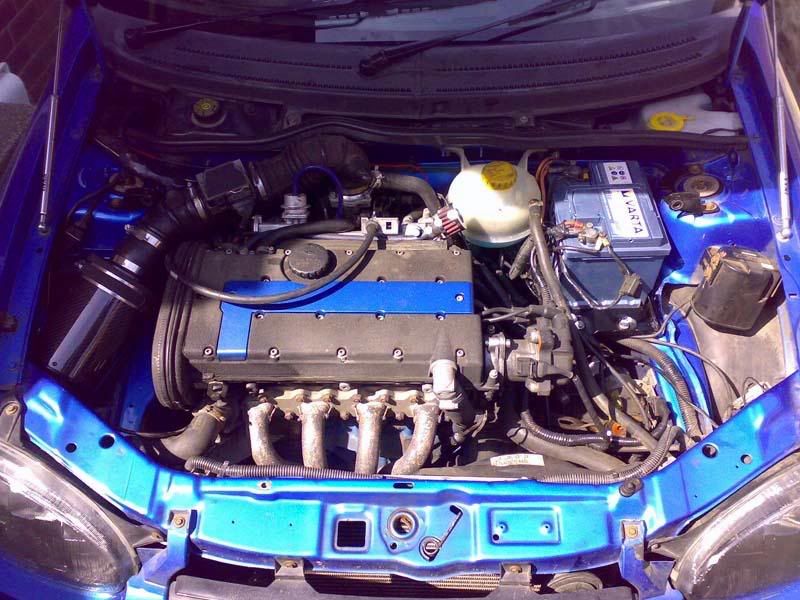
With only minor chopping it fitted well; you can just see the hole in the bulkhead behind the pipe:
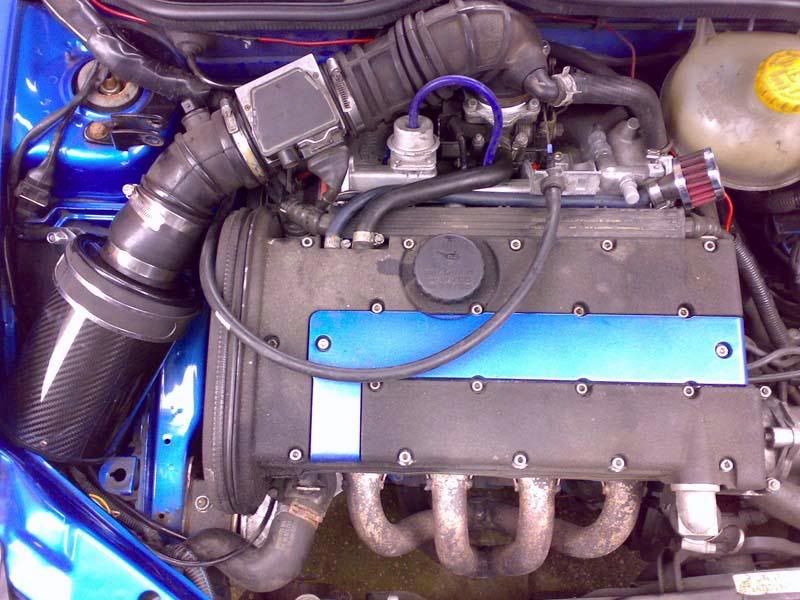
All back together:
During doing this a bit of rust on the battery tray caught my eye, so I decided to get rid of it
Battery tray gone
Cleaned
Primed
Refitted
During the above I decided to try and fit my new speedo transducer and get that all working.
This is the transducer that's required:
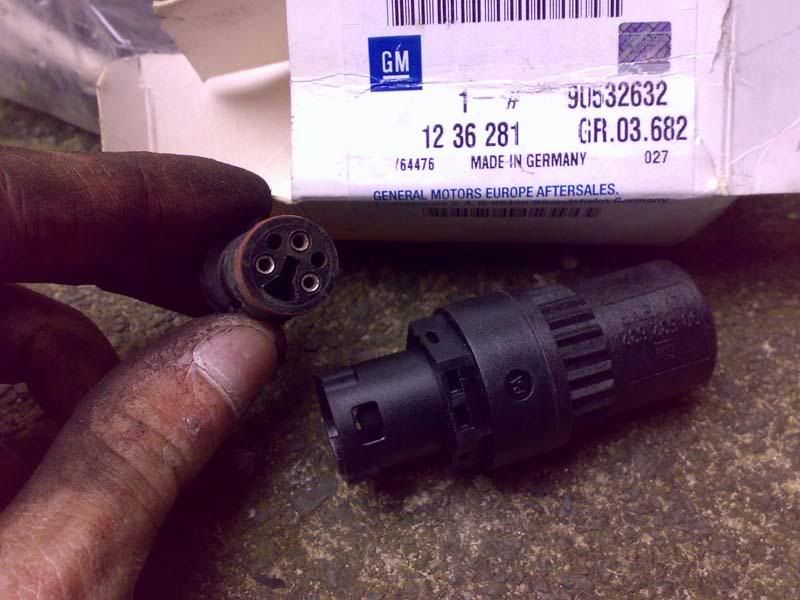
The plug on the left was acquired from the scrapyard earlier in the day. This is the plug that was on my car:
This needed to be removed and then it was a case of matching the wire colours:
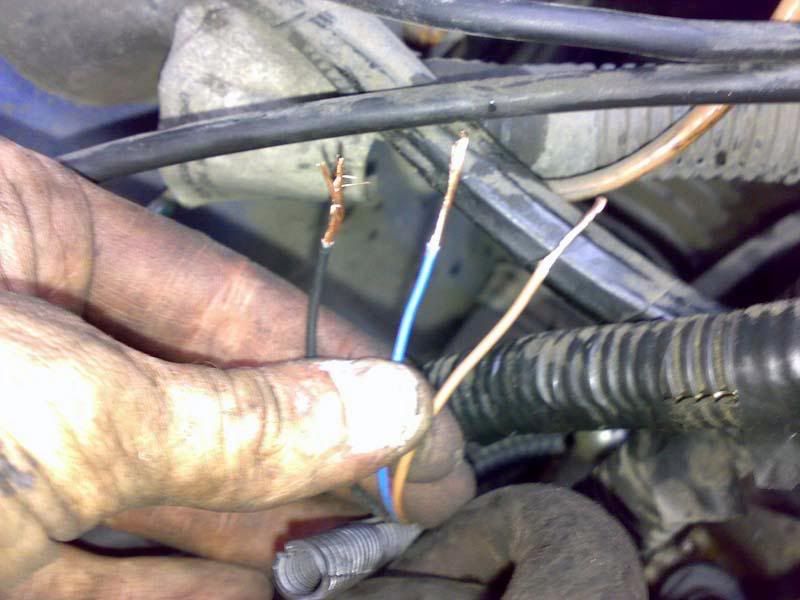
This is the transducer in place:
All covered up with conduit:

The engine was 'reassembled' and all ecu faults/engine hunting/air leaks were gone
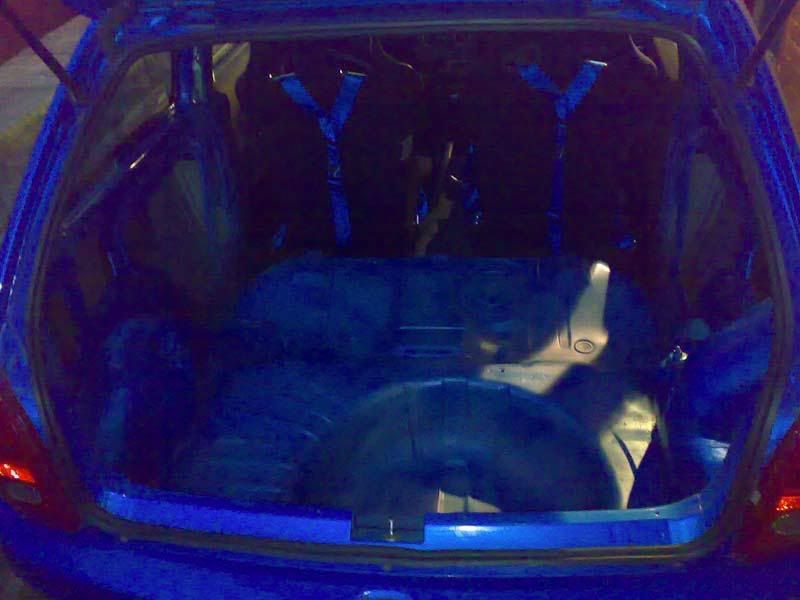
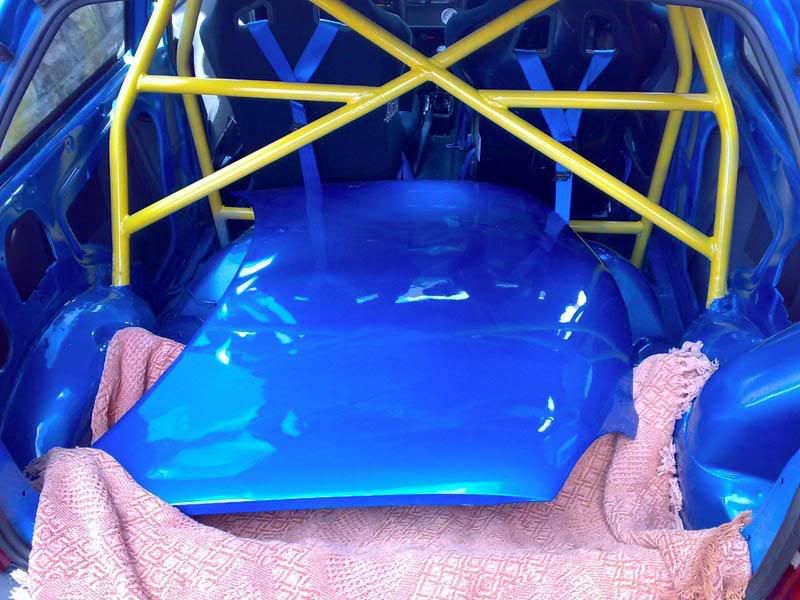
While doing the entireity of the above, I finished off the spraying in the back of the car:
Final few coats of paint:

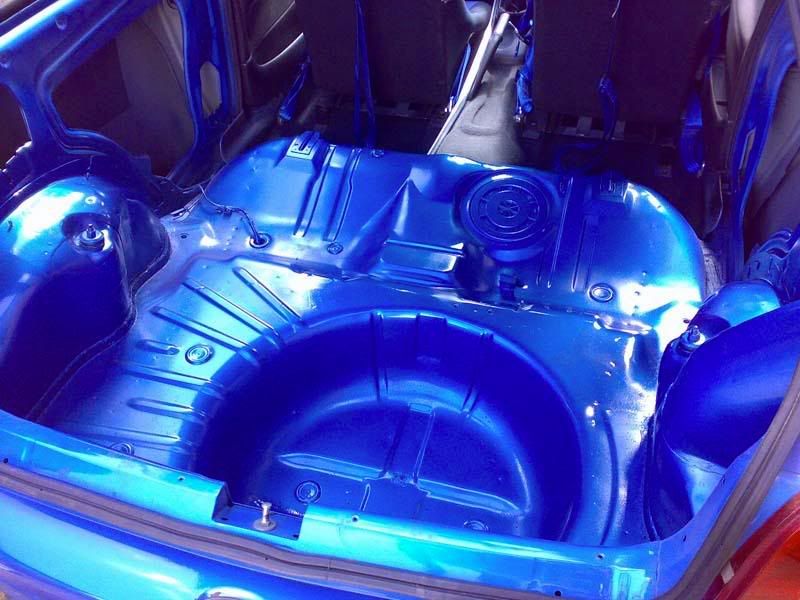
Completed boot after Lacquering:

Went out for a blast and the car drivers lovely Well happy.
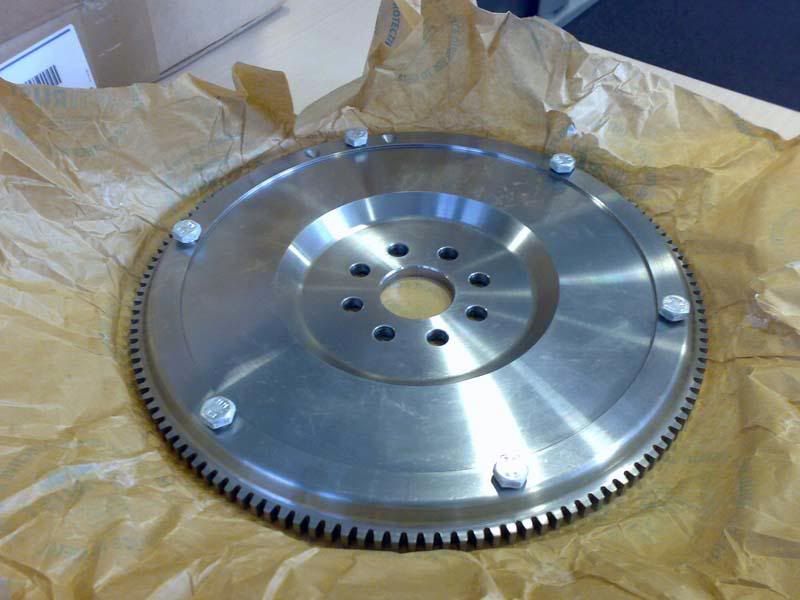
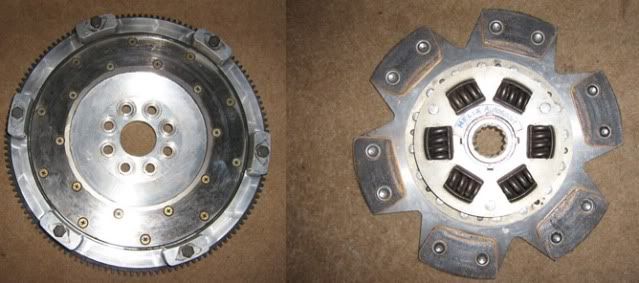
Also, my new flywheel arrived:
Oh, and before the day was complete; I did the necessary
Well the plan this weekend was to fit the light flywheel I got from vxlgsi
But being a lazy barsteward, and seeing the weather forecast I booked in at FPE in Keighley to have it fitted by my mates Mark and Matt (sounds like a boyband or something? lmao)
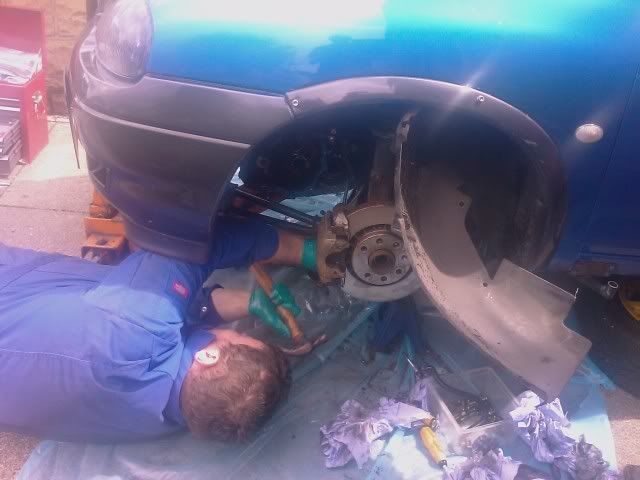
So, we arrived nice and early and Matt got down to the job at hand.
I can seeee yoooou
Car Up
Car Higher up
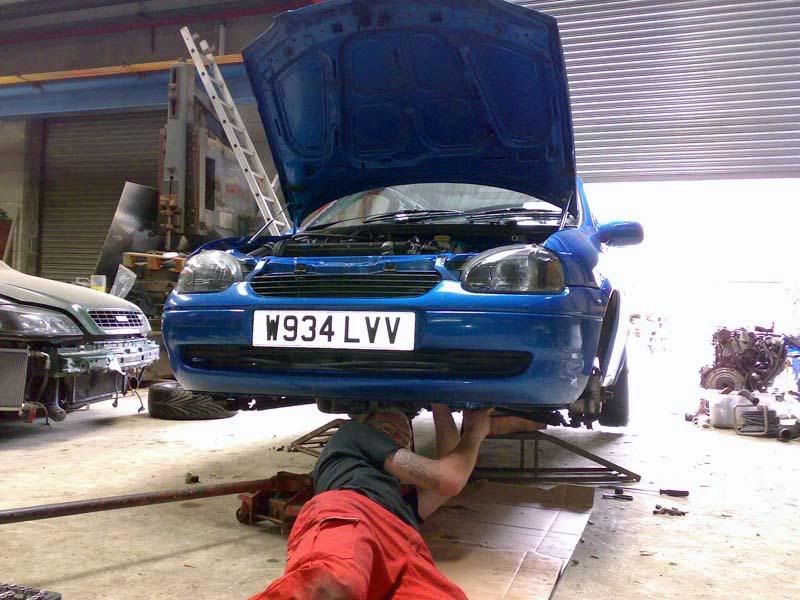
Gearbox Out
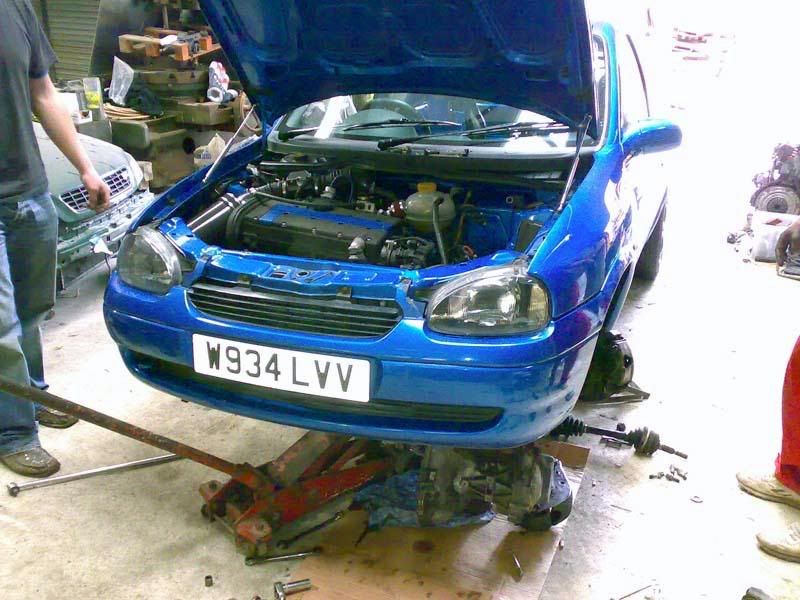
Peekaboo
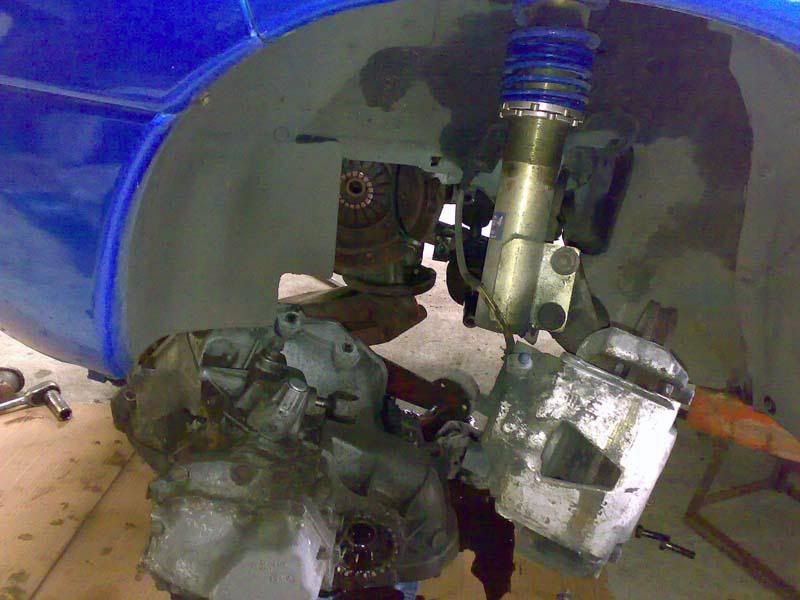
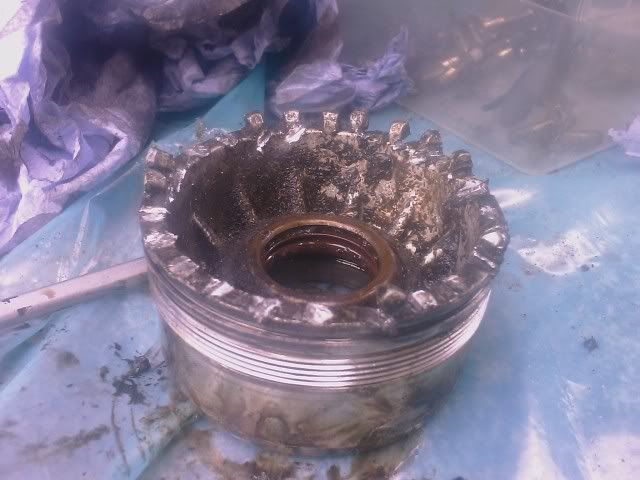
New Flywheel
It was at this point I found out that for some reason my car had a later 9.4kg flywheel fitted, so I was literally jumping about with excitement at loosing nigh-on 4kg from my flywheel weight lmao
Eww, old big nasty flywheel
It was all bolted back together and worked like a charm. By god it's fkin quick. Revs like a coont and spins it way through 1st,2nd and 3rd now in the wet lmao Really love it now
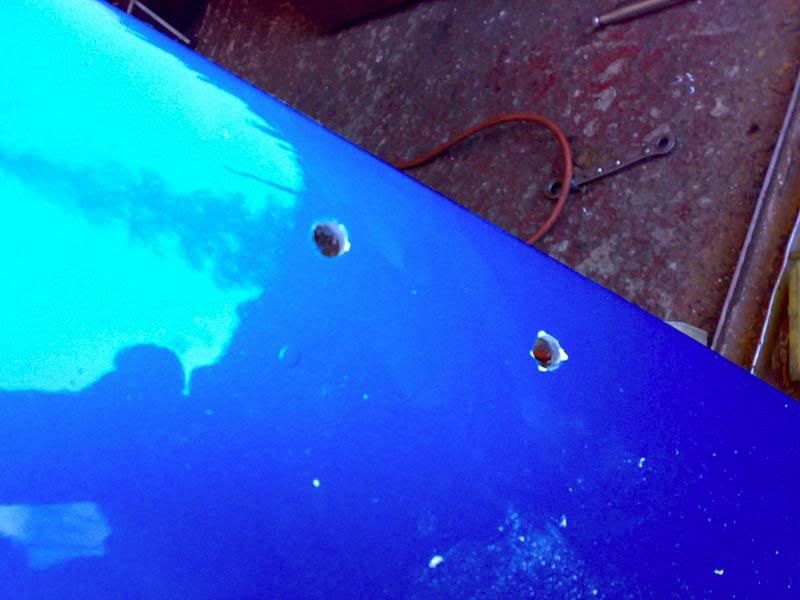
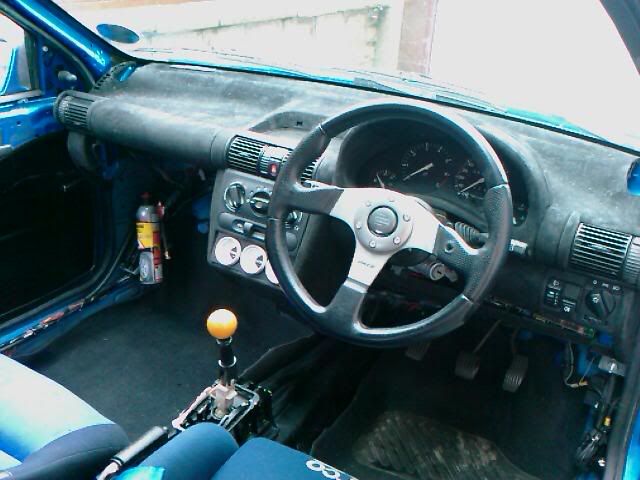
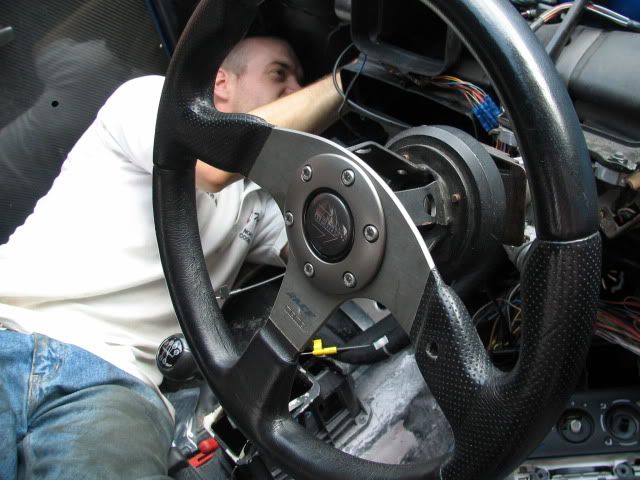
Oh, and I fitted my new Momo Racer steering wheel. I got it from gsijay on here (thanks mate :beer: ) unfortunately it had an early boss with it (non air-bag) so it wouldn't quite fit with the shroud on. Given that I'm northern (and therefore tight) I decided that rather than paying another 40quid on a boss, I'd just modify the shroud (hence the hole behind the steering wheel lmao)

While at Marks we came to a deal over a corsa gsi front splitter. So that'll be going on 1night this week
[Edited on 14-12-2009 by DaveB]
[Edited on 19-04-2010 by DaveB]
[Edited on 18-05-2010 by DaveB]
[Edited on 06-08-2010 by DaveB]
[Edited on 05-10-2010 by DaveB]
[Edited on 27-10-2010 by DaveB]
|
DaveB
Member
Registered: 29th Dec 00
Location: Huddersfield
User status: Offline
|
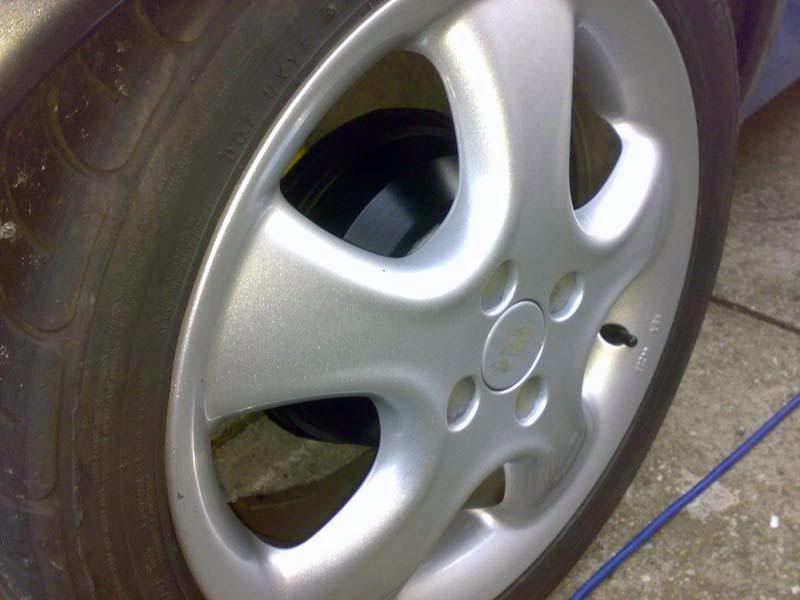
Well, here is my update. I managed to part-ex my old wheels for these lovely softstars
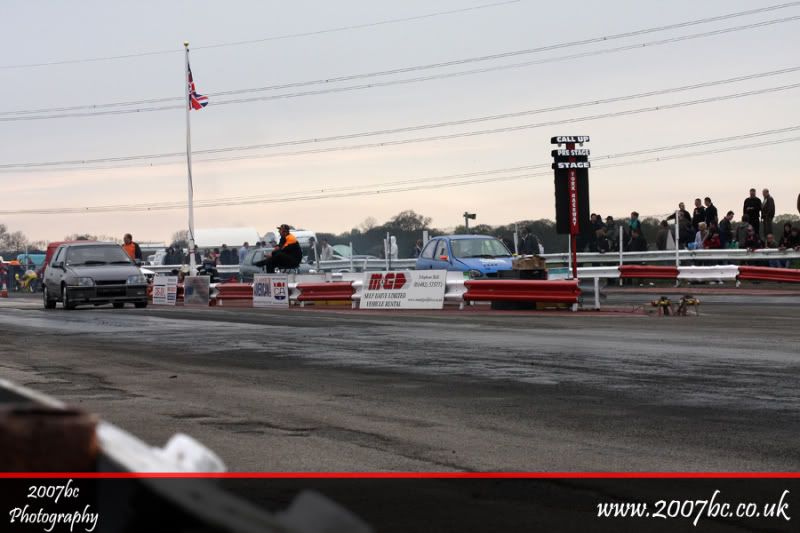
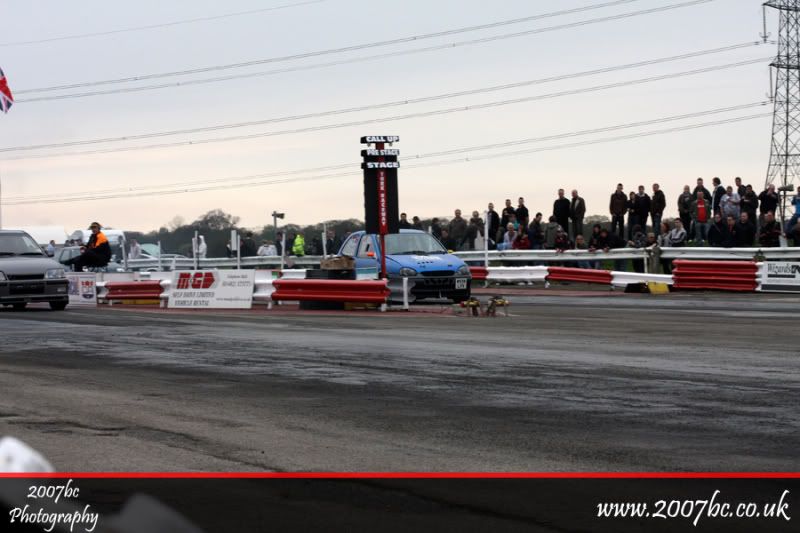
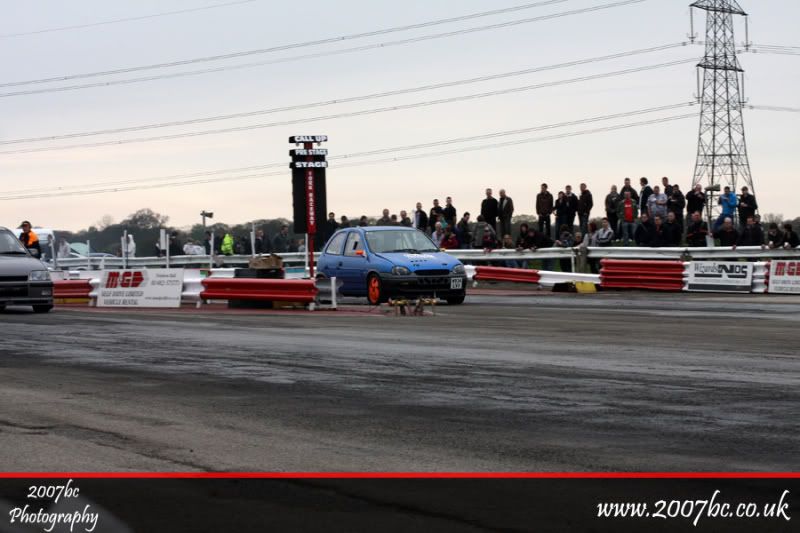
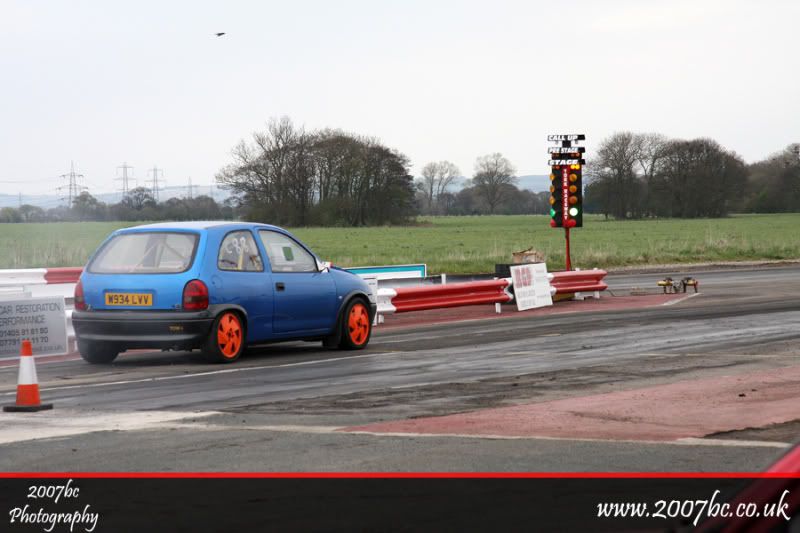
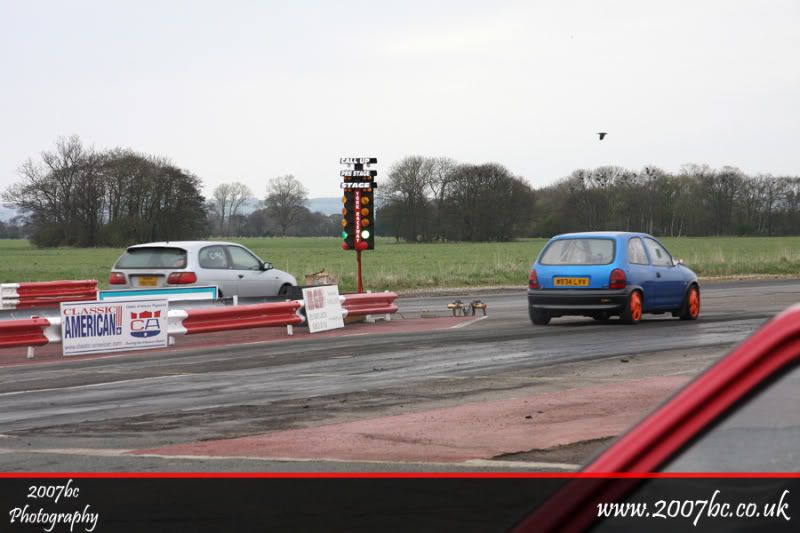
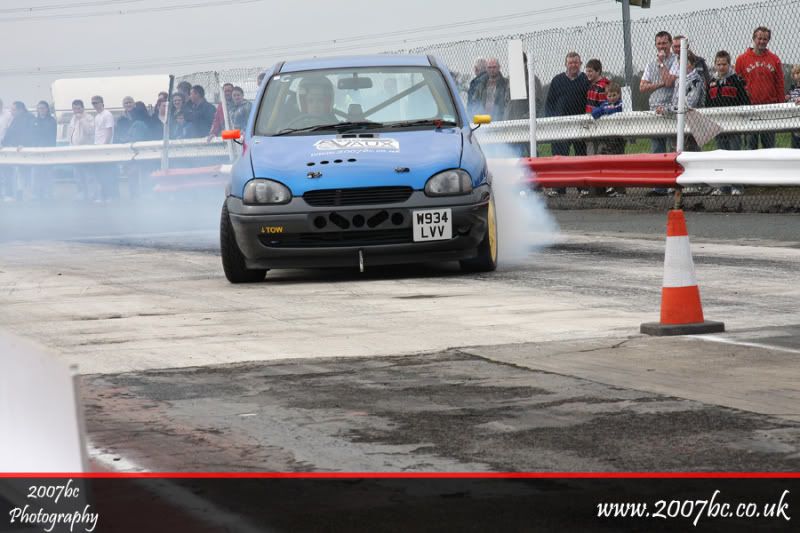
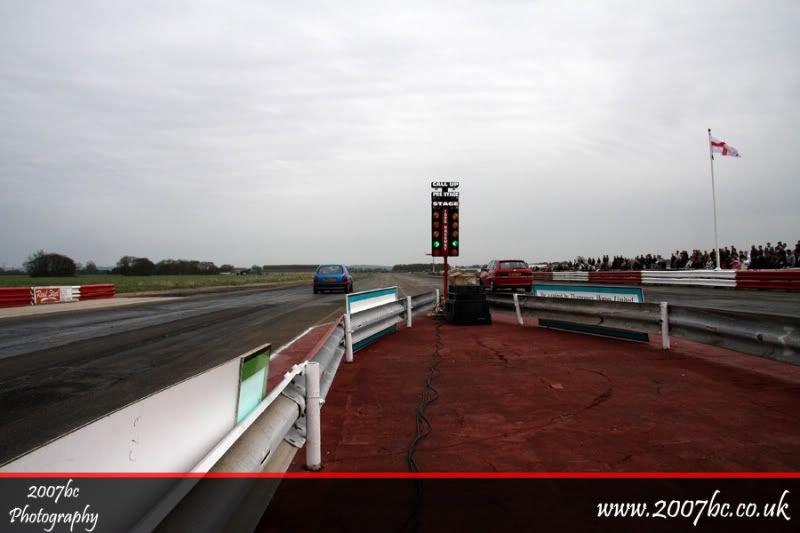
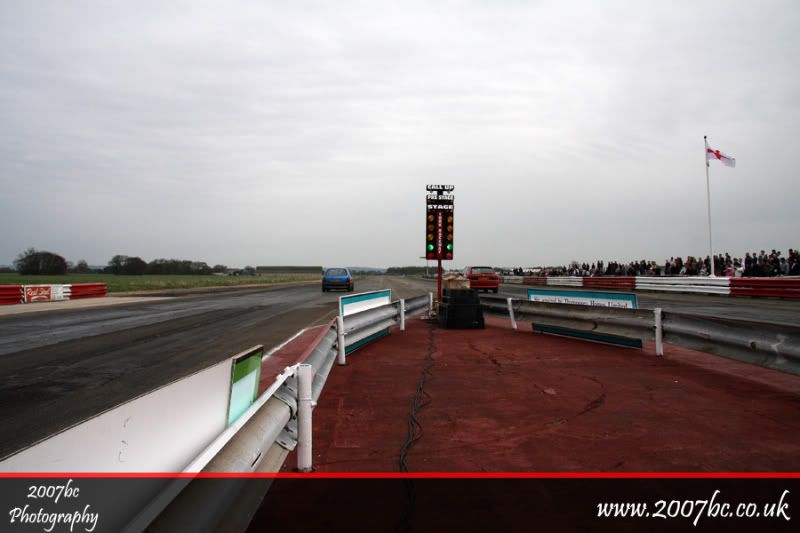
As mentioned on a previous post the little corsa managed to pull a 14.7 at York dragway. I'm well chuffed with that as it's quicker than I thought it'd do. I think with practice I should be able to hit a 14.5 with no further modifications.
The only downside to constant abuse of a car that's spent the last few months parked up is that things break. On the way home the hangers fell off the backbox, lmao This meant being up early the next weekend to get it sorted.
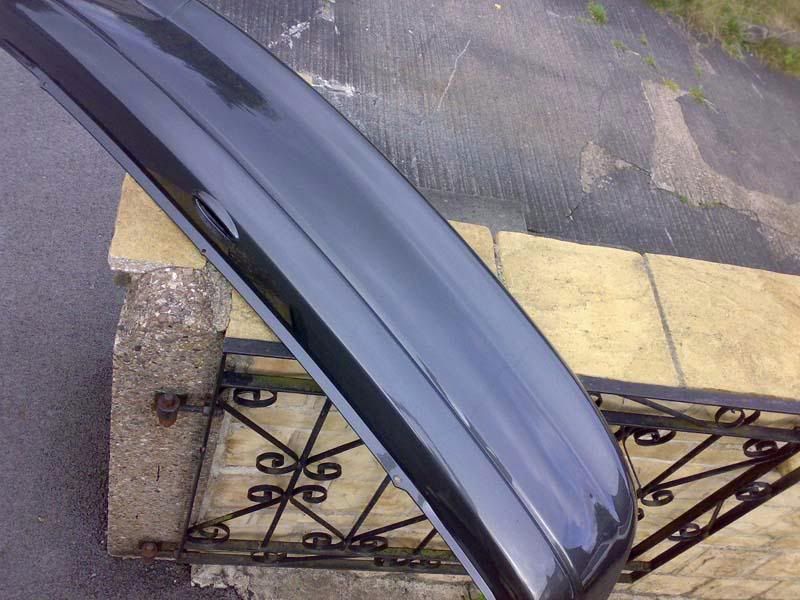
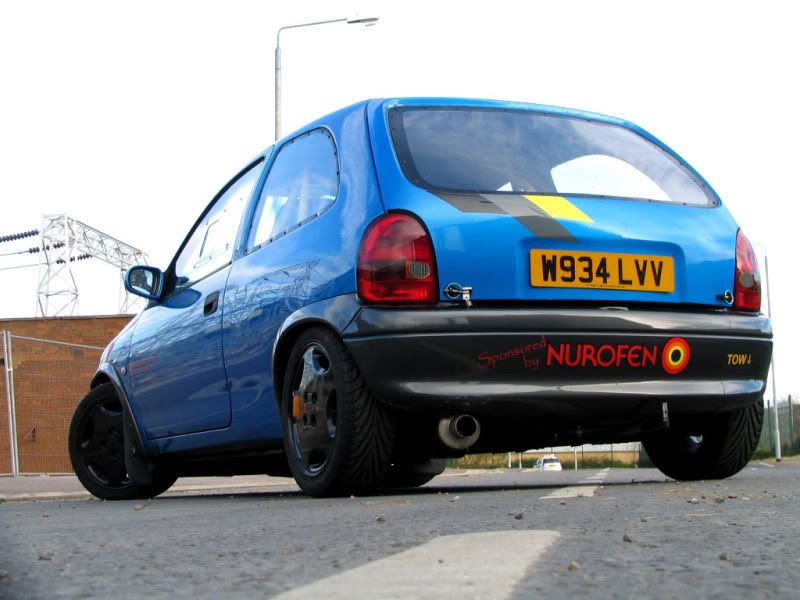
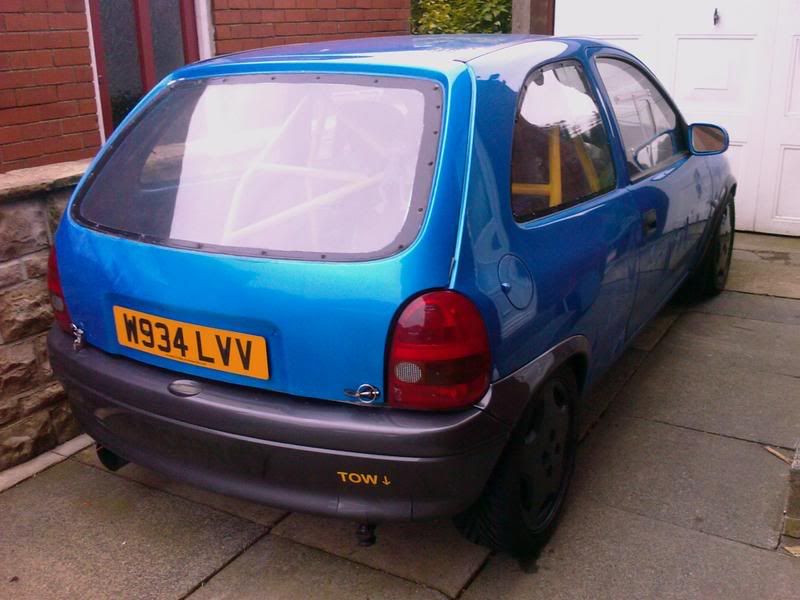
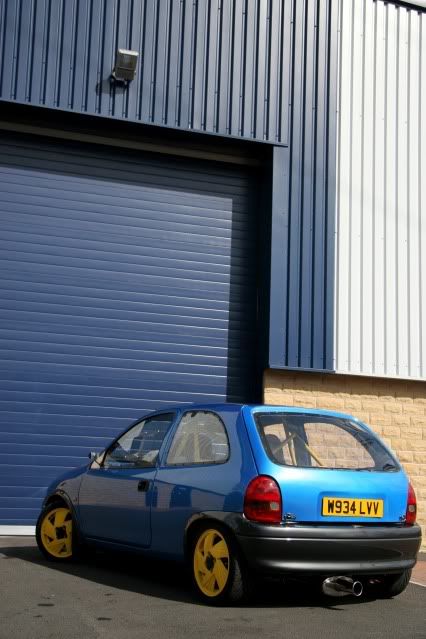
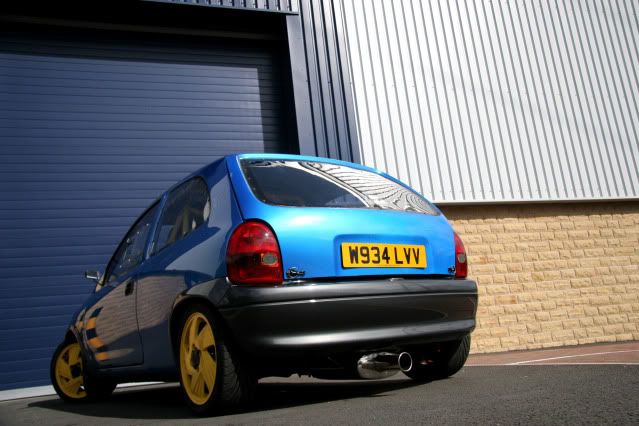
Some of you with keen eyes will notice the new colour of the rear bumper.
The bumpers and arches were lovingly painted by a mate in a local bodyshop, in Benns special colour
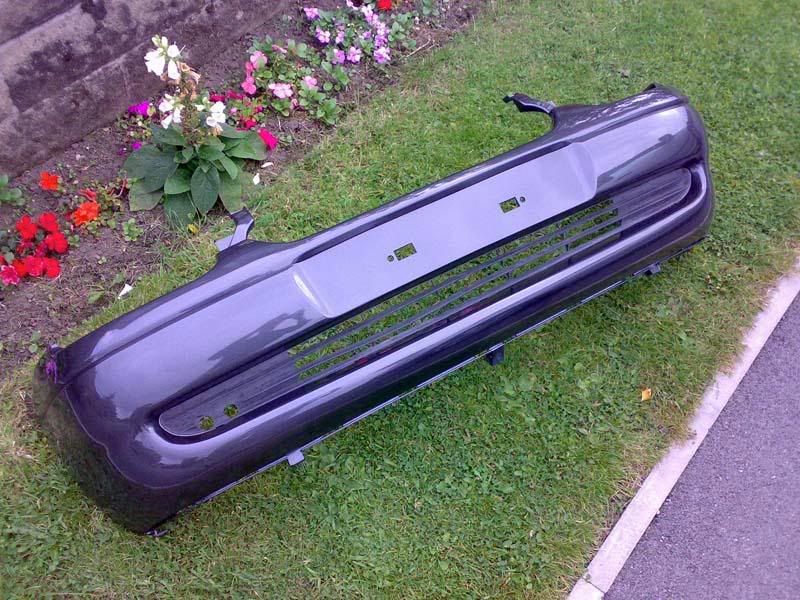
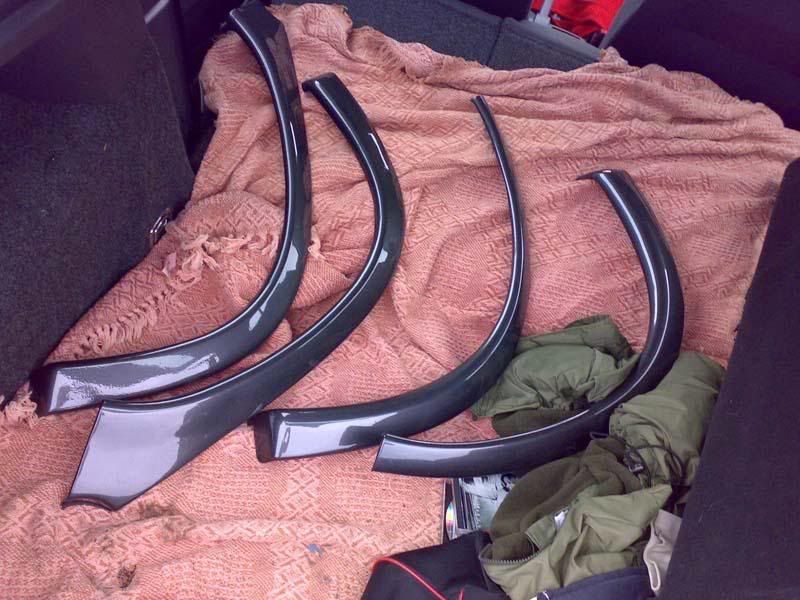
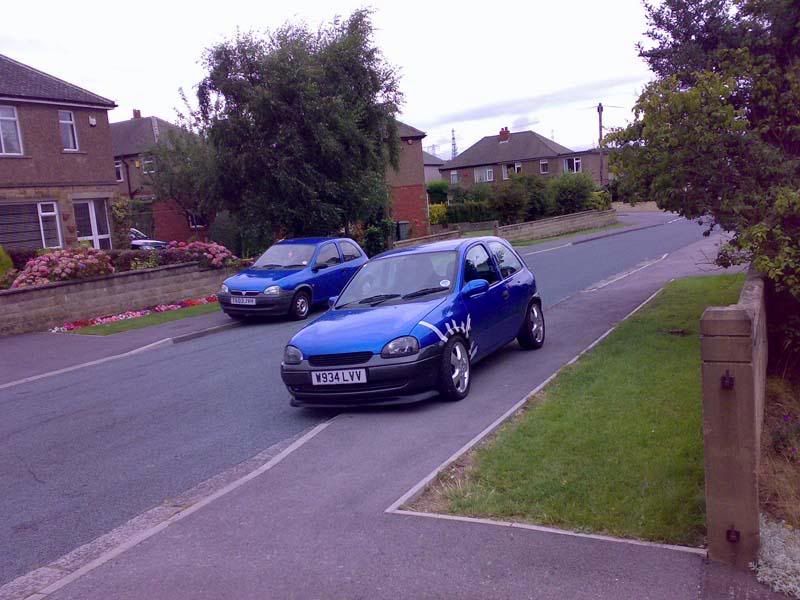
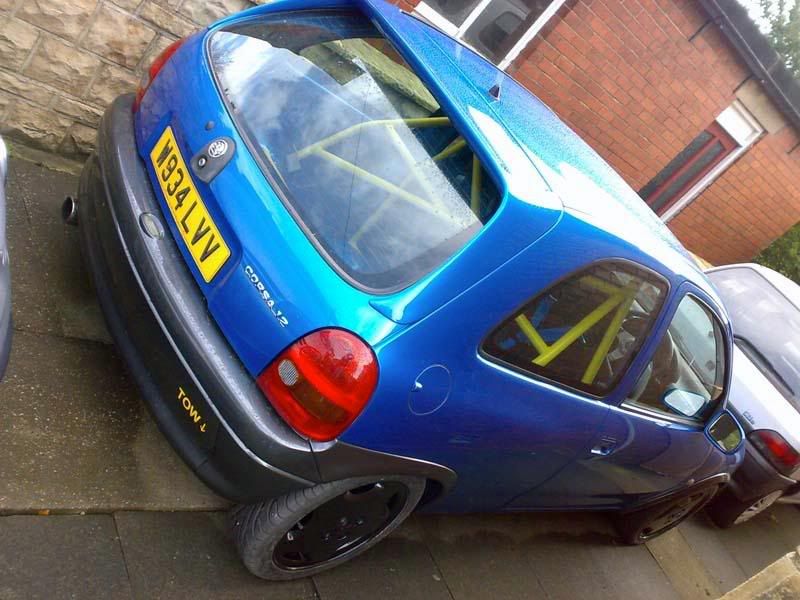
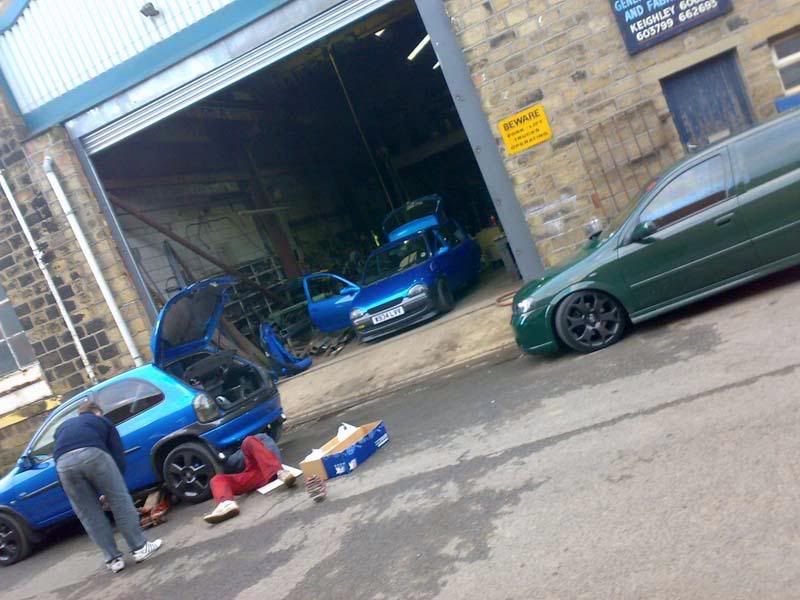
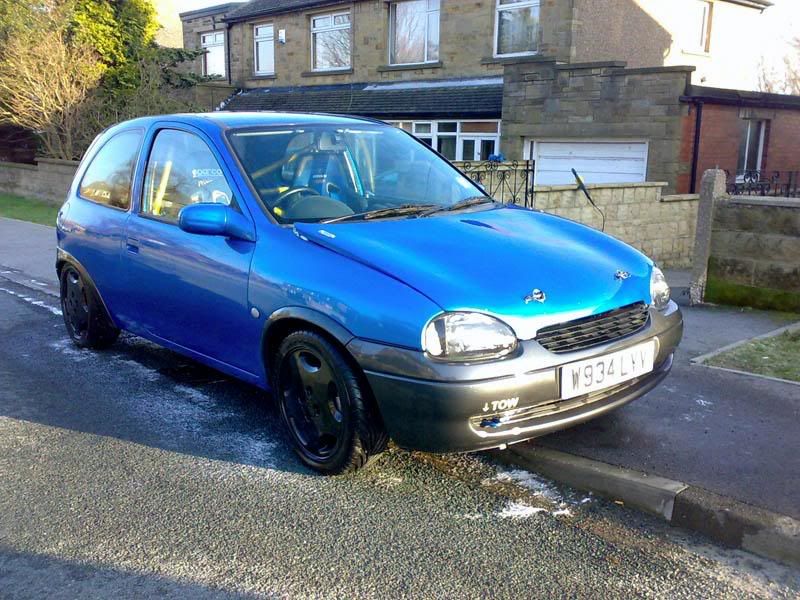
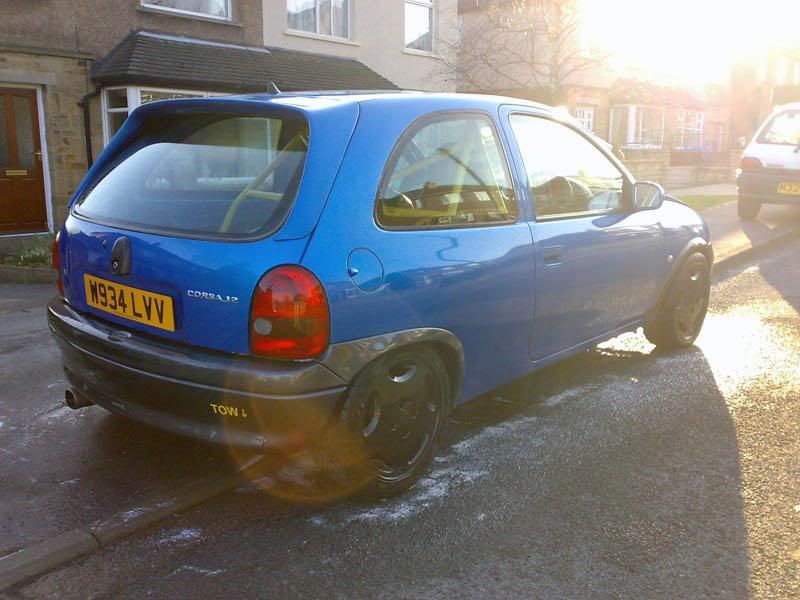
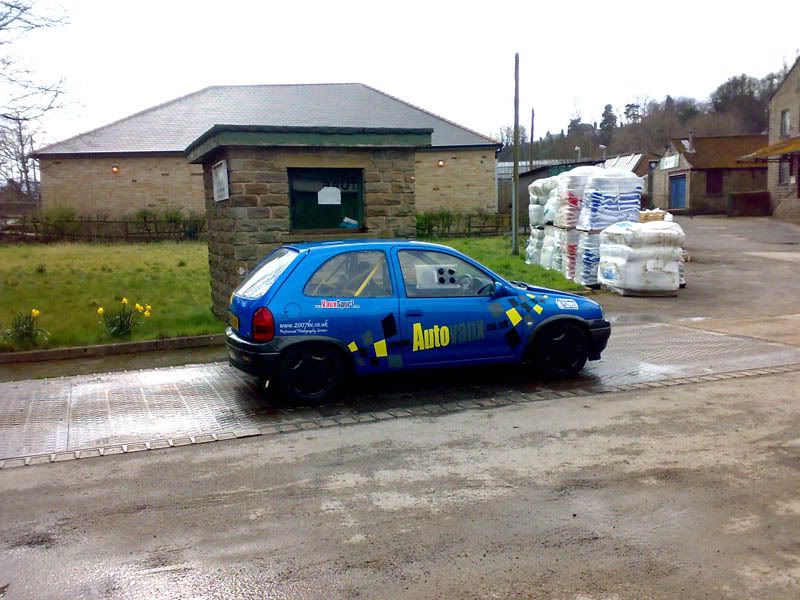
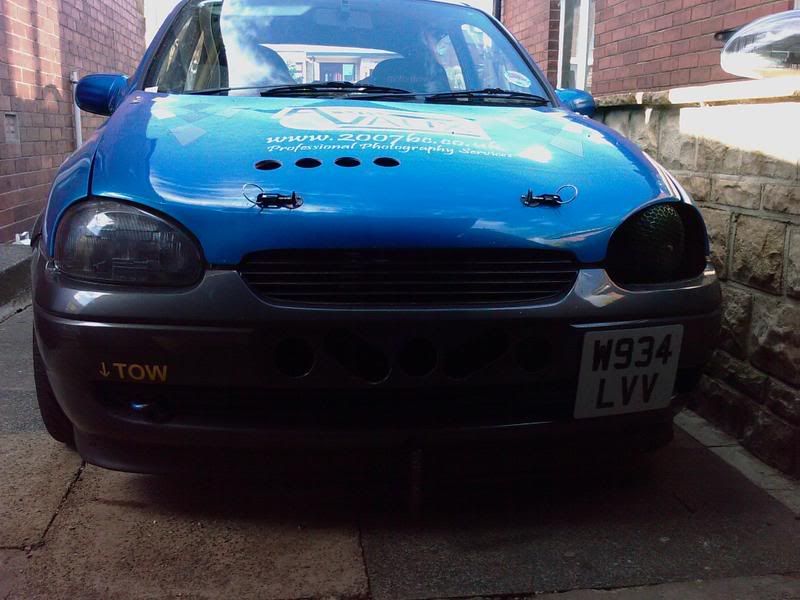
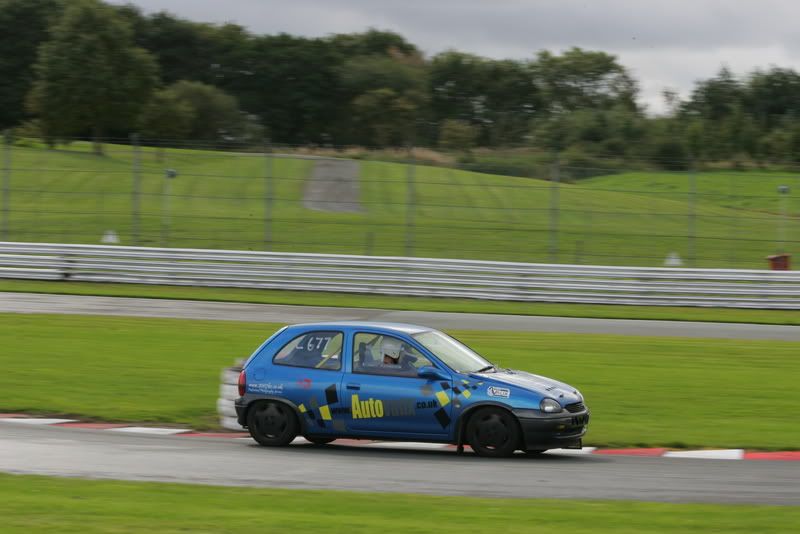
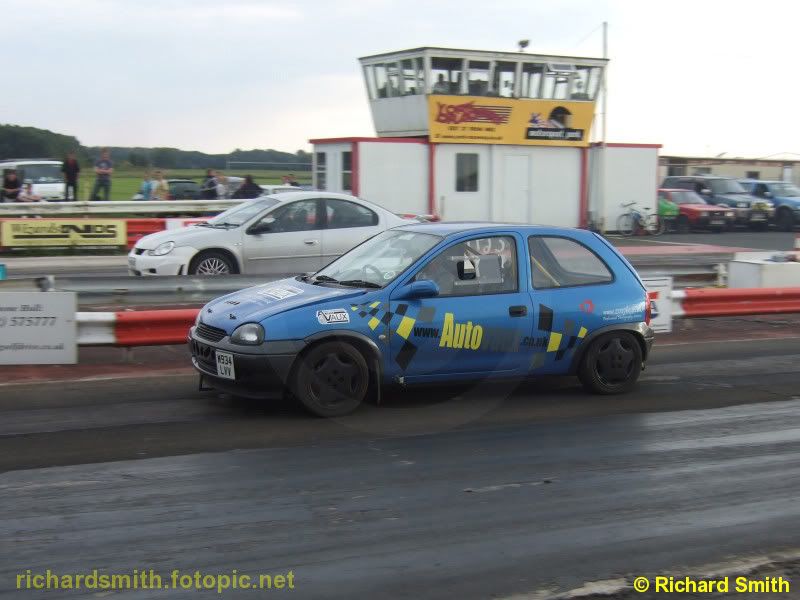
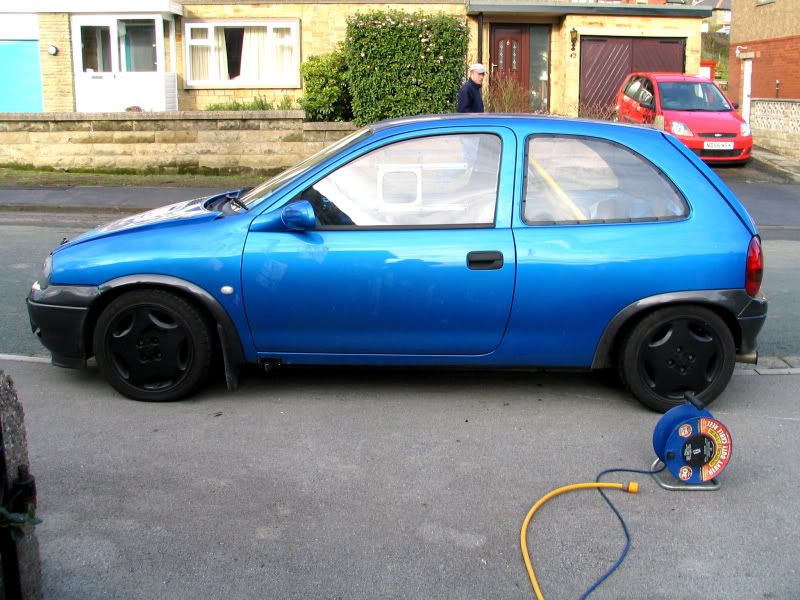
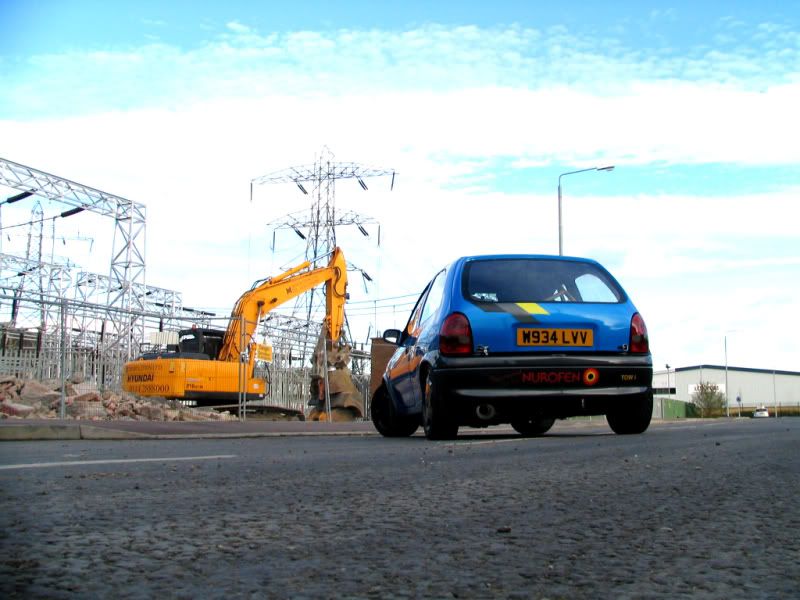
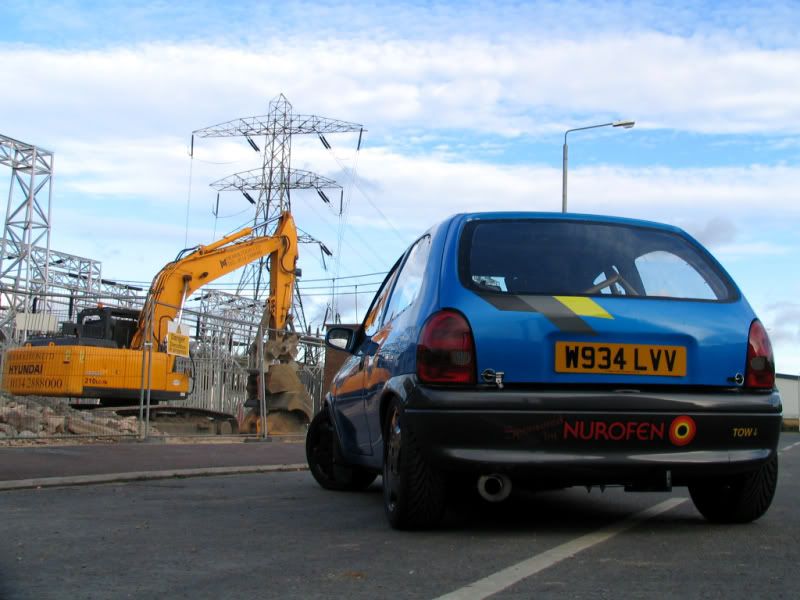
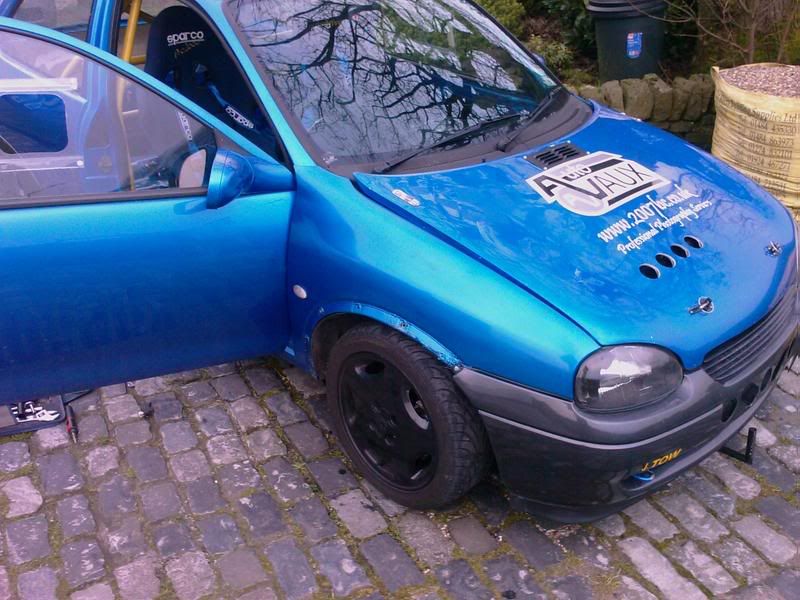
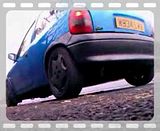
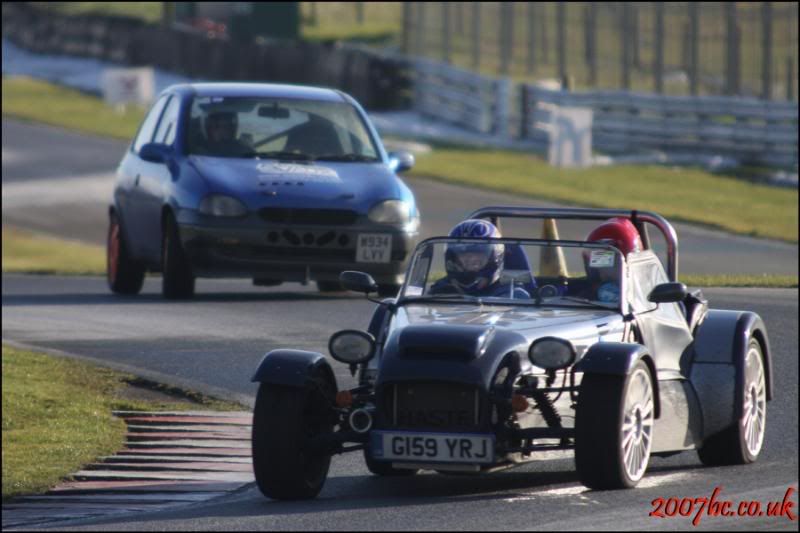
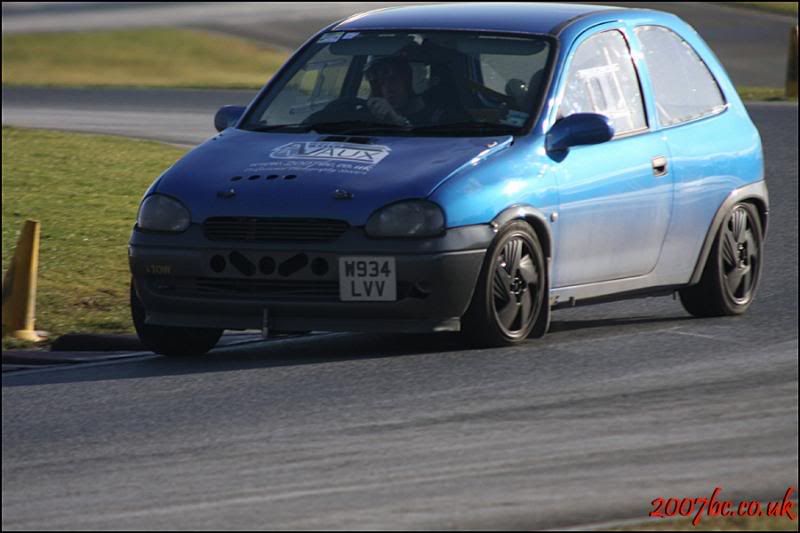
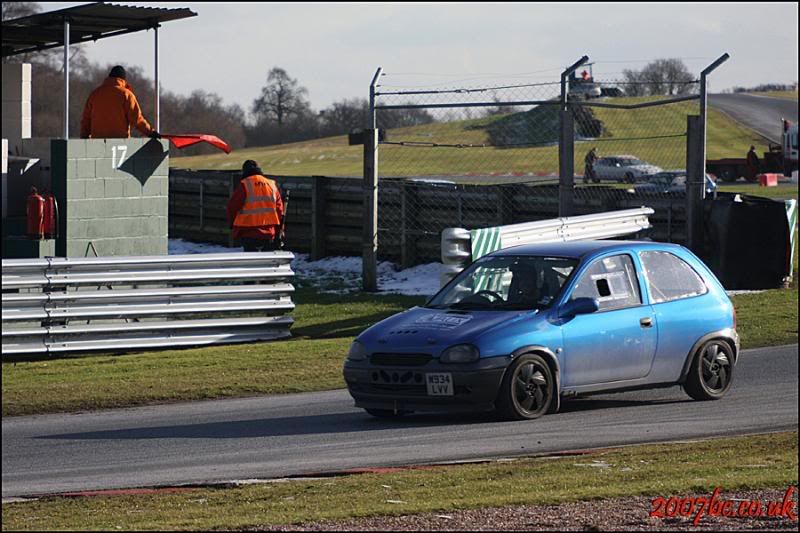
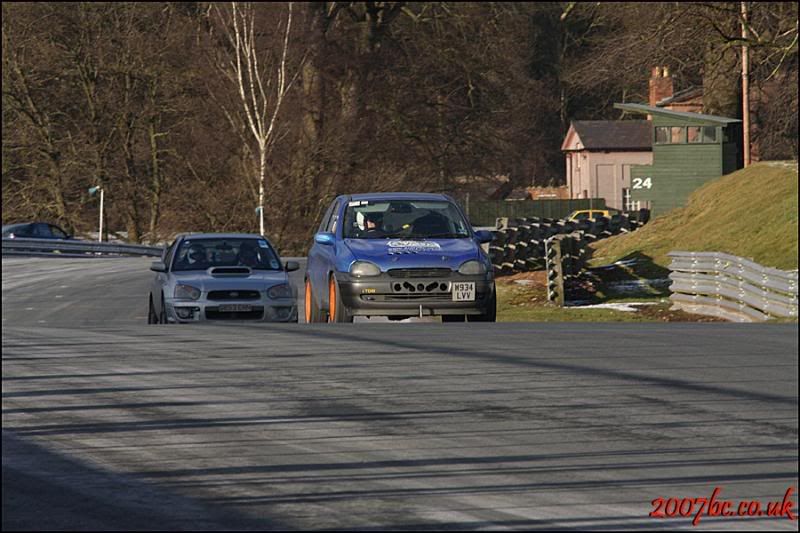
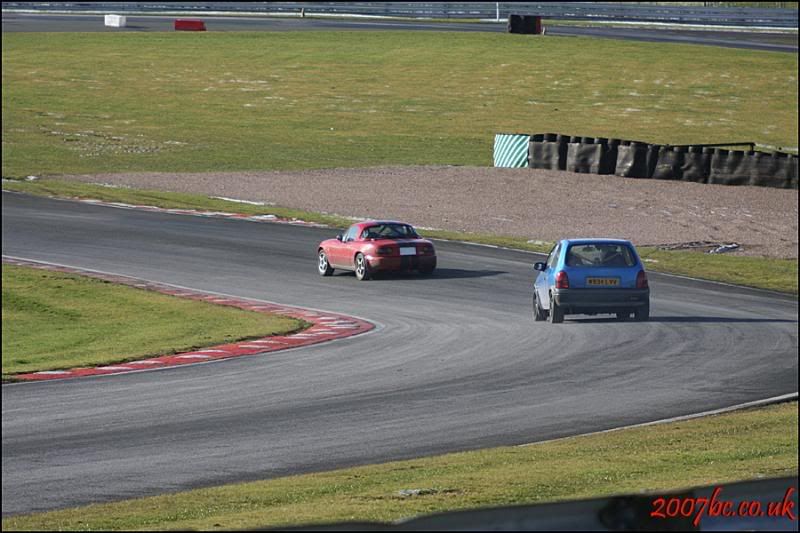
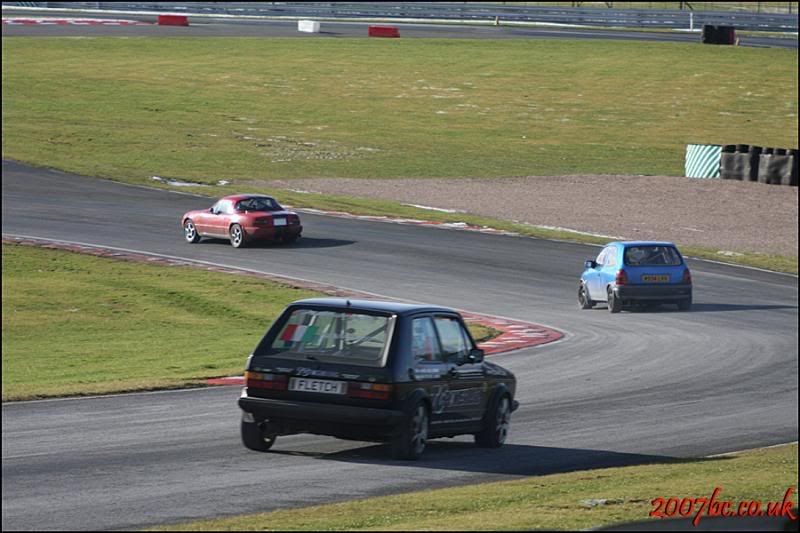
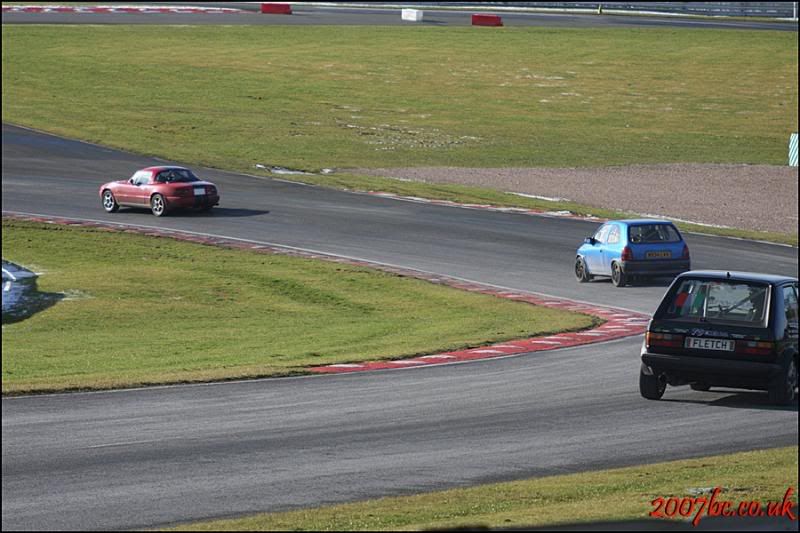
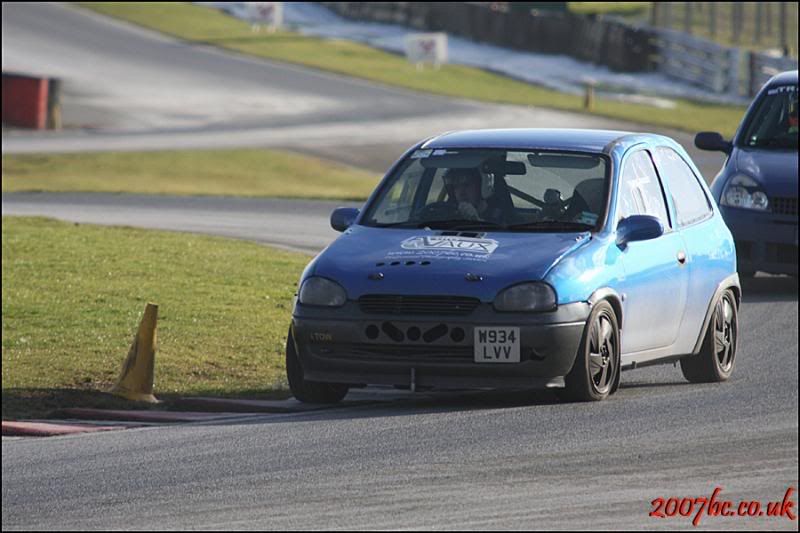
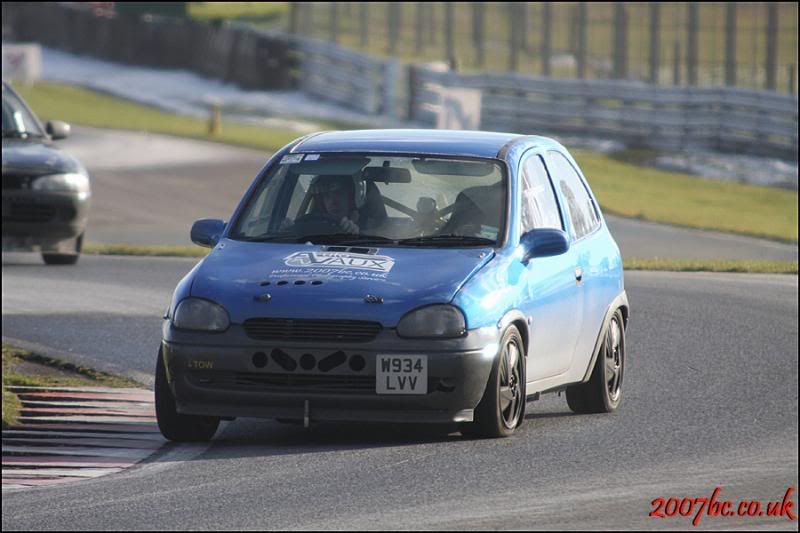
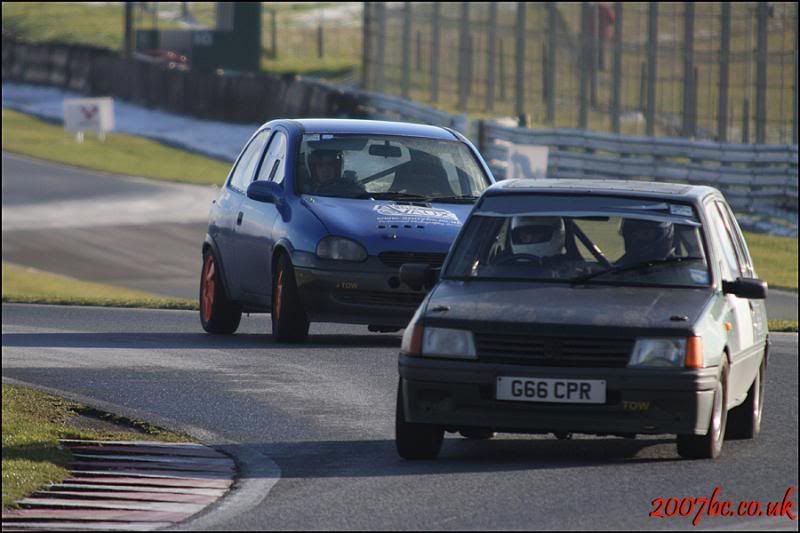
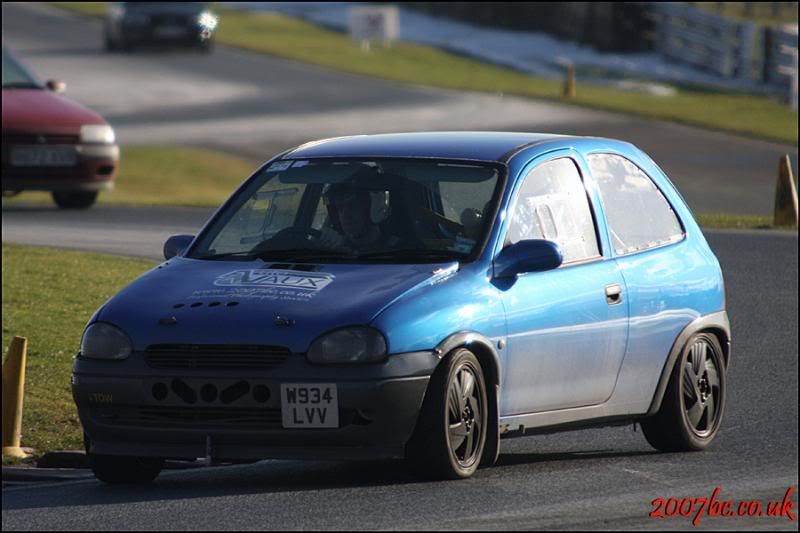
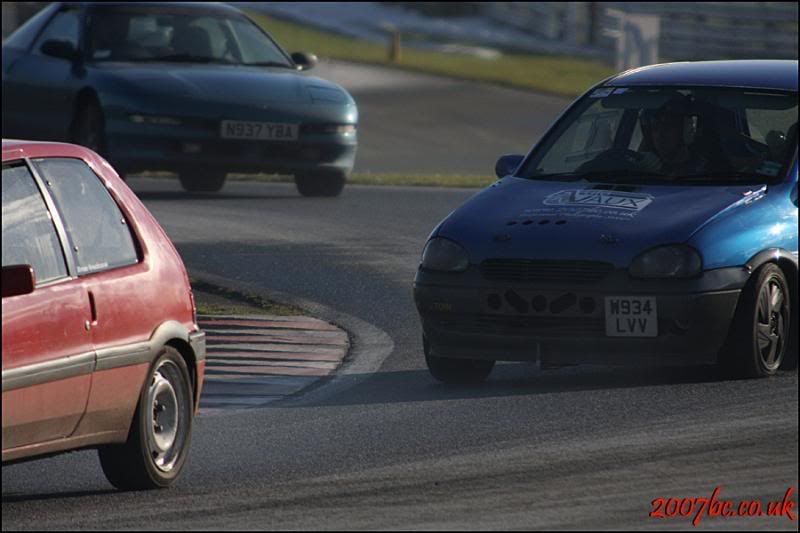
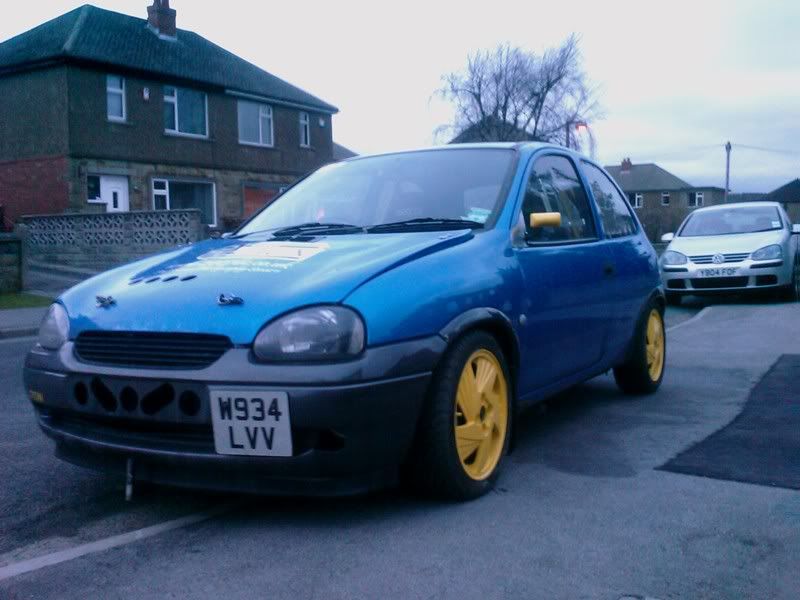
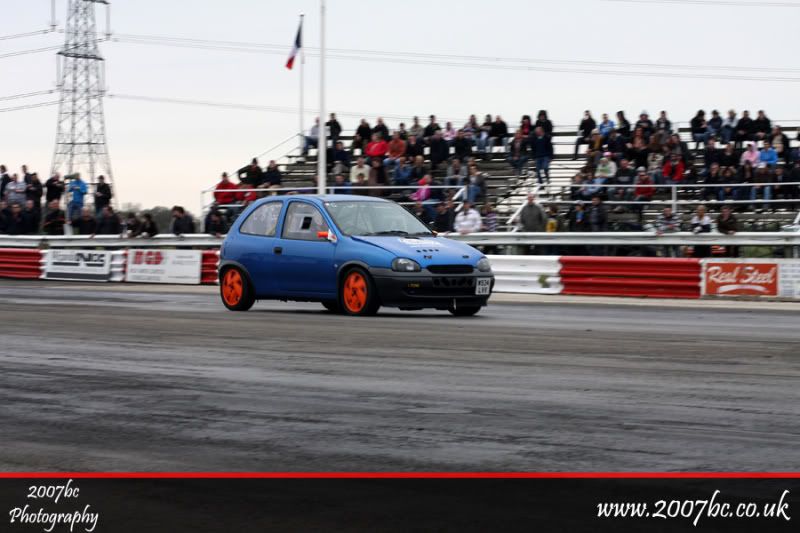
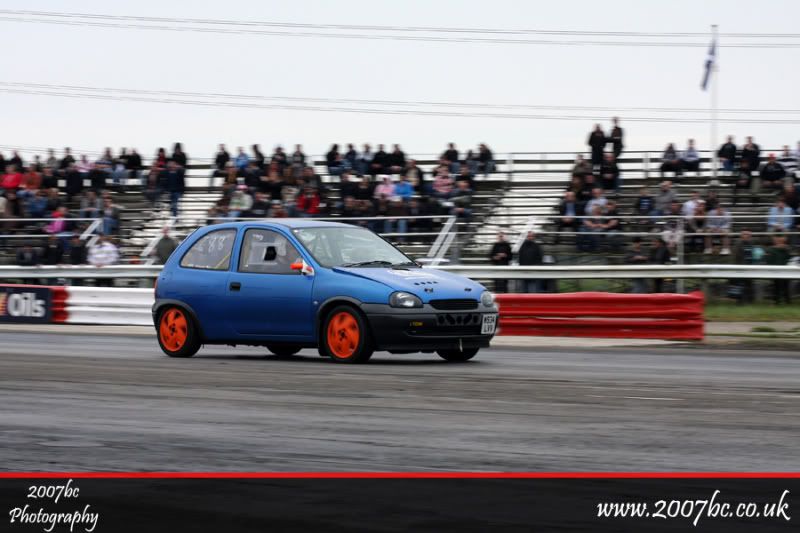
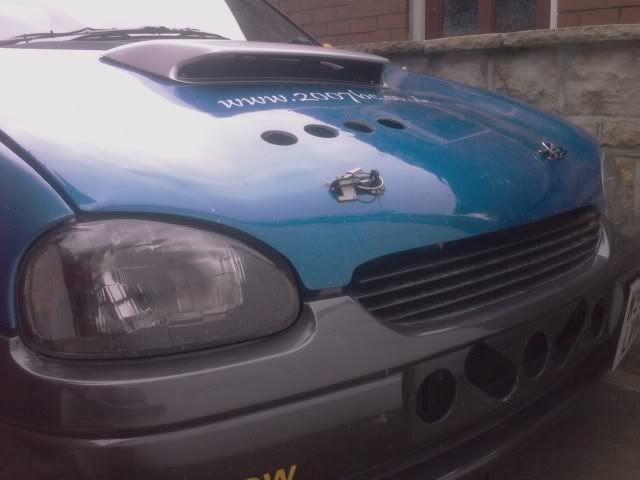
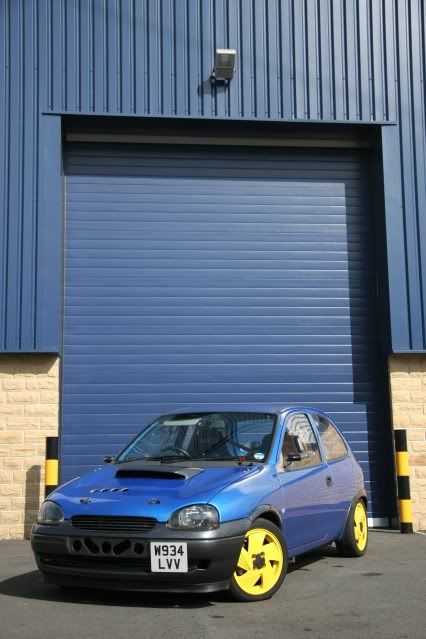
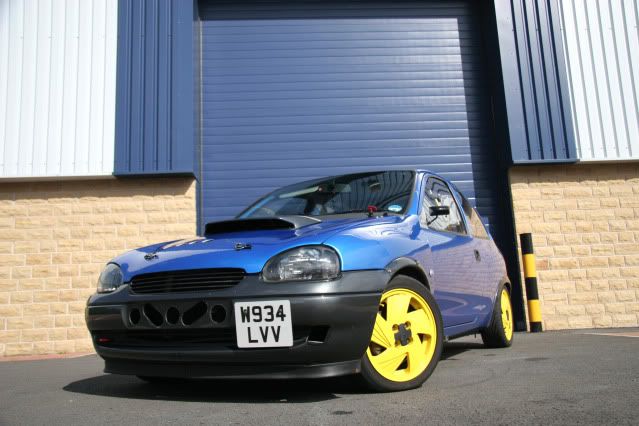
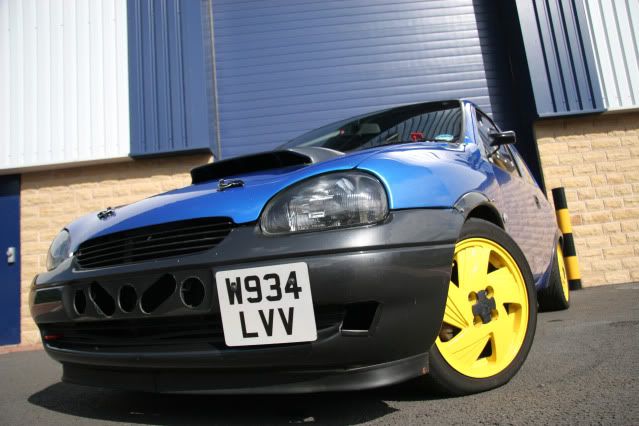
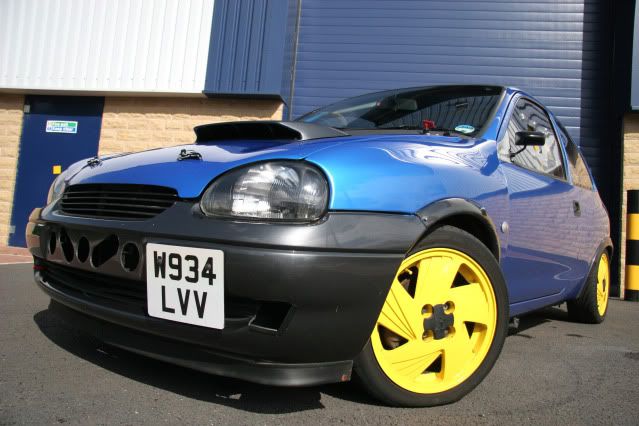
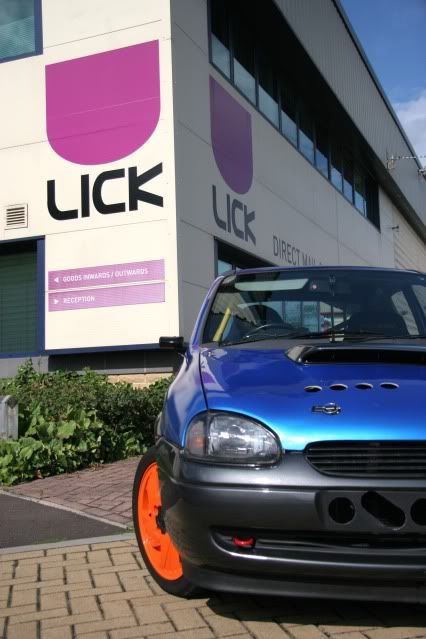
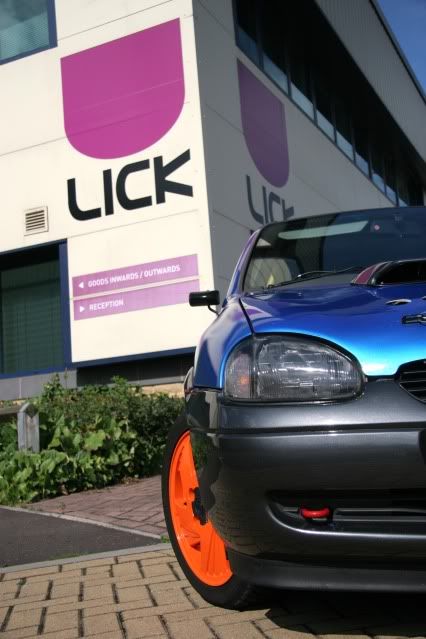
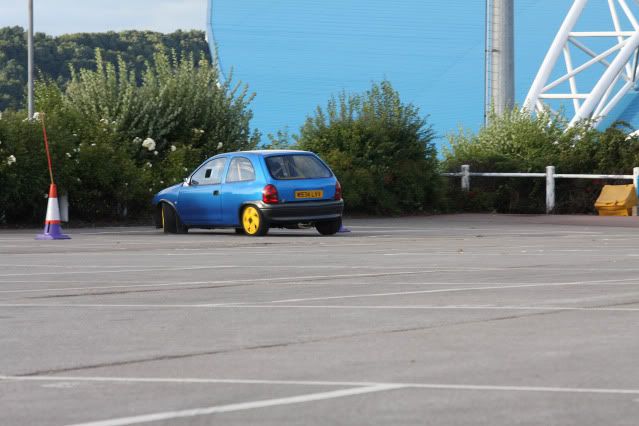
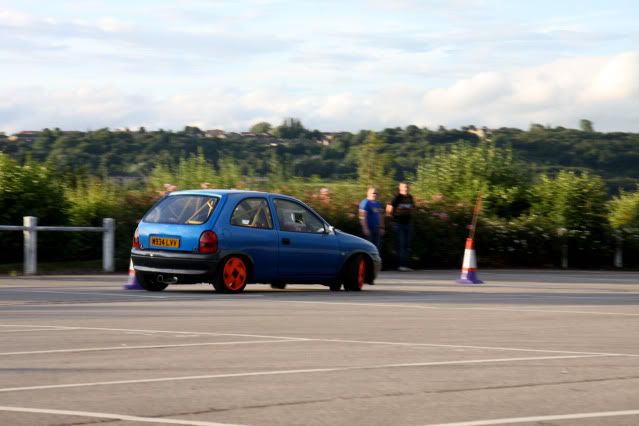
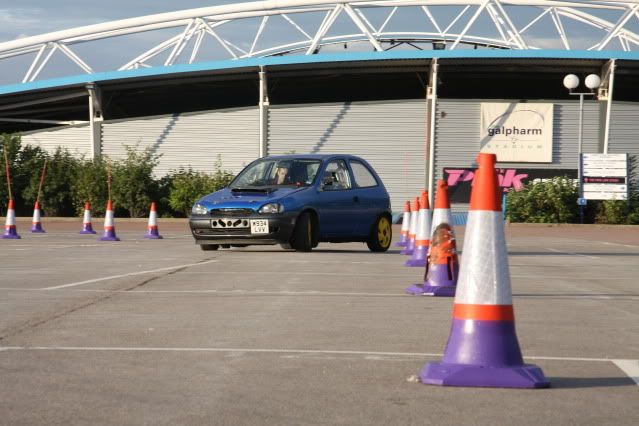
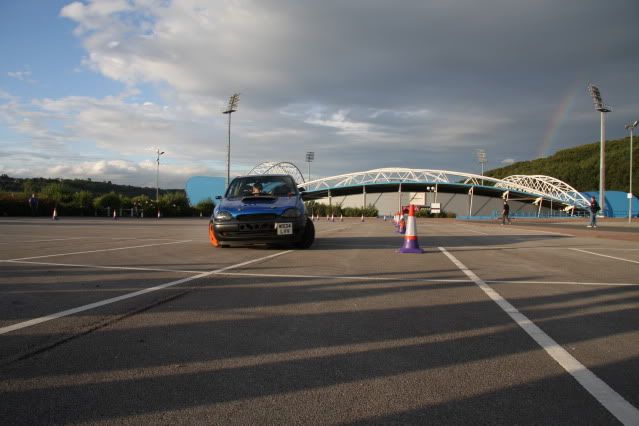
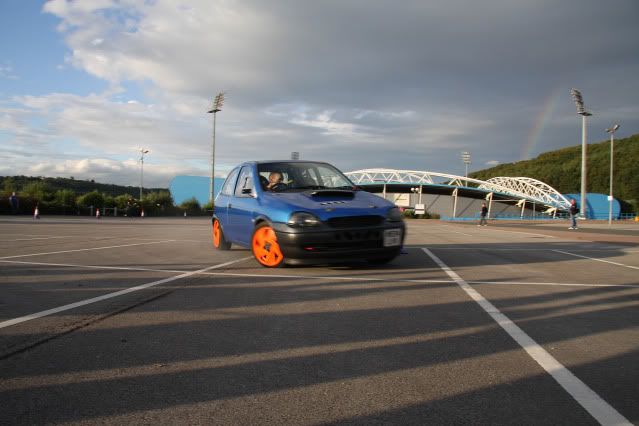
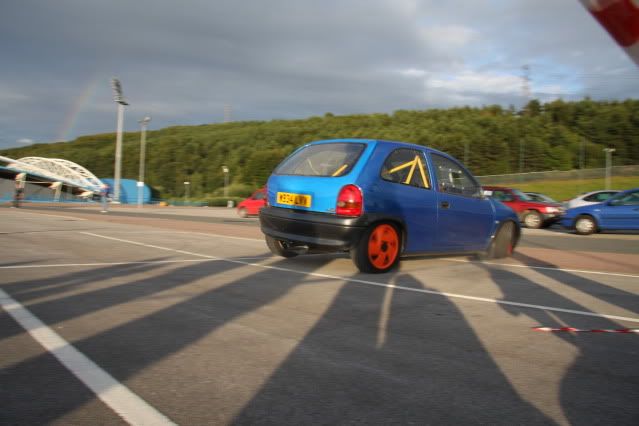
The front bumper then got the edition of a corsa gsi front splitter to bring it down abit. These pictures were taken the day before Trax. The corsa behind is a neighbours car, and how my little 'club' started off
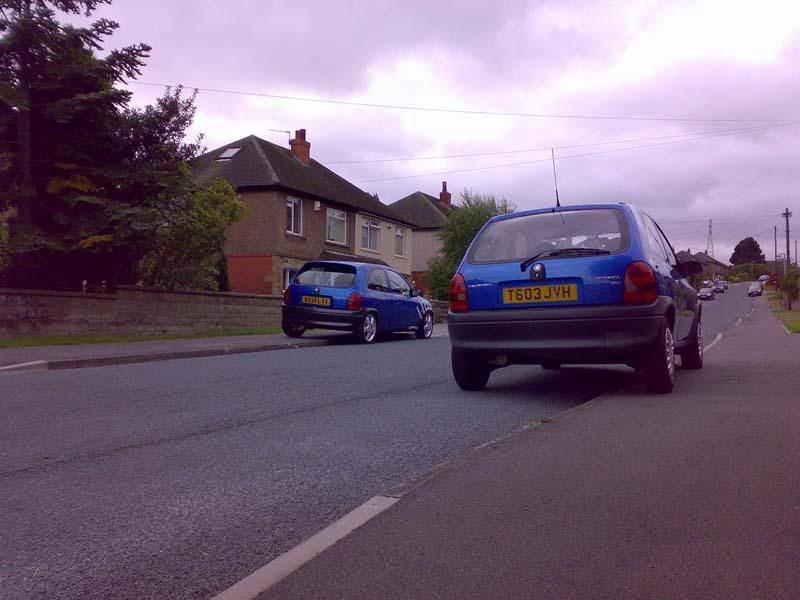
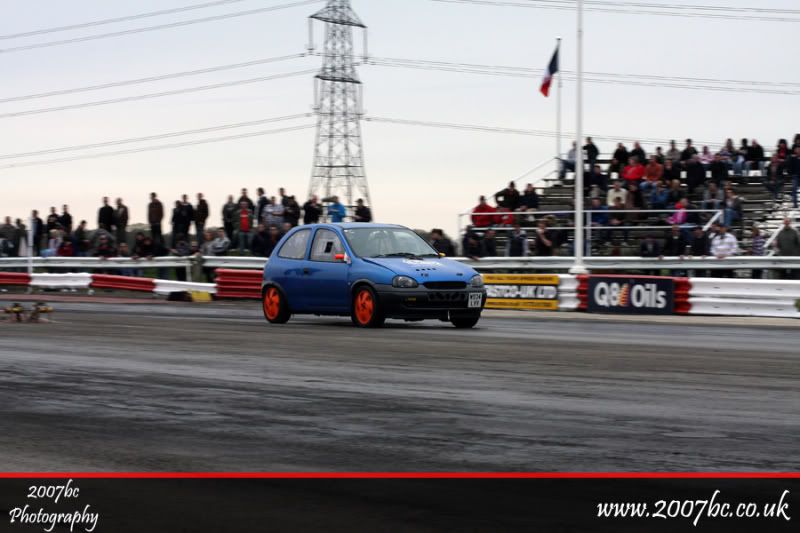
The car did its first track session at Trax, and lapped it up It got there and back with no faults. Now I know we've got some reliability, the games can really being
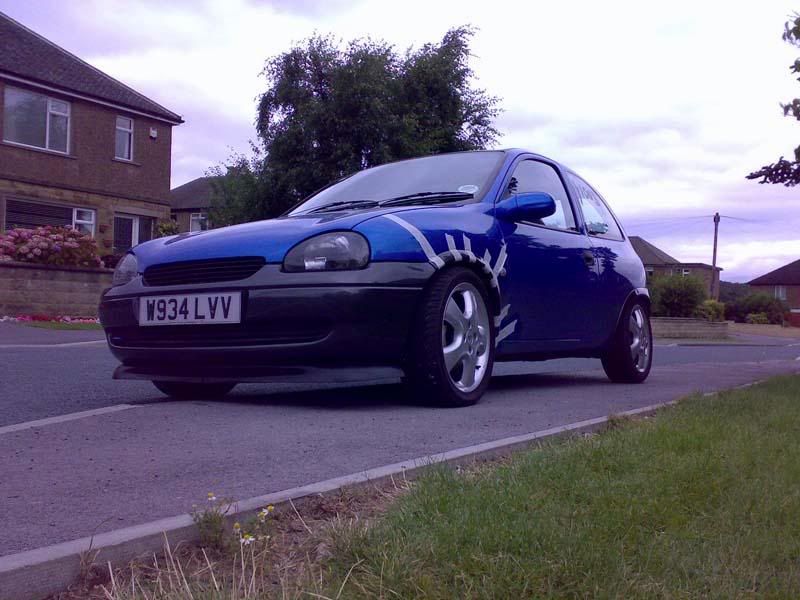
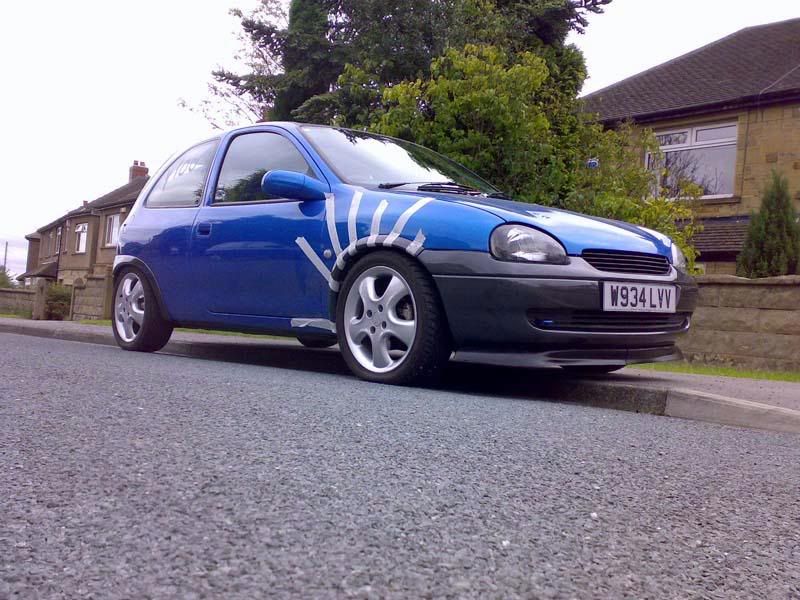
Here are afew pictures without the masking tape on:
Can't seem to leave the damn thing alone on a weekend, so I just have to tinker with it and try and fix things that aren't broken lmao
I started by painting up the new rear drums I had fitted afew weeks previously, before they started to rust.
I then fitted the anti-rollbar that I acquired from a scrapyard last week, after first calling over to Chris Astleys to collect some of the ally blocks to lower the anti-roll bar
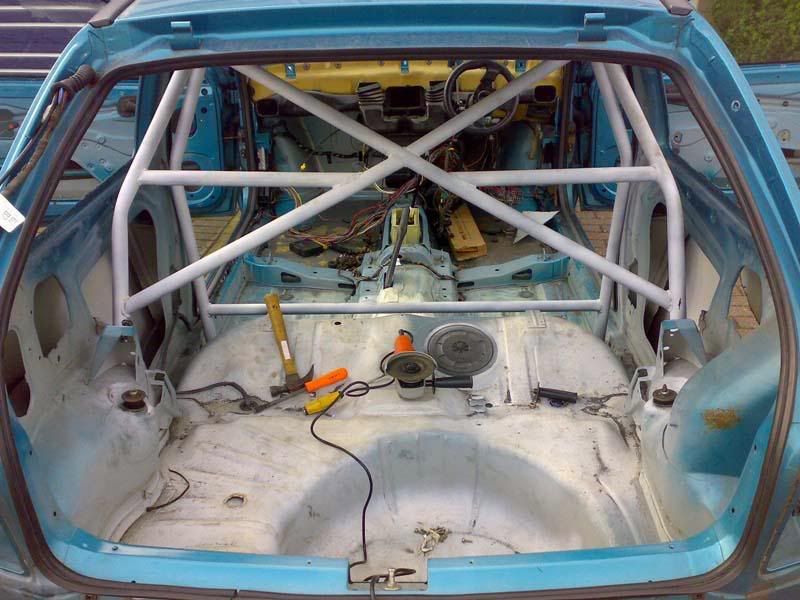
Next job was to try and strip some more weight from the inside.
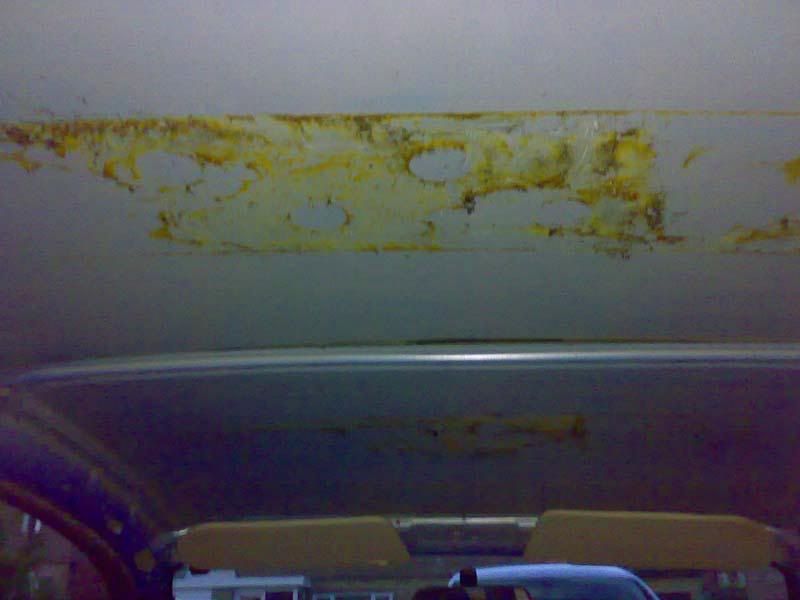
Off came the last bit of sound deadening on the roof
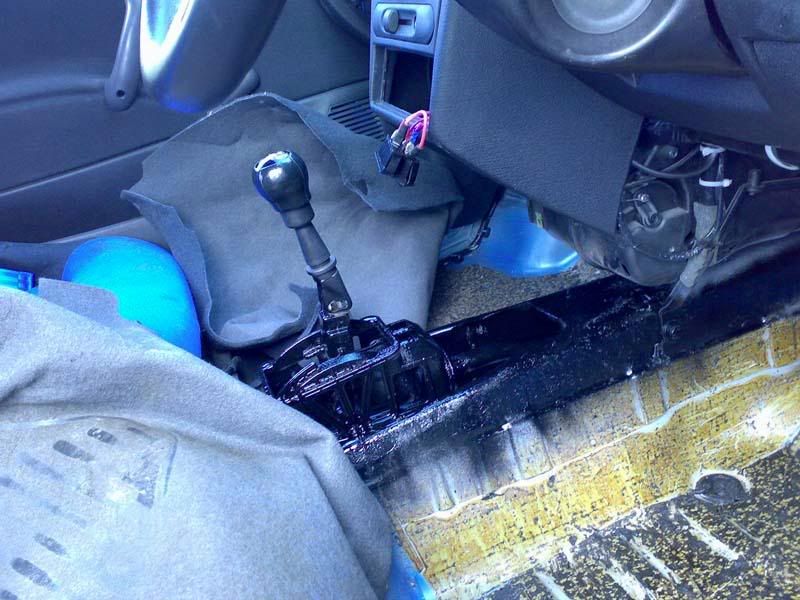
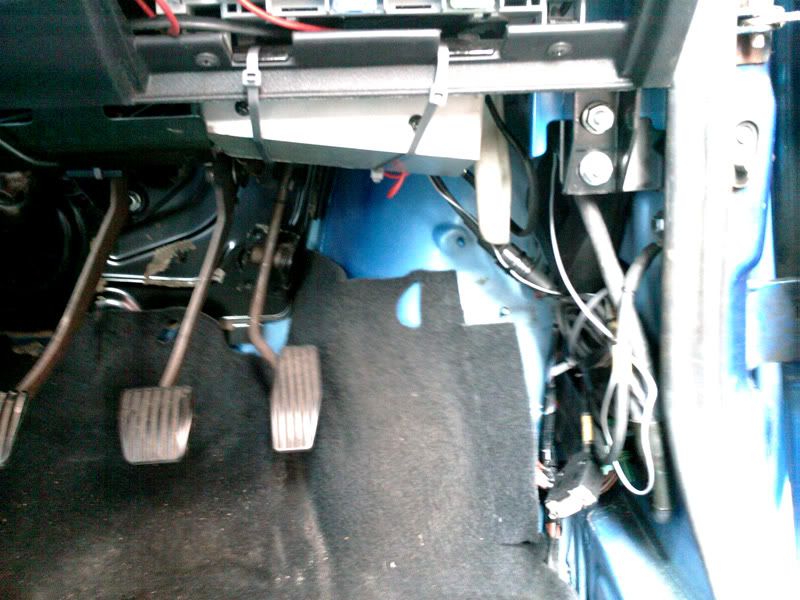
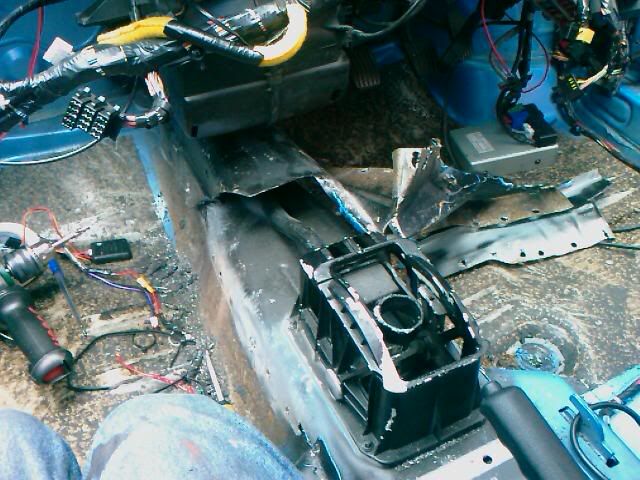
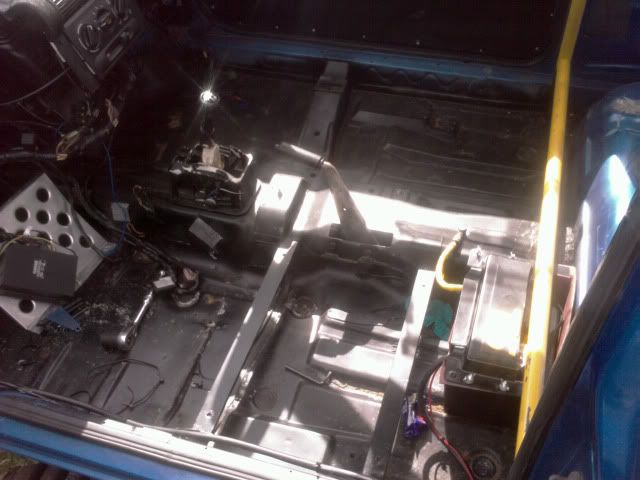
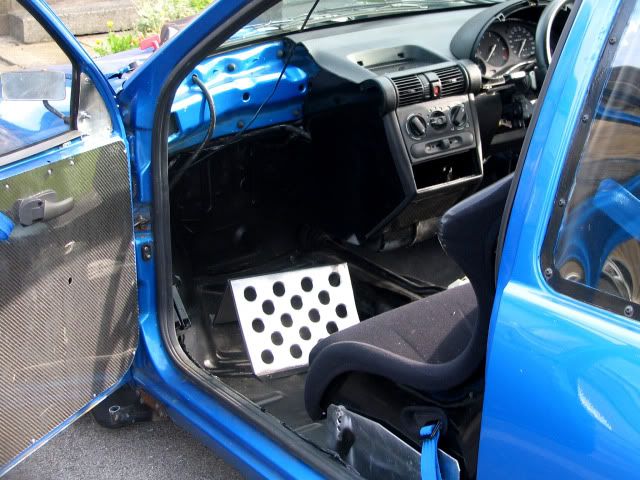
Then I moved to the footwells in the front of the car:
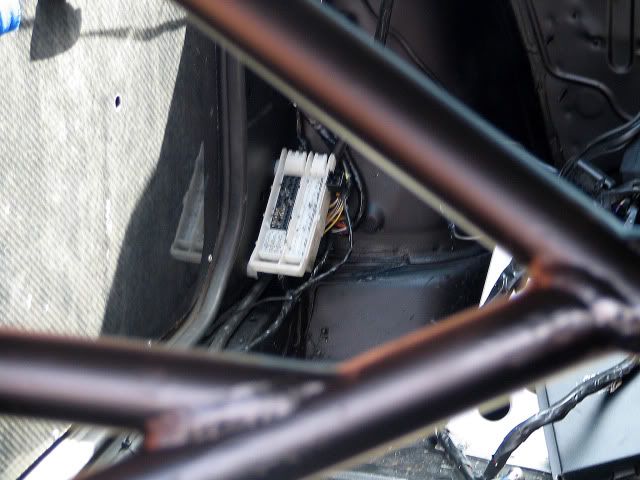
Then I removed the gearstick surround, airbag ECU, airbag ECU mount, chopped abit of metal out that looked scratty, and then threw abit of black paint over it all
All back together

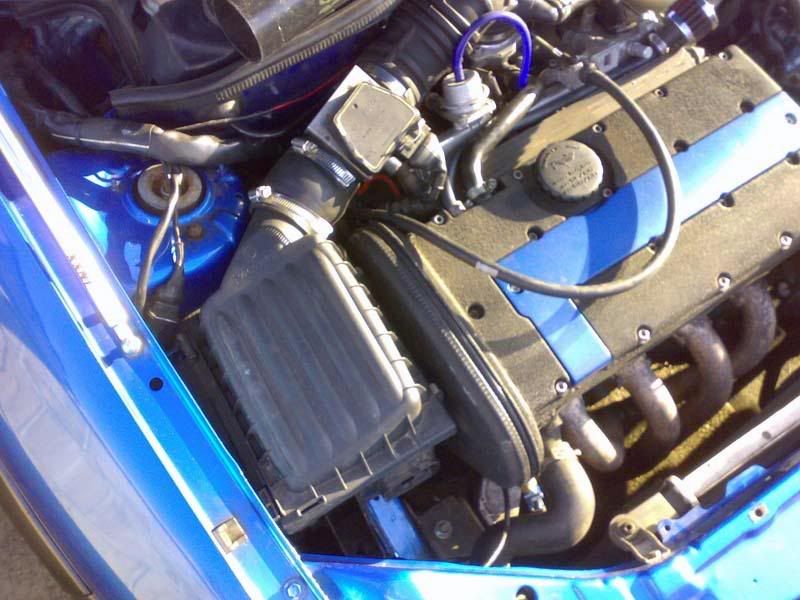
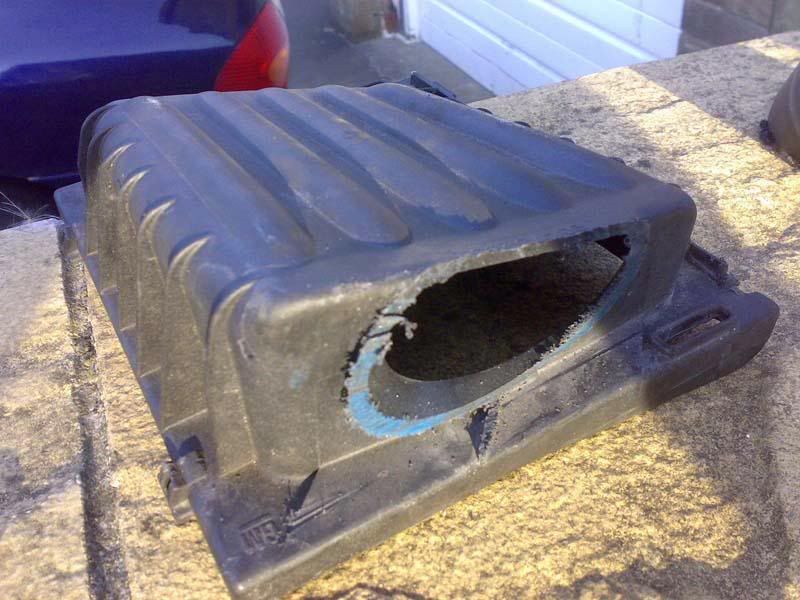
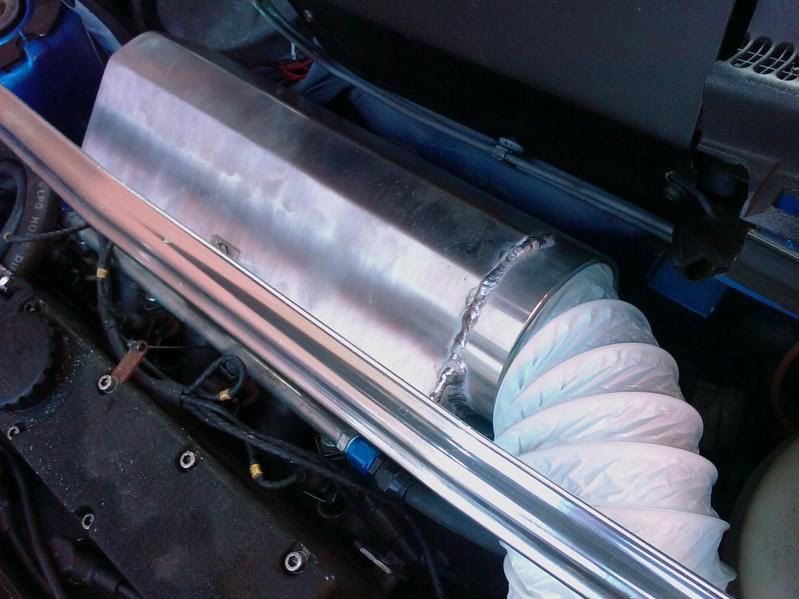
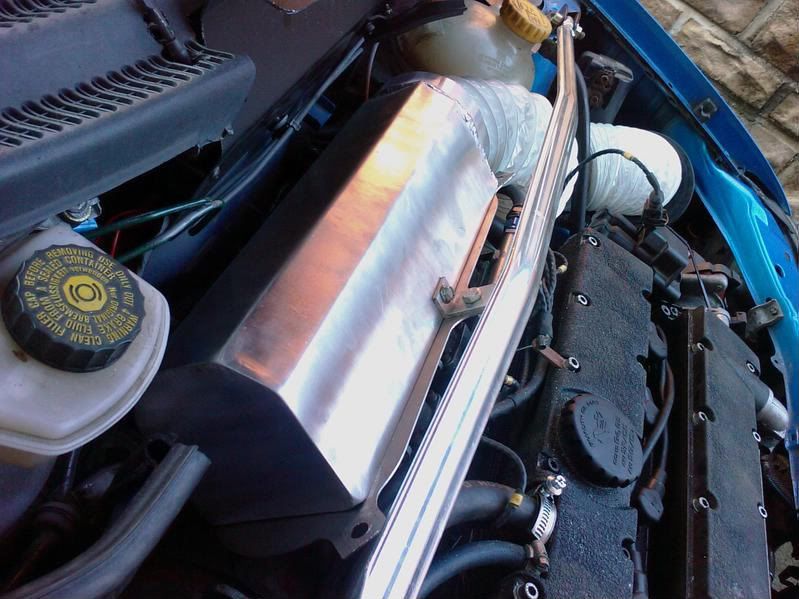
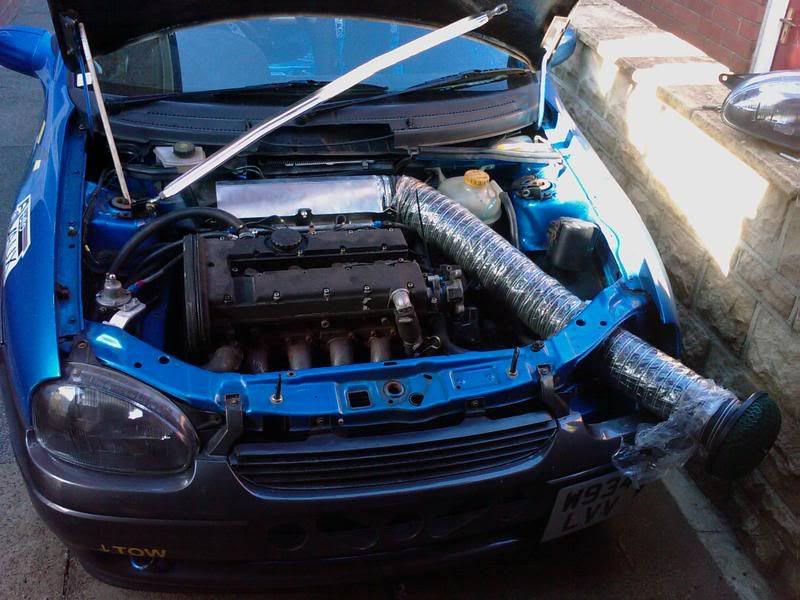
While in the scrapyard I spied an airbox from a tigra 1.4 16v. I've never been a fan of induction kits (TBs are more my thing ) so decided to buy it. I acquired a 2nd hand K&N for it for not much money and set about fitting it into the car. It fitted, but wasn't really straight, and the inlet hose was quite abit smaller than the XE one.
I decided I could improve on it by replacing the inlet part of the airbox with some err, drainpipe.
Picture for size comparison:
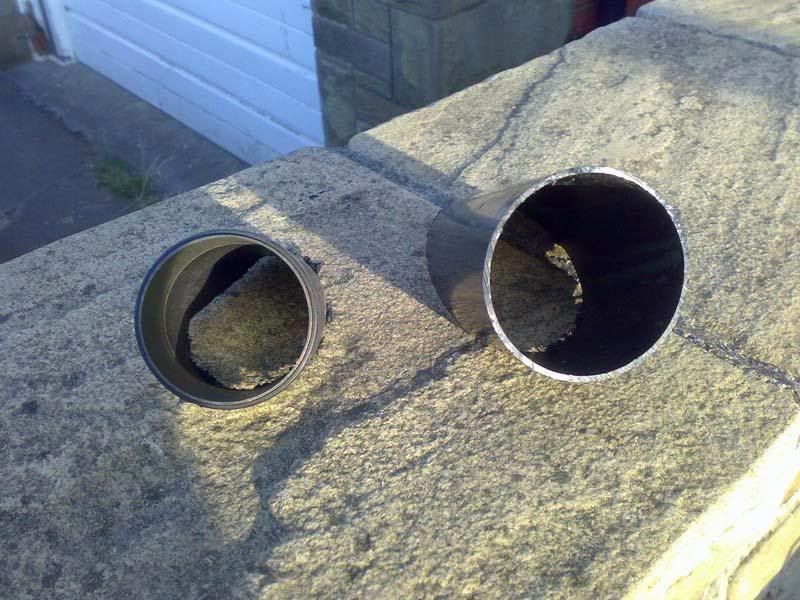
What's left of the airbox
Drainpipe all bonded to whats left of the airbox
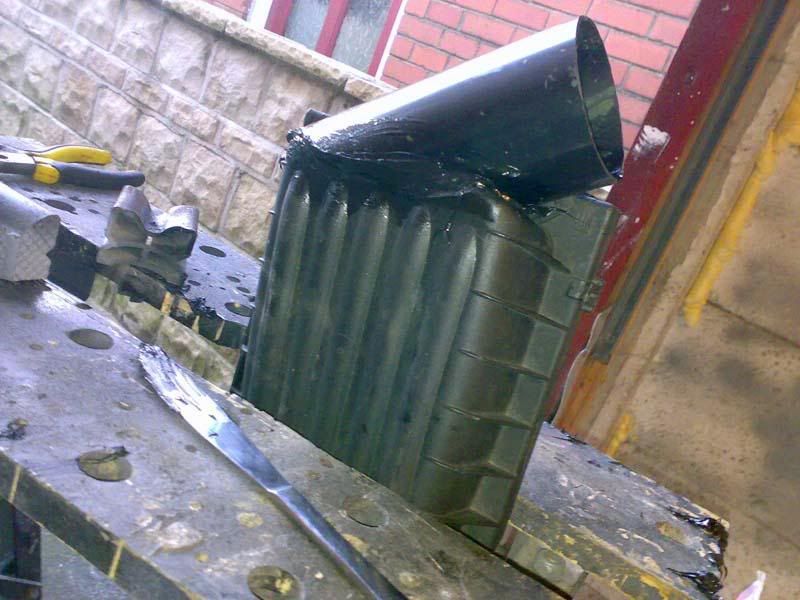
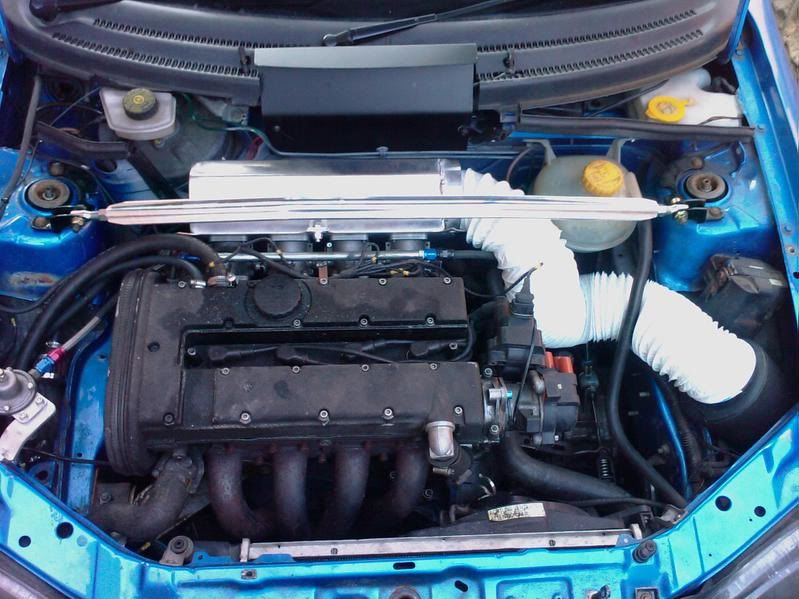
and finally all fitted back to the car
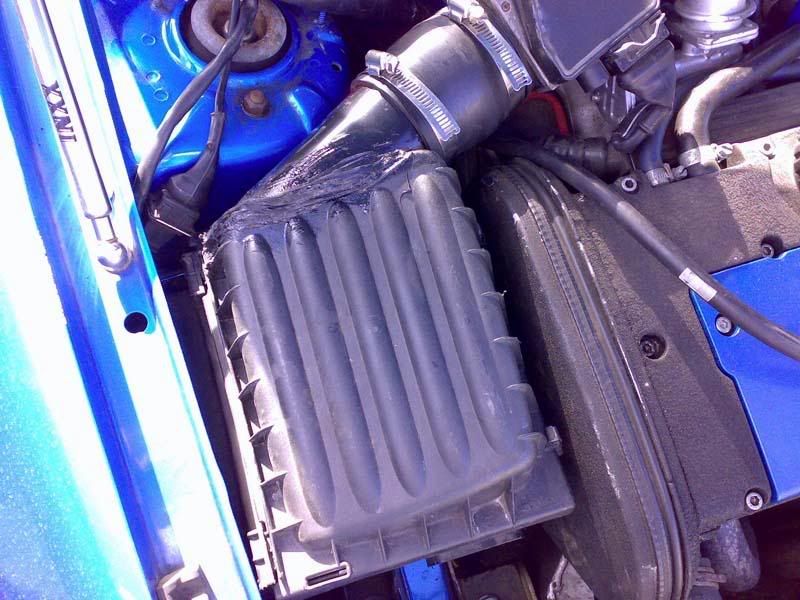
It's not the prettiest by a longshot, but then the car/engine bay isn't meant to be. Function over form I'd say replacing the induction kit has made a big difference, the car seems to pull alot better from lower down, and that half-arsed attempt at induction noise has now disappeared
Major(ish) update, plenty more to come over the next couple of months:
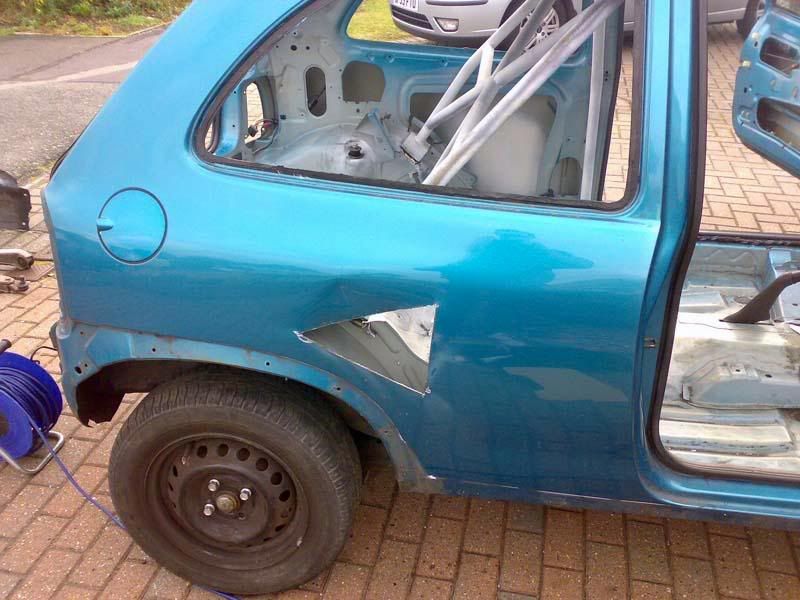
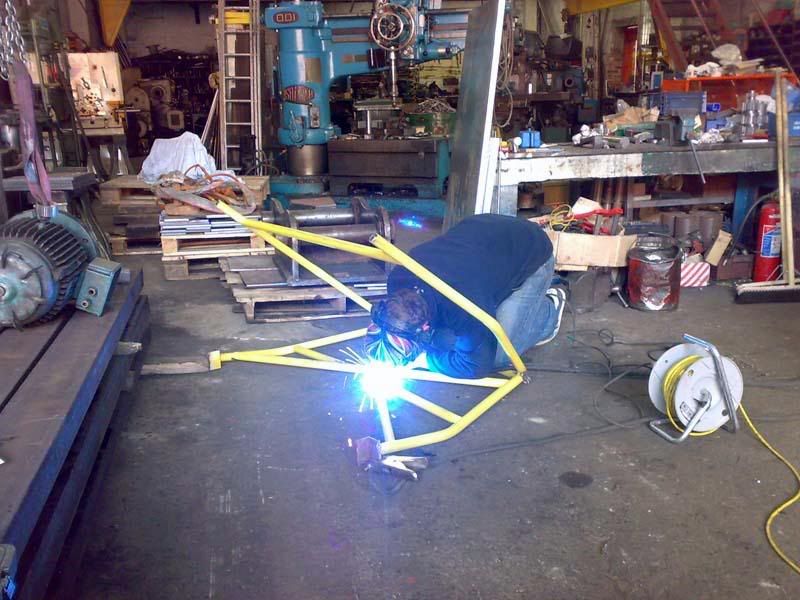
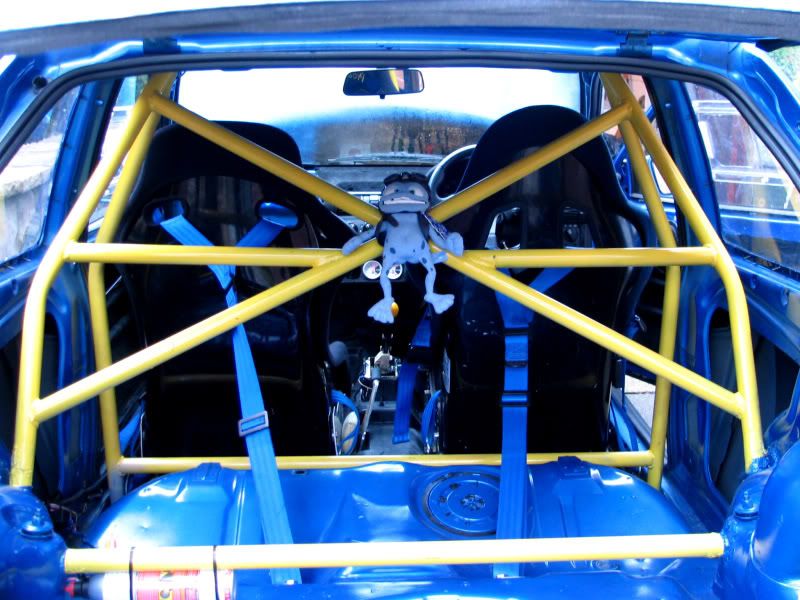
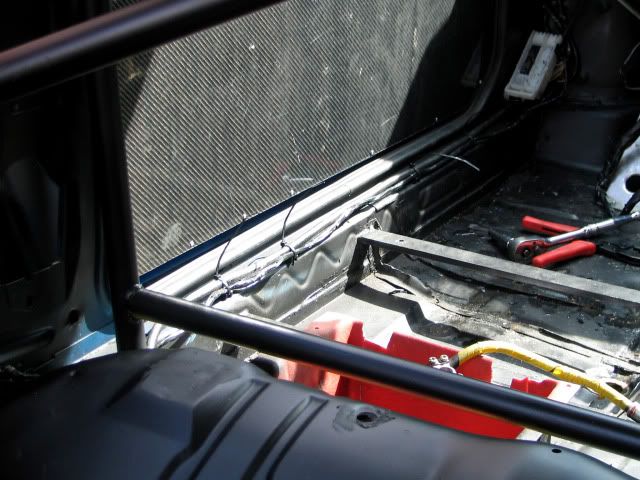
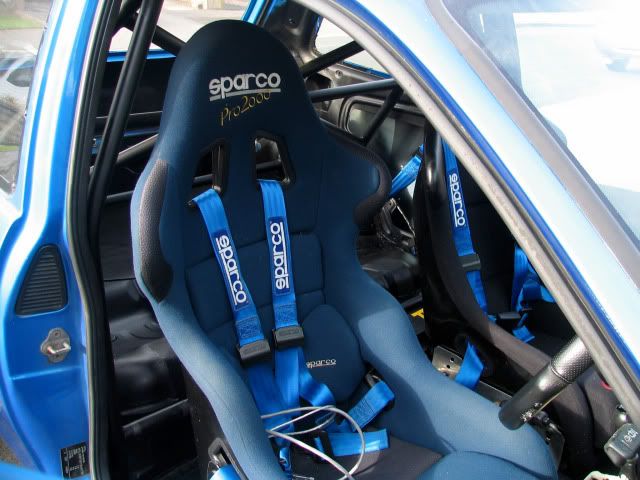
Set off at 4.50am down to Essex to pick up the rollcage that I'd bought on Ebay and Sparco seat from 'teej' on here. got to Teejs house at a decent time, collected the seat and set off to Richards to get started in cutting the cage out of the corsa shell.
I expected it to take me about 30mins if that, I was wrong. Took me 4 hours, lol. Which included my angel grinder dying and having to go to BnQ to buy a better one, lol.
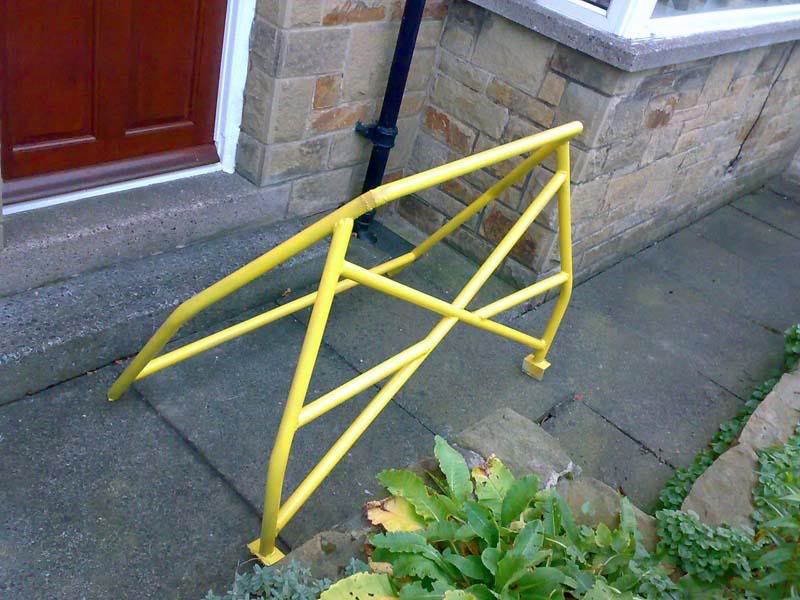
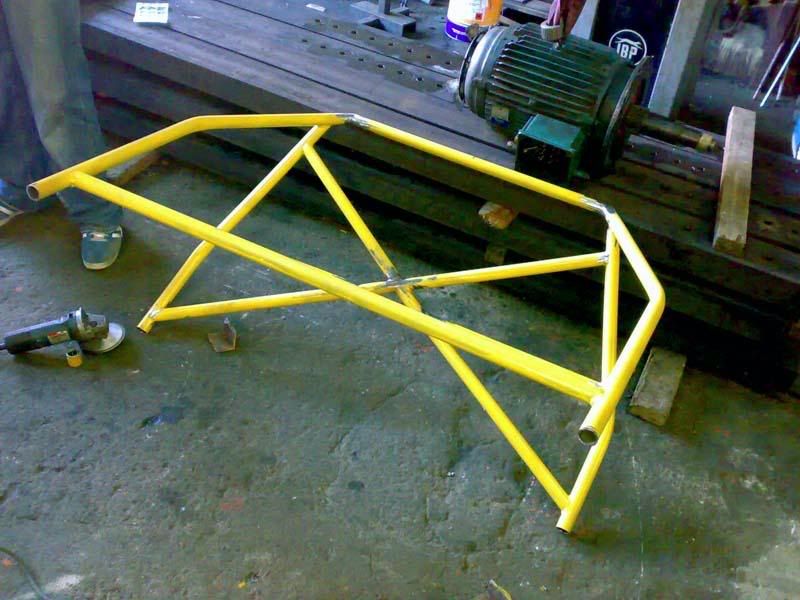
The cage:
I used various backdoors to get to the welded cage mountings, lol
All the bits I'd got JUST fitted in the golf;
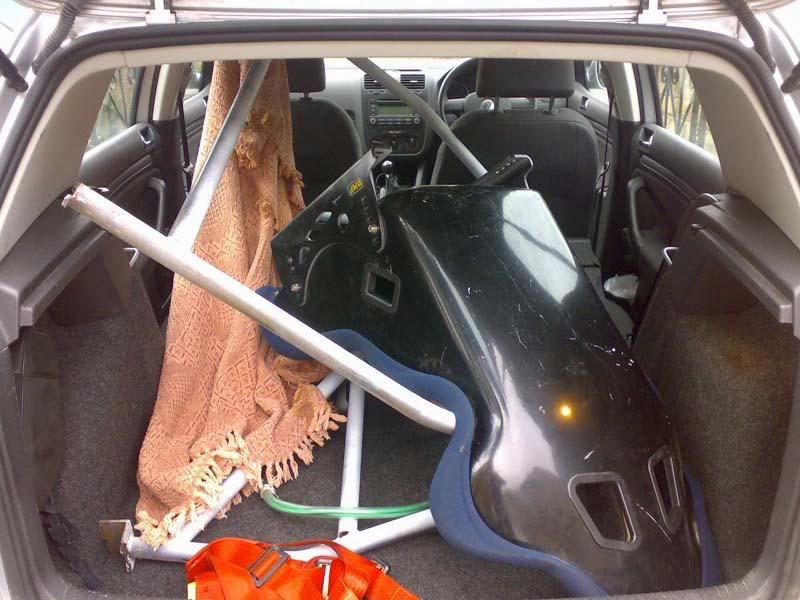
The other bits you may be able to see were; anti-roll bar from the gsi, and rear strut brace also from the gsi.
Once I got home, the car was left packed and I decided to start my jobs on sunday.
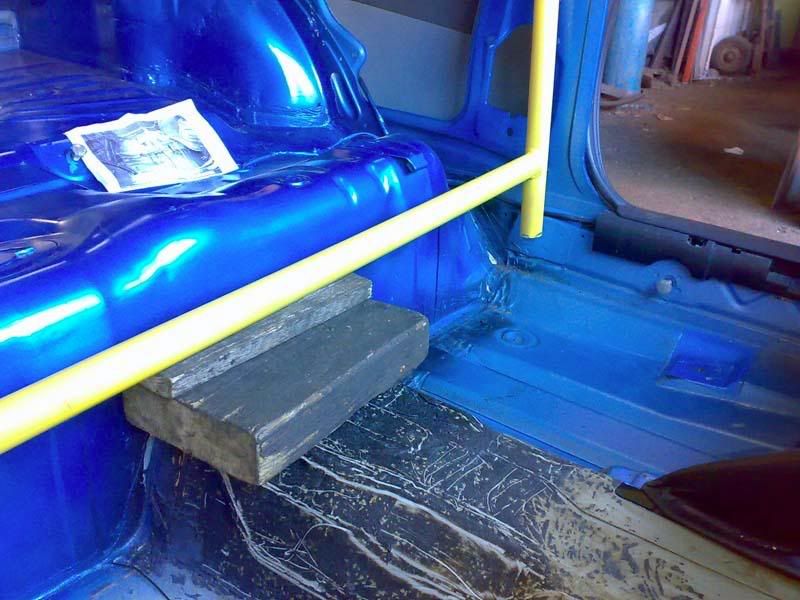
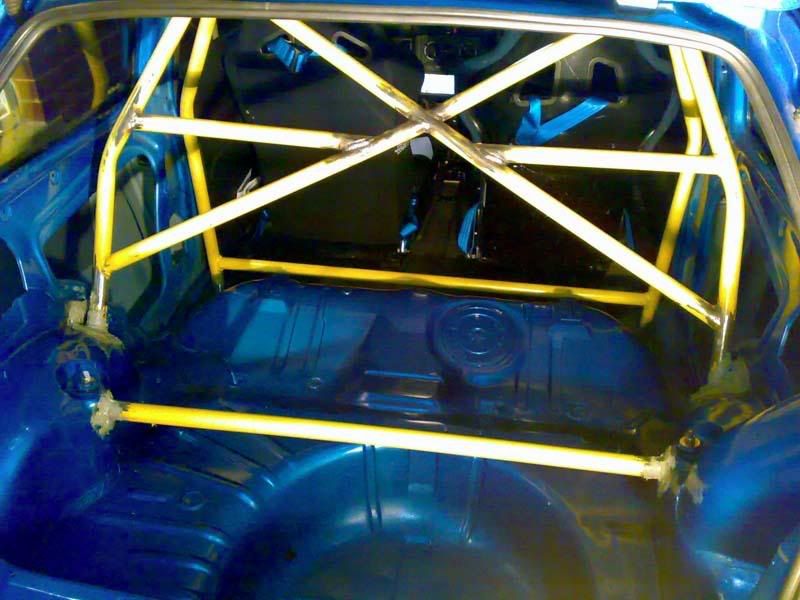
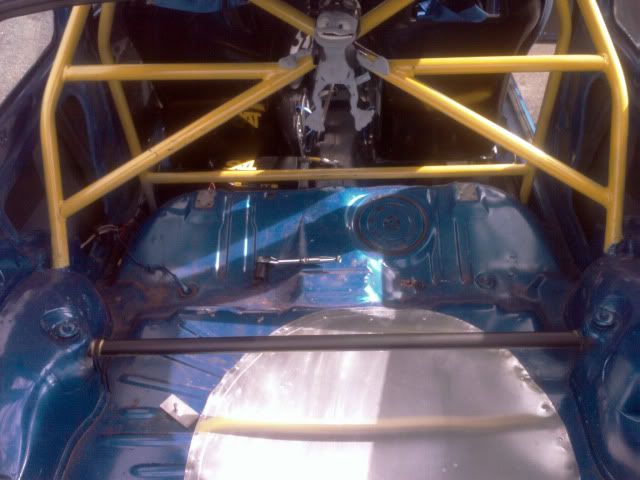
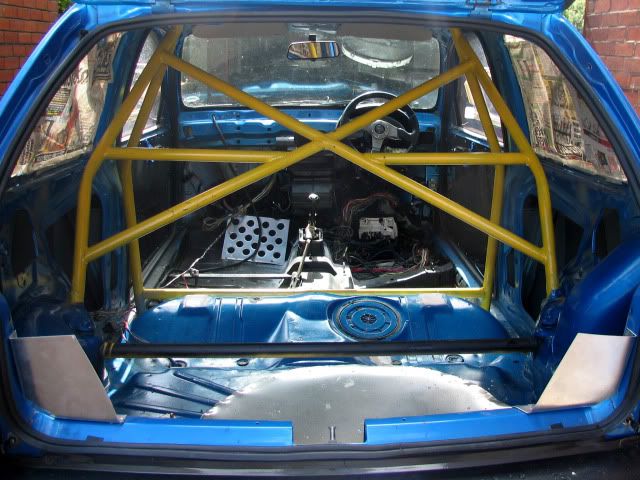
First thing first, get the rear strut brace painted and fitted. I'd been pondering what colour to go for for the cage and bar and finally settled on yellow;

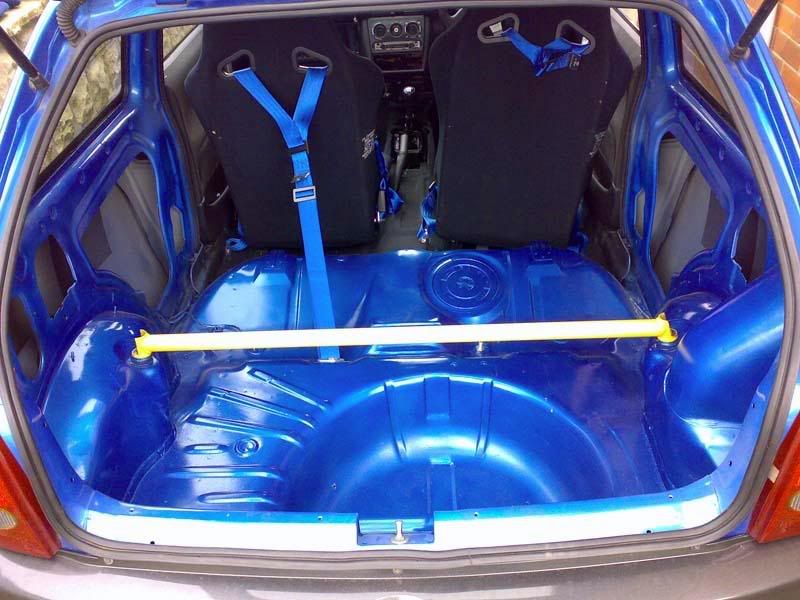
(it is REALLY yellow but the camera won't pick it up)
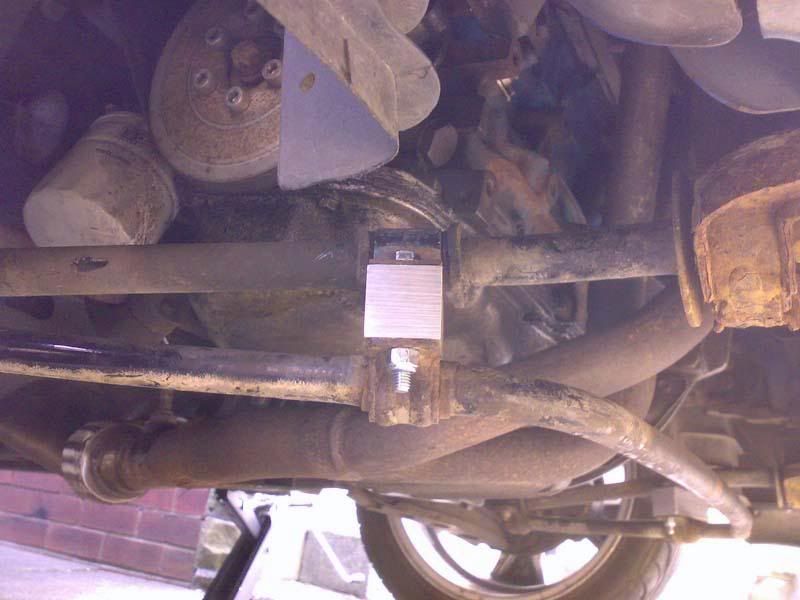
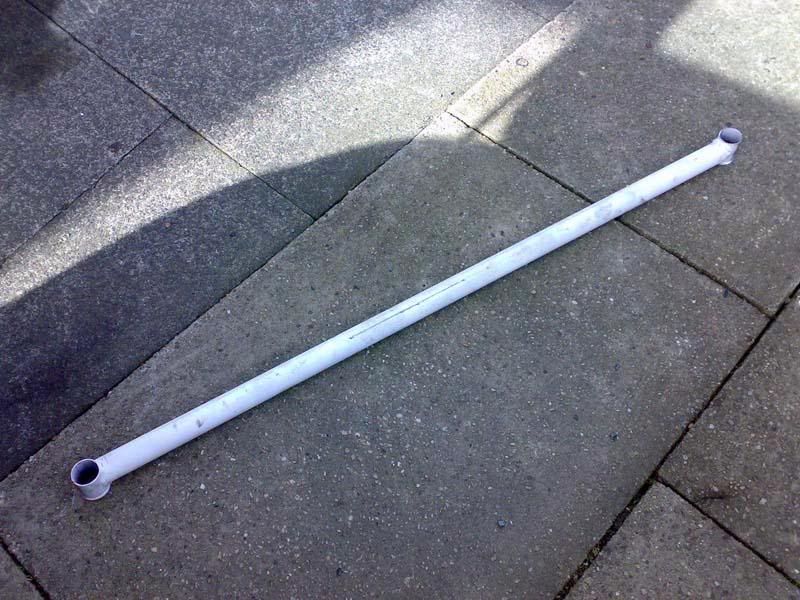
Next up, the rear anti-roll bar.
It goes here:
You insert it one way;
Hammer it into the other side, and bolt it up
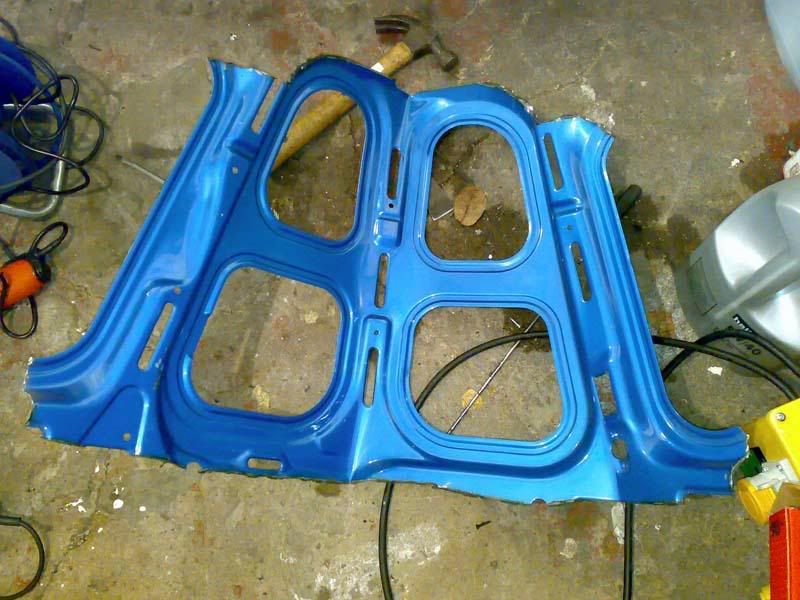
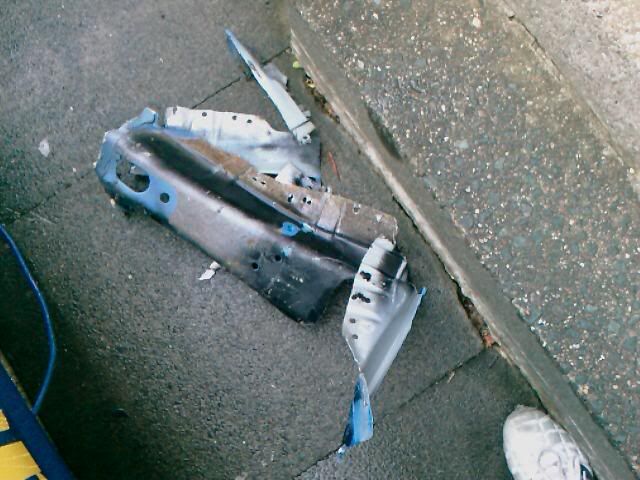
Then I wanted to try and save some weight on the front end, until I finally go for a fibreglass bonnet. So I decided to cut out the under-bonnet bracing out with a grinder.
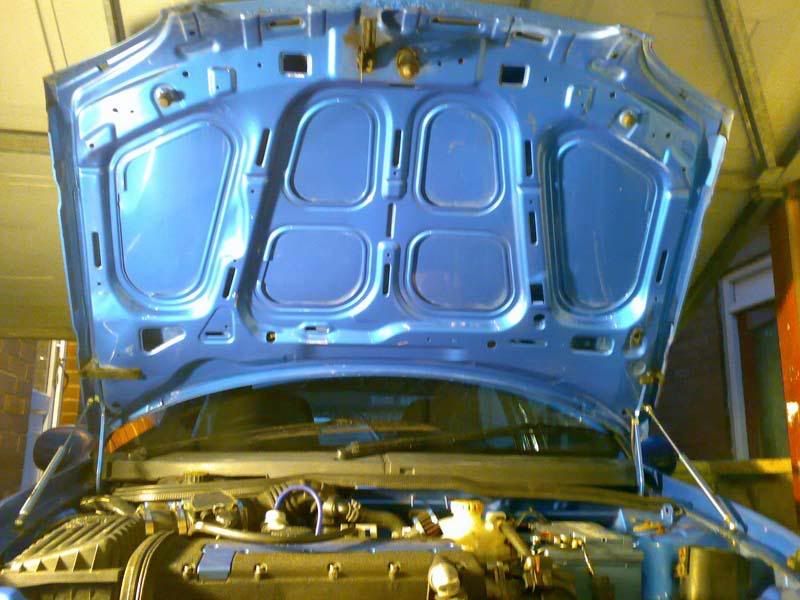
First incision:
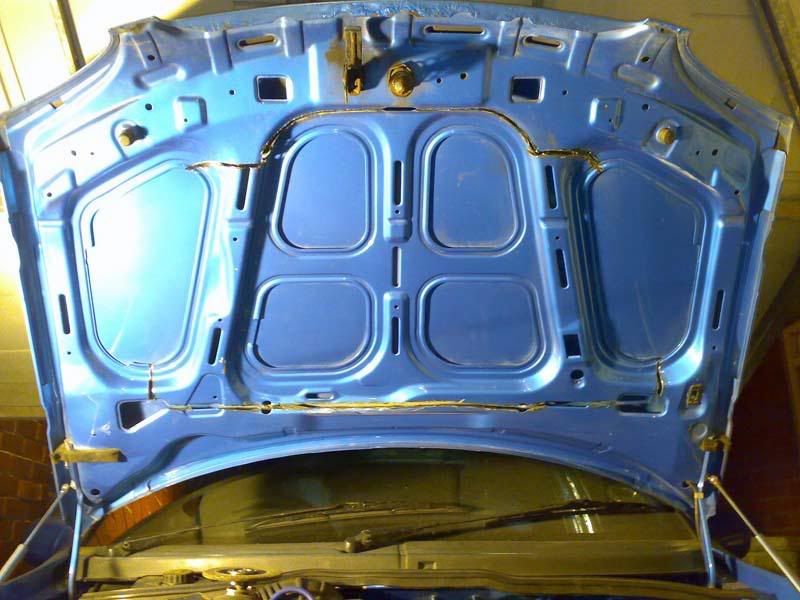
All cut out
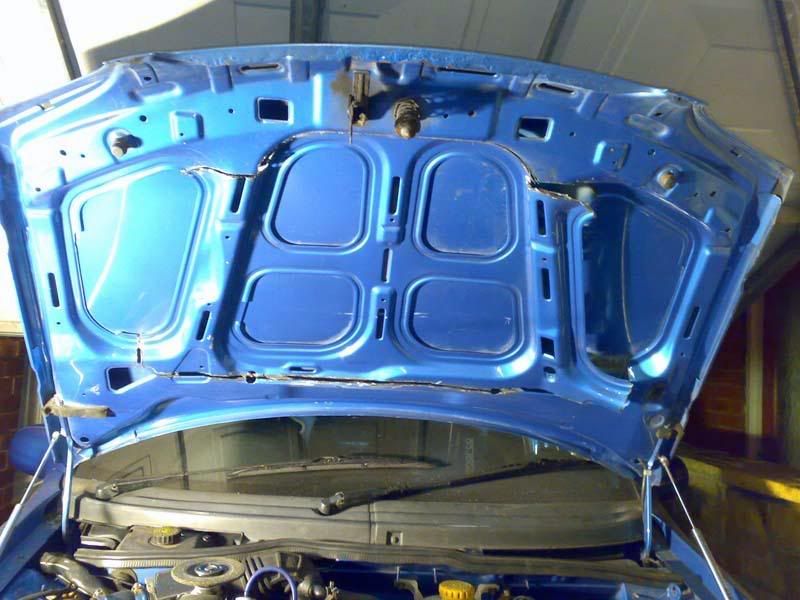
All off
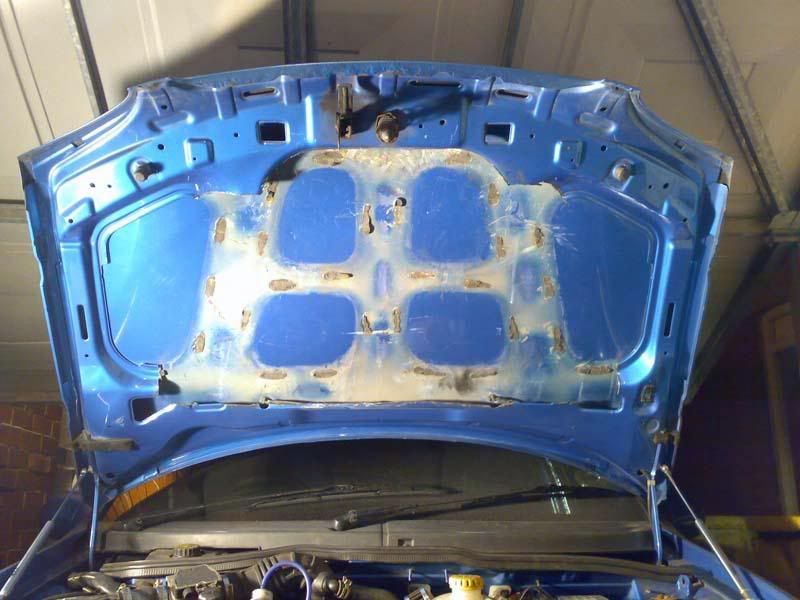
Quickly painted to prevent rust
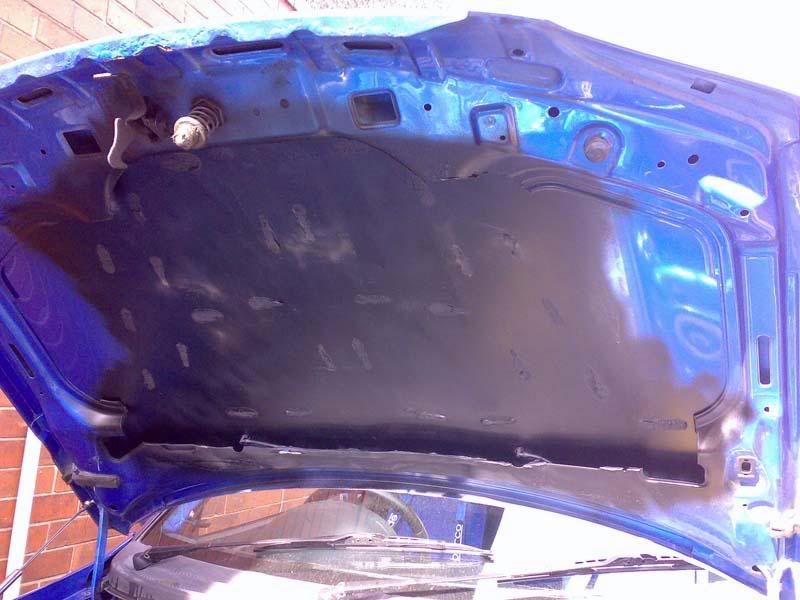
And the removed item
Next up, fitting my new oil temp/pressure gauges. I need the relevant 'bolts' tapping as per odders fitting guide, so for the moment I just got the gauges all installed in the car. I removed the MFD on the top of the dashboard and stuck the pod in there for good line of sight:

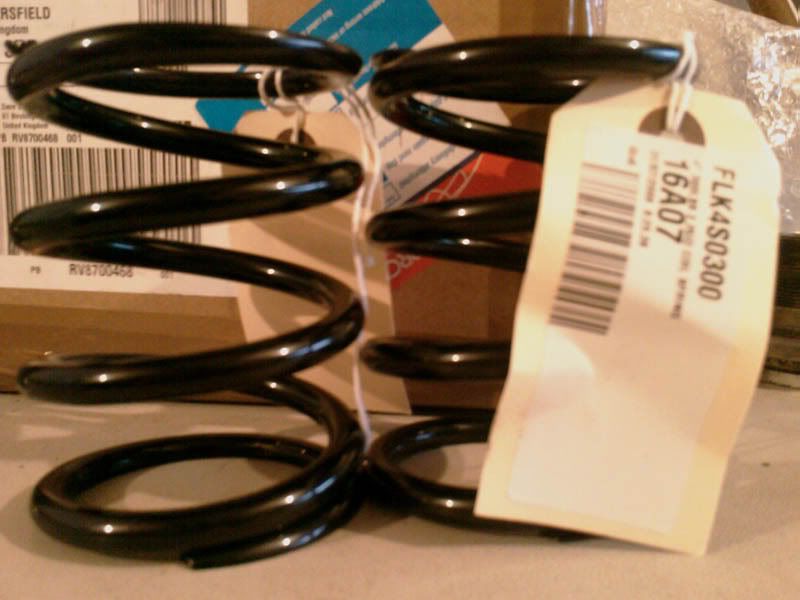
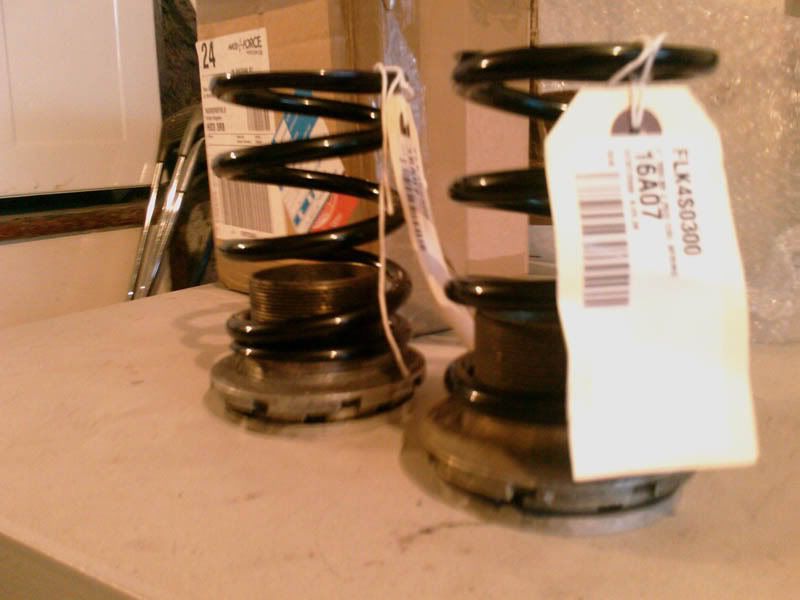
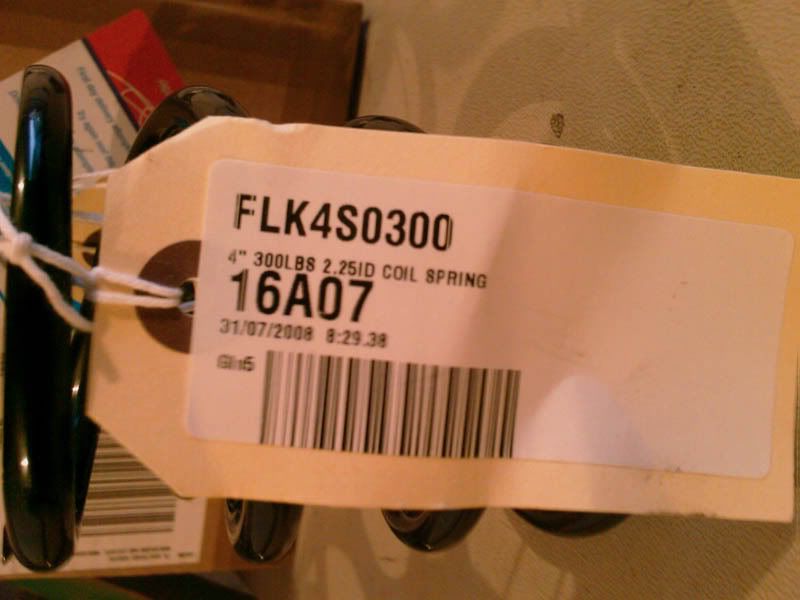
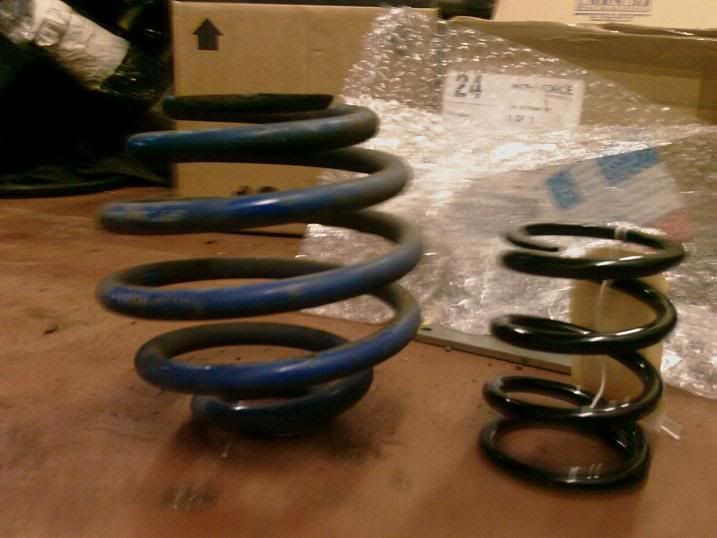
next up; fitting the new 300lb front springs that I'd got from Chris Astley, unfortunately though I didn't have a swan neck spanner that was suitable to hold the shock, so I didn't finish that job. here's a picture of the FK springs compared to the juicier 300lb ones!
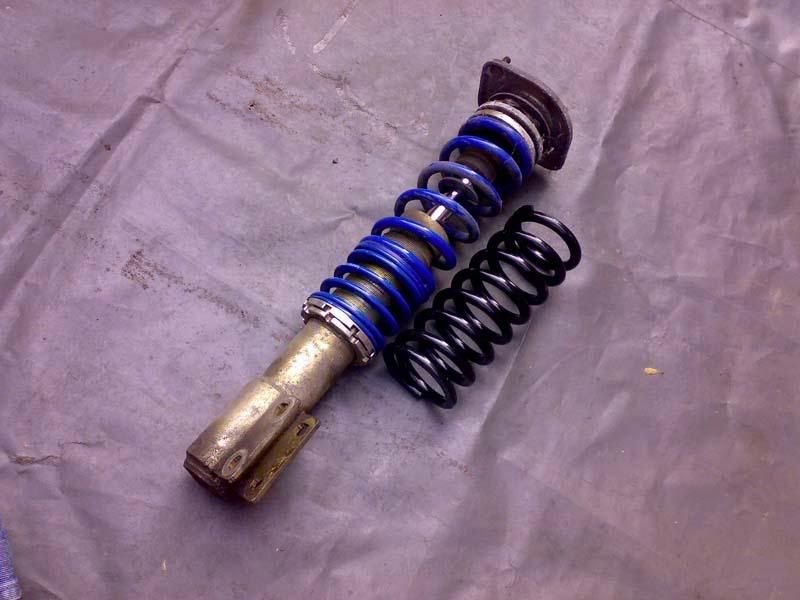
And thats where my day ended. Fitting the two rear bars has made a noticeably difference to the driveability. The car is noticeably 'planted' to the road and feels alot more stable on high speed corners, it should be even better with the front springs on; that'll be done one night this week I hope.
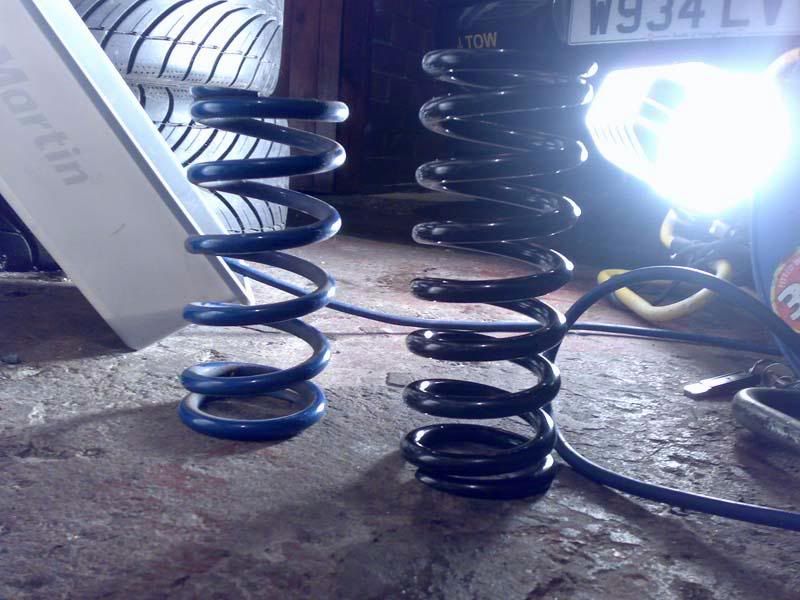
First up here's a picture I took a few nights ago when I fitted the 300lb front springs; shows a good comparison between the standard FK (I assume 1litre) springs and the 300lb rated ones:
Went of for several test drives throughout the week to make sure everything was back together properly, thankfully it was. While warming the car up one night this week it cut out; strange I thought as everything that is related to cold-start has been replaced. It restarted OK, but on the drive that night it didn't just feel as happy as it normally did; only one thing for it- time to start fault finding again
After taking advice from JamieFFF I sprayed carb cleaner around the throttle body and inlet. The car hunted abit and a few misfires developed. I jumped in the golf and headed over to autovaux for a few serviceable items;
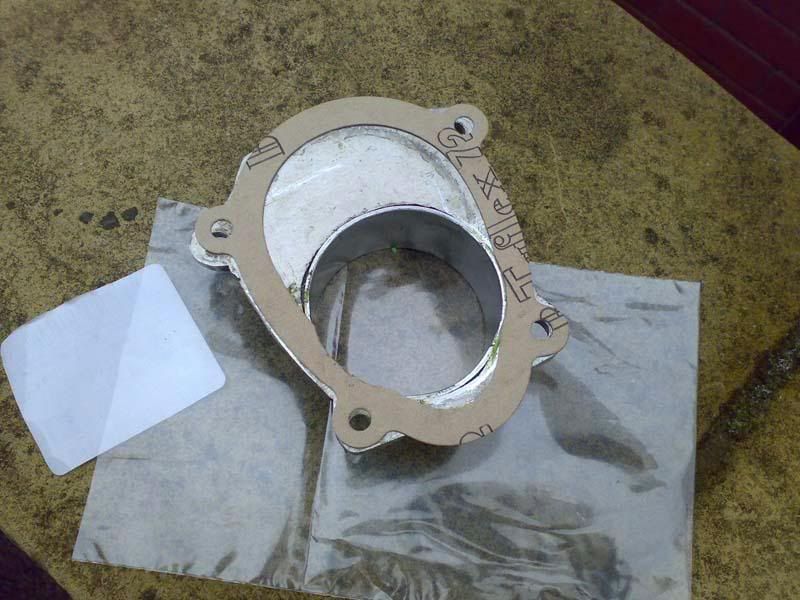
an ecotec plate gasket
a throttle body-inlet gasket
spark plugs
rocker cover gasket
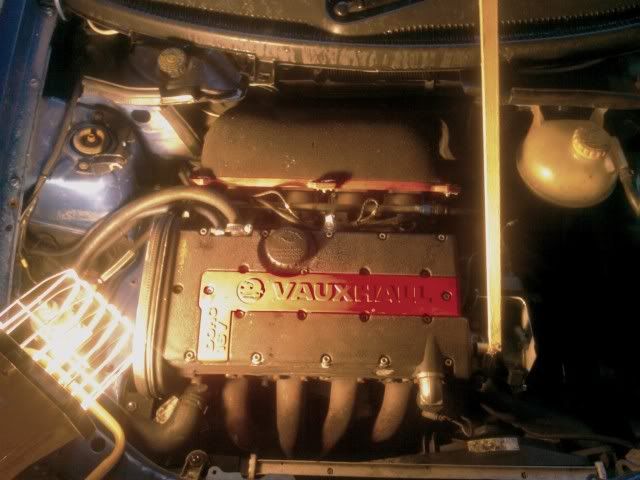
Got home and whipped of the ecotec plate, nice - NO gasket just loads of green gooo
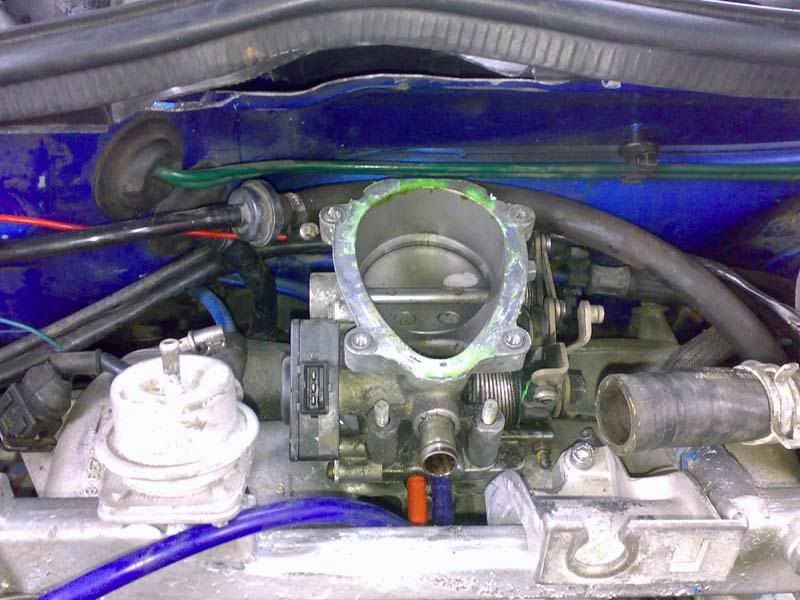
Whipped of the throttle body...even nicer. 1 stud is missing and NO gasket at all
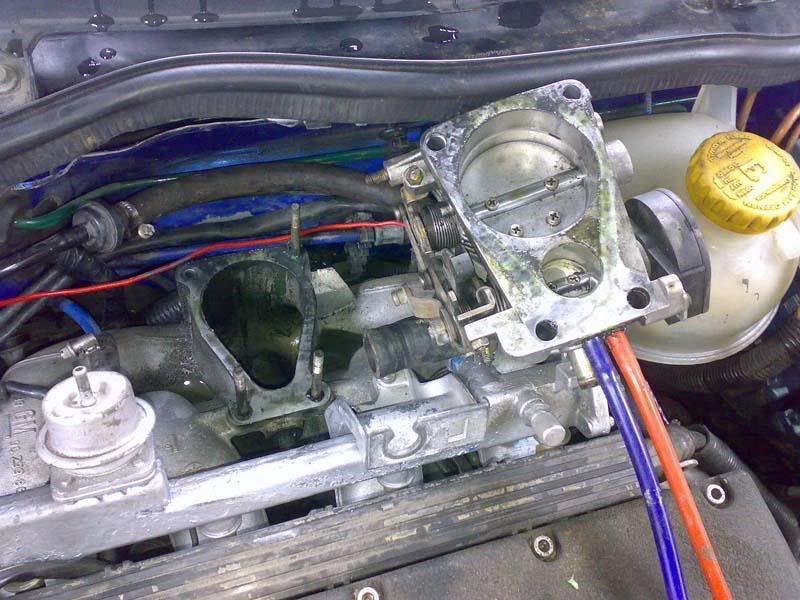
I gave the TB a clean and refitted the new gaskets along with a new stud:
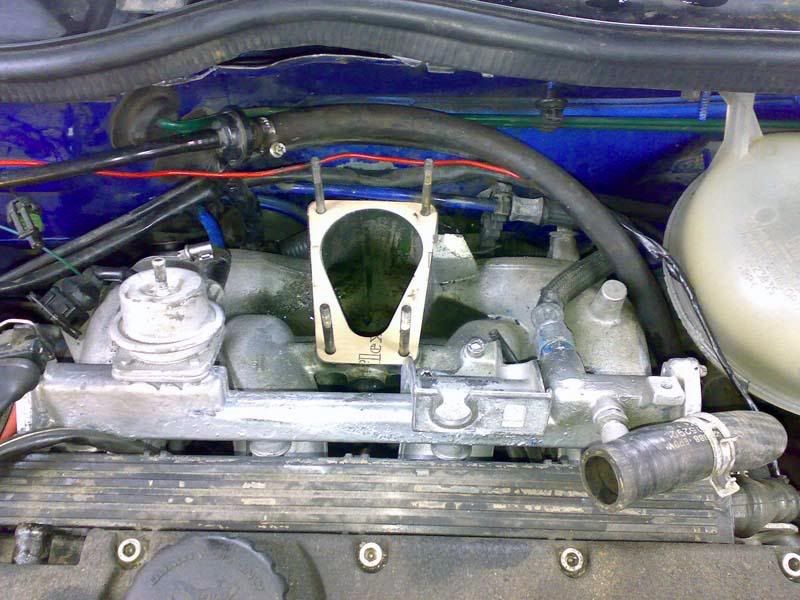
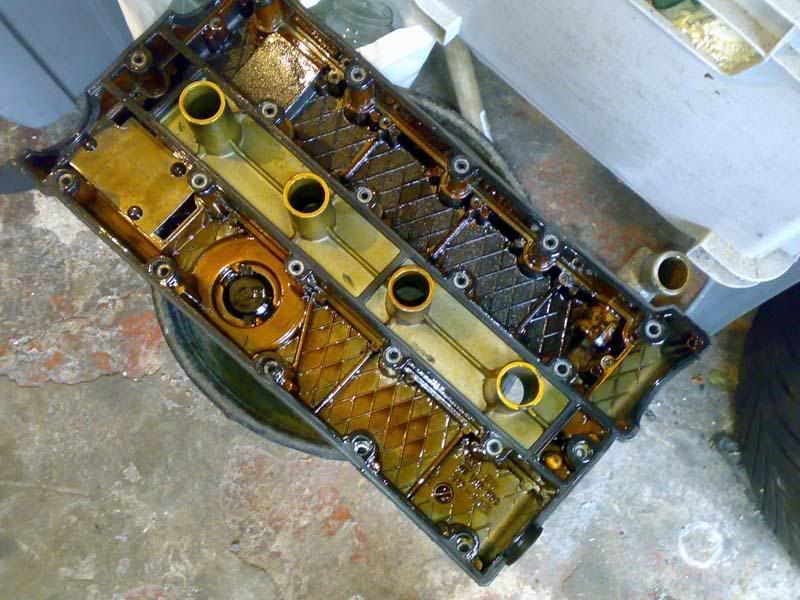
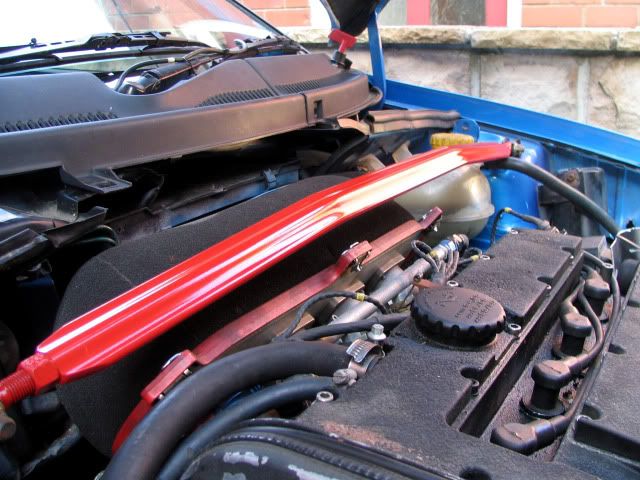
Then moved onto the rocker cover as it was starting to leak abit at the front
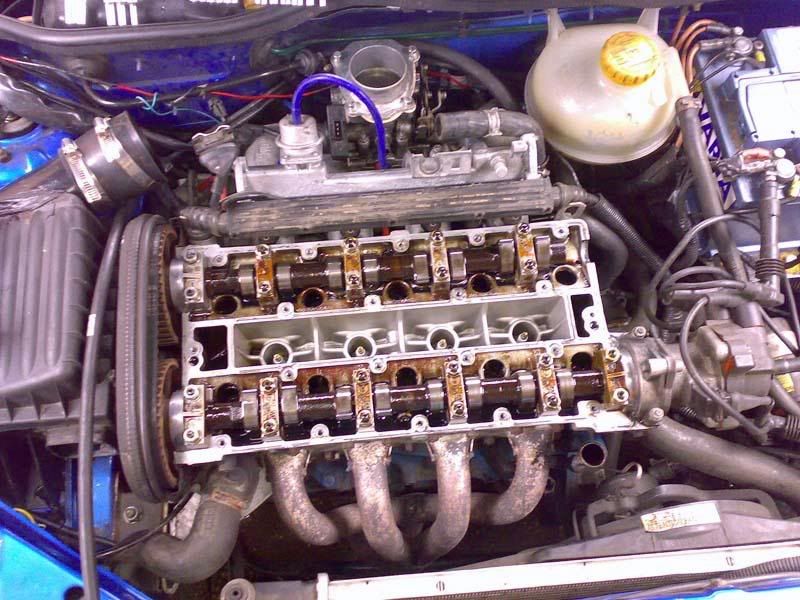
Nice and clean inside which is good, and the camcover has had the ultimate breather done on it, lol
All back together:
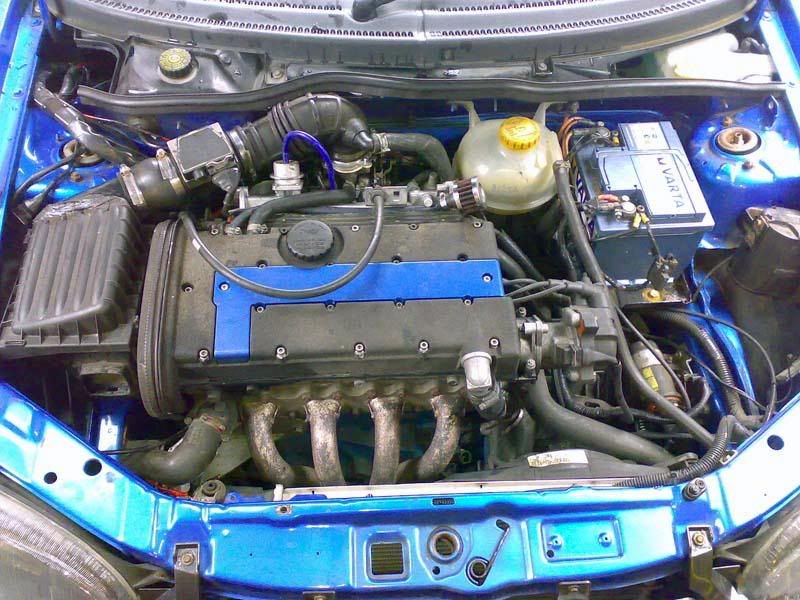
Any misfires and judders are now gone, and it idles perfectly now. I'm quick ****ed off about the lack of gaskets to be honest. When you buy a car that has a rebuilt engine in it you don't expect for it to be held together which childrens green slime, cable ties and glue.Whoever built the engine was clearly a fkin cowboy, I just hope they knew how to put rod bolts in right
I hope, i hope that is the last bodge to come on this car. I'm just so glad I've come across all the current issues before I've hit a track yet..
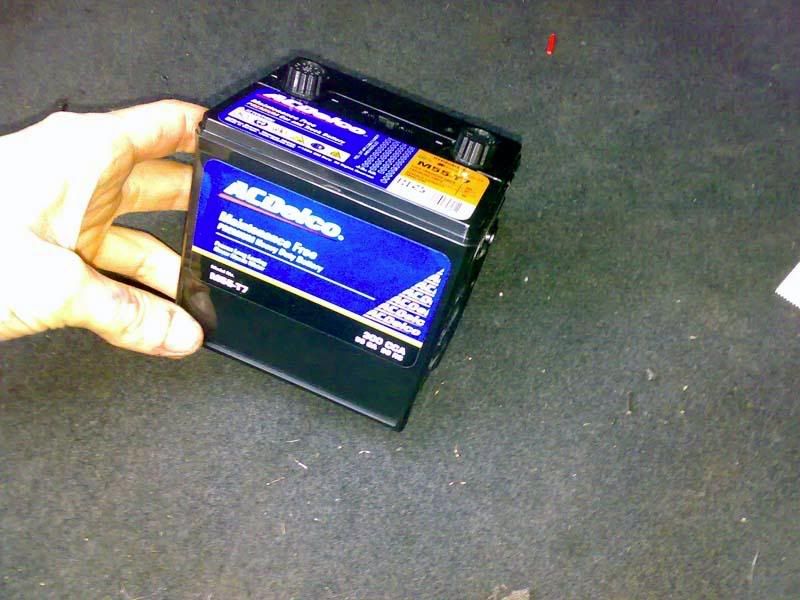
Oh, and a I bought some in-car entertainment - a car battery radio
|
DaveB
Member
Registered: 29th Dec 00
Location: Huddersfield
User status: Offline
|
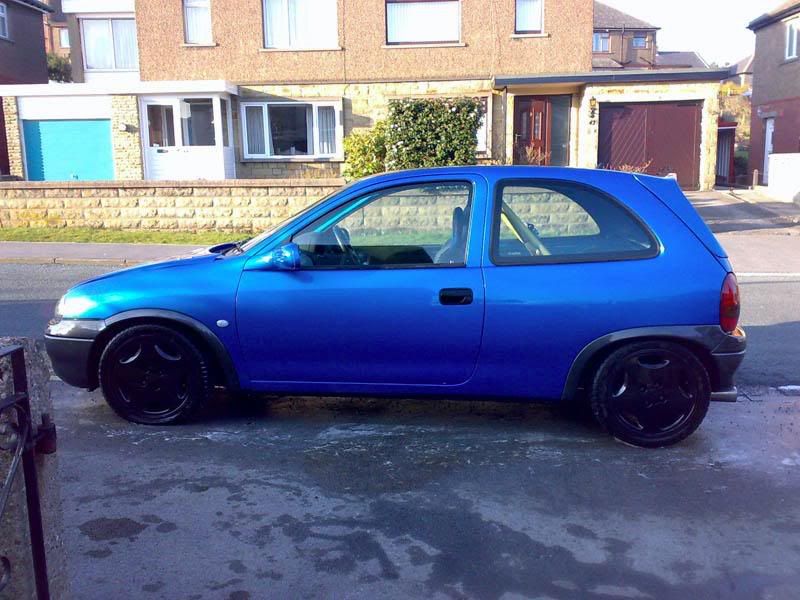
Right; my biggest update so far I think.
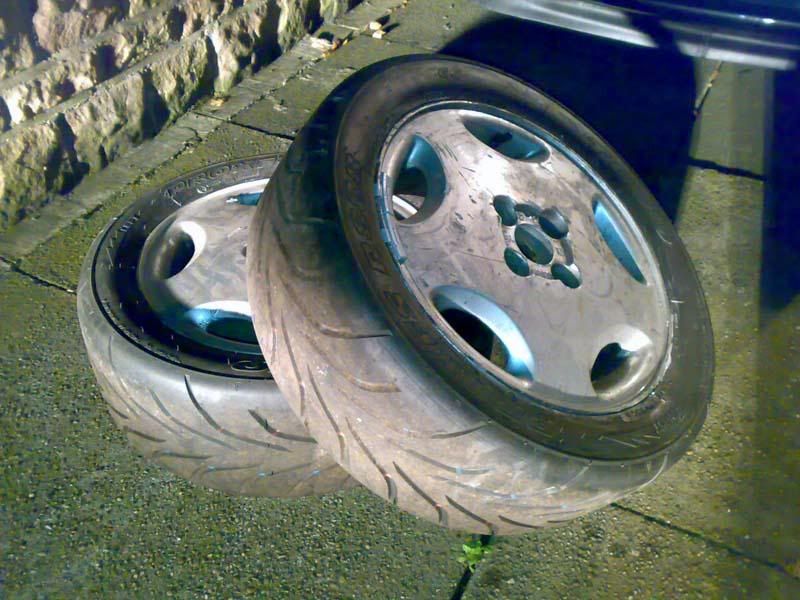
First up, the softstars were too poncy for my needs, so they had to go. They were replaced by a set of cav gsi rims, with brand new Toyo T1s wheels. Wheels were taken to local bodyshop and painted;
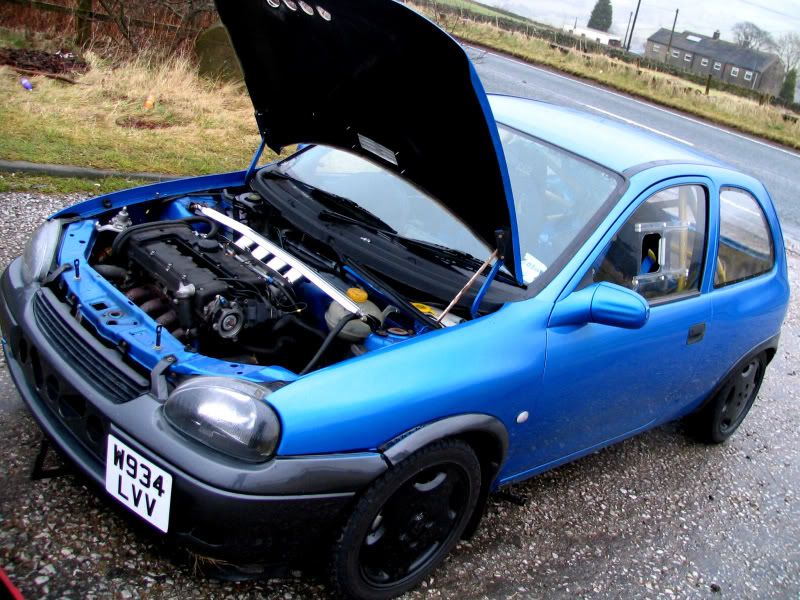
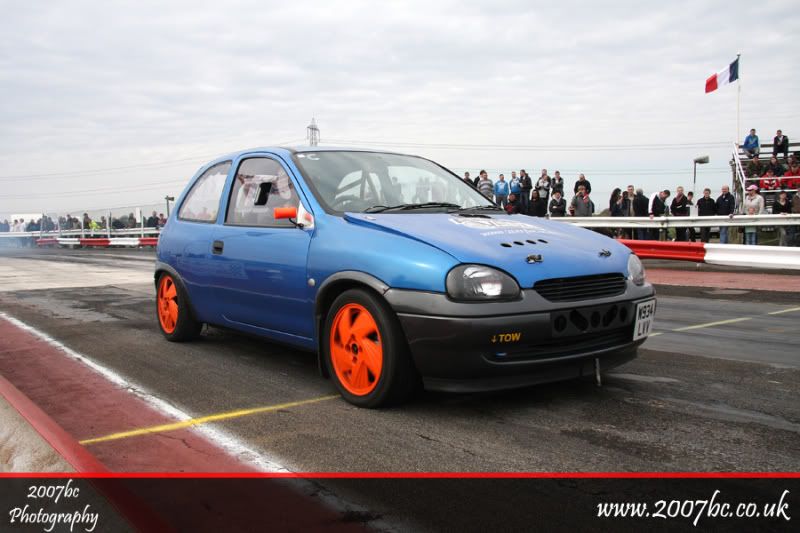
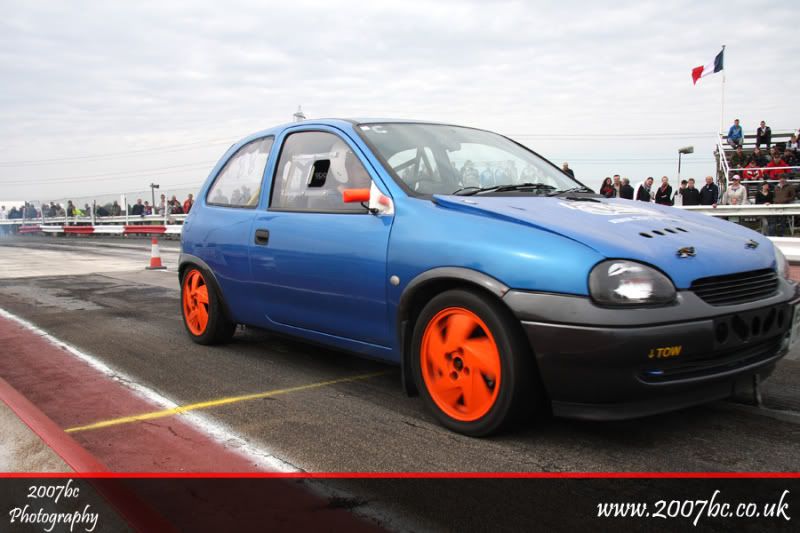
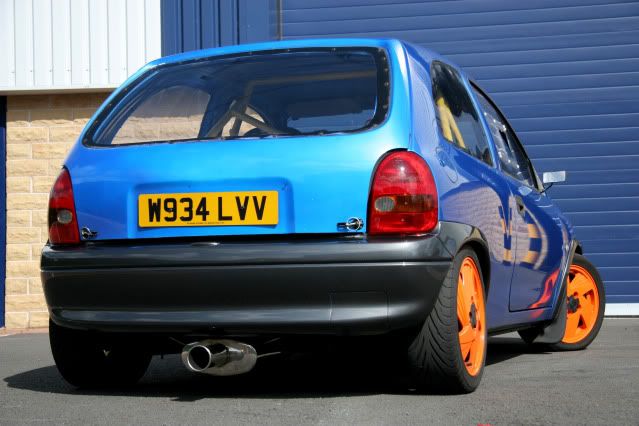
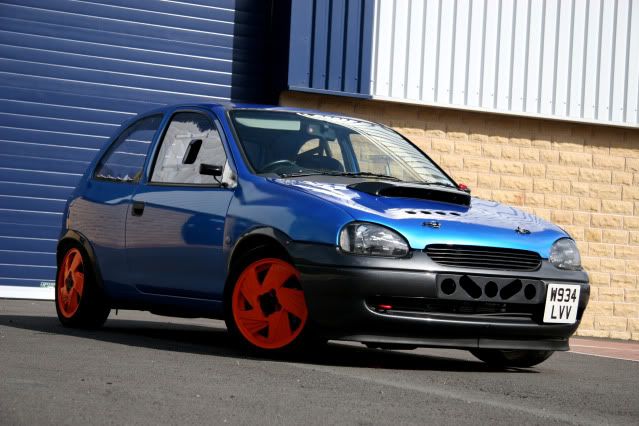
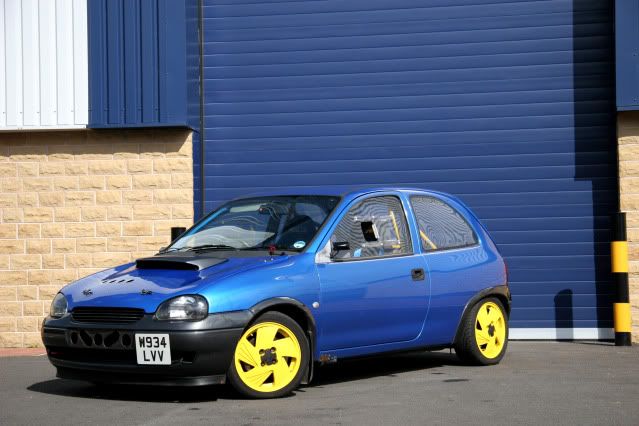
So it now looks like this; much more hardcore!
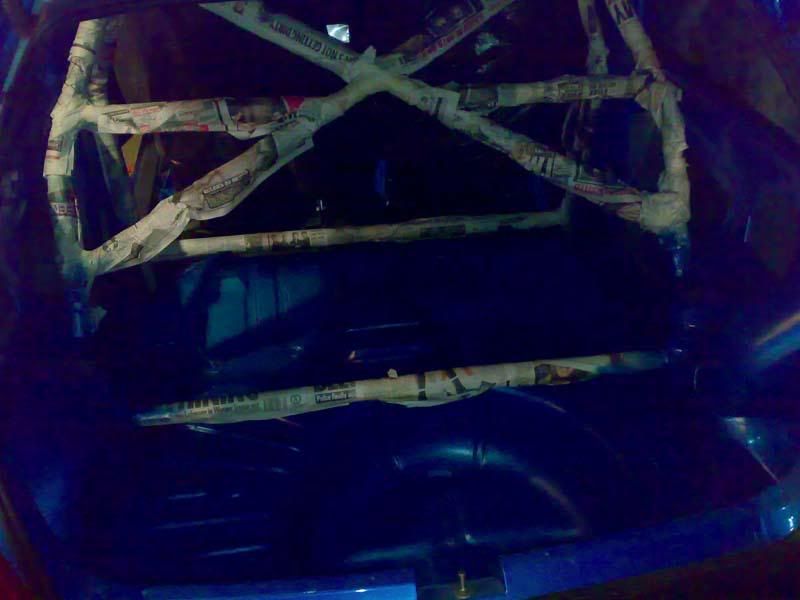
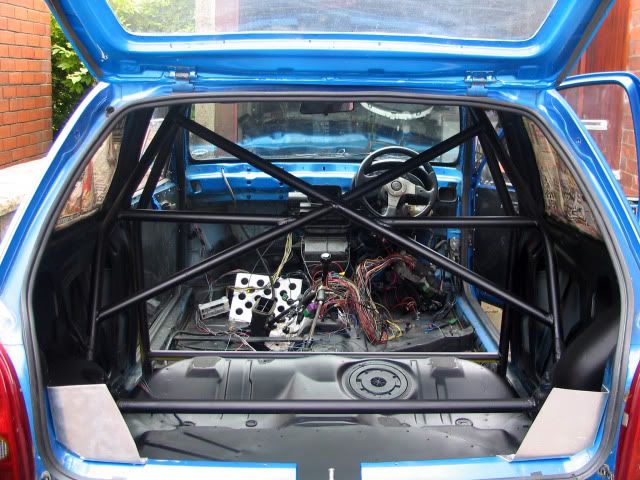
Right, off we go over to FPE to have the rollcage fitted.. loads of pics; I think it's obvious from the picture as to what's going on so I'll leave out the commentary
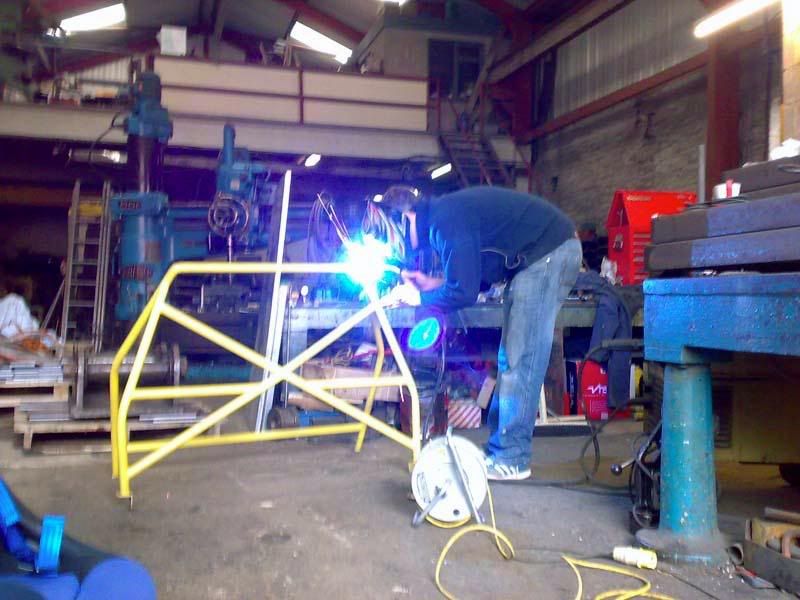
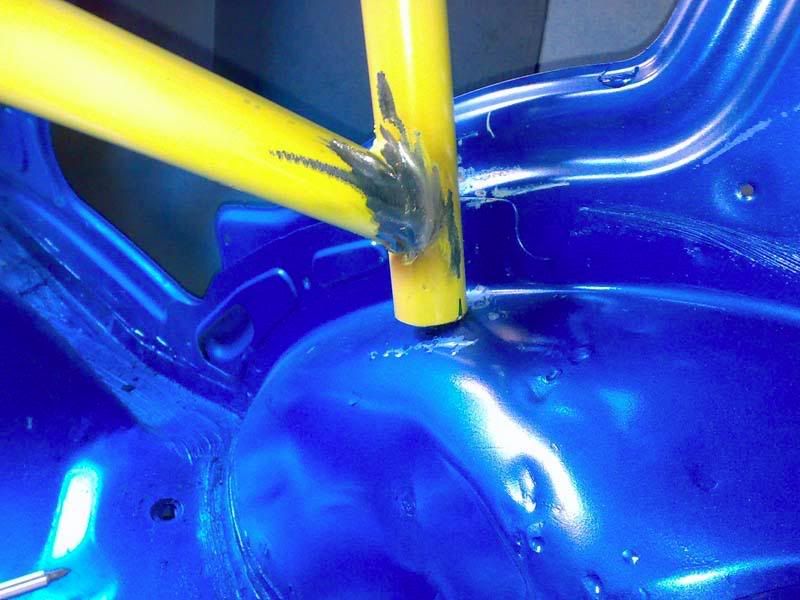
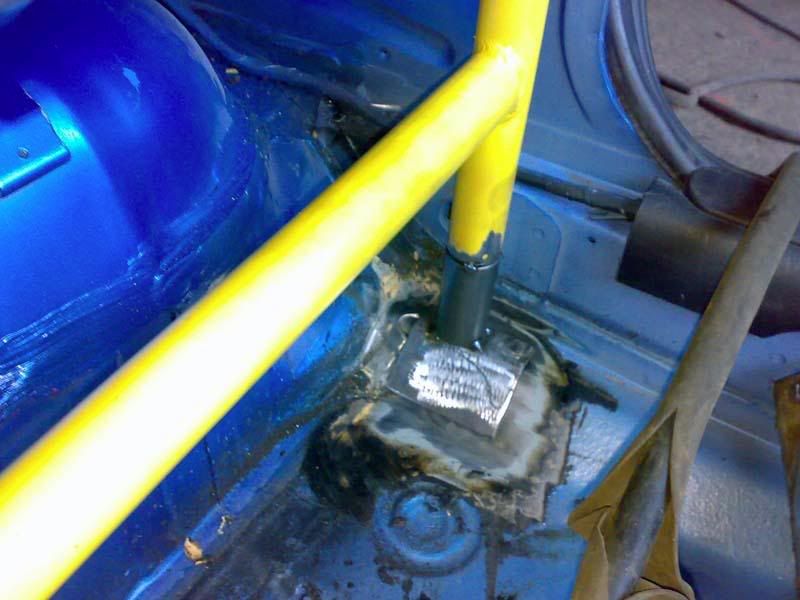
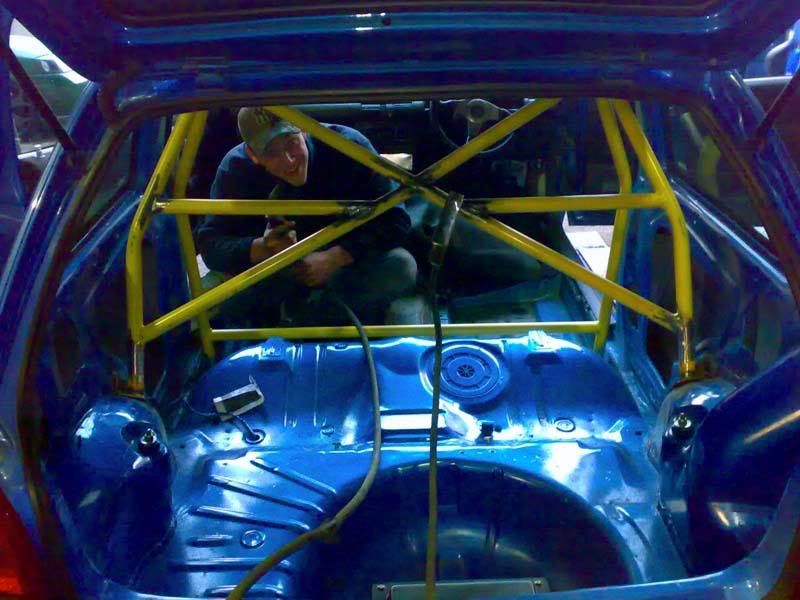
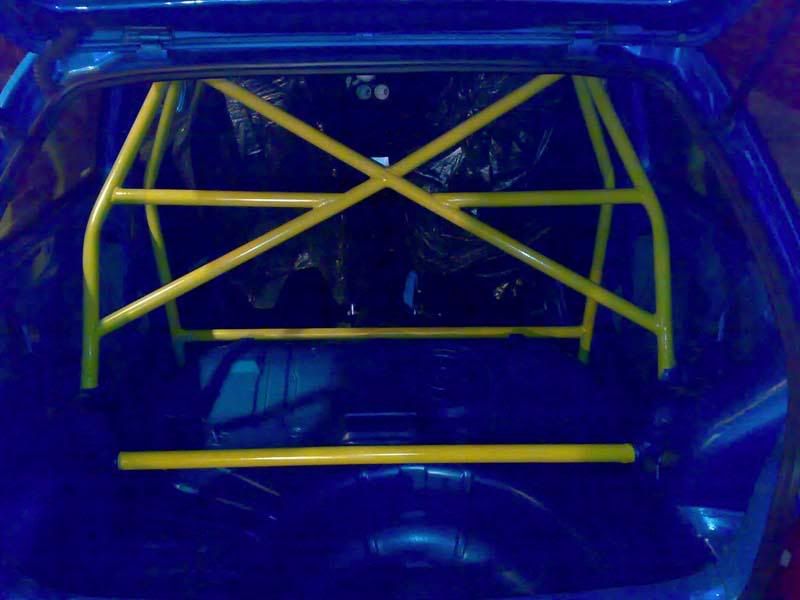
Cage and strut brace all fitted
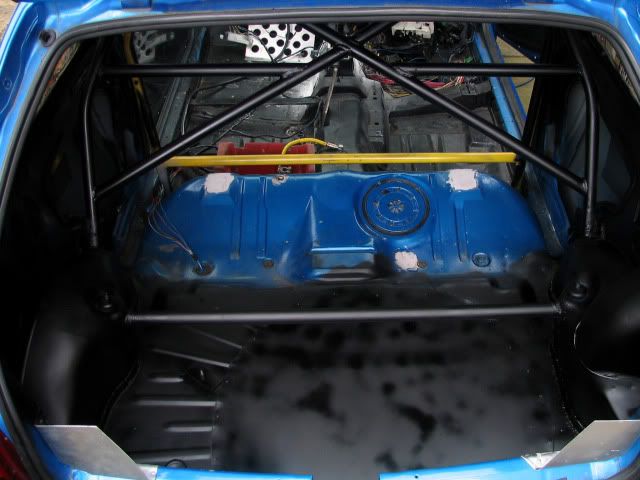
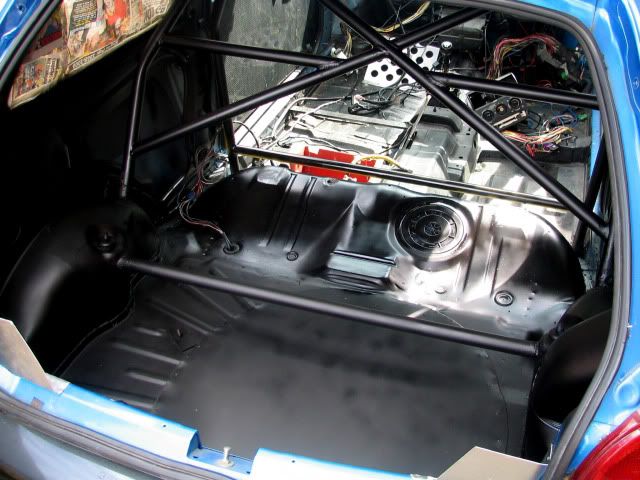
Mark wasn't happy with all the welds on the cage; so redid alot of them; this meant that once it was in place I had to repaint it; and the back of my car...again!
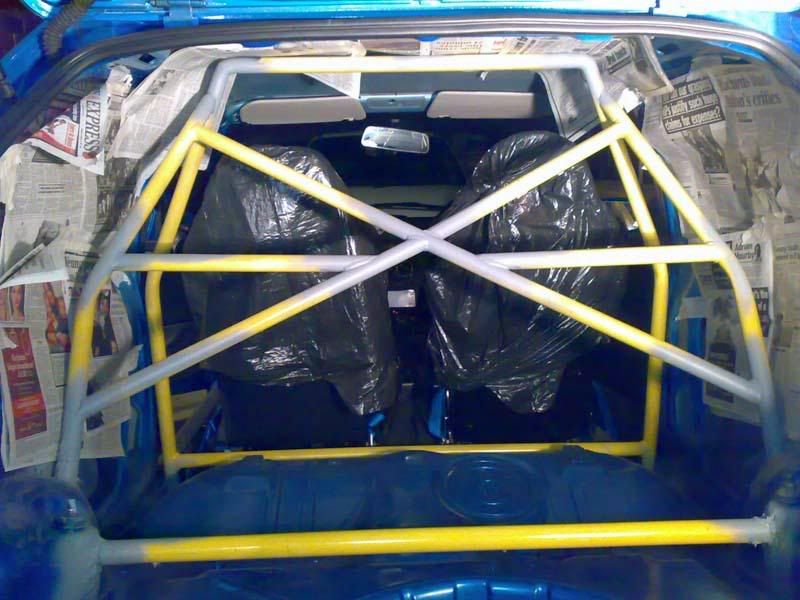
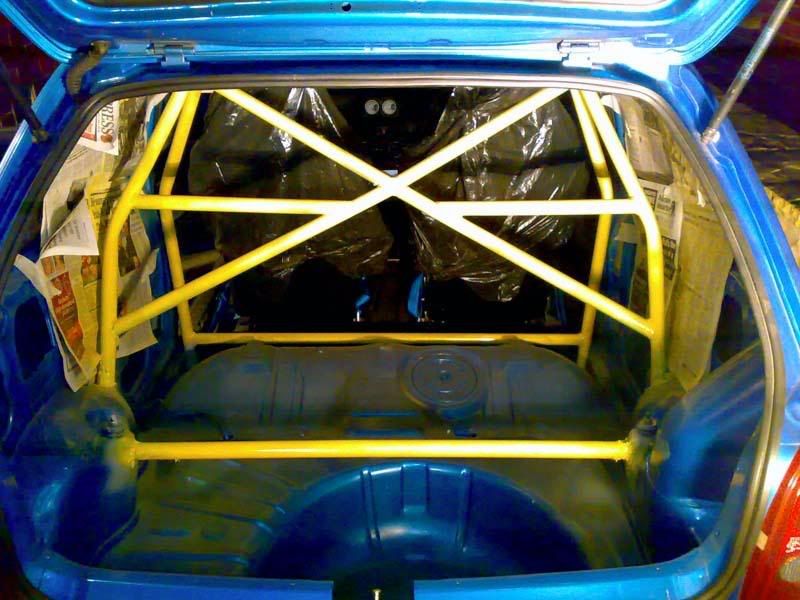
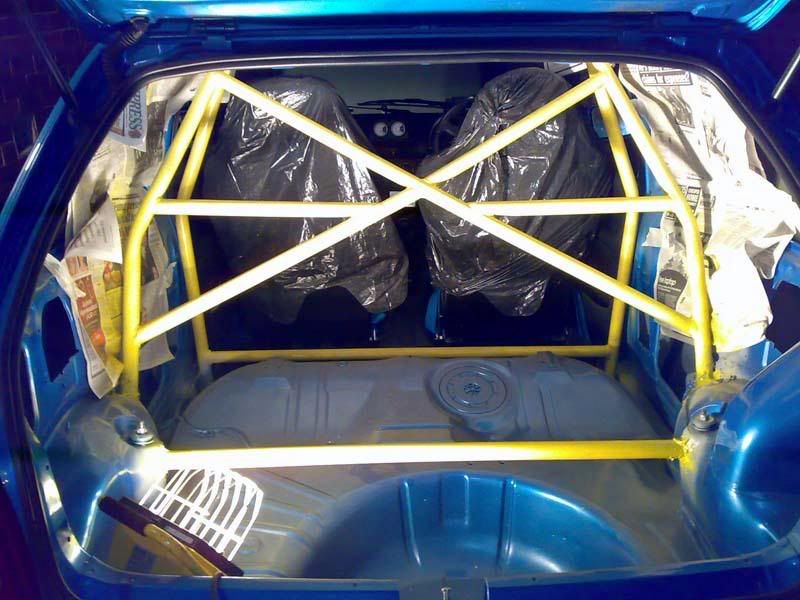
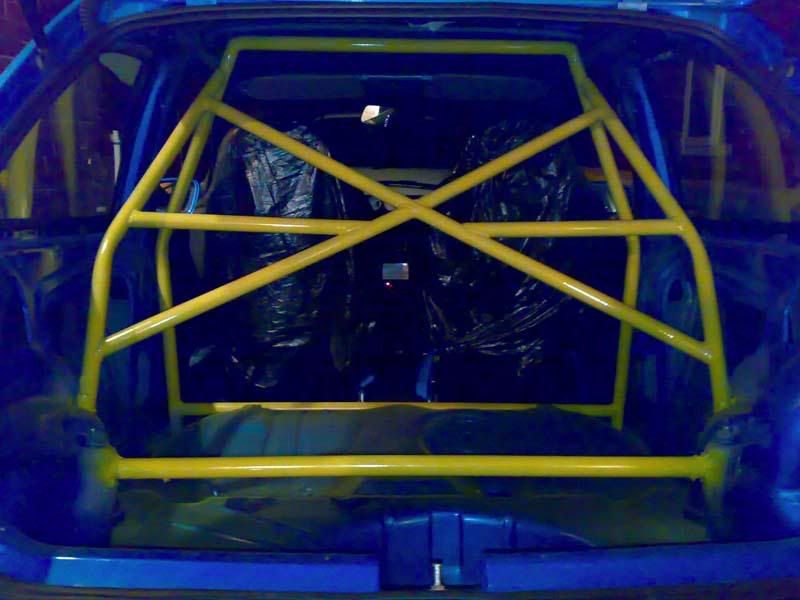
...and the finished article (no daylight pics I'm afraid)
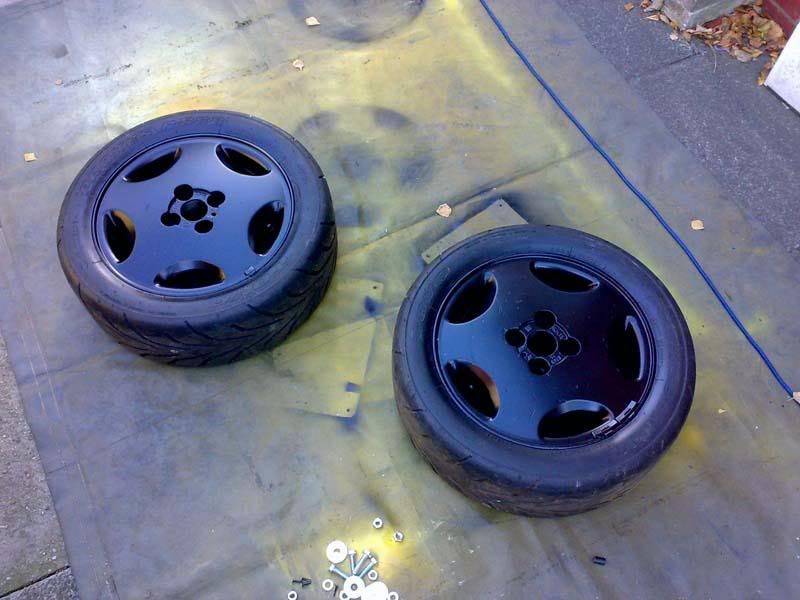
Another pair of cav gsi rims came up cheap; ie. free so I thought it'd be rude not to upgrade those to be my trackday rims. Also, a pair of R888s came up cheap that same day so off I went to collect. I got them fitted the following day; cav gsi rims look bland in silver though so a rattle can of satin black later and we have this
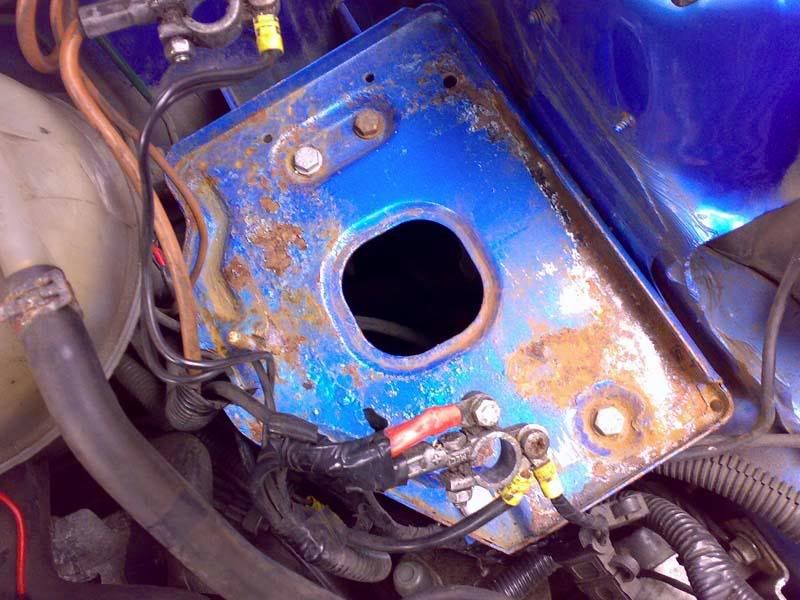
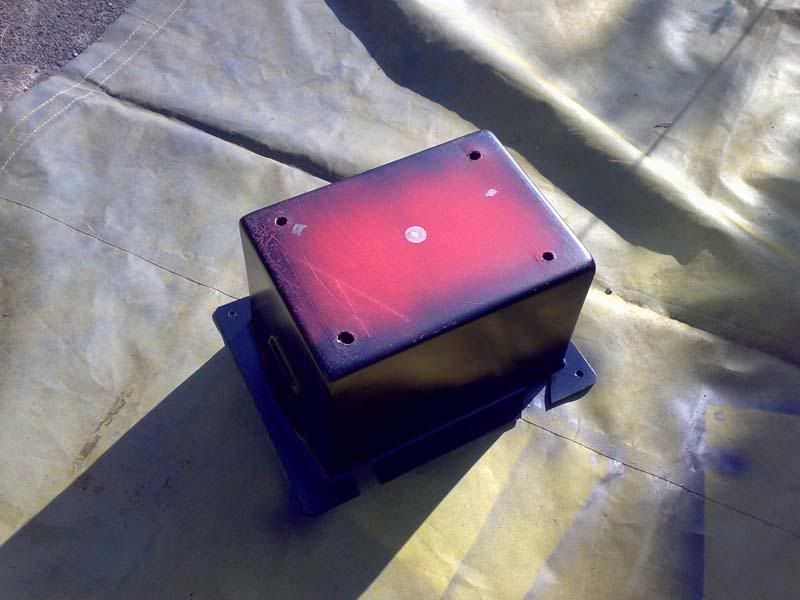
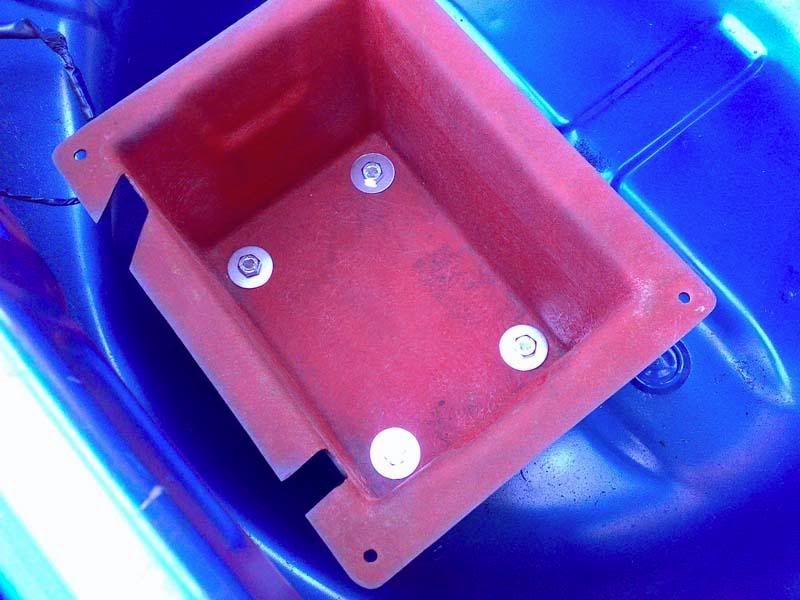
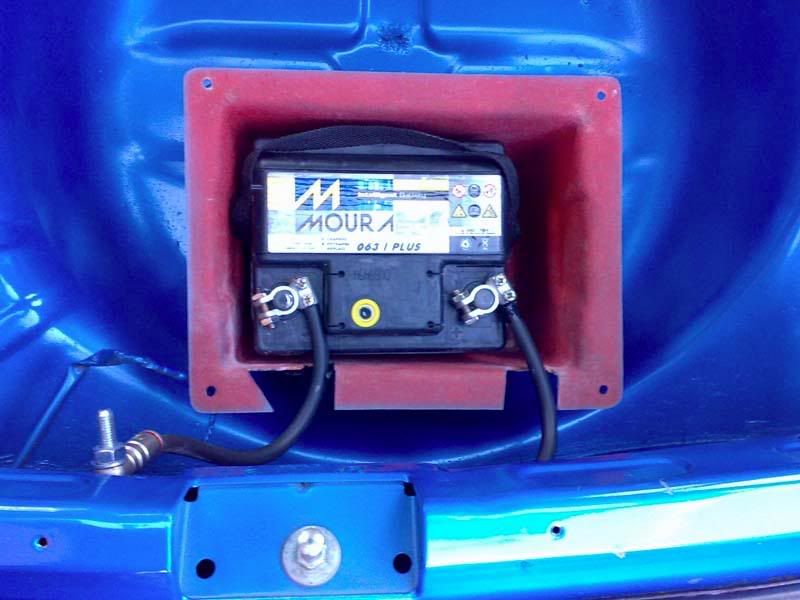
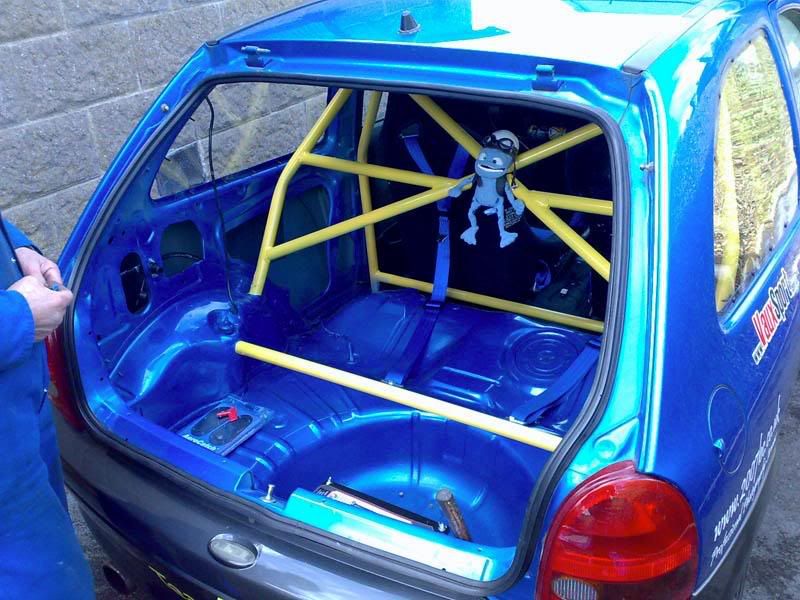
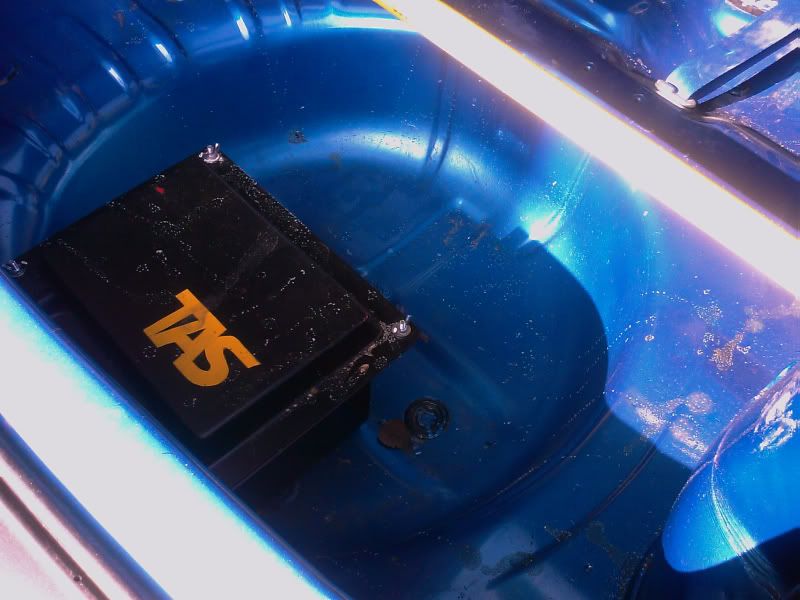
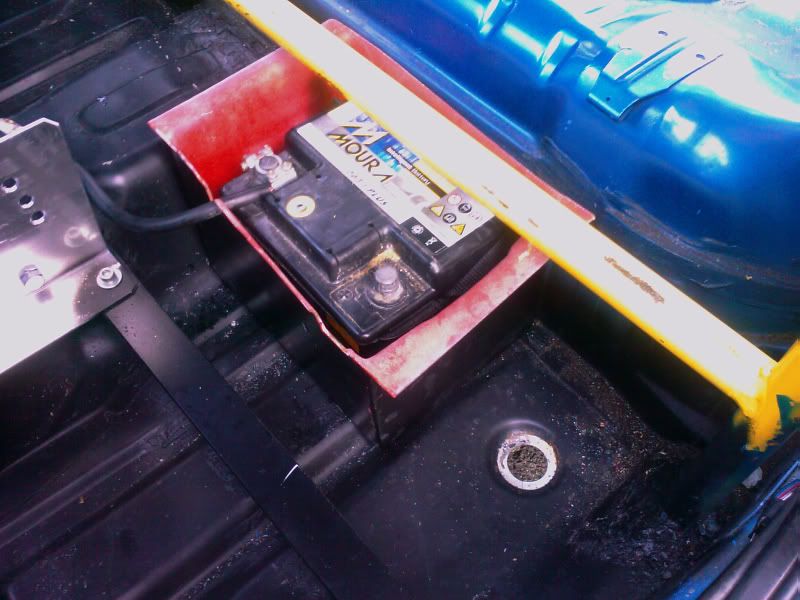
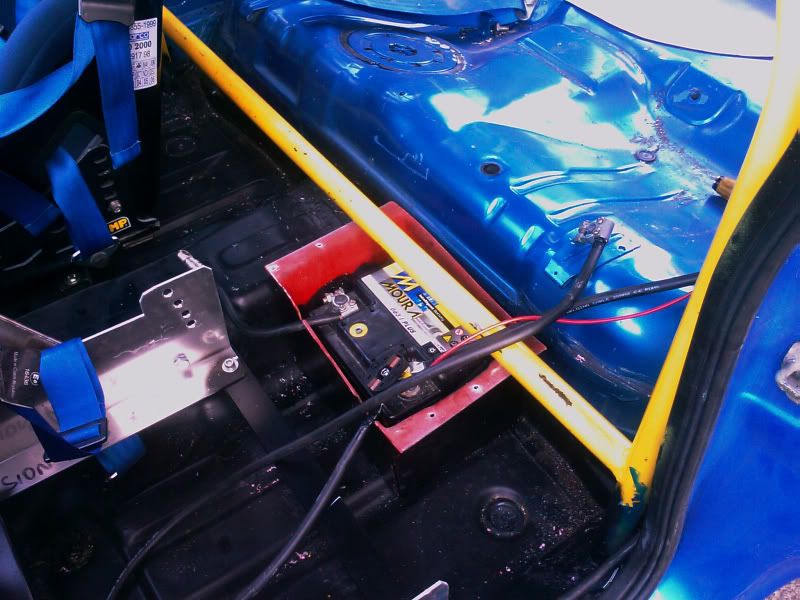
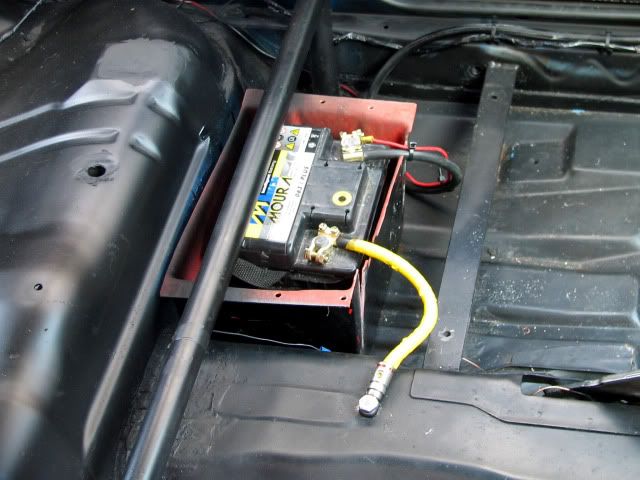
Up next, battery relocation. I got the battery box cheap too (notice a theme here? LOL)
but I'm not into red, so that got dose of satin black paint also, with some yellow detailing

Mount securely in boot:
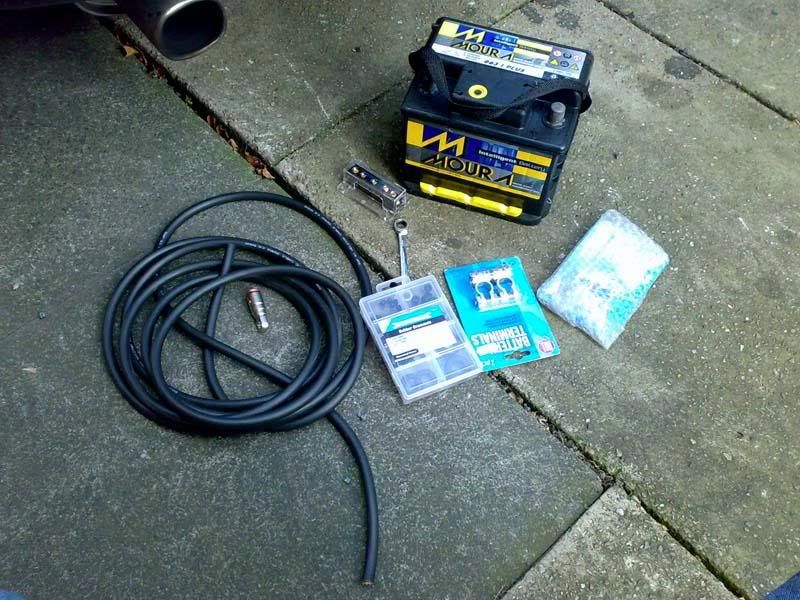
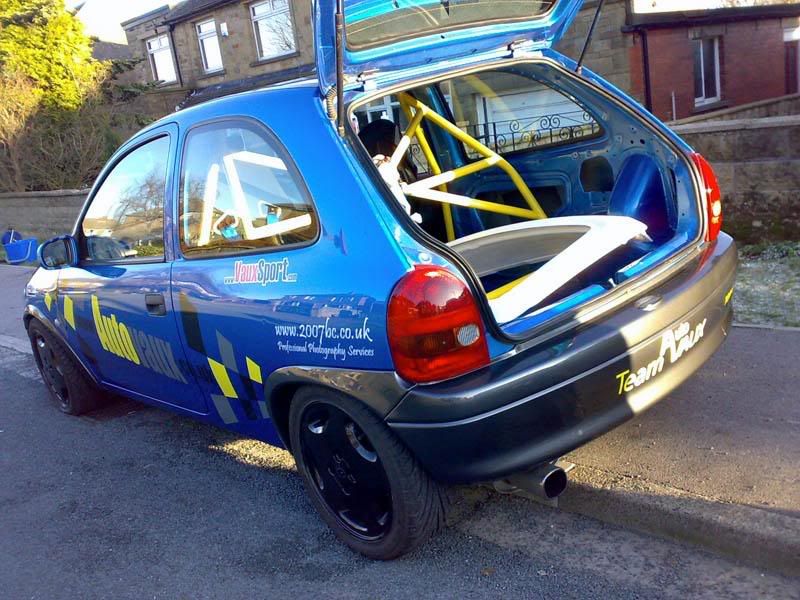
Battery starts like this:

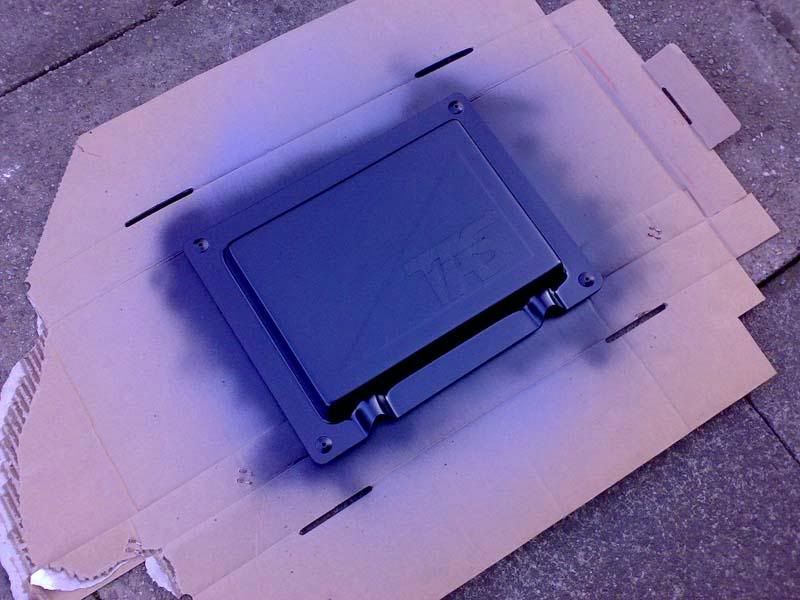
To move it, you need this:
Distribution block and negative terminal mounted:
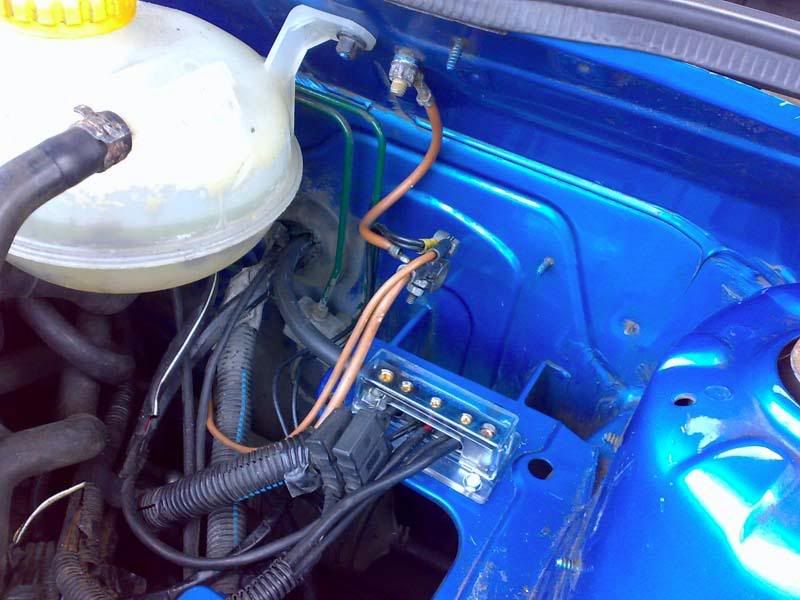
Battery in place with HUGE ground wire, lol
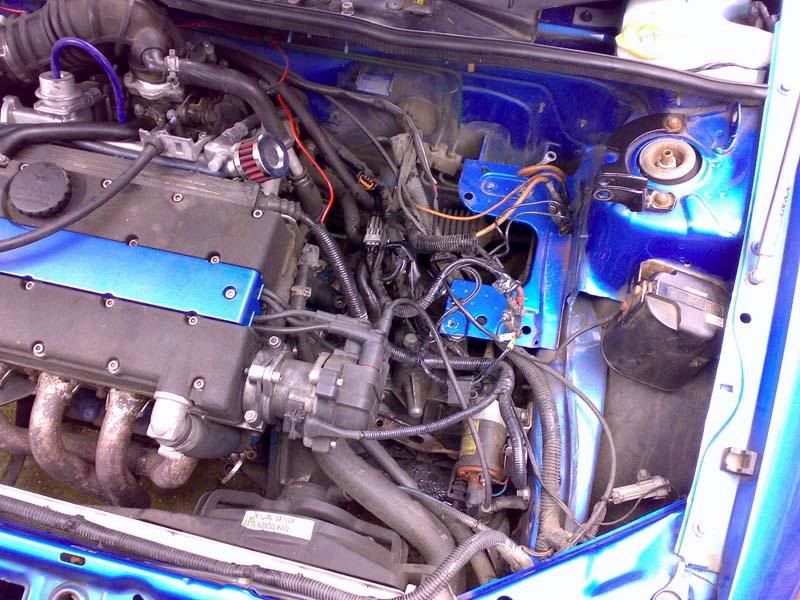
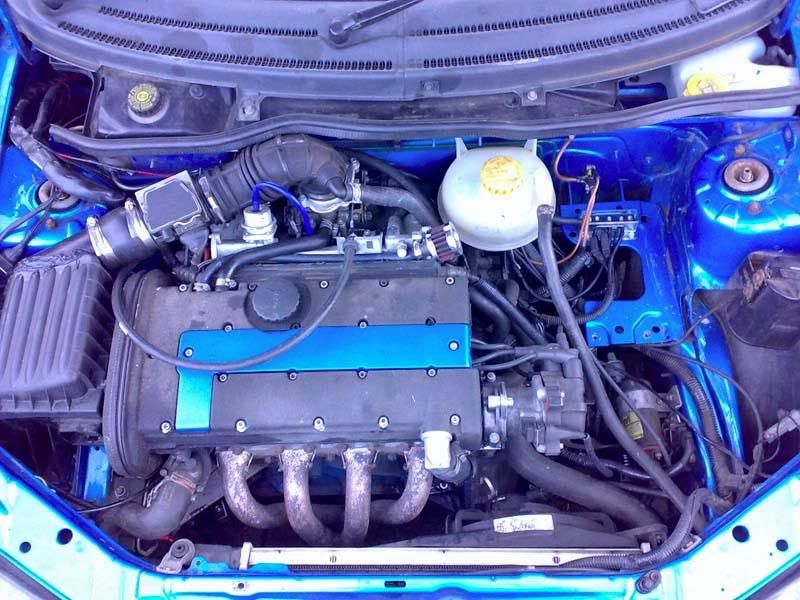
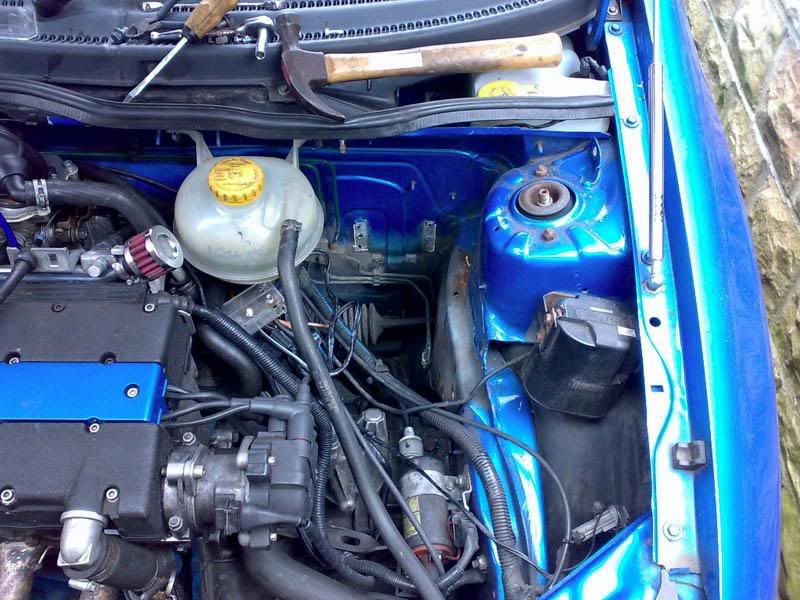
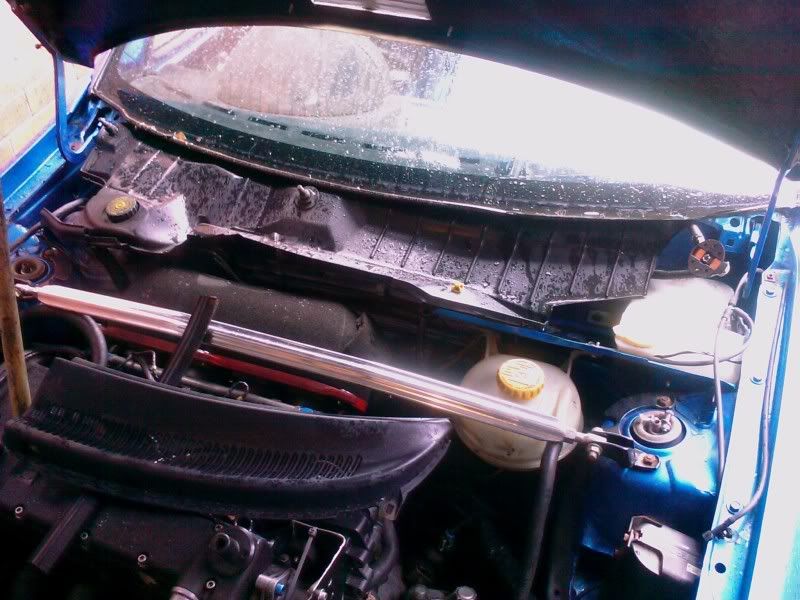
Engine bay now looks like this: (tray will be removed at some point)
Check the charge... voltage meter it say yuusss very good charge
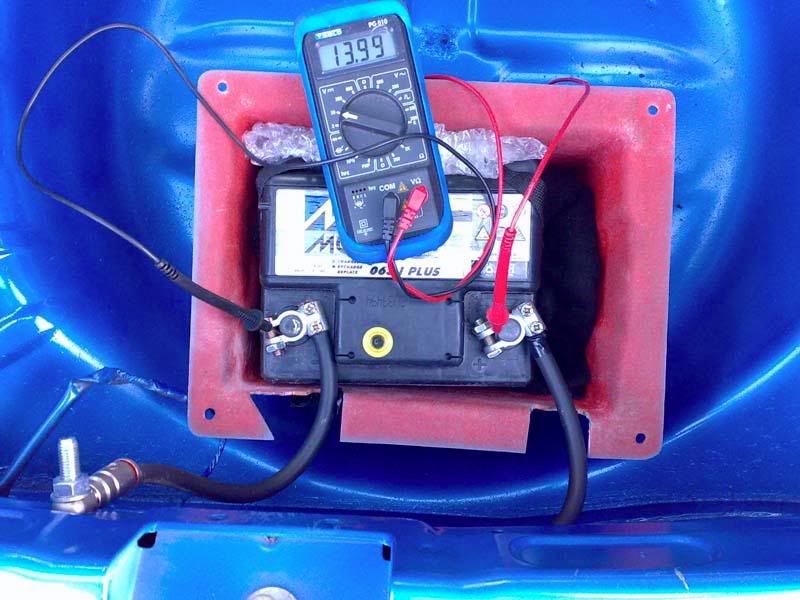
...and then put to bed in its box
Alloy bottom pulley still to fit; doing that tomorrow
Damn, over a month since my last update; better change that then!
First up, lightened bottom pulley was purchased from robsb16v, cheers mate :beer: It weighed naff all, and a noticeable difference to how fast the car revved.
Old Vs New
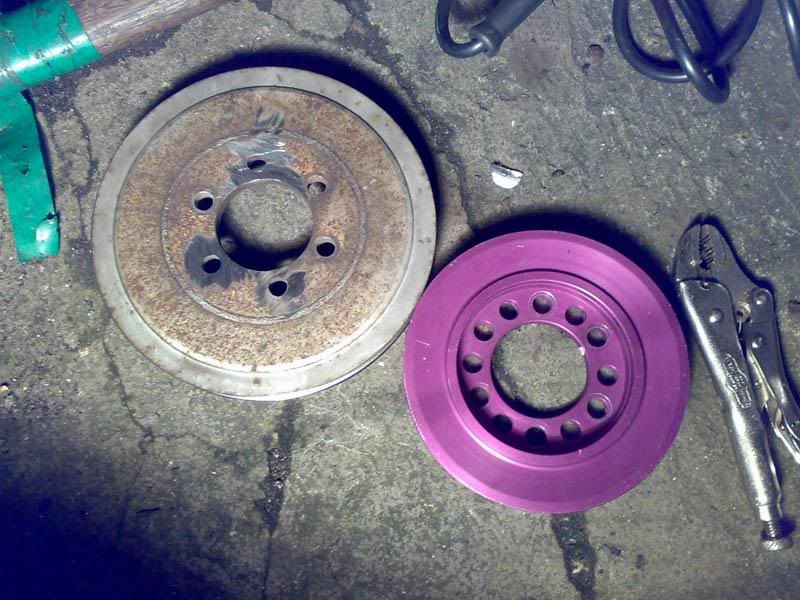
Definately an underdrive pulley
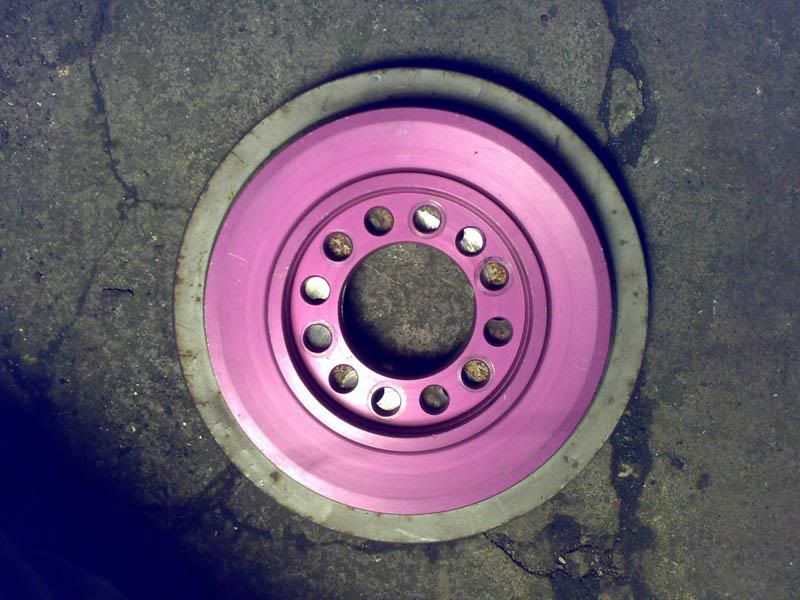
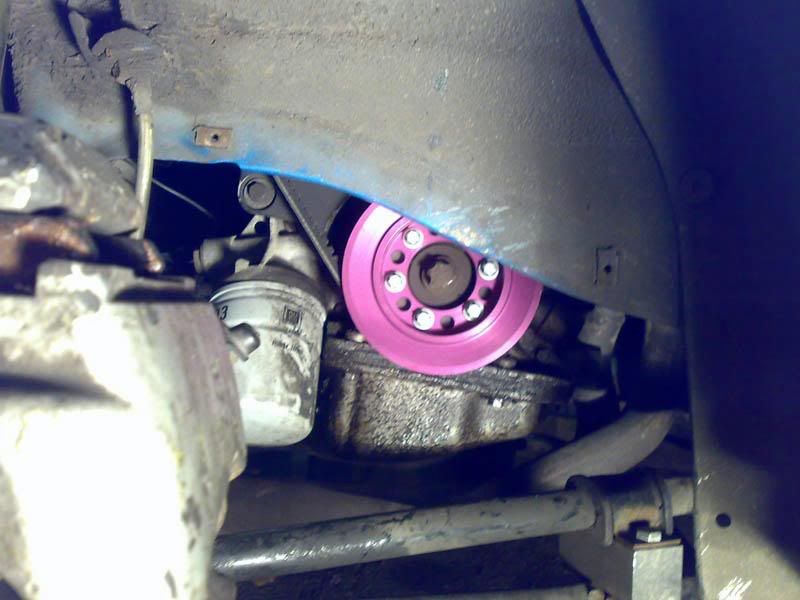
All Fitted
Got a new rear numberplate, just to try and get a few more traffic light grand prixs Inspiration taken from beardys plate afew days ago...
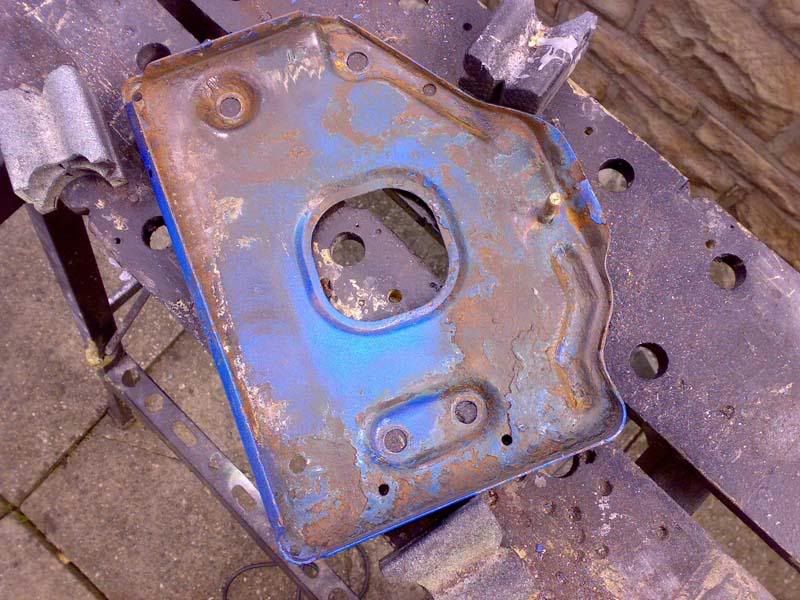
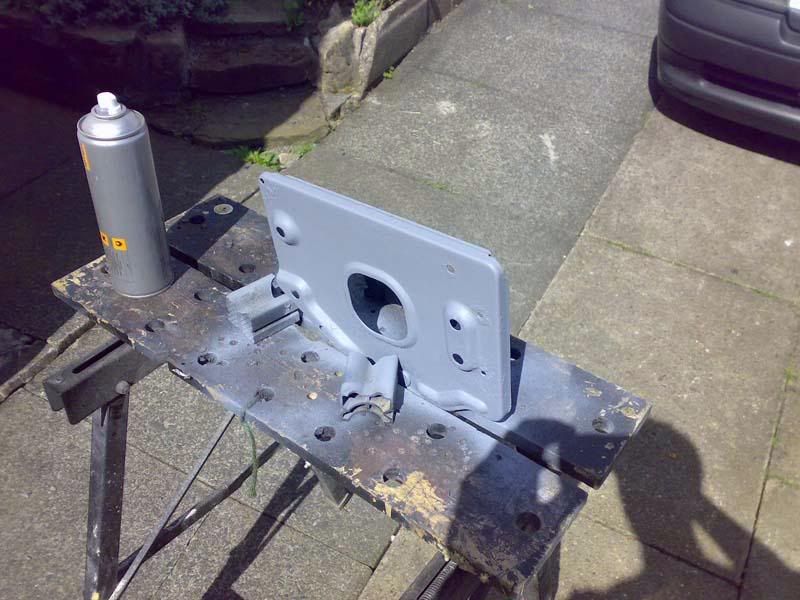
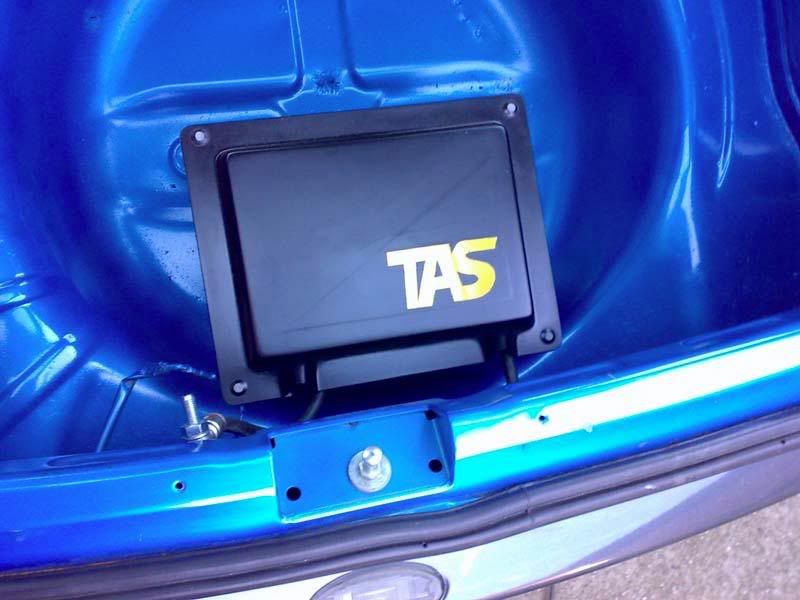
Next up it as time to loose the battery tray
Distribution block bolted to the bulkhead, I'll get it painted at somepoint if I get chance

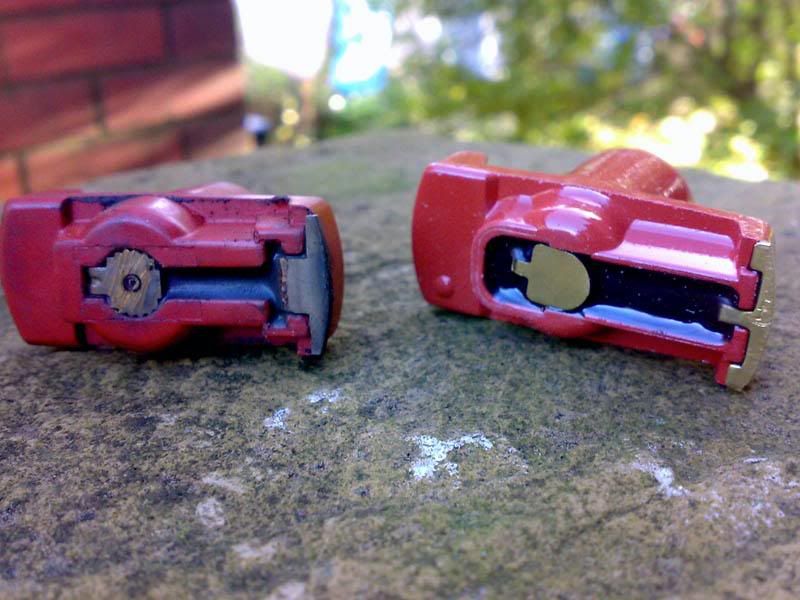
After moving my battery and fitting the new bottom pulley I had a few idling problems(yes more!). I realised that I'd never replaced the distributor and rotor arm, so after a trip to autovaux got some serviceable items on there.
Rotor Arm Comparison
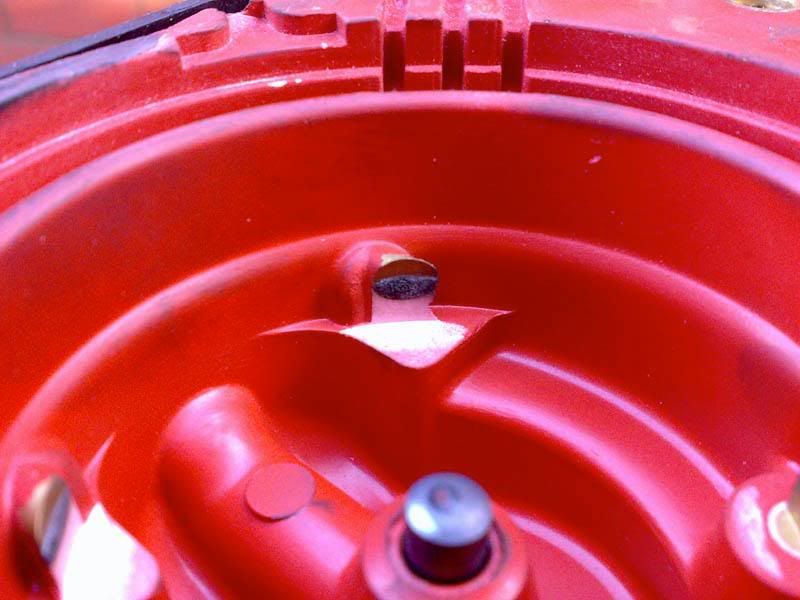
Old Dizzy
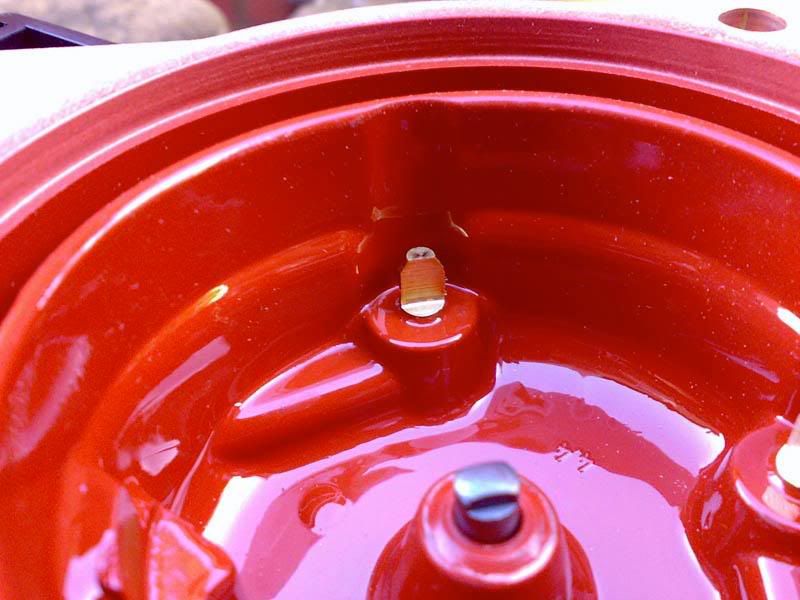
New Dizzy
Decided the interior needed brightening up abit, so got a couple of new gauges; voltmeter and afr gauge
Somewhere within this lot are the wires!
But they all work whiih is the main thing

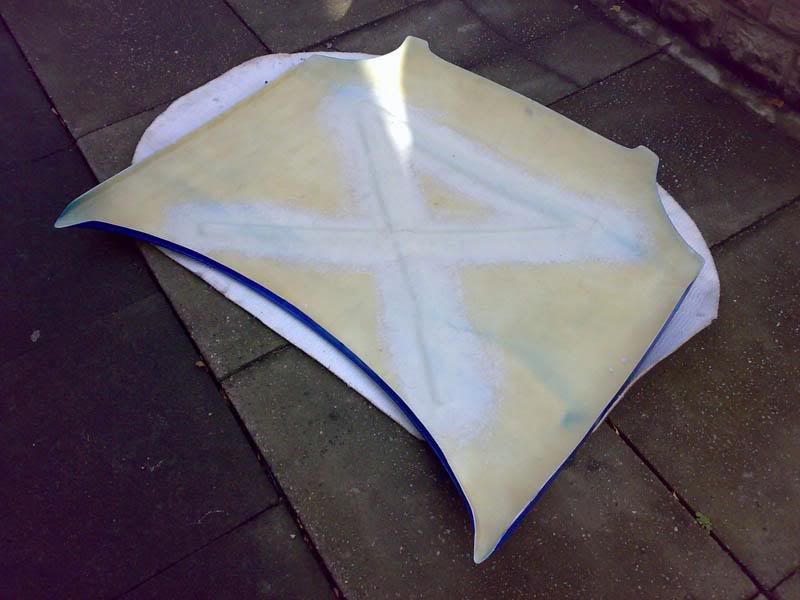
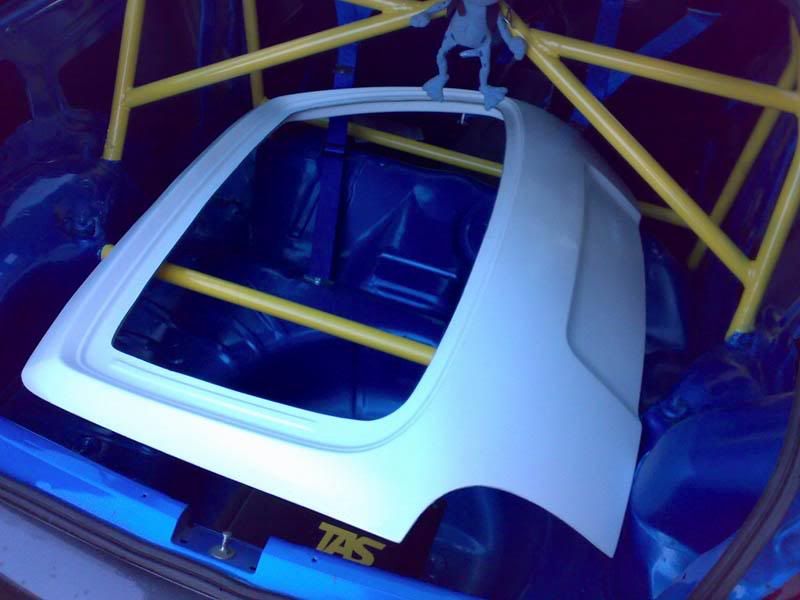
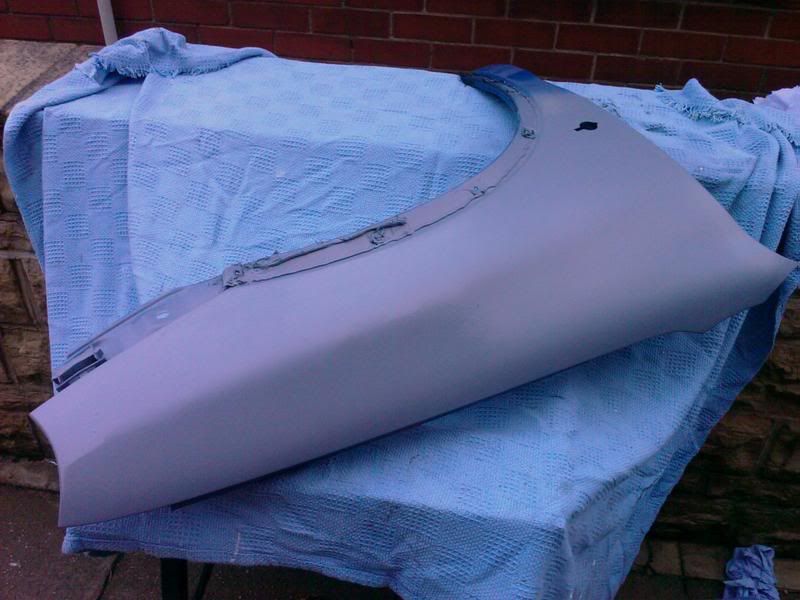
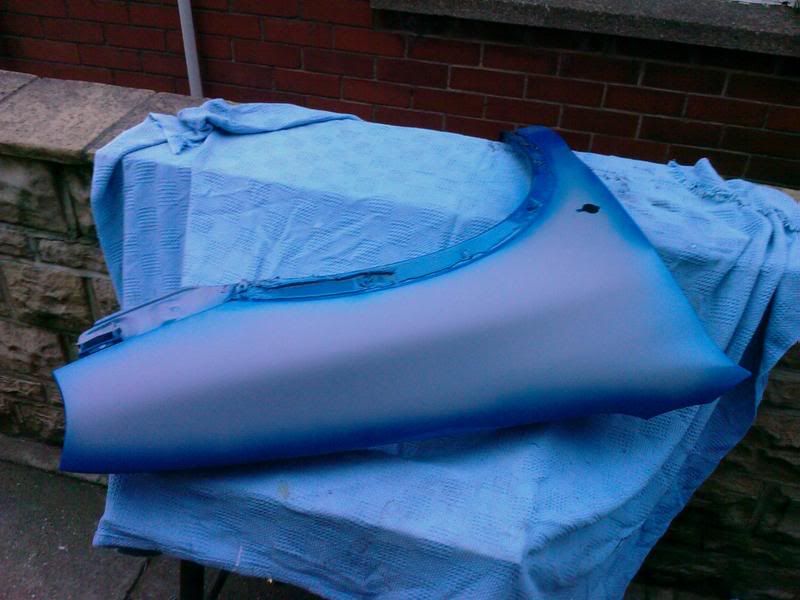
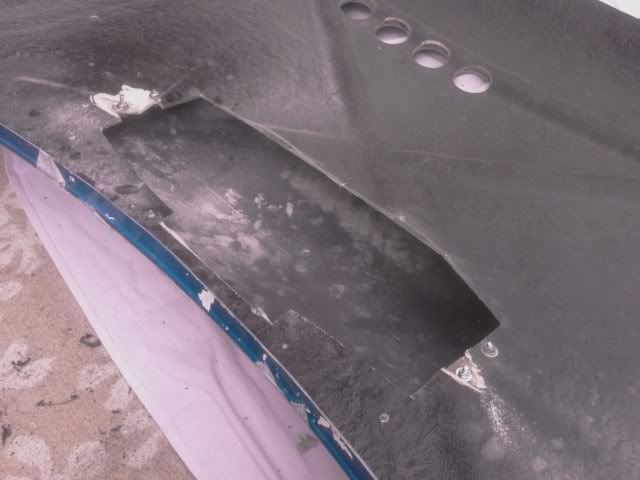
An early christmas present to myself; a fibreglass bonnet.
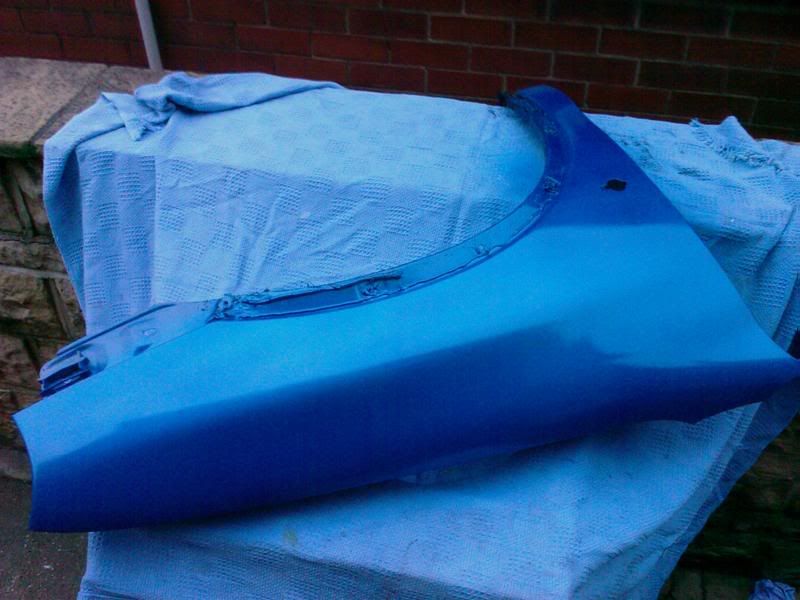
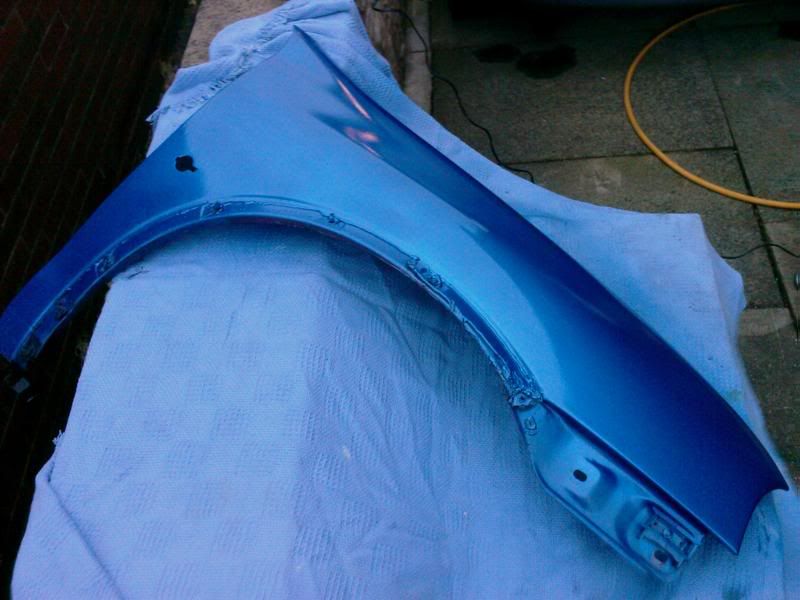
Bonnet back from the bodyshop:
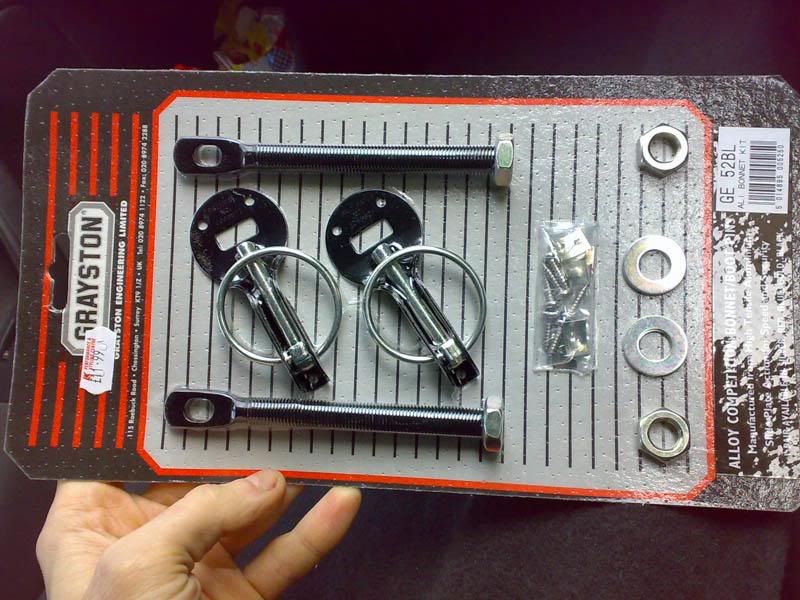
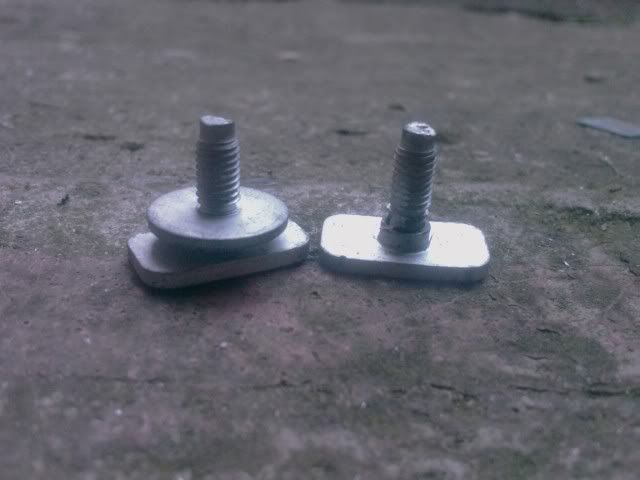
The bonnet pins that I'll be using:
Measuring up for fitting:
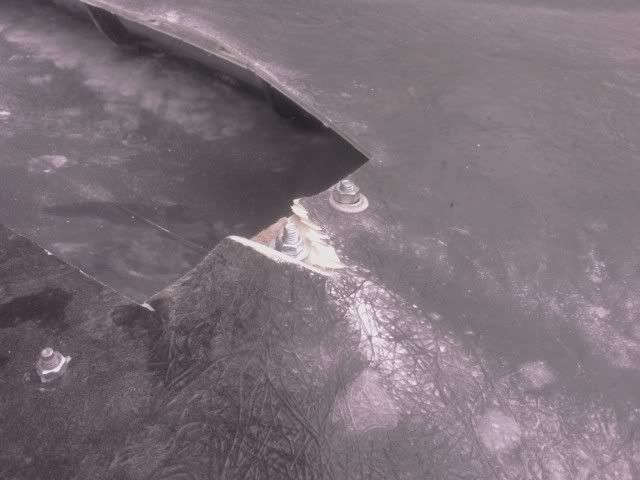
Drilling holes for the rear mounts
All Fitted
Close up of the rear mounts
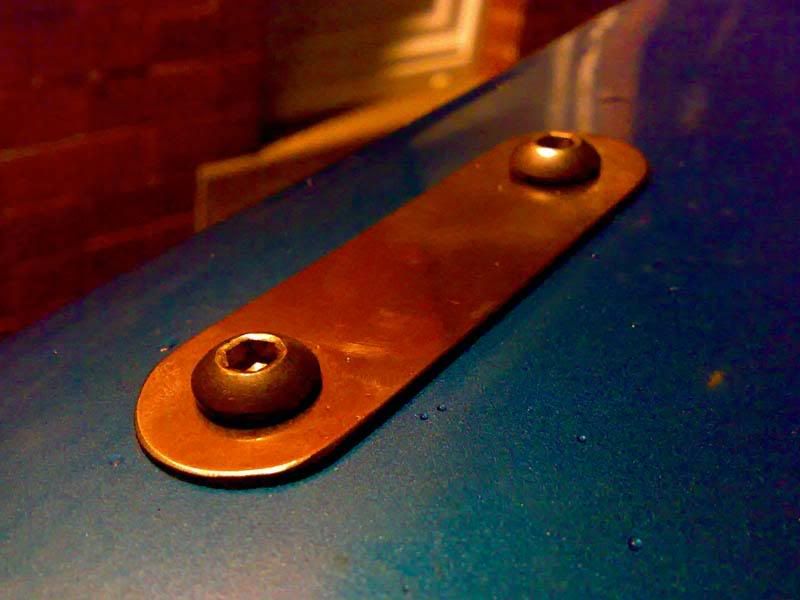
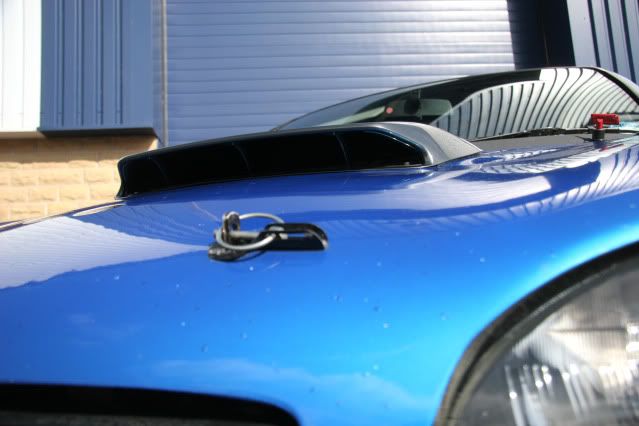
Decided to go for the 'RST' raised look
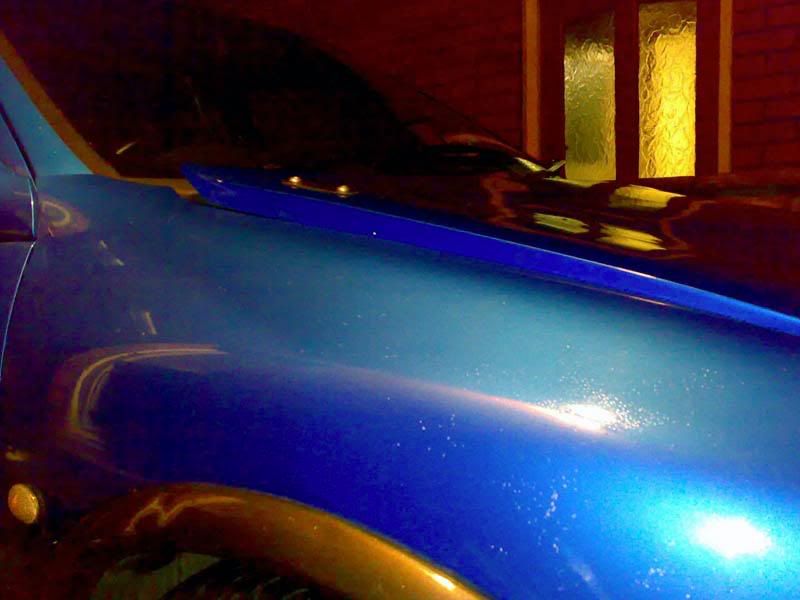
No 'full frontal' shots of the car I'm afraid. It'll be getting a good clean at the weekend so will do some proper pictures then.
Oh, I've also located an ATB diff, which will be getting fitted over christmas. I really can't wait :beer:
Very little updates I'm afraid (not that anyones really bothered). Thrown my dummy out of the pram with it tbh
On driving home from picking up my tophat I burst a fuel line in the engine bay.
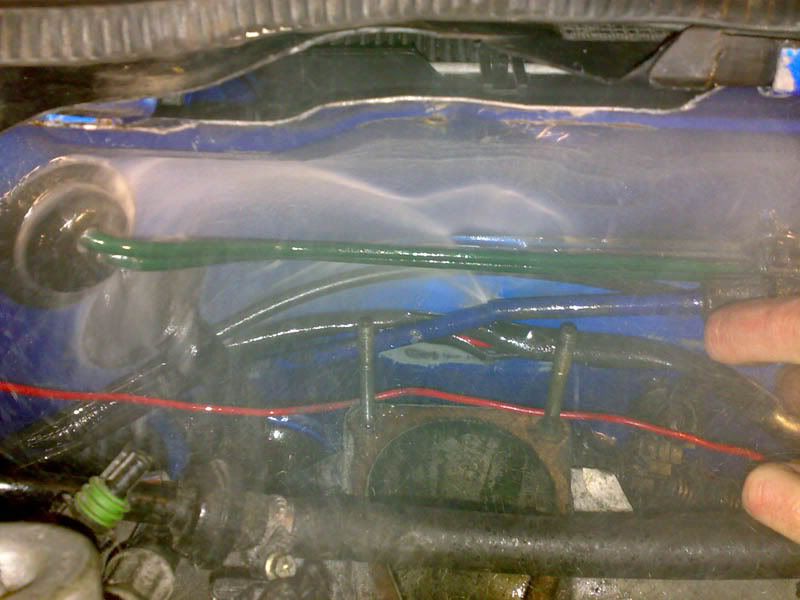
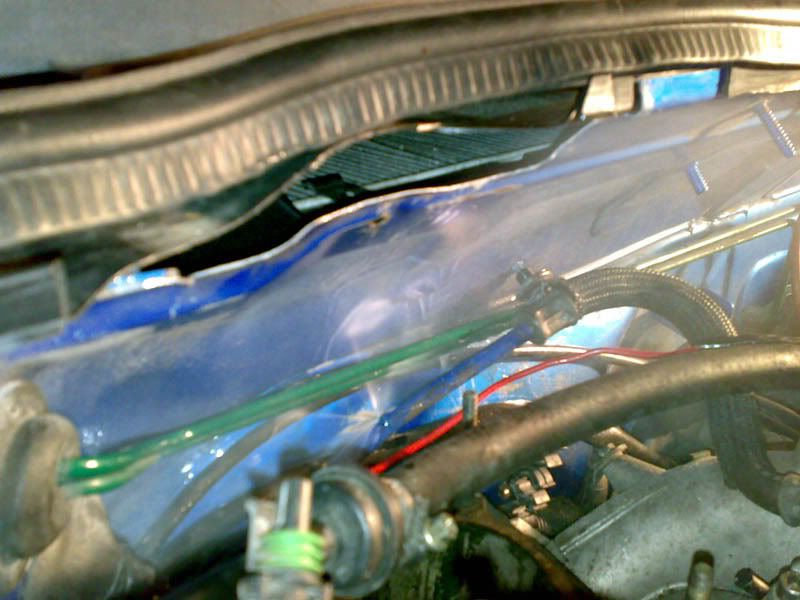
A week later I pretty much got that back together. Then decided to fit my new top hat last week, but managed to **** up the TB in the process. Got a new TB for it last night so will fit that sometime next week probably
Update time then. Still no tophat pictures as I've got to get some new hoses to finish that off, so onto the new bits.
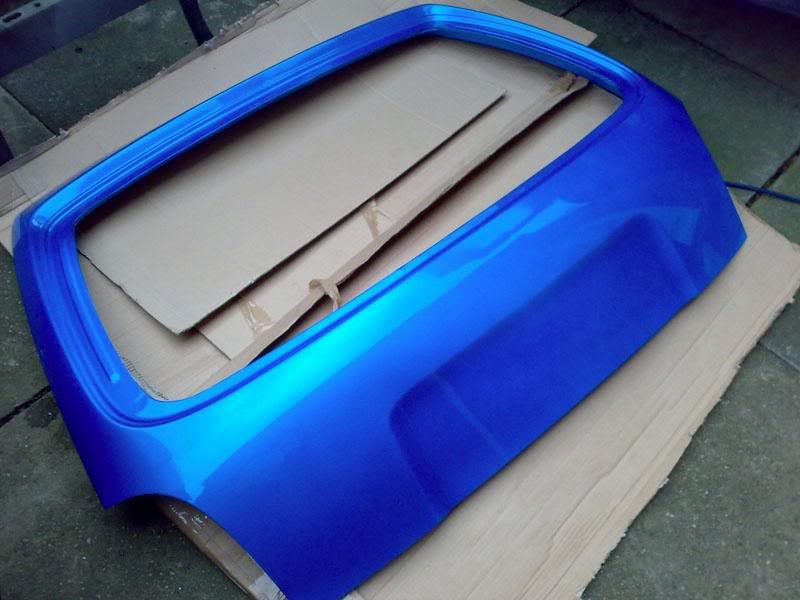
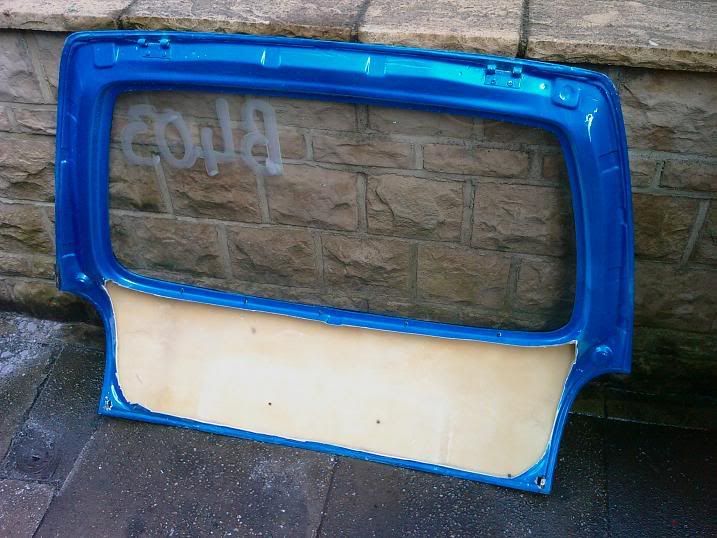
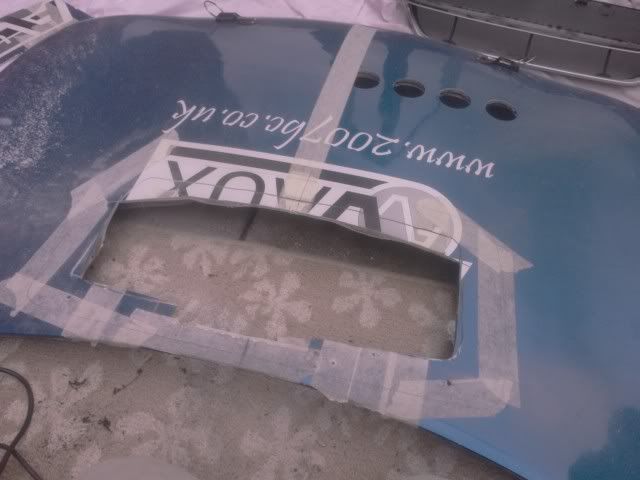
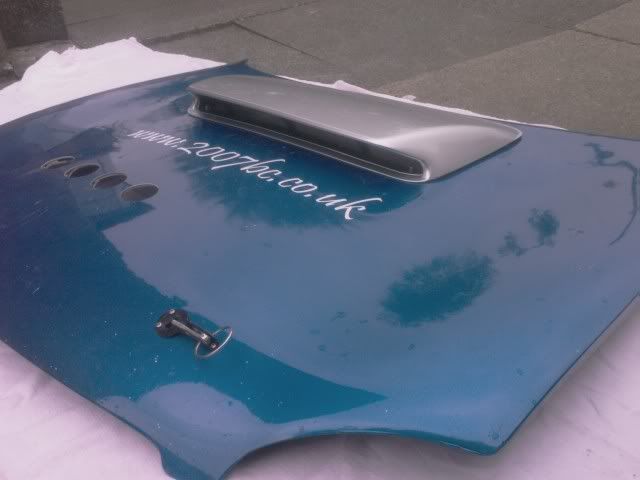
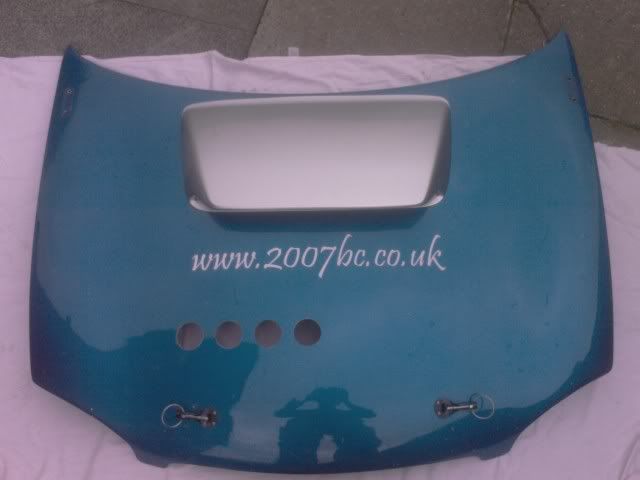
Firstly, GRP tailgate; this has been taken for painting today. This came from www.agmotorsport.co.uk and bolts STRAIGHT onto the standard hinges. They come HIGHLY recommended.
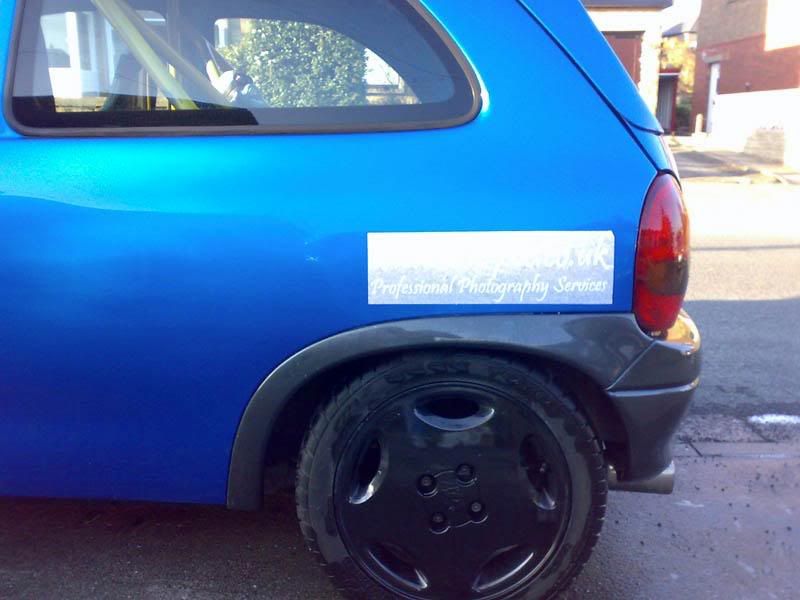
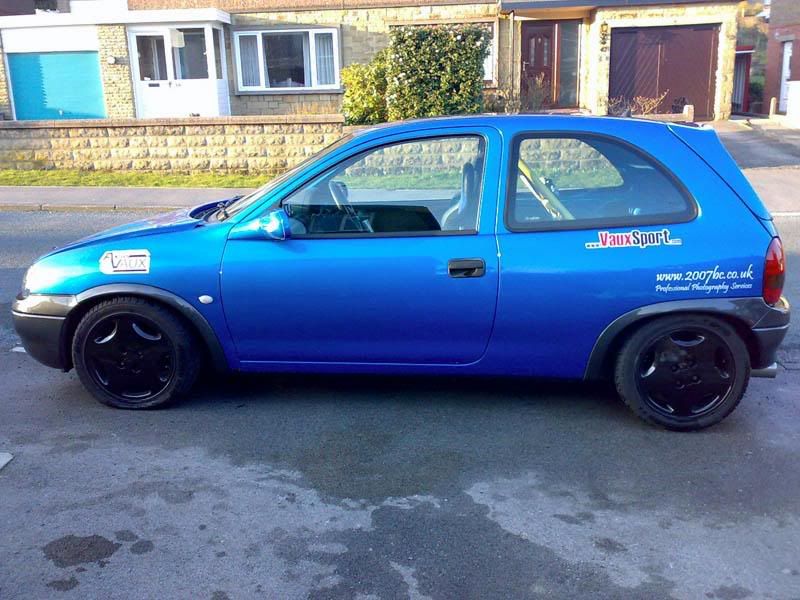
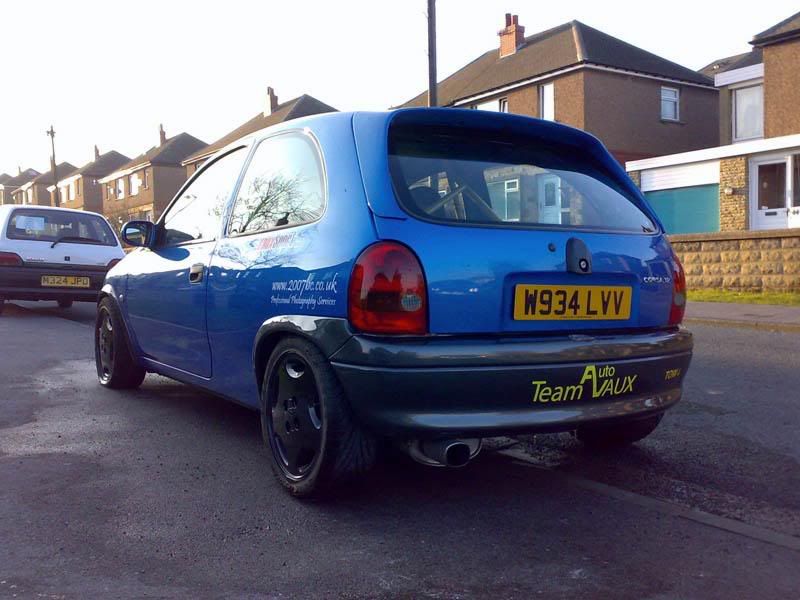
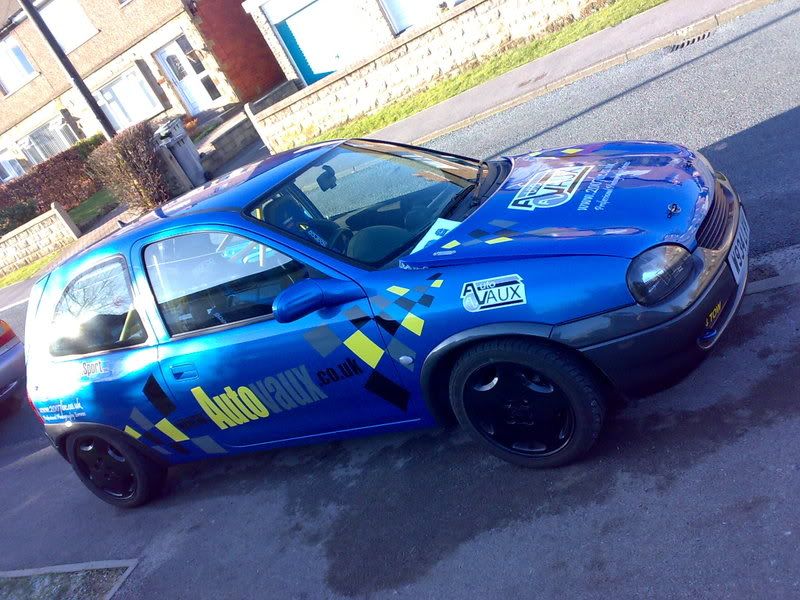
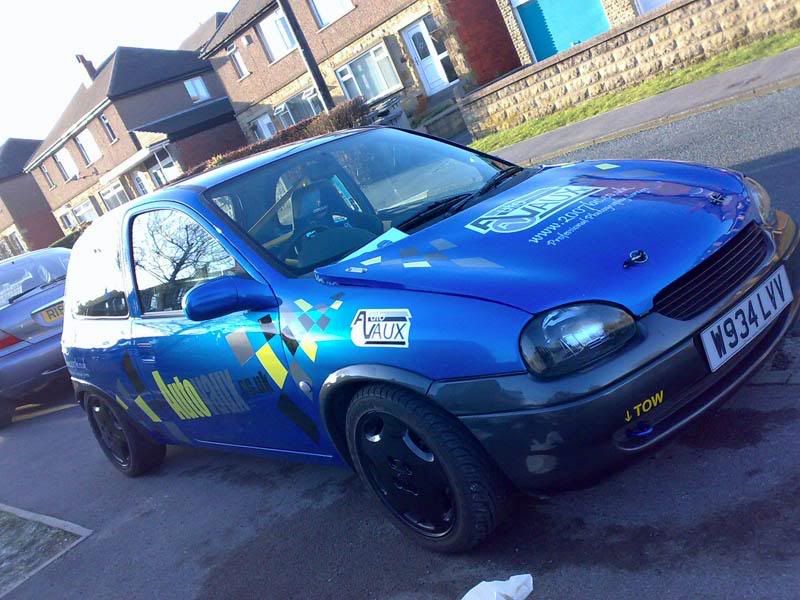
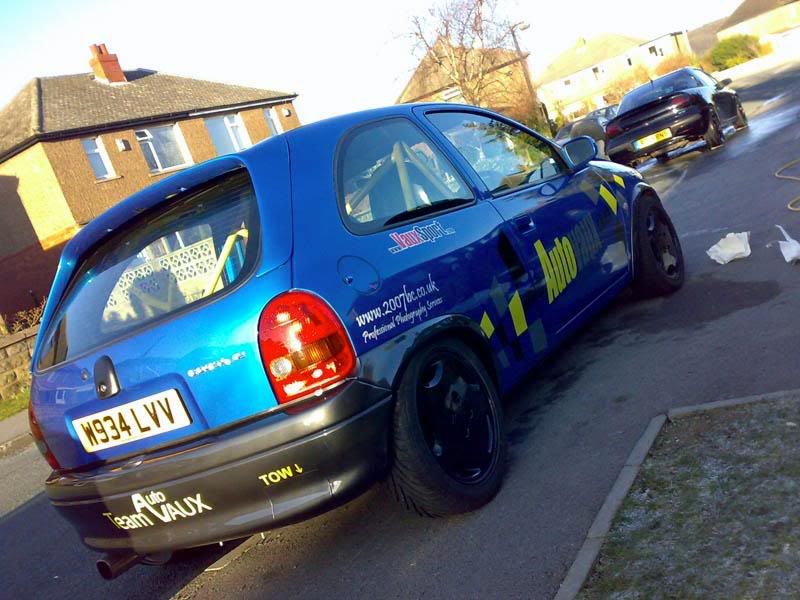
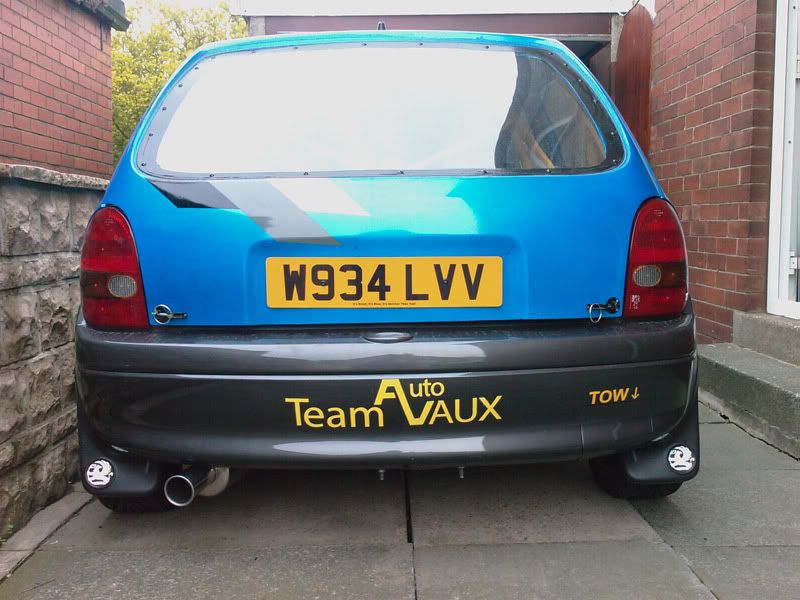
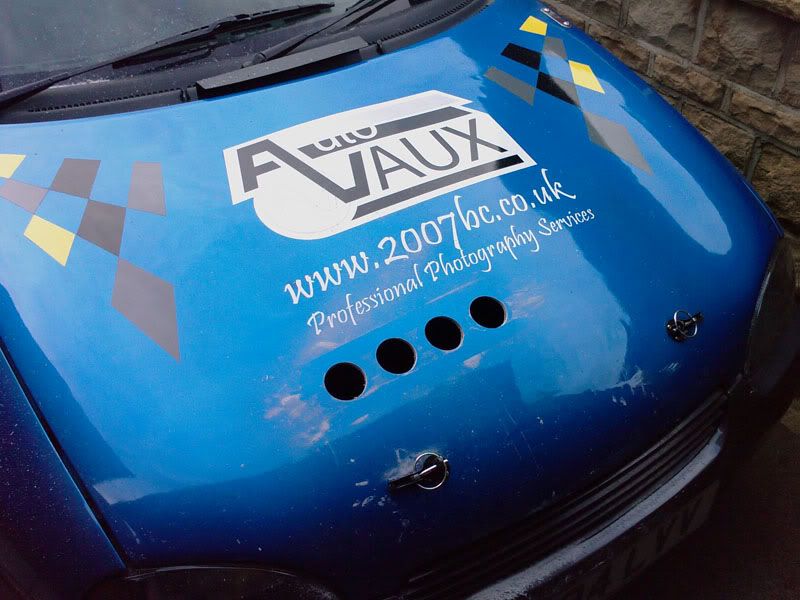
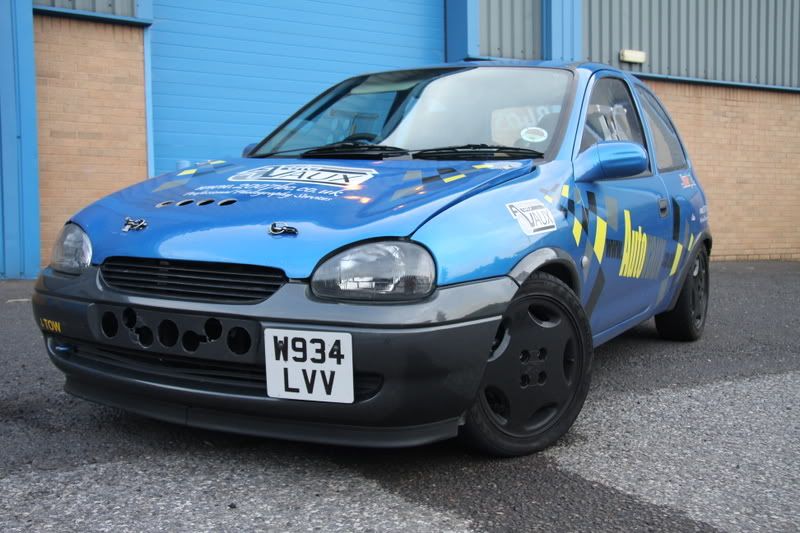
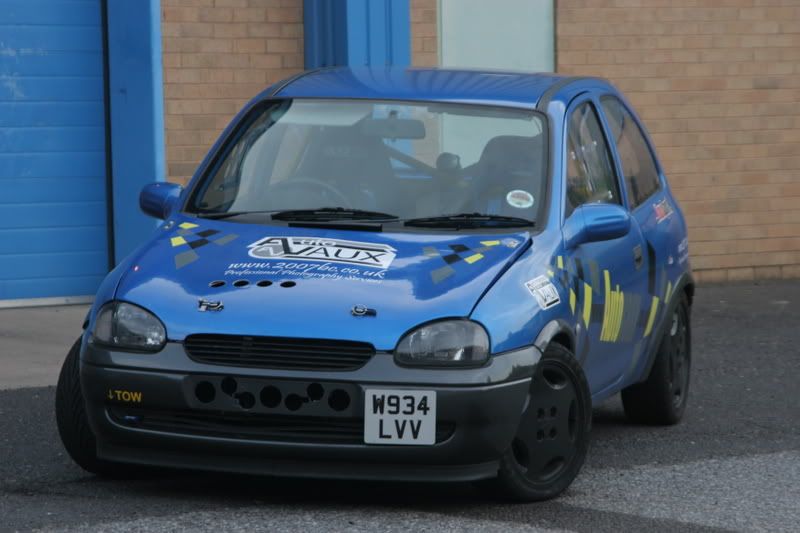
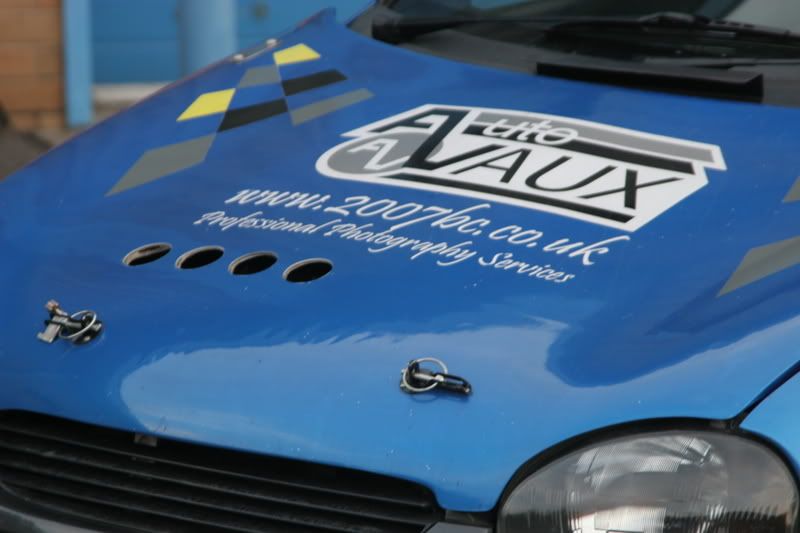
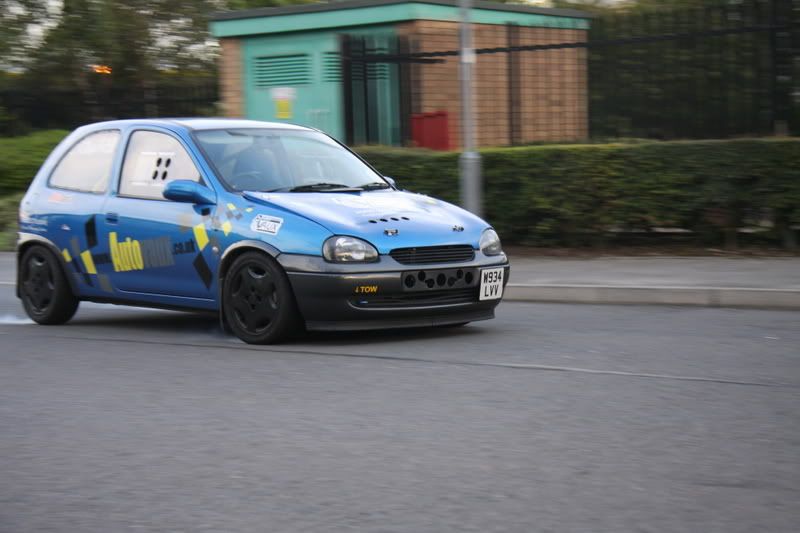
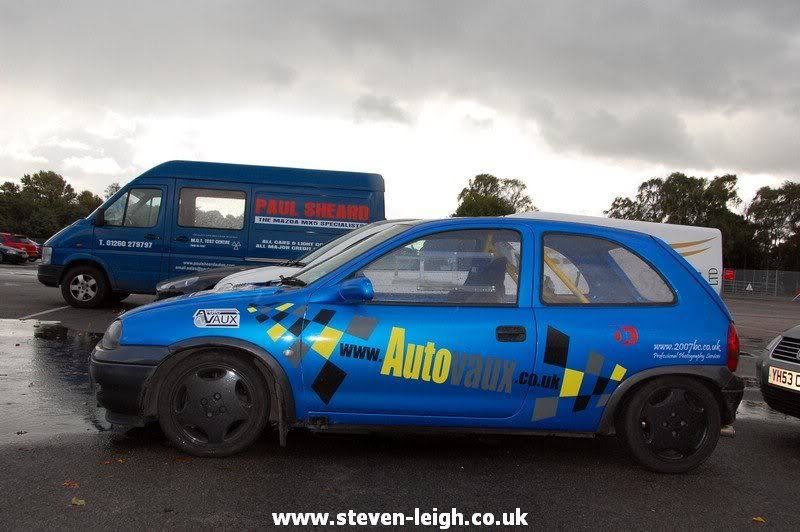
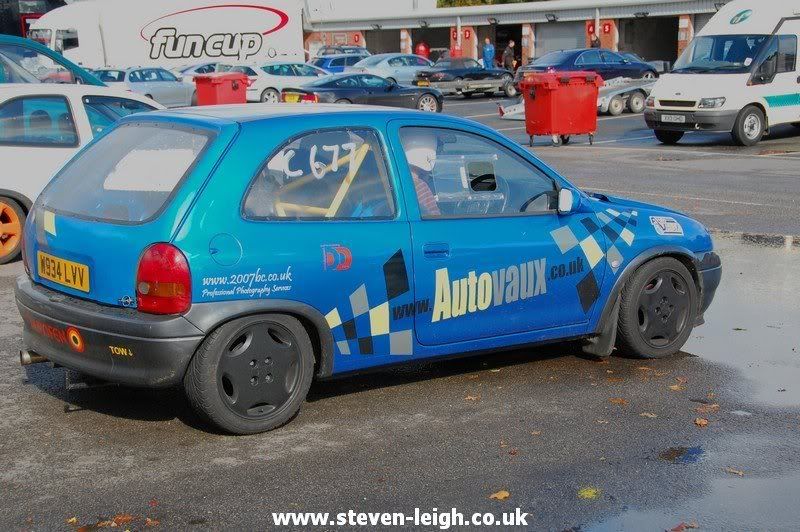
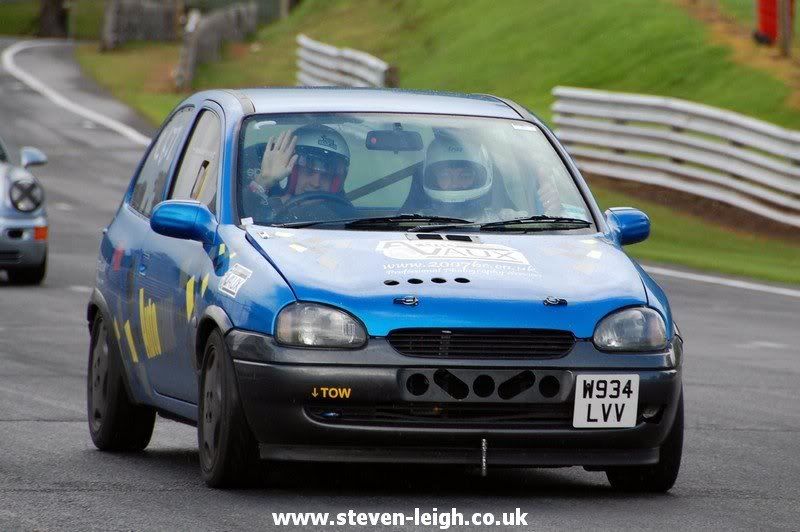
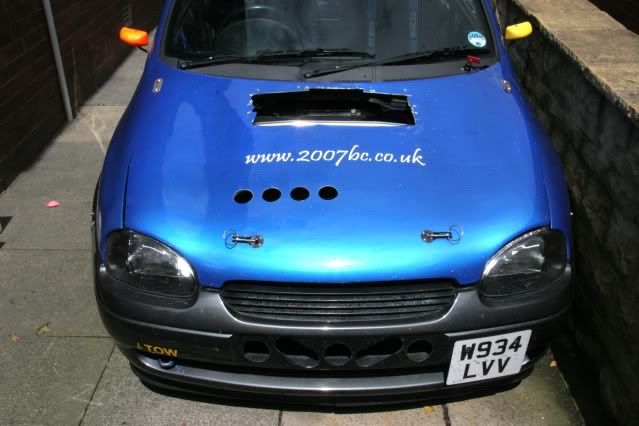
Now onto the livery. www.autovaux.co.uk have sponsored myself and wazpaz, in return for covering our cars with their logos, amongst others. I personally think they looking fapping awesome, although my sleeper-look has now gone totally out of the window lmao
I've never fitted vinyl before; not to this scale anyway, but managed pretty well. There's just a few tailgate stickers to fit, but I'm waiting until my new one gets back from the bodyshop. Enjoy :beer:
Before
During


(not quite convinced on the Team Autovaux thing yet)
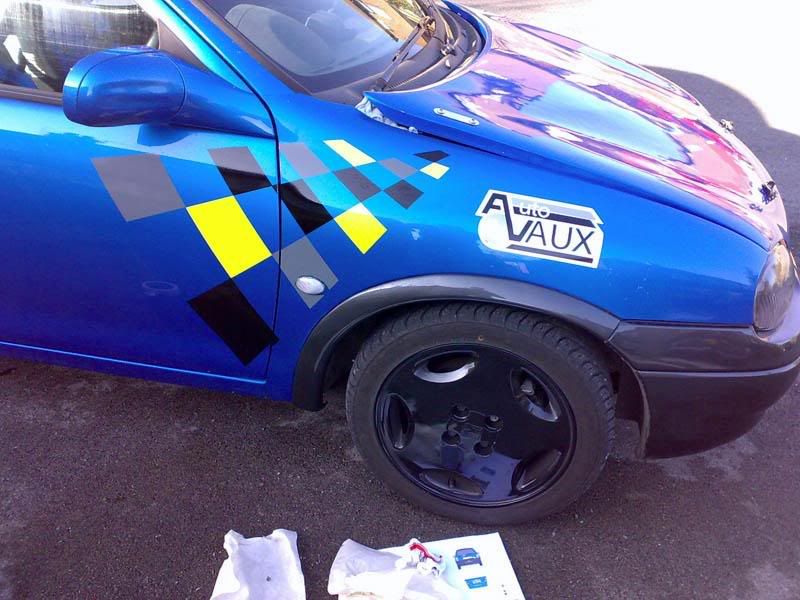
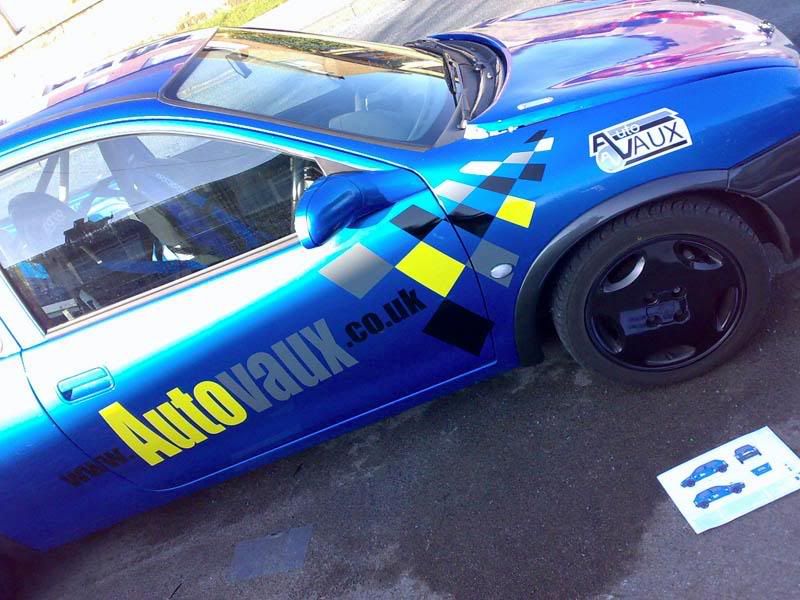
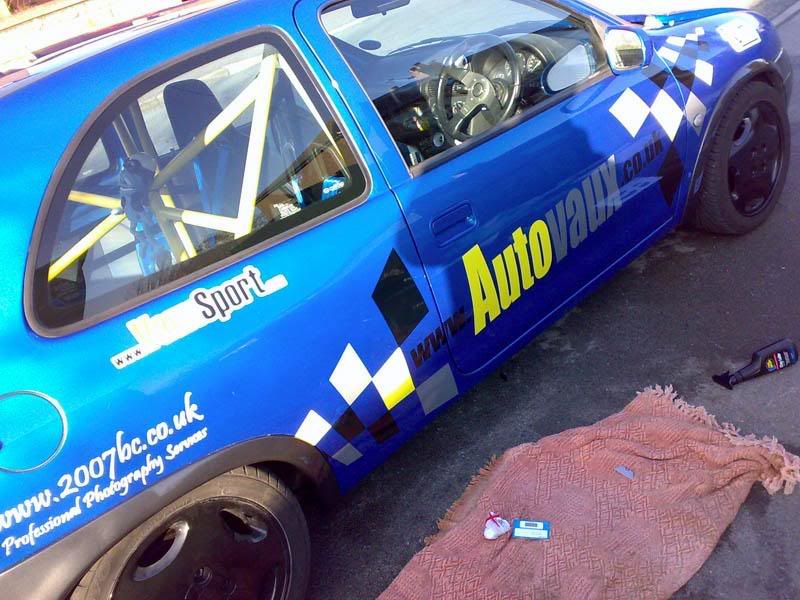
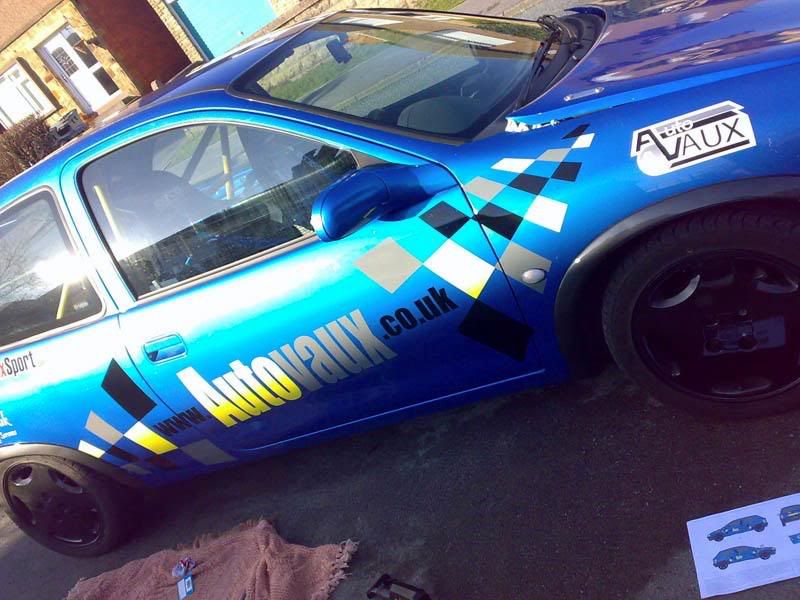
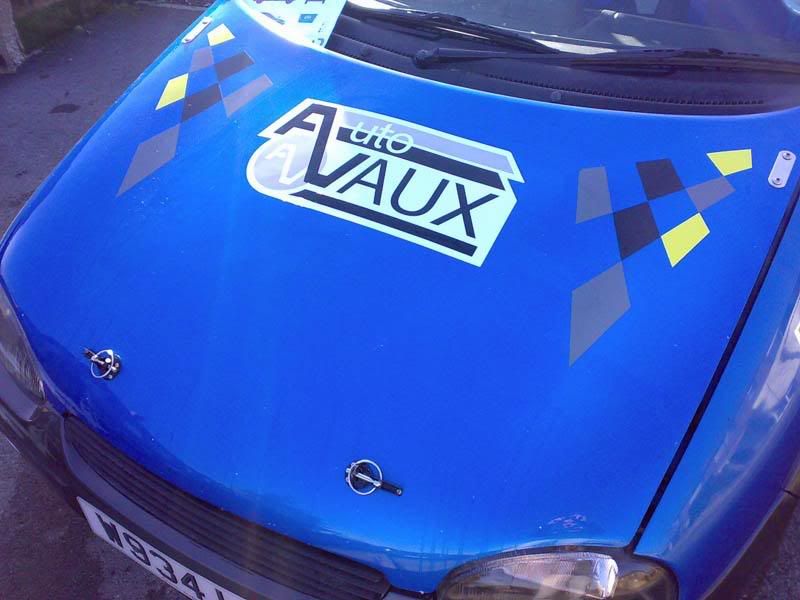

Finished
|
DaveB
Member
Registered: 29th Dec 00
Location: Huddersfield
User status: Offline
|
Abit of progress.
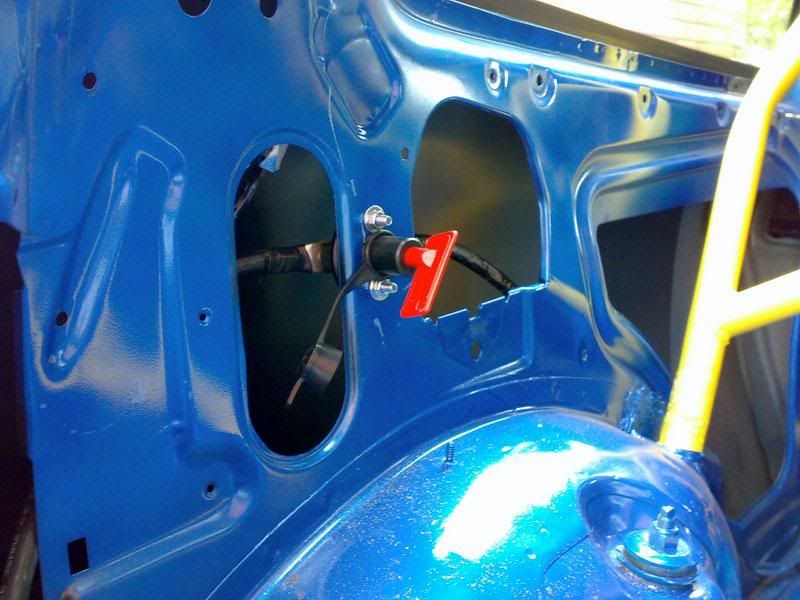
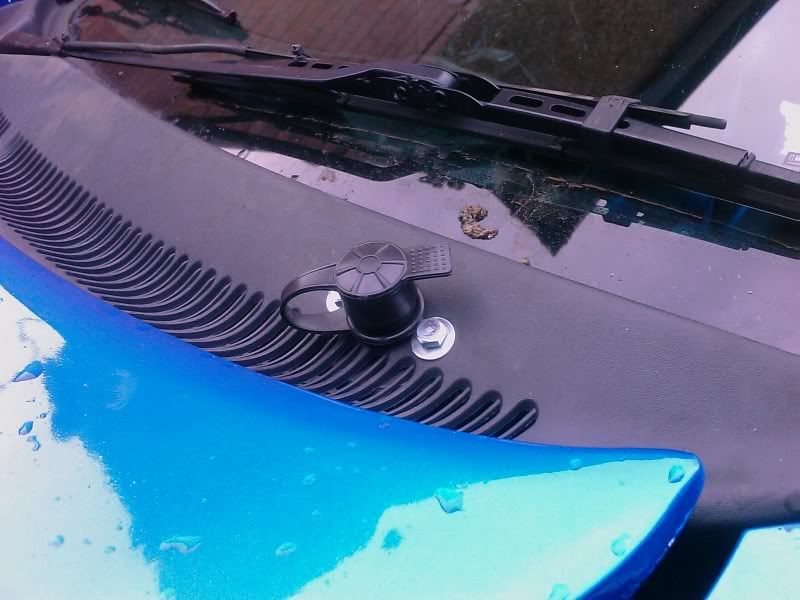
Decided it was time to get a battery cut-off switch; I never leave the battery on when I'm not using the car, so aswell as abit of safety, the idea is to make it quicker to re-connect the battery up. Abit of hole cutting and some wiring and we're done (and yes I know it's not FIA approved...)
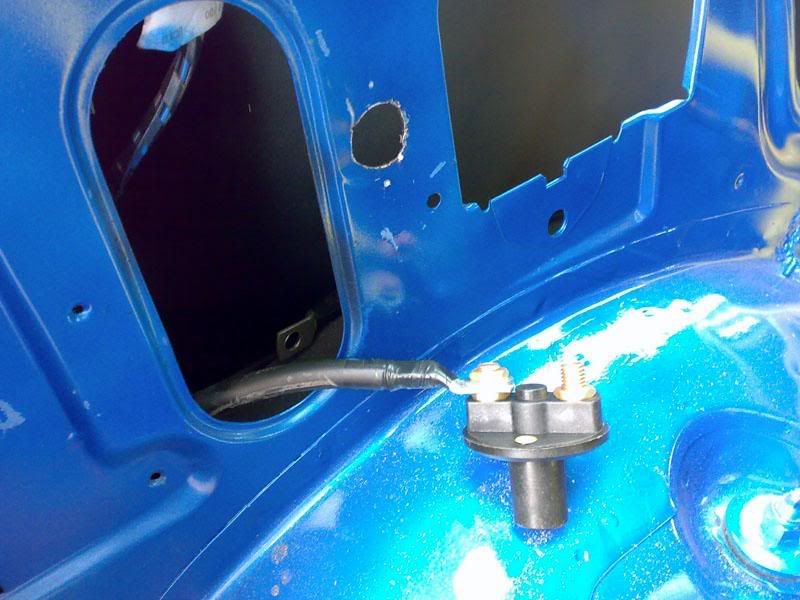
As the switch was now in place, I could put some proper bolts on my battery box
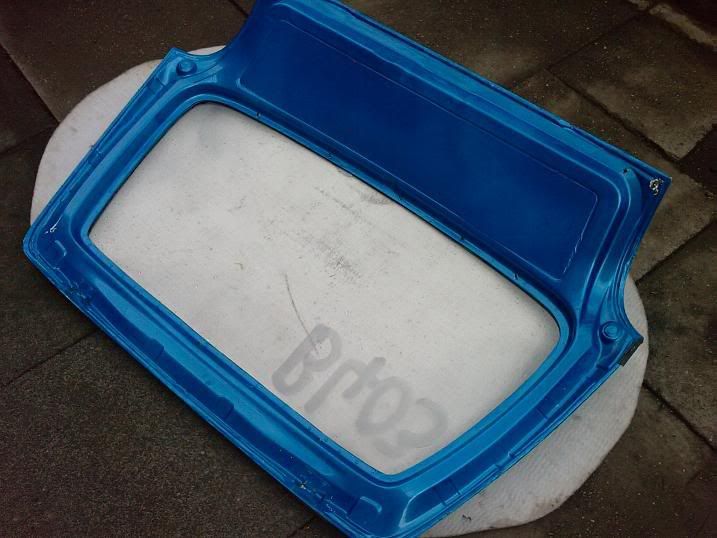
I picked up my grp tailgate from the bodyshop...
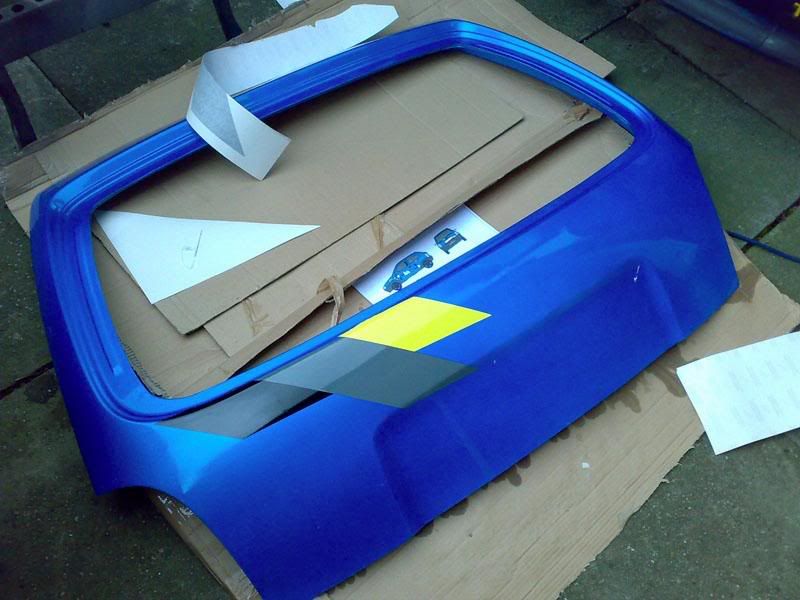
and fitted the last bit of livery to it
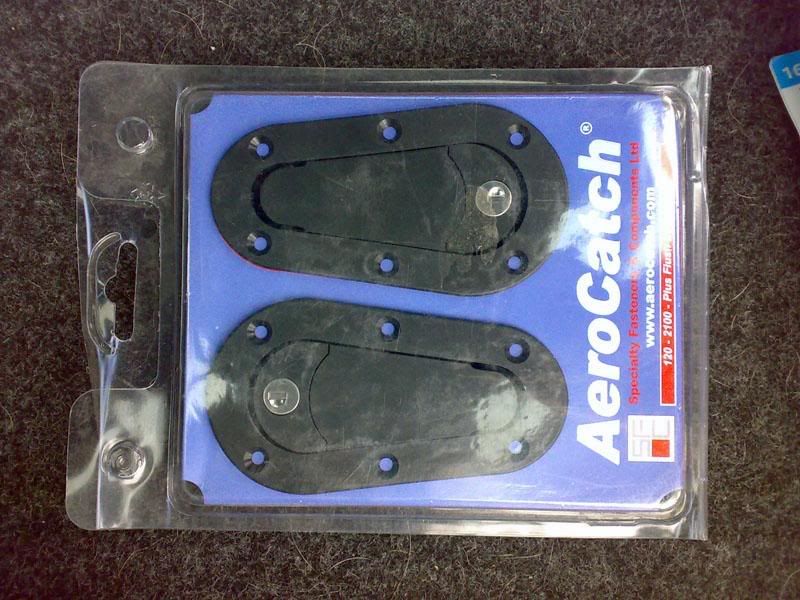
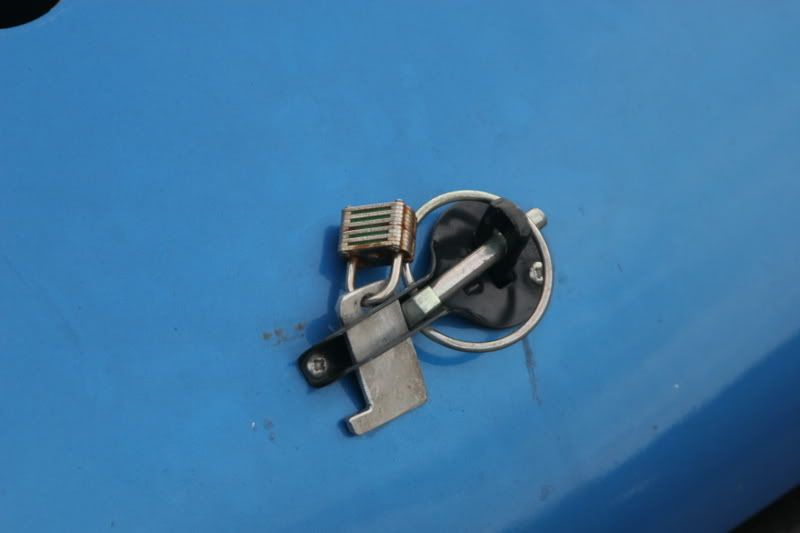
and then bought these to keep it all locked up with
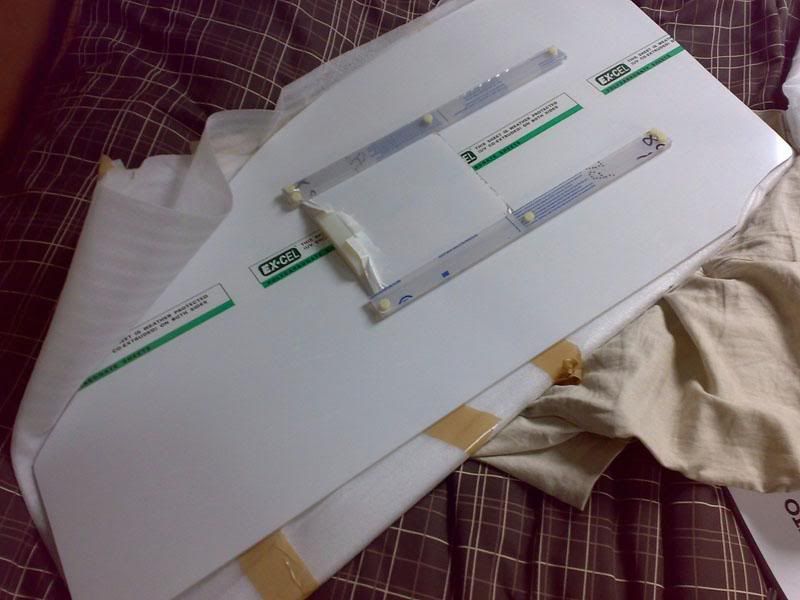
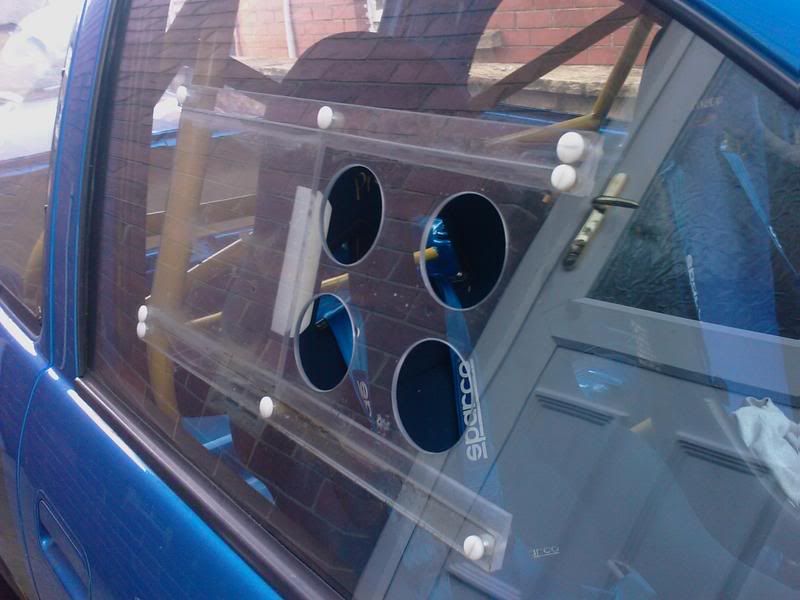
Then it was onto to this parcel
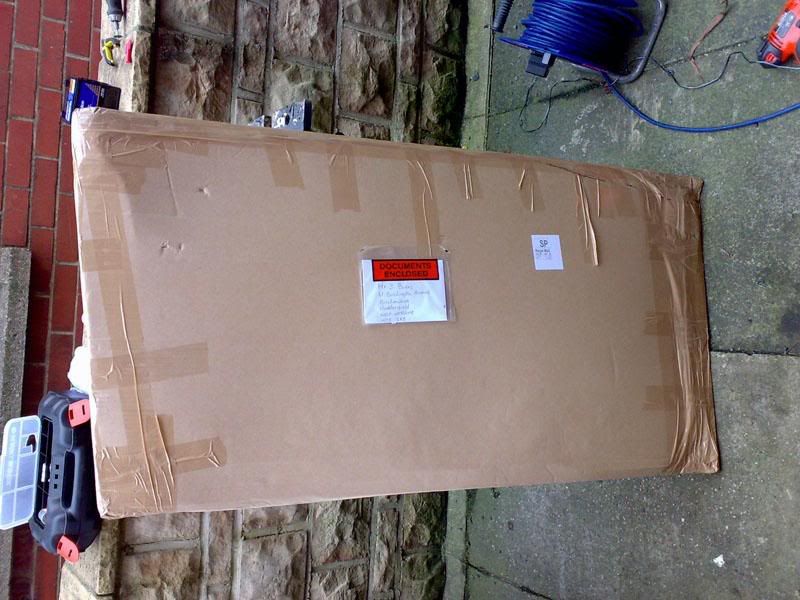
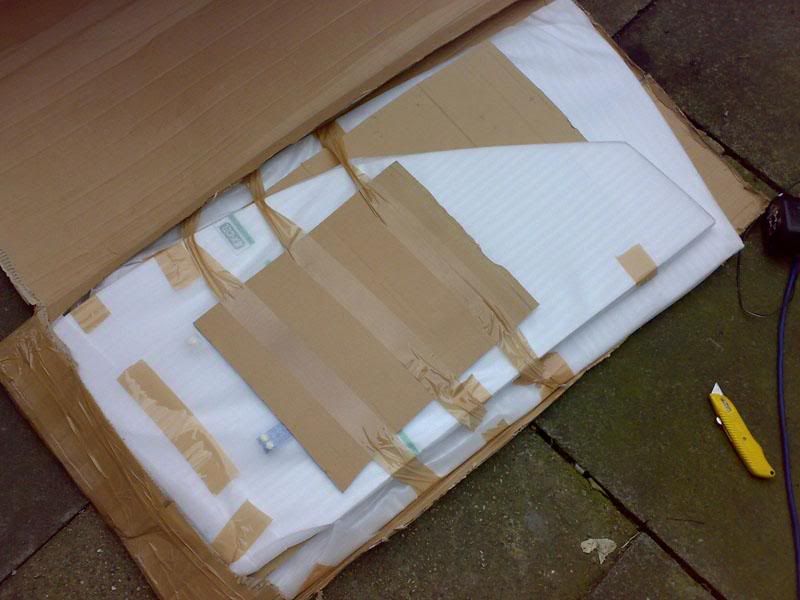
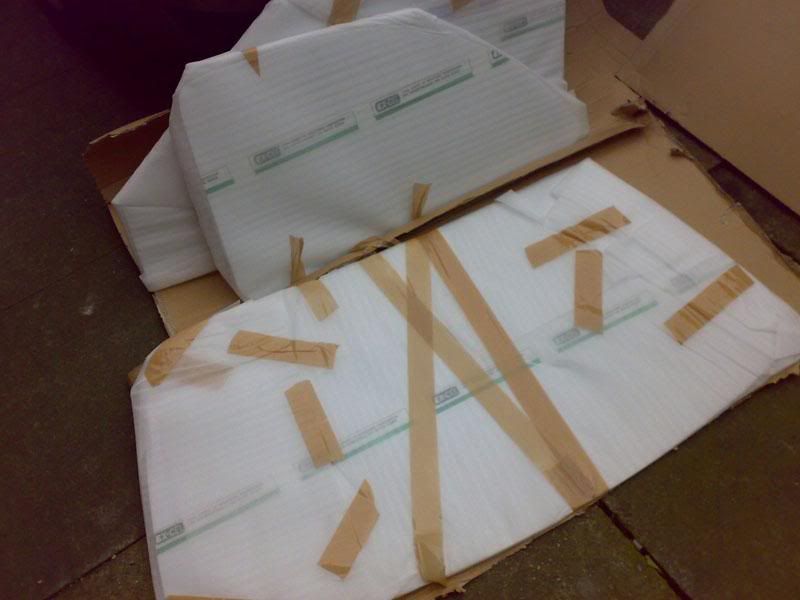
Started to fit it...
..then I got bored to gave up.
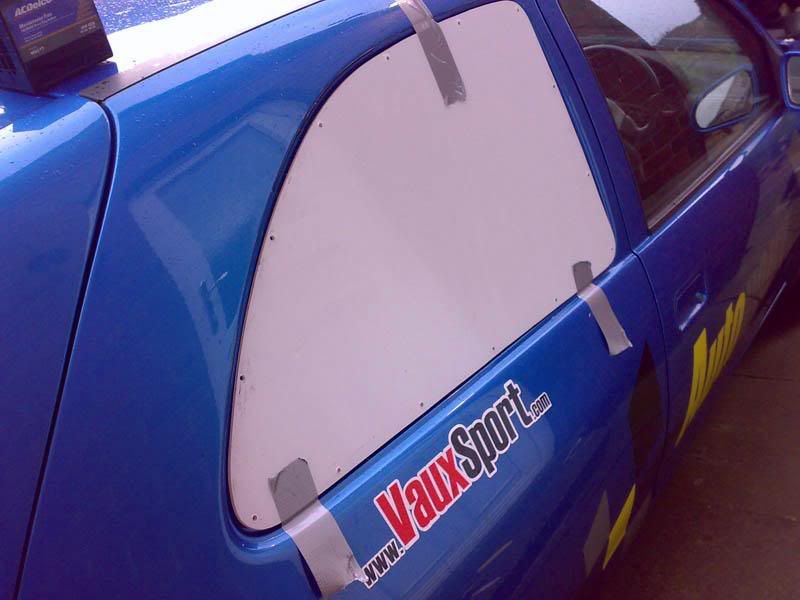
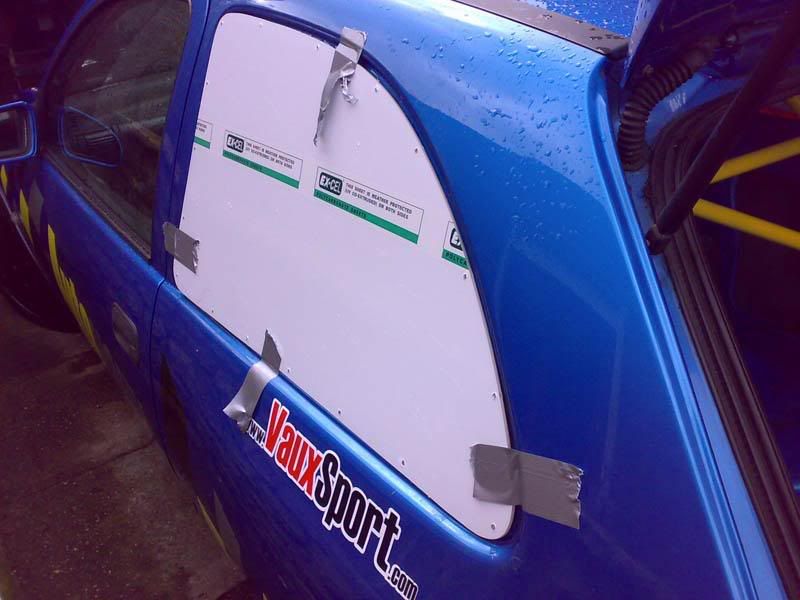
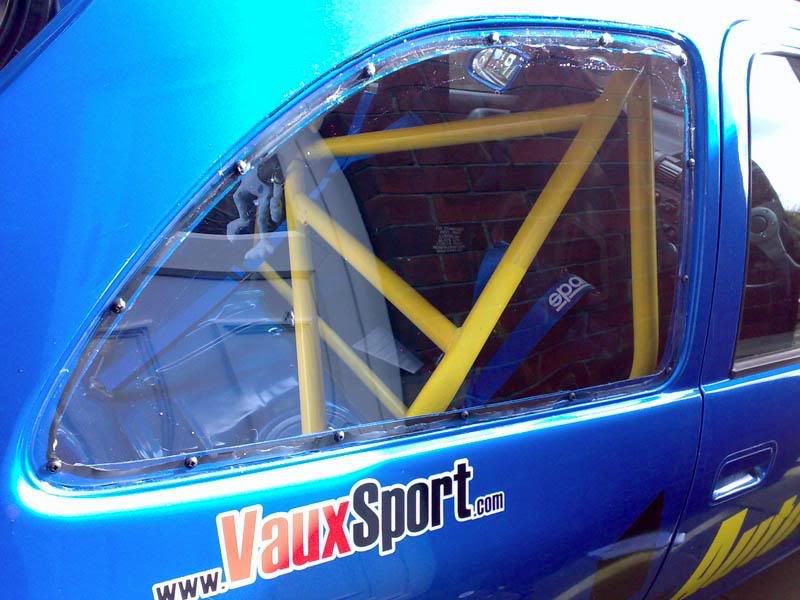
Final picture of the front polycarbs
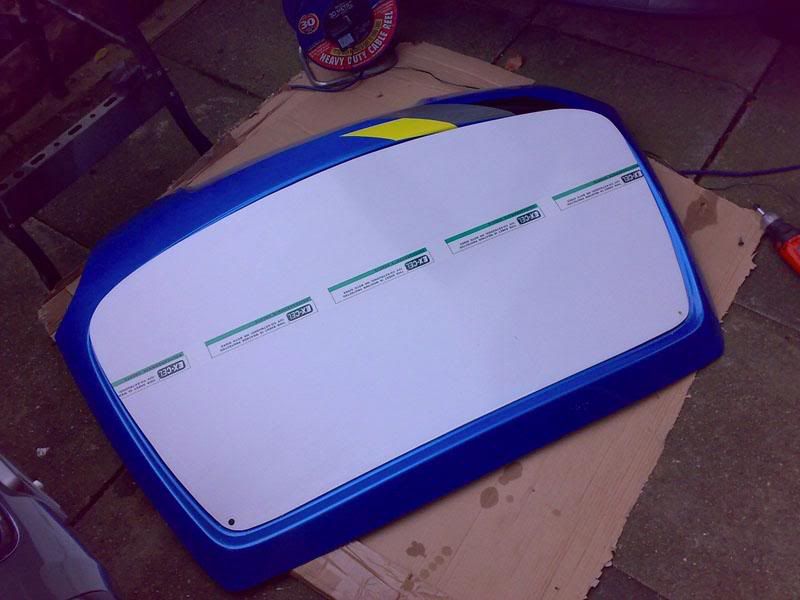
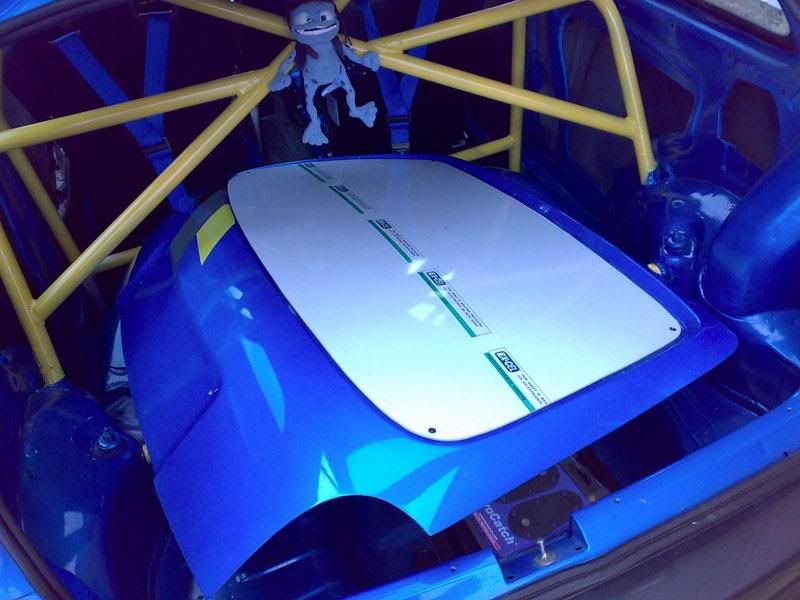
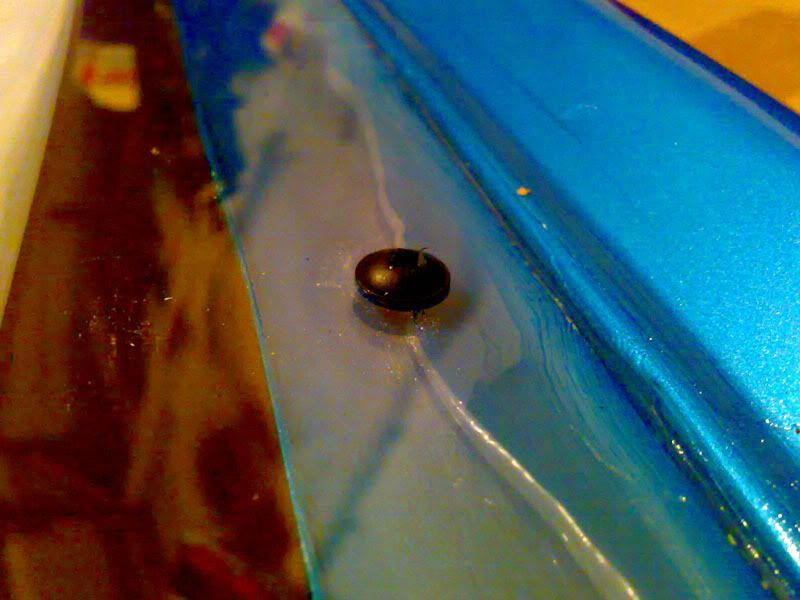
Managed to finish fitting the rear polycarb window this evening. I was going to paint the inside of the tailgate window frame black, and then do the same with the polycarb, but thought what the **** is the point, its a track car and isn't meant to be pretty. If being able to see abit of sealer really bothers me(although I doubt it will) then I'll take the entire tailgate to a bodyshop and have them mask the surround of the window and paint it in situ lmao
Fitted
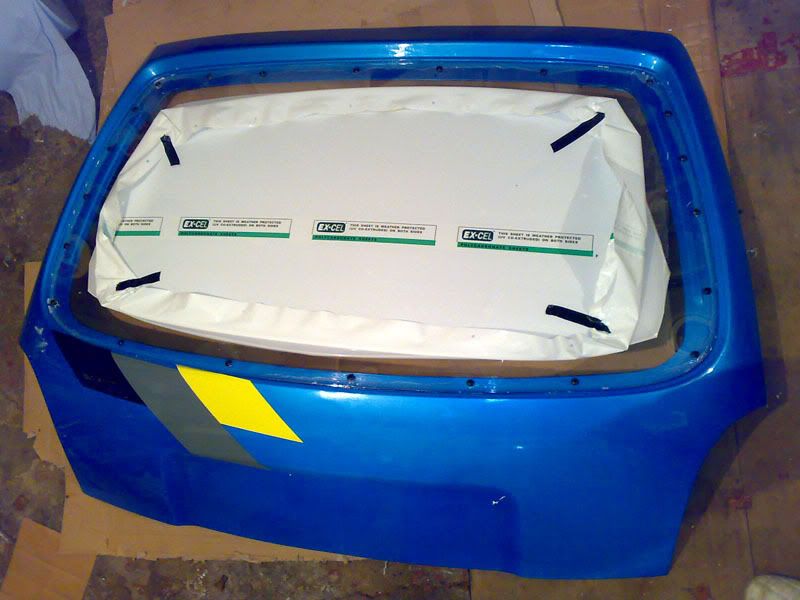
Closeup of Sealer Used under the Polycarb (modified rear seal will be put on to aid with waterproofness)
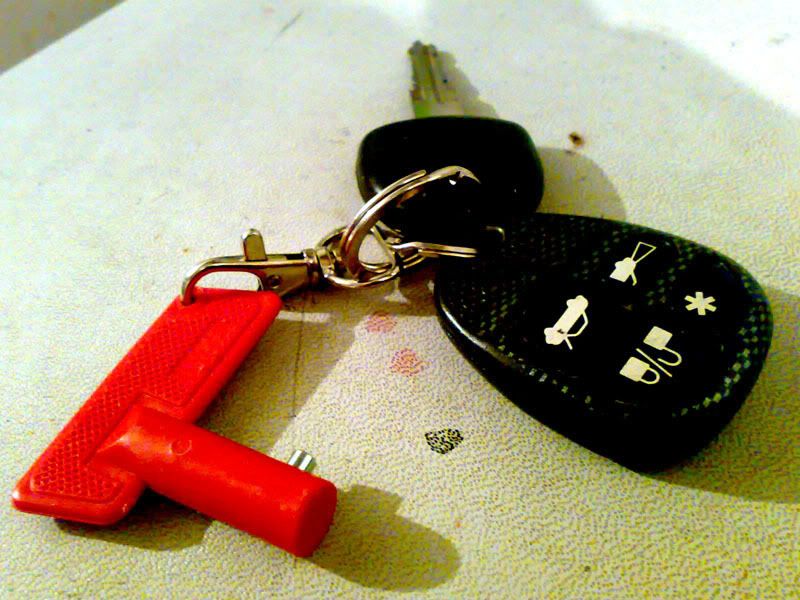
New keyring
Tailgate should be all fitted onto the car this weekend, along with (hopefully) the rear quarter polycarb windows:beer:
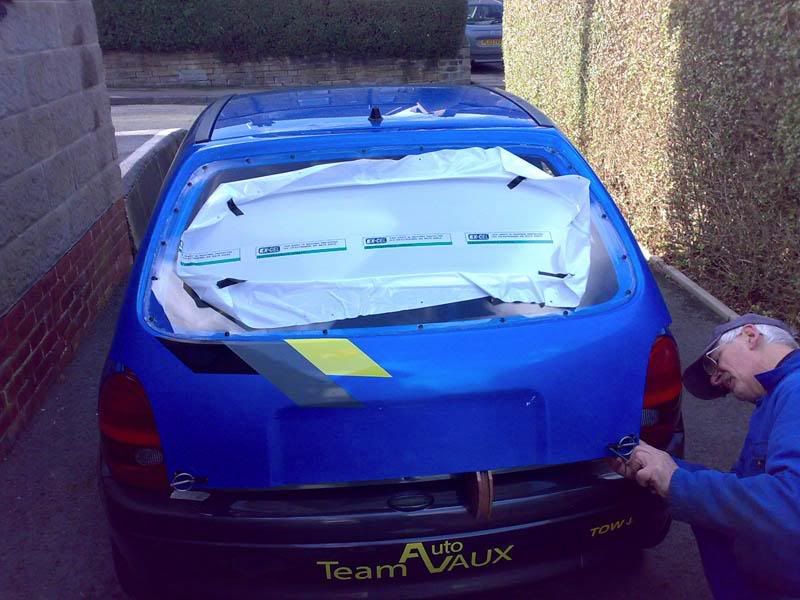
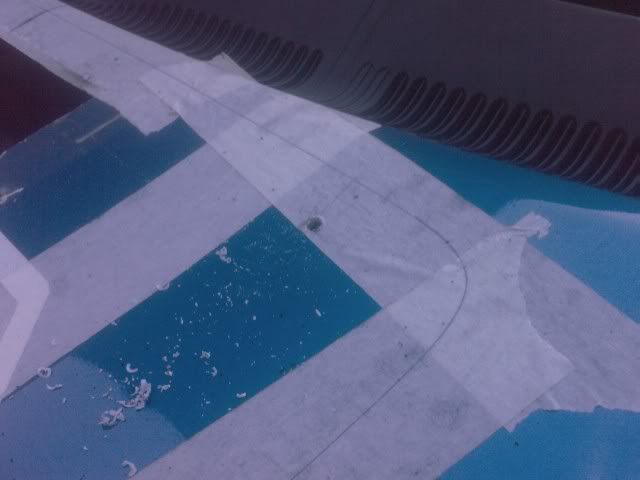
Yesterday was time to fit my rear polycarb windows and grp tailgate
I started with the rear windows:
Removed the outer seal and then cut through the bonding with cheese wire

Rested window on the car, marked up and drilled the holes in the new windows
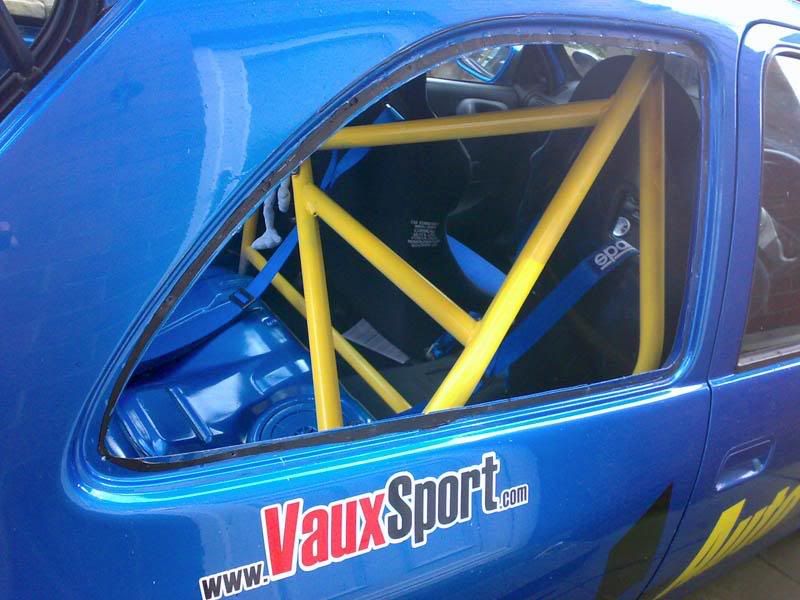
Pulled back some of the covering and screwed in the windows into the car
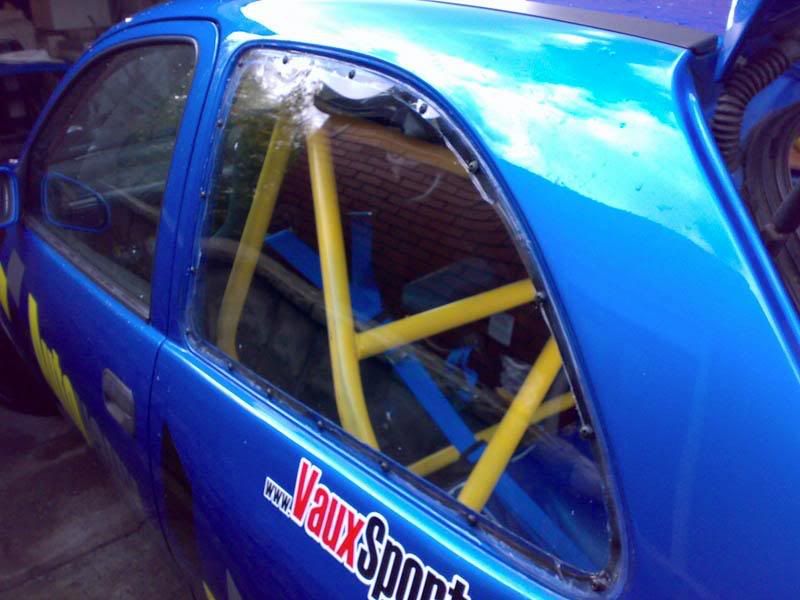
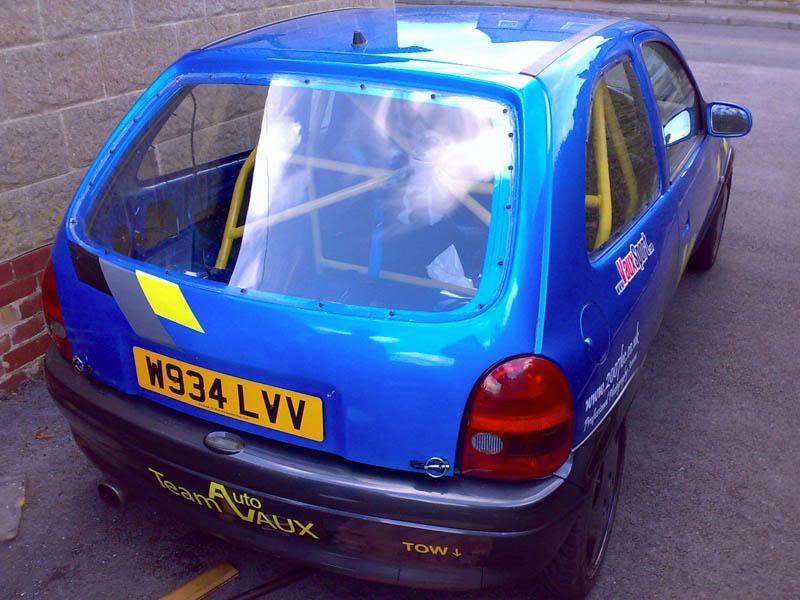
All Done
Then onto fitting the rear tailgate, I took it to my mates grandad again; ex engineer who really knows his stuff and would obviously make a lot better job of it than I would LOL
Old one removed...
New One bolted on without issues
All finished and mounted with pins Can't believe how light it is :beer: not very impressed with the paintjob on it, so it might get returned to the bodyshop yet to be redone
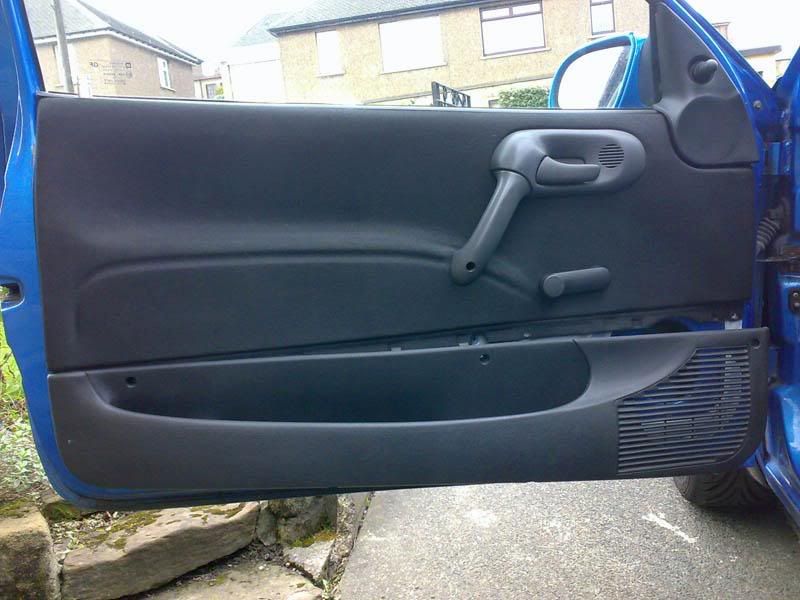
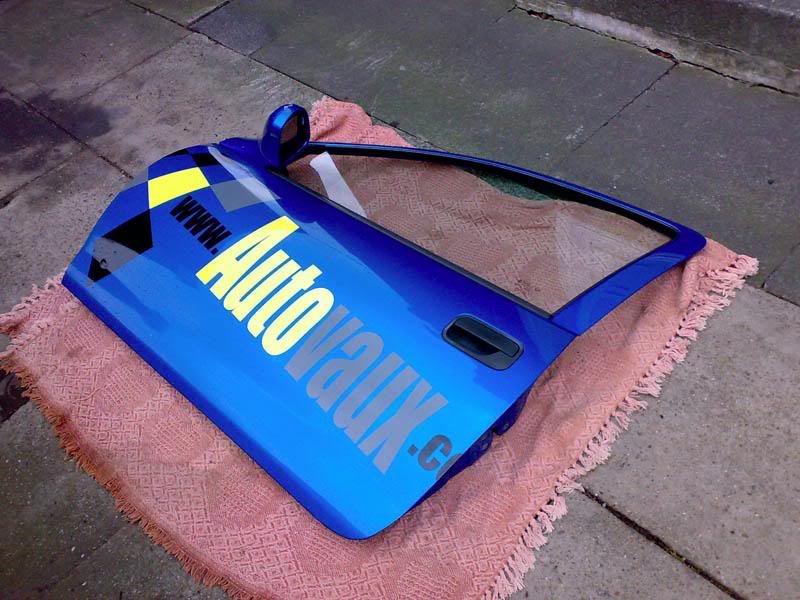
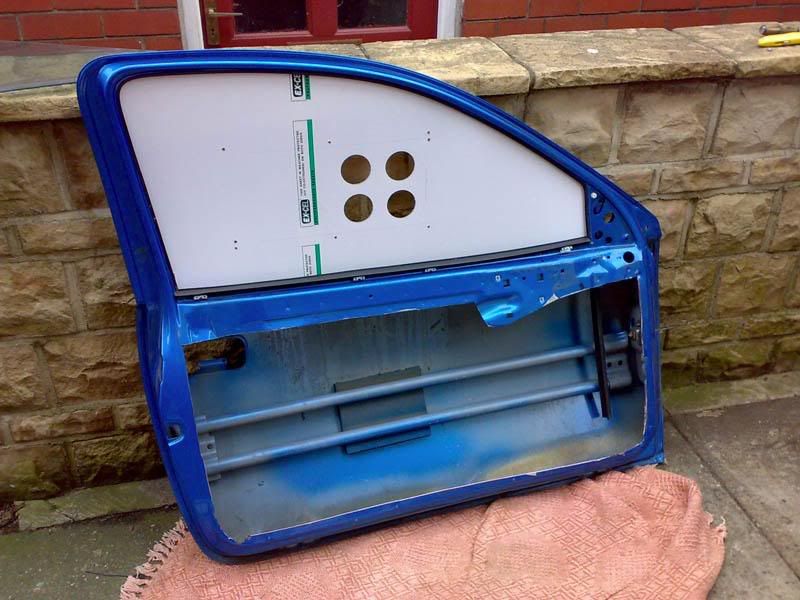
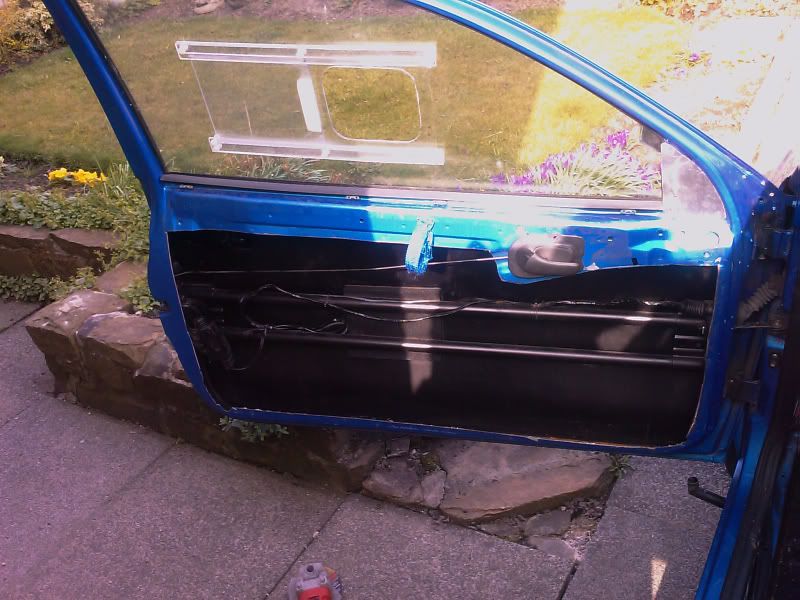
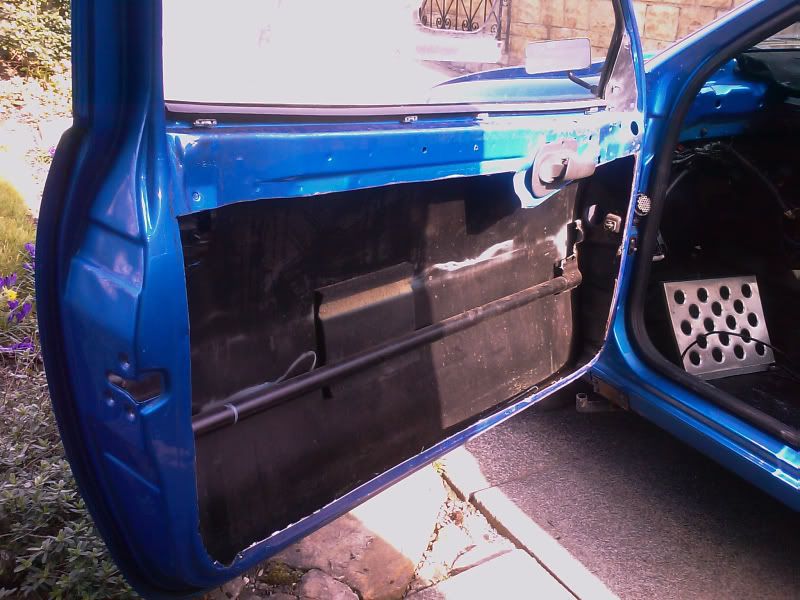
Onto the front ones next weekend I hope, just need to gut the front doors first
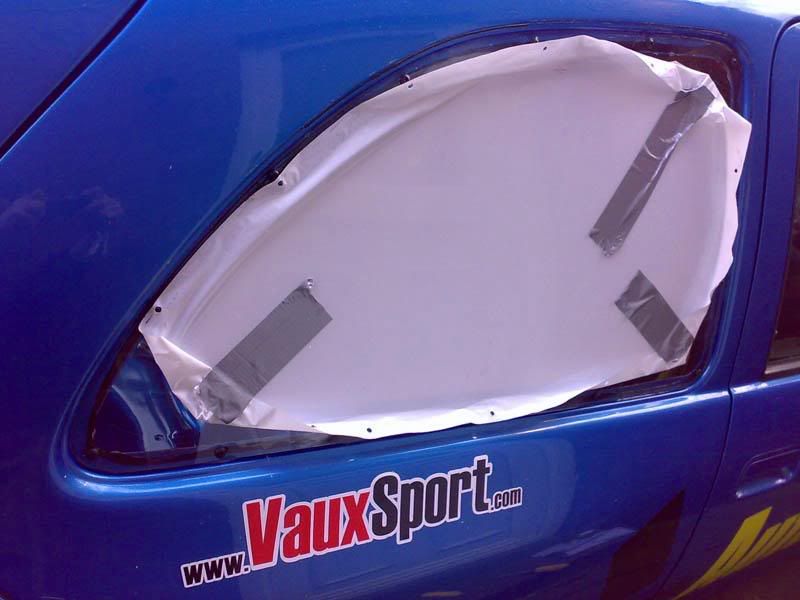
Just flat, forms itself when its fitted really.
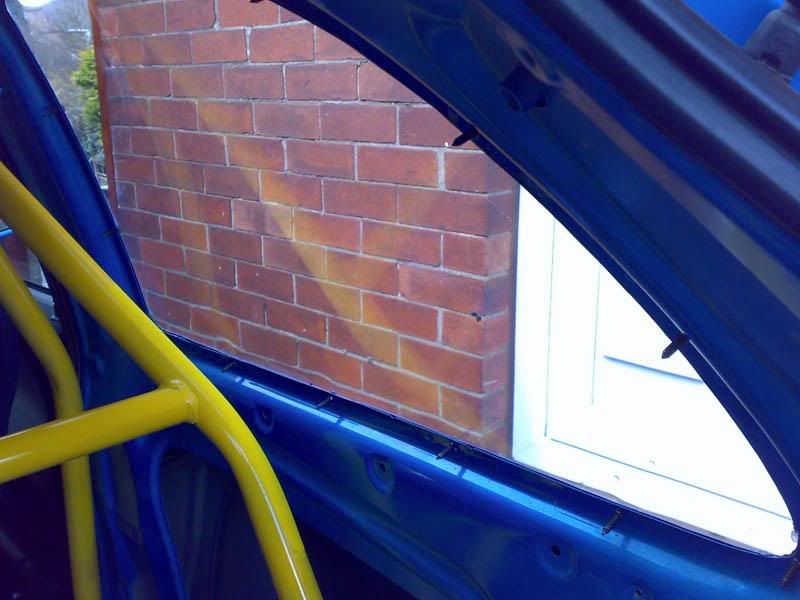
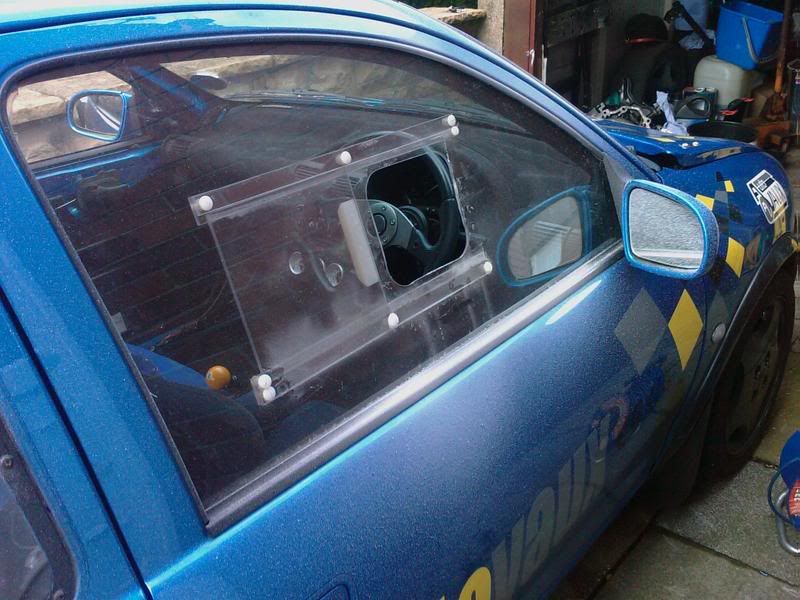
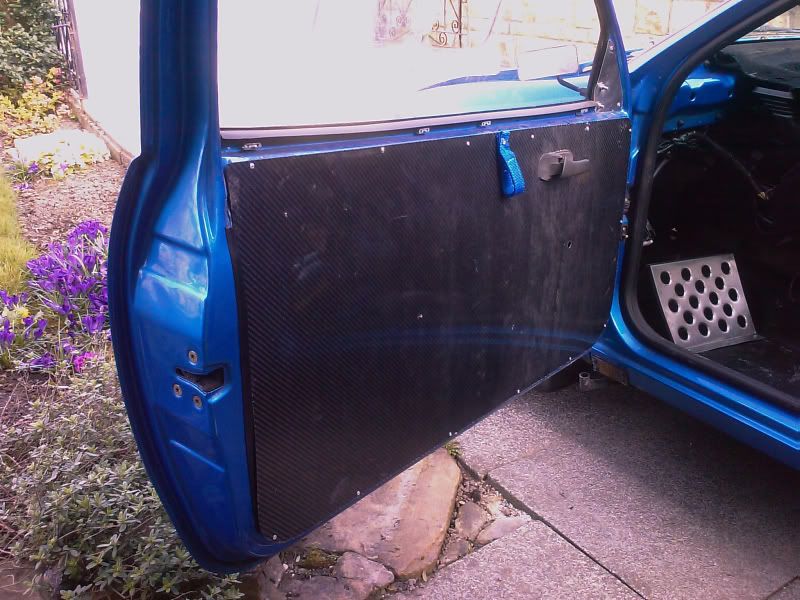
Today it was time to fit the front polycarbs, went steady away with the passenger side first. Won't bother showing the drivers side pics, as it's the same, just a different side lmao
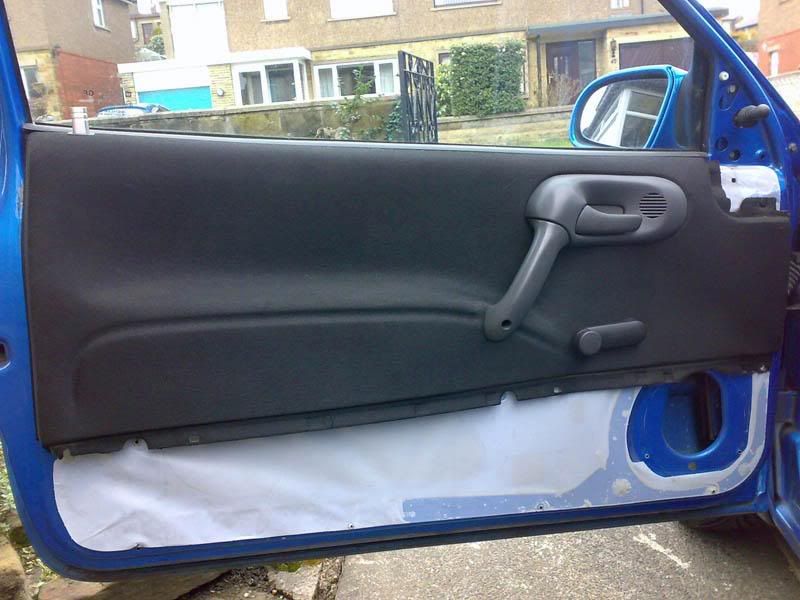
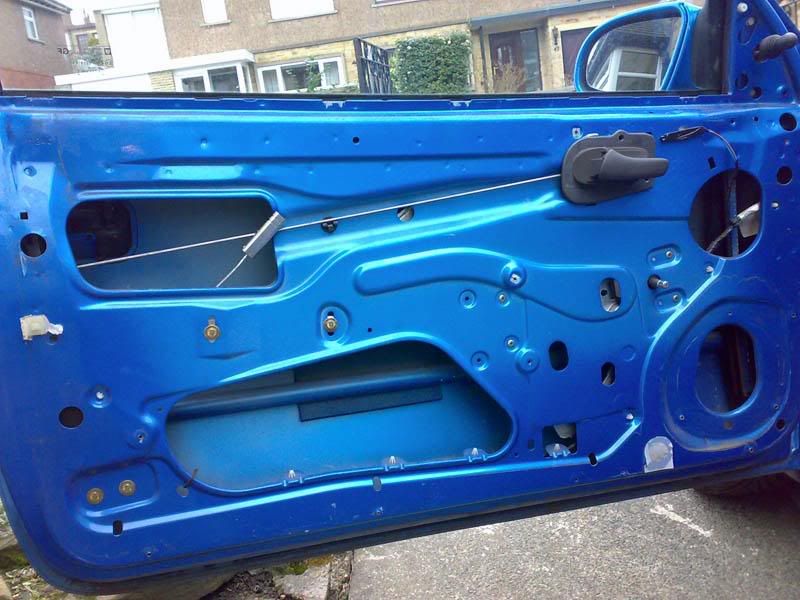
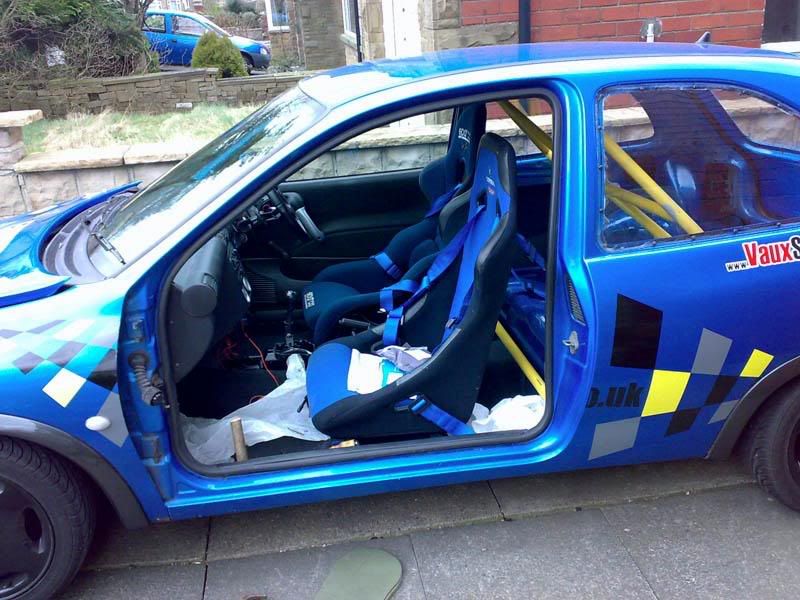
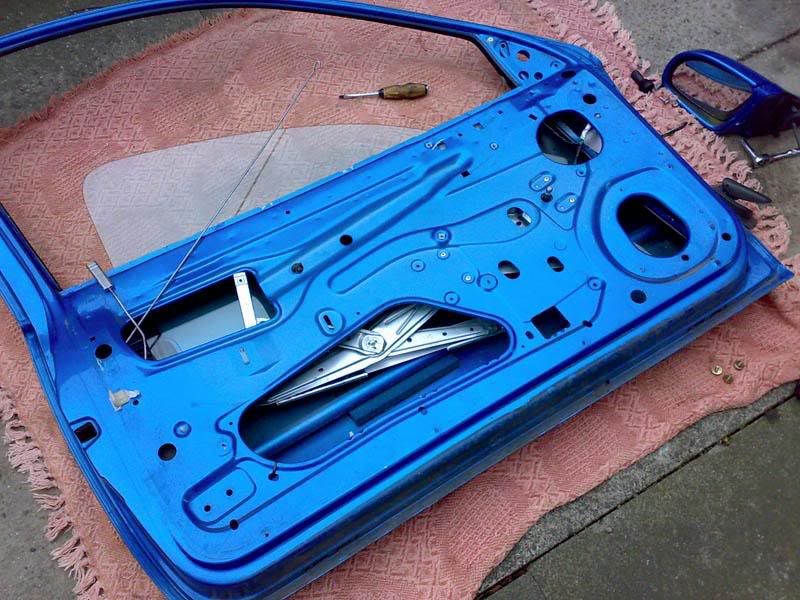
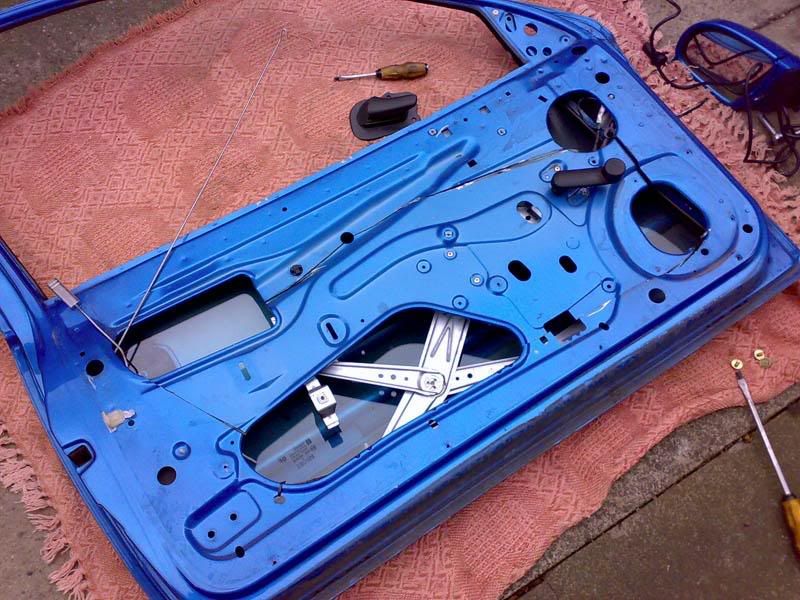
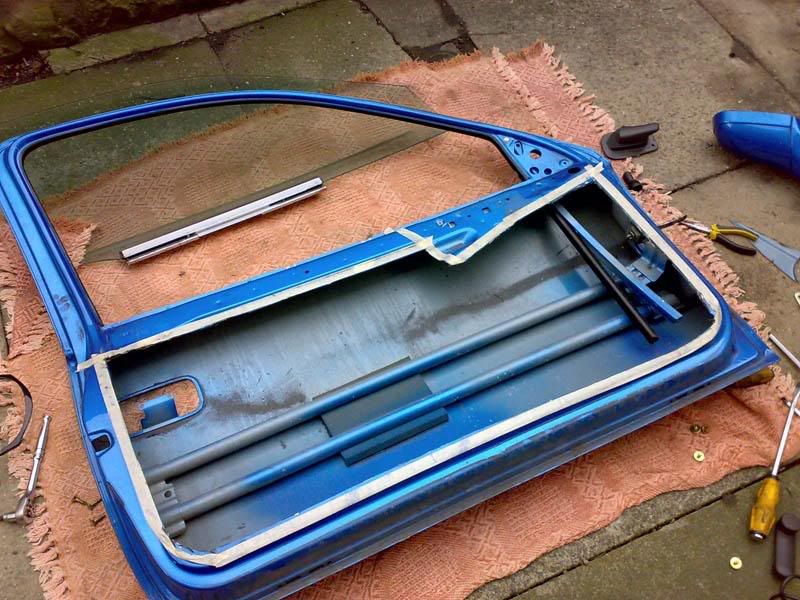
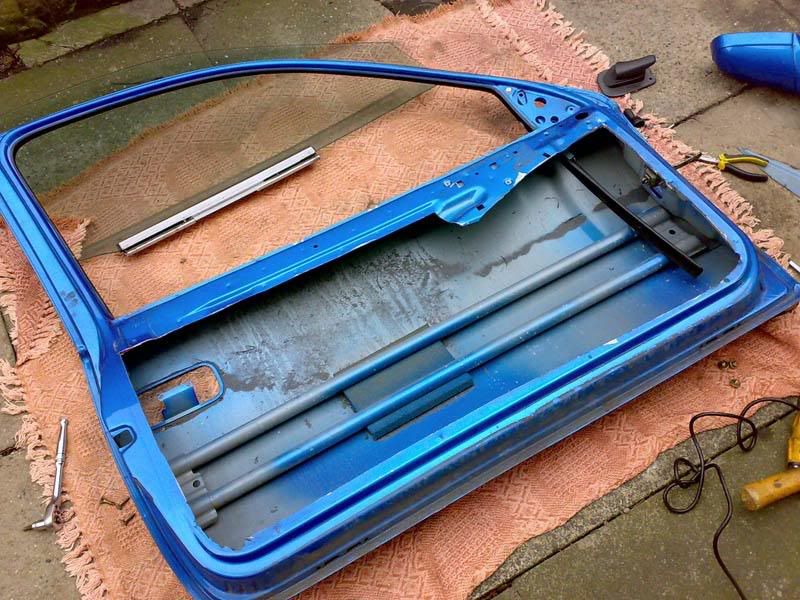
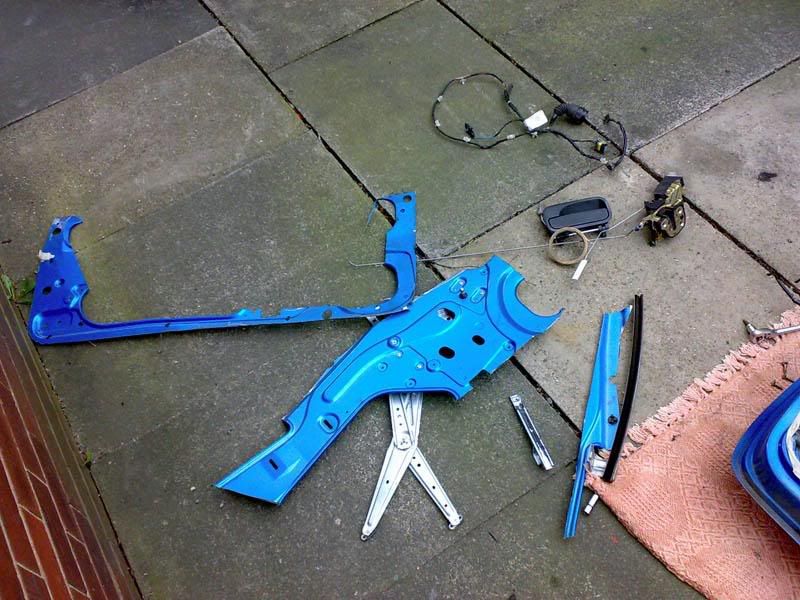
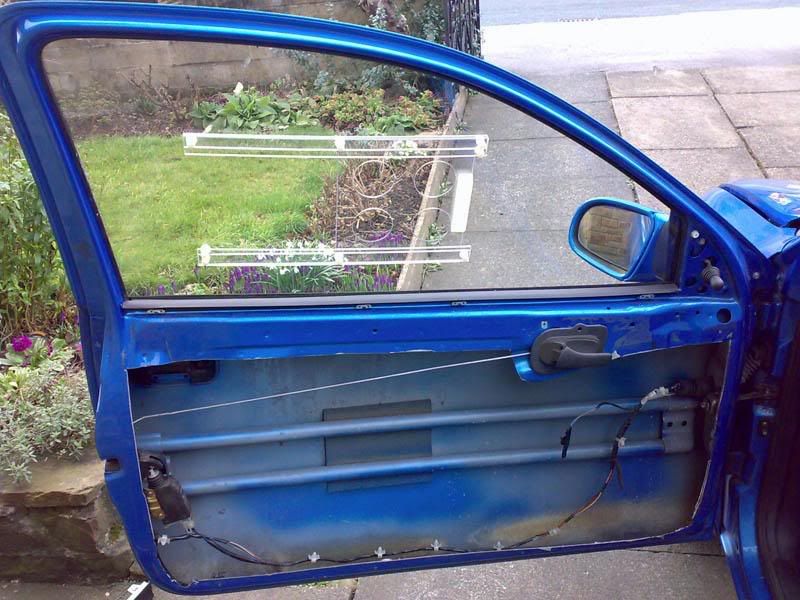
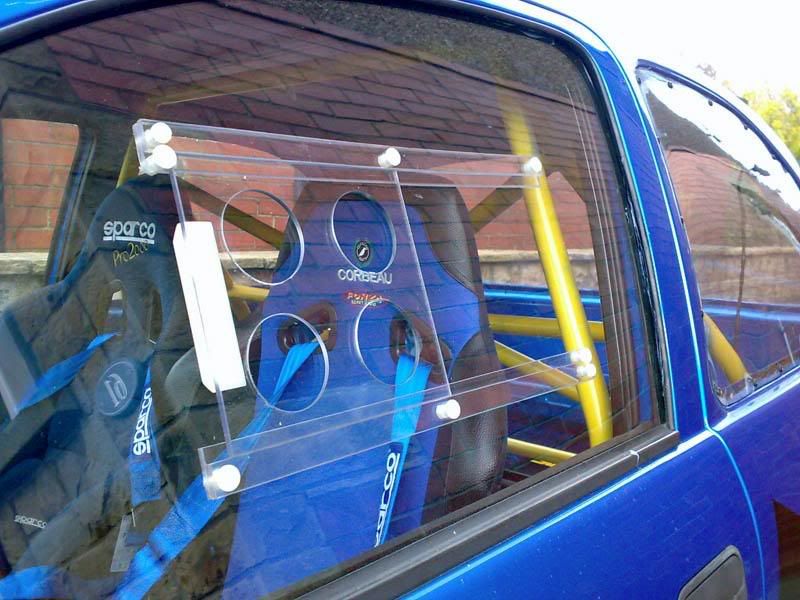
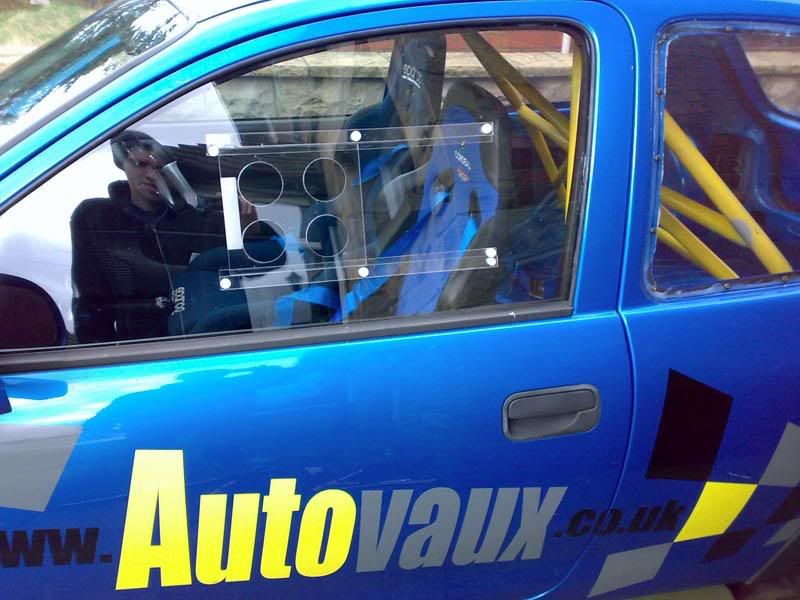
All done I will be removing the door bars when the rest of the cage gets finished later on this month; it won't take long Inside of the doors will also be painted, and the 'edge' where I've cut will be getting a rubber edge fitted to it tomorrow.
Oh, and my bargain cams arrived too
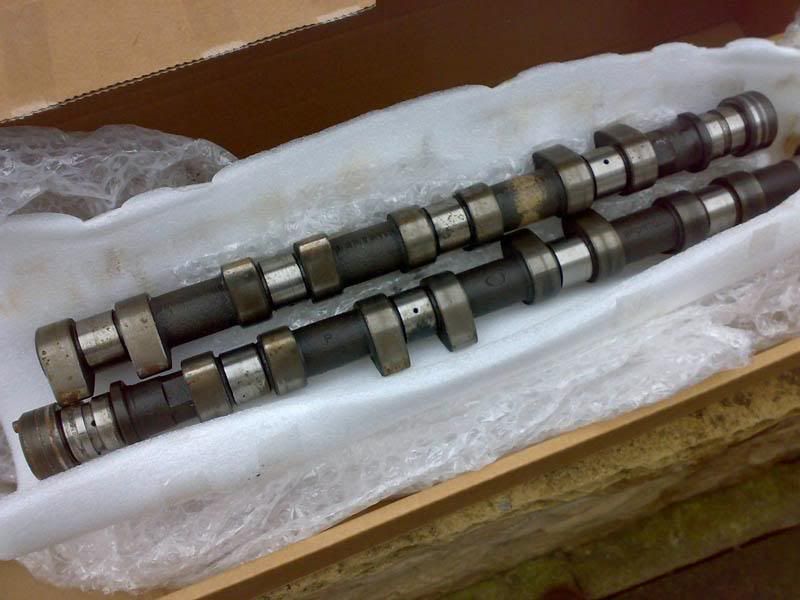
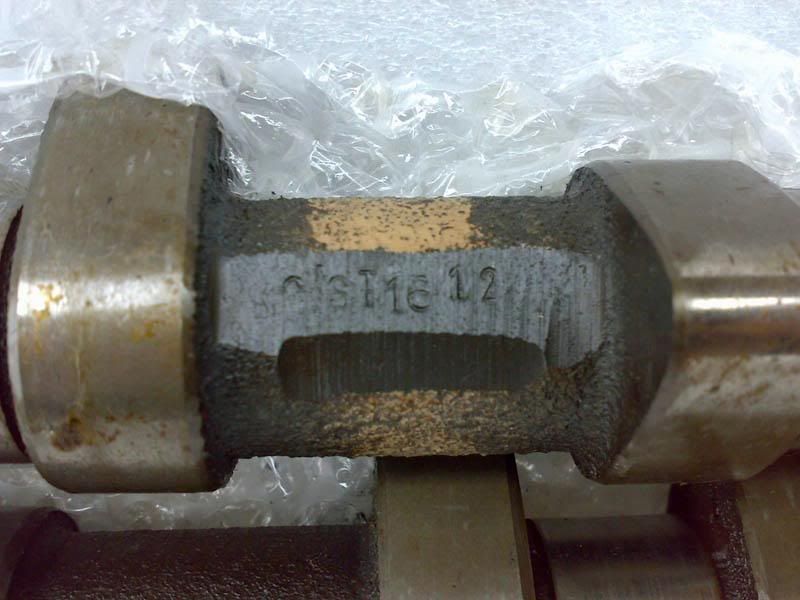
No further updates really, bar the cams being fitted.
I took the car to be weighed yesterday morning. I was hoping for sub 800kg but was sadly over-estimating
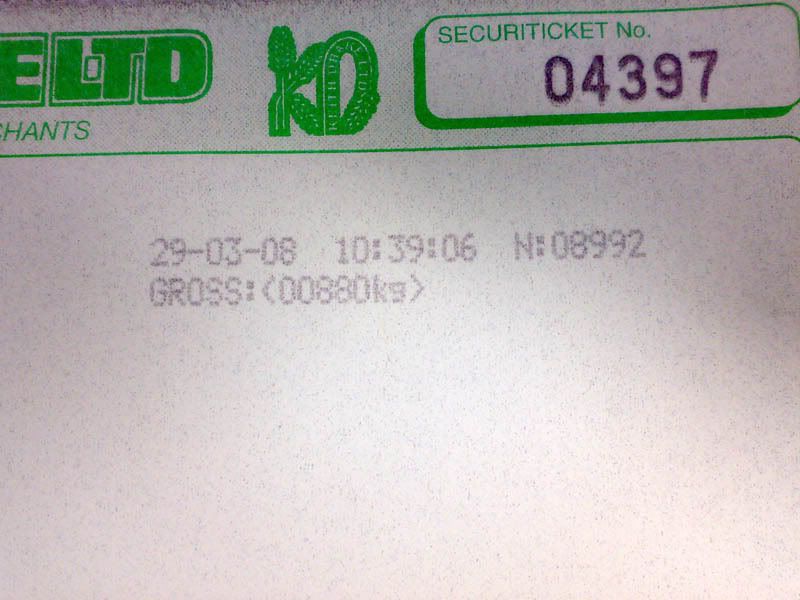
Total weight with half a tank of fuel was 880kg. Therefore, I guess I need to carry on loosing weight off the car :doh: It has amused me massively though that all these people with 'stripped' out corsas are probably still well above 1000kg!
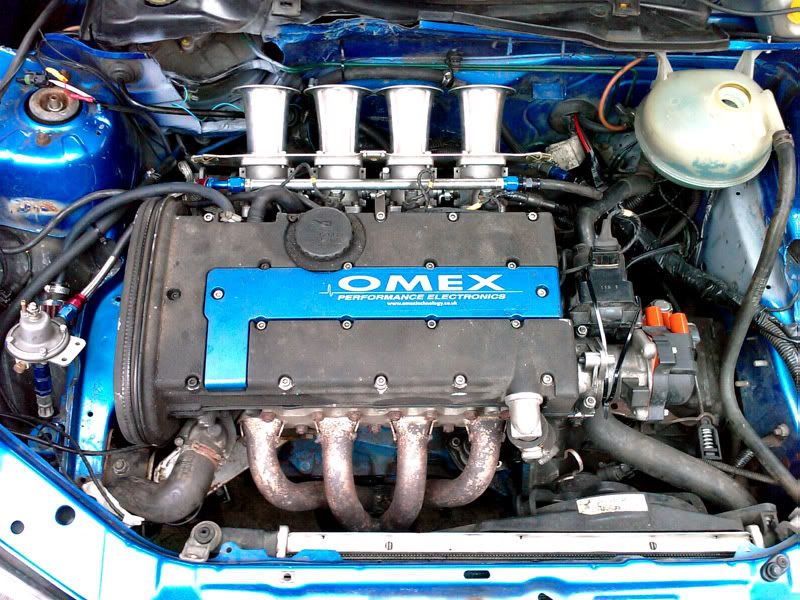
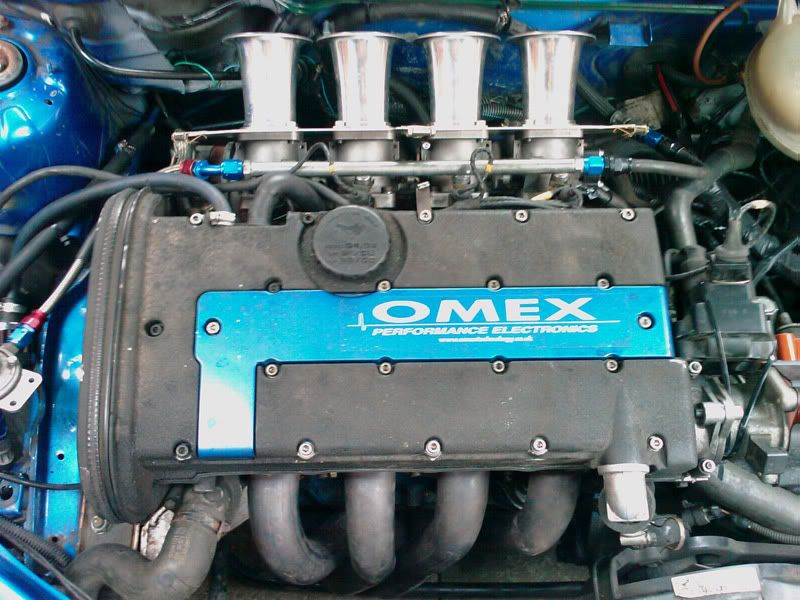
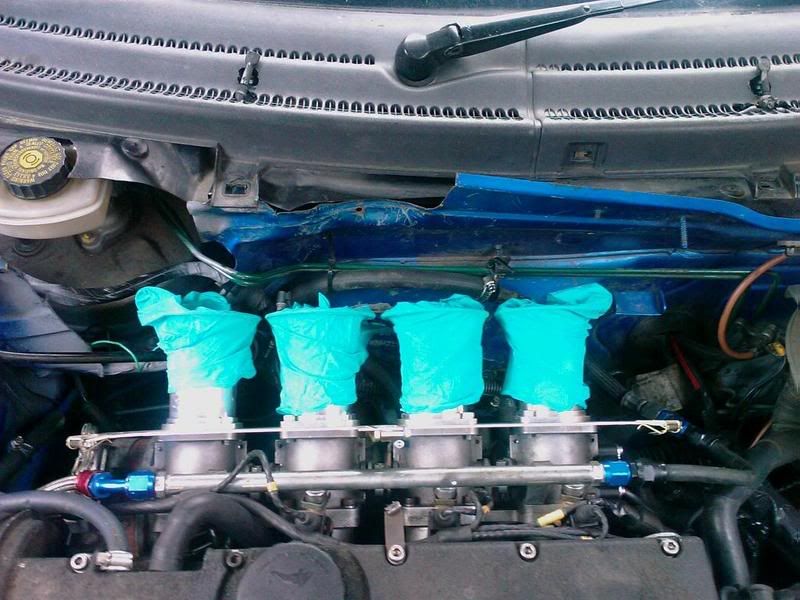
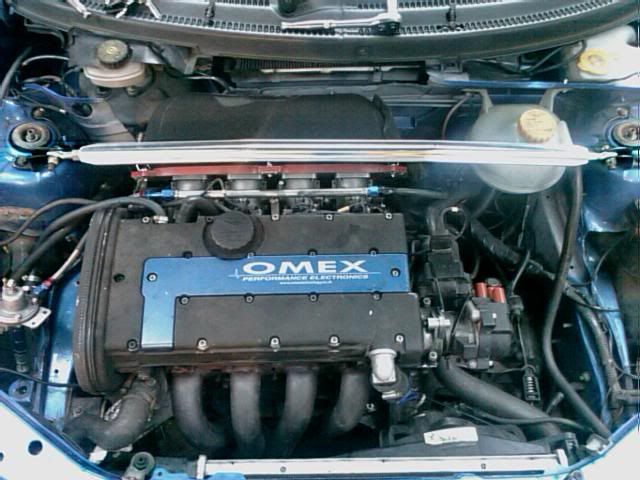
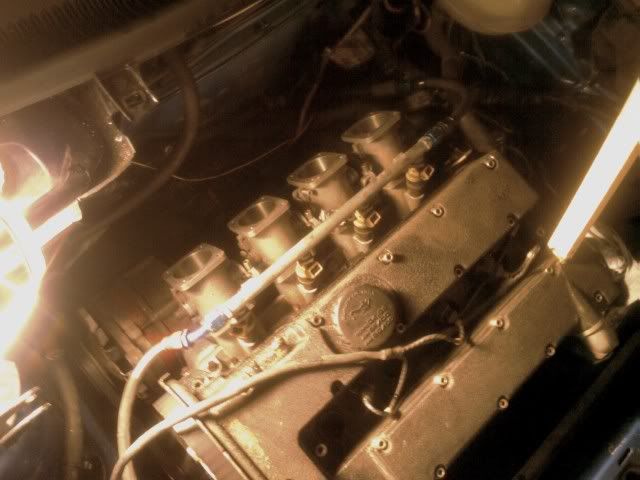
Well, over the past couple of days I've had the ECU light coming on - "Co Potentiometer - Voltage High". I know this is most likely to be the airflow meter, but I did what any self-respecting XE owner would do to cure the fault once and for all; throw away all the motronic **** and get MBE with some Throttle Bodies
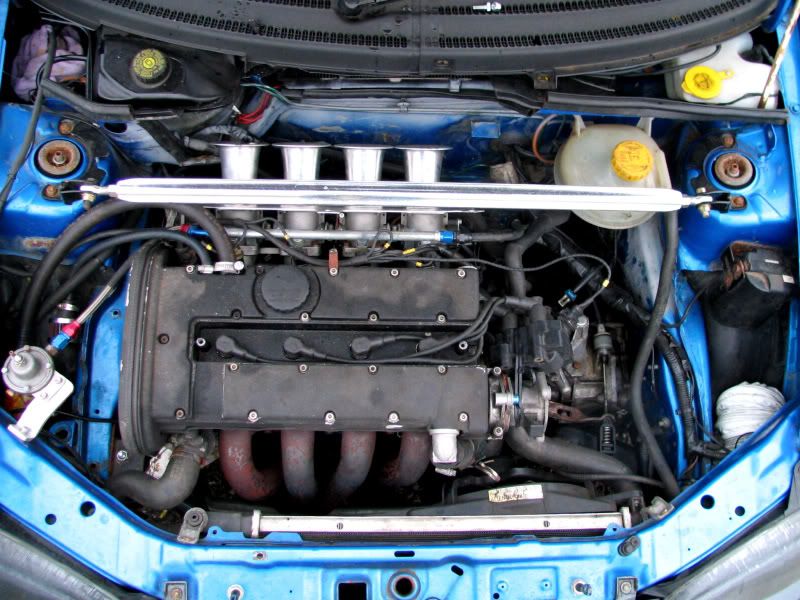
The kit I went for was the SBD TP208 kit It arrived earlier in the week (Massive thanks to JamieF :beer: :beer: ) and I started fitting it yesterday evening.
The Start
The Middle
Bit Removed:
Bodies Built Up
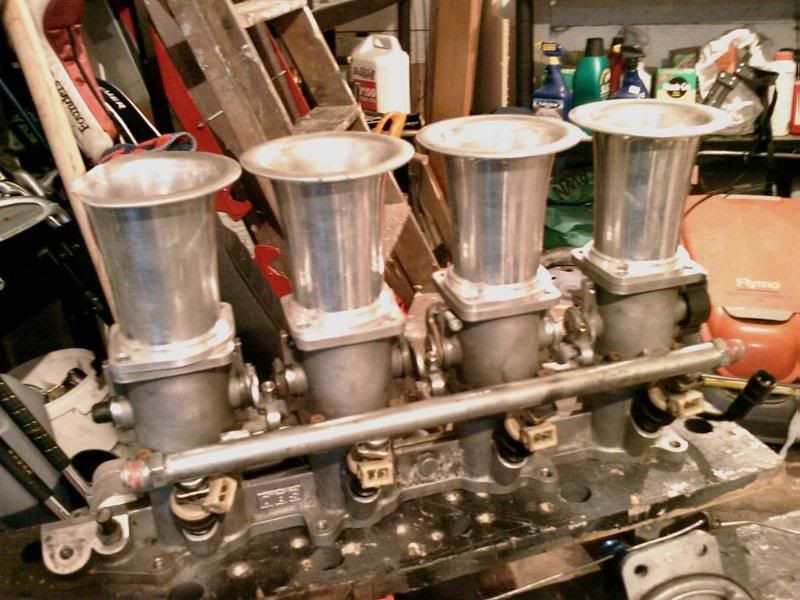
Fitted to the Car
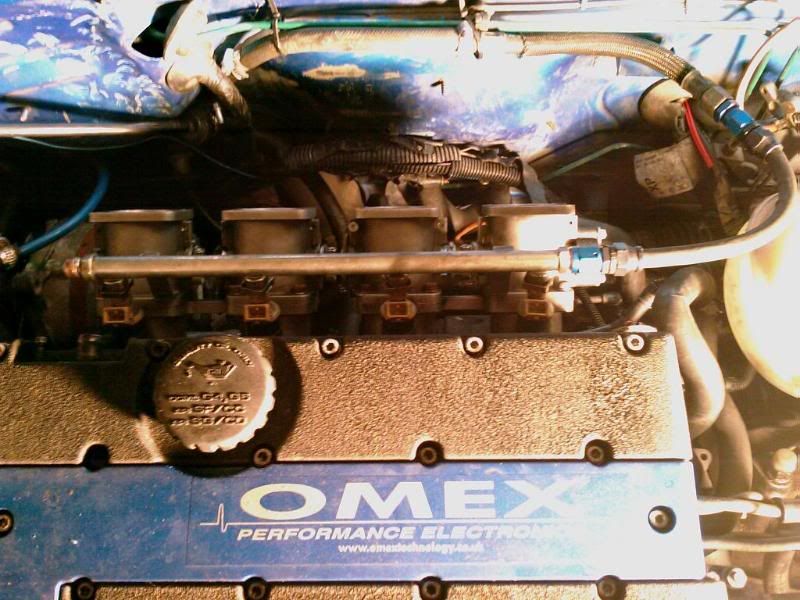
Aeroquip Fittings were an un expected bonus
That's where I got up to last night, will have it finished by the end of Saturday :beer:
Oh, I also got an SBD TypeC Hi-Torque manifold too
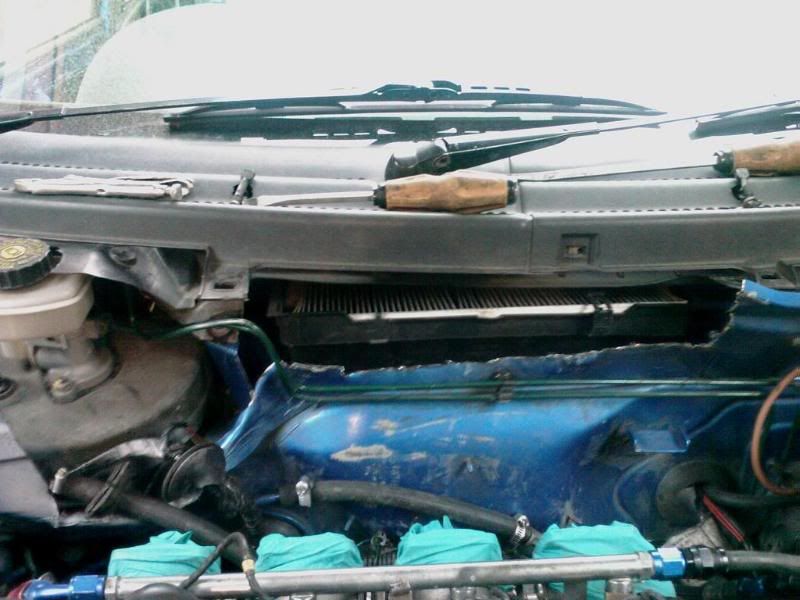
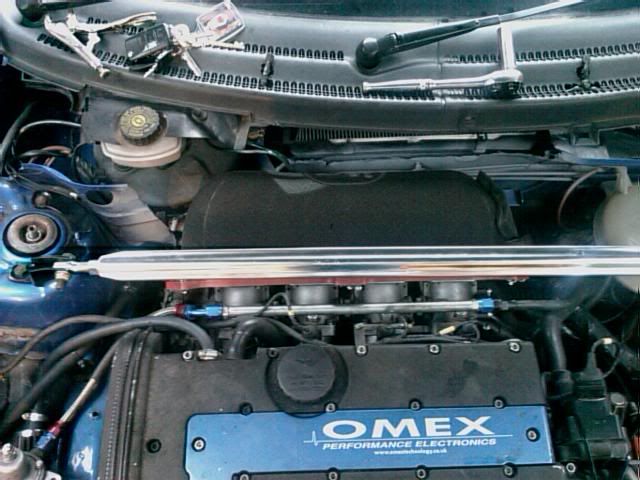
Got up early today to get everything else finished off.
Because they're tapers, and because I have a late (v-grill) style corsa, the left trumpet was catching on the firewall. I smashed the **** out of it earlier in the day to get it to fit, but it was still abit close. So I needed to chop a hole out for clearance
Not the prettiest; but it works so I don't care

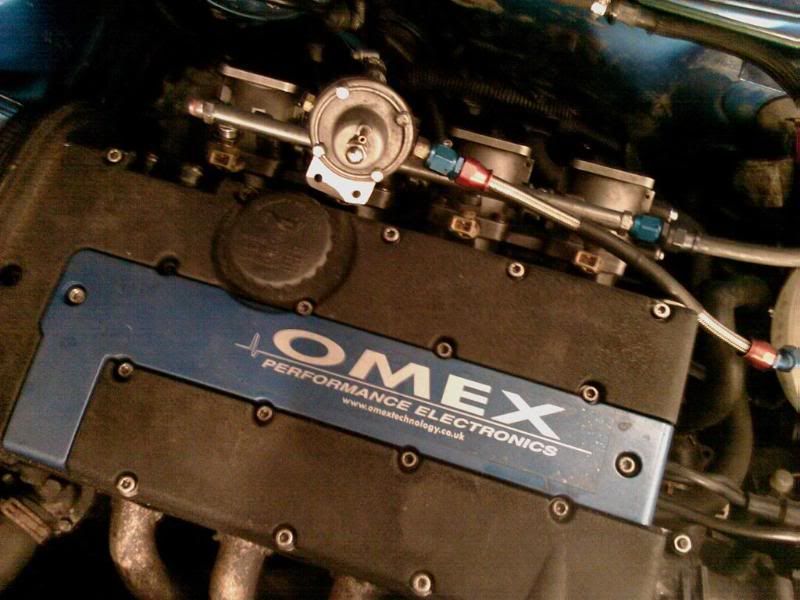
Standard throttle cable attached to SBD setup
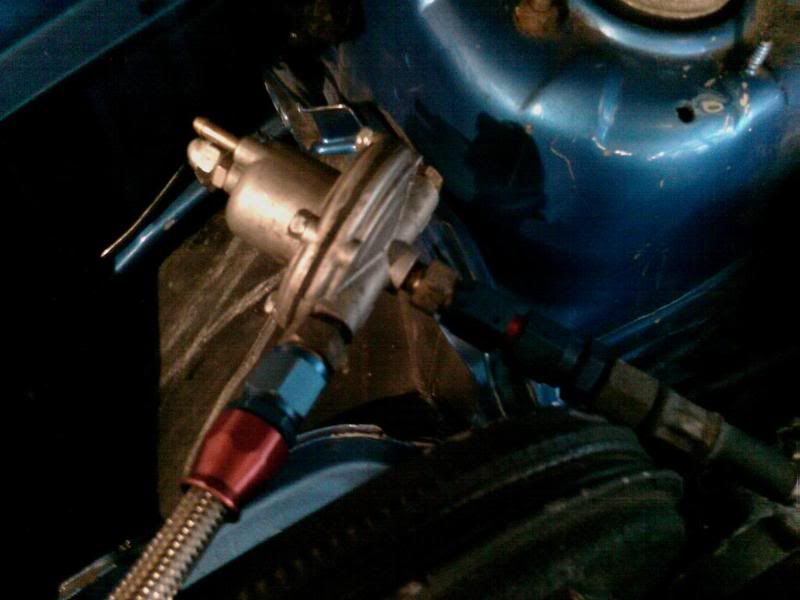
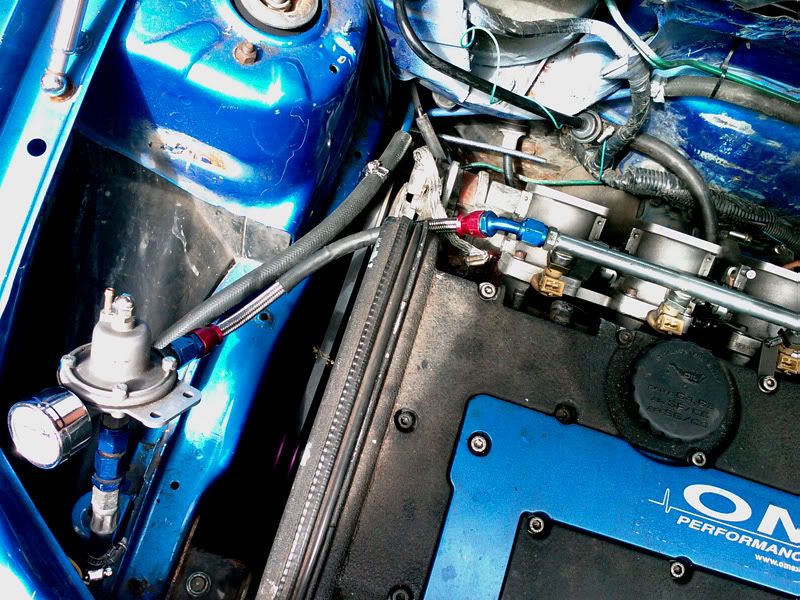
Fuel Lines all plumbed in - bracket for FPR will be made next weekend.
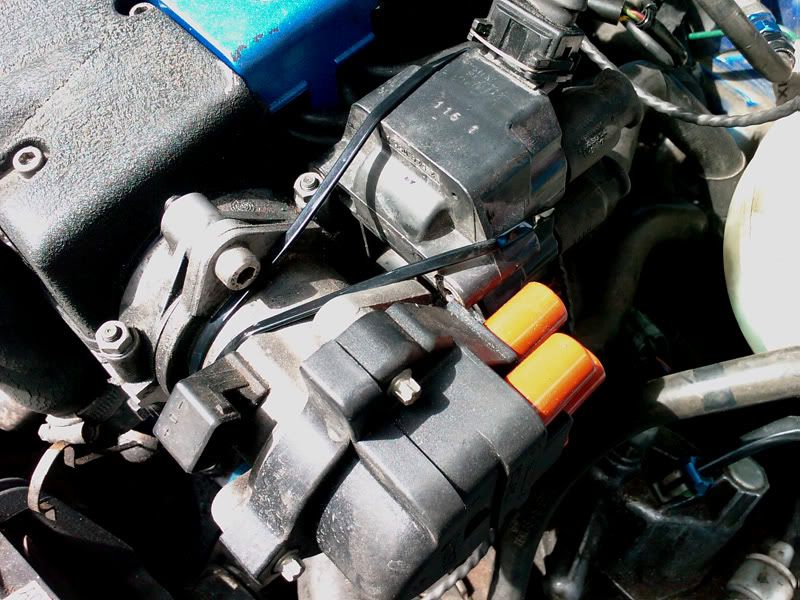
Coilpack 'bracket' made 
Wiring
Finished
All complete, started first turn of the key
Small video, gotta love lazy tappets when an XE's cold
Will be fitting the manifold one night next week, then need to get booked in for having the rest of the exhaust system made, and then the mapping 
Loads to do
|
DaveB
Member
Registered: 29th Dec 00
Location: Huddersfield
User status: Offline
|
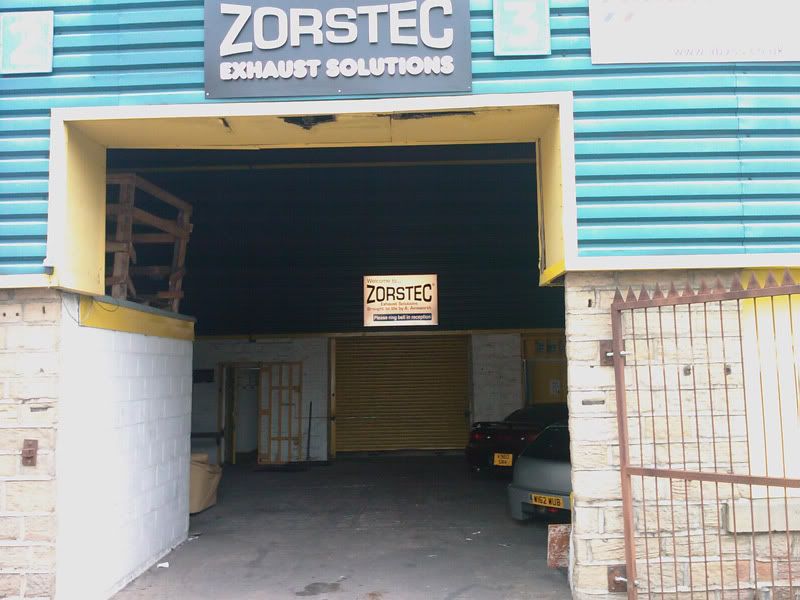
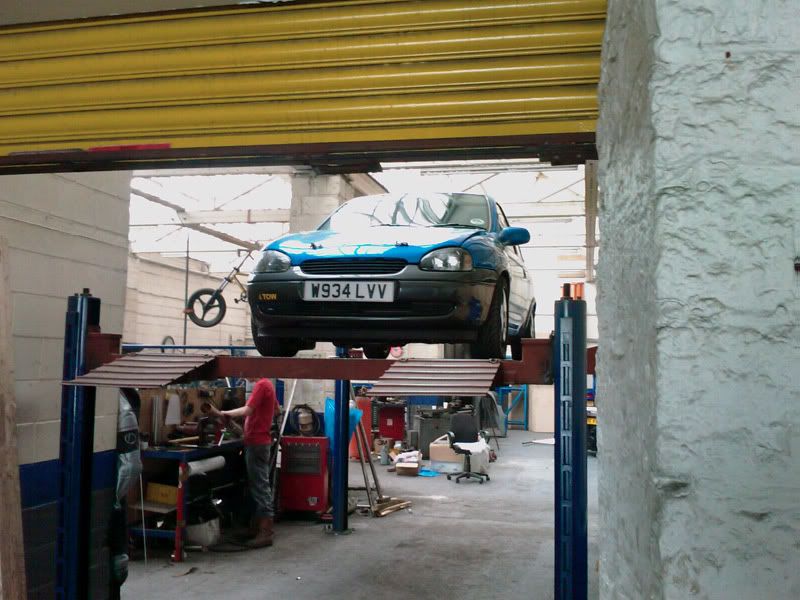
Exhaust fitting today at Zorstec in Shipley. Excellent company, very professional and perfectionists when it comes to their work. £380 from a manifold-back 2.5" mandrel bent system.
Arrival:
Up on the Ramps
Customary Chav Saxo in the wings...

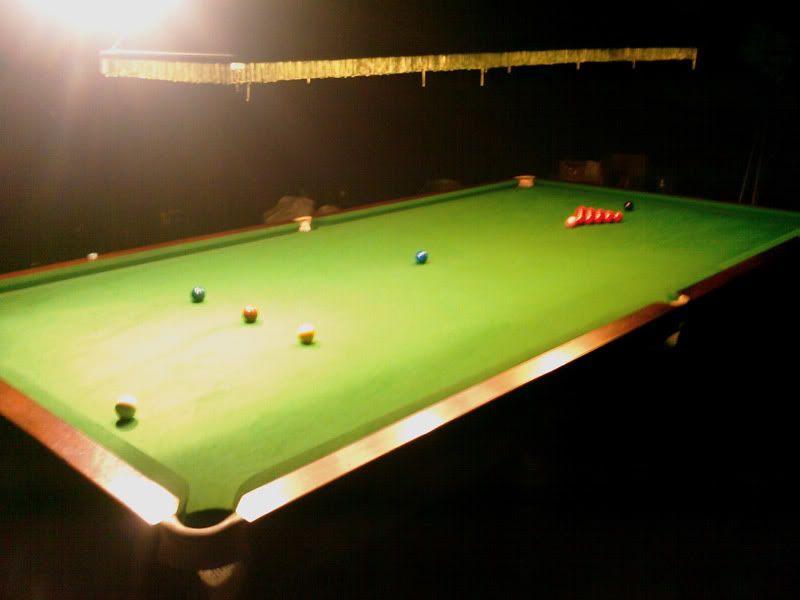
One waiting room...
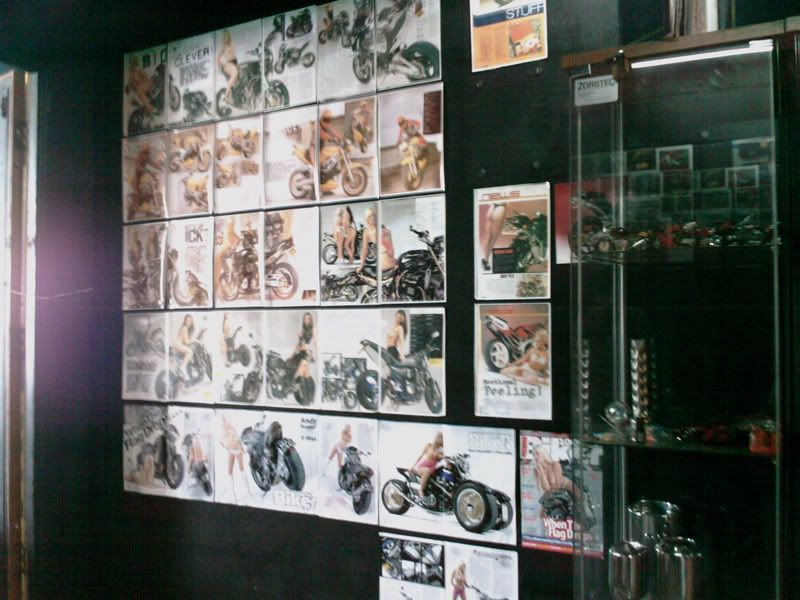
...the 'recreation' room :eek:
...and if there's no answer:
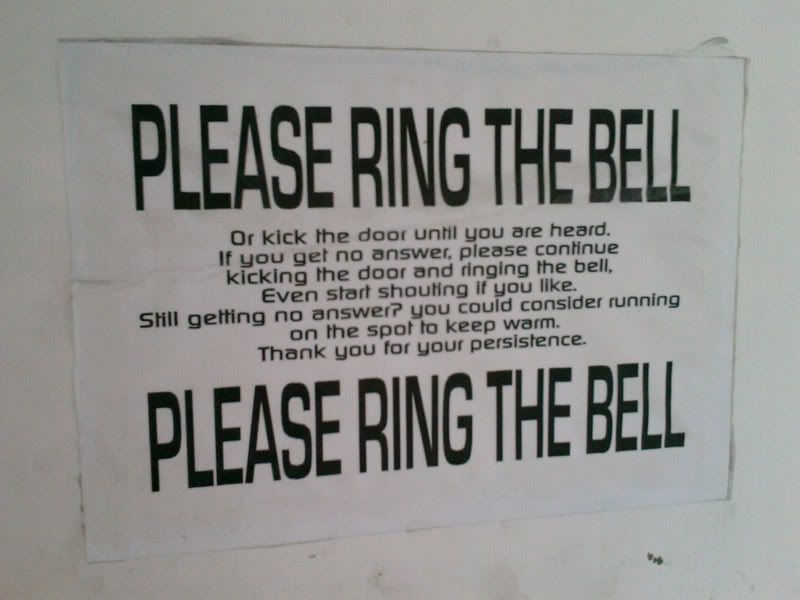
System all done:
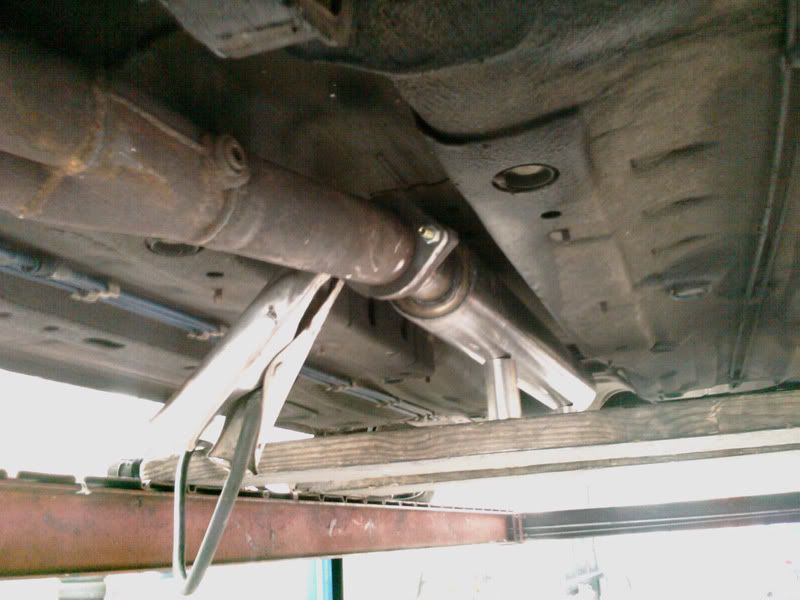
It's quite loud; but there's potential for a tailpipe bung if needs be. I think it'll quieten down though after a few miles. Annoyingly my new manifold is causing my dipstick to rattle against my baffle plate, so I need to sort that
Did a few bits last night. The sausage filter was a twat to get on and off, so I decided to cut abit more of the firewall out. I know it looks rough; but it'll all be sorted for PV. I'm hoping to have a small airscoop fitted to the scuttle before then aswell
Ooh, also managed to fit my strut brace too, which was nice
Hopefully getting my Mocal 16row oil cooler thrown on one day this week aswell; along with painting the inside of the front doors.
Oh, the resonating exhaust is where the monkey at Zorstec has forgot to put in a gasket so I get to go back over there this weekend. joy of joys Not happy about that at all 
I'm booked in for mapping on 4th June at Noble Motorsport
Bite me Dave 
Got my 'scoop' made. Not quite a scooby scoop like I had on my old astra, but it definitely makes a difference and doesn't look as gay as a big 'ol slab of plastic on the bonnet
Small 'housekeeping' update. The things I do to get ready for PV, lol
Paint inside of doors (cba masking stuff up, lmao)
Paint my new 'scoop'
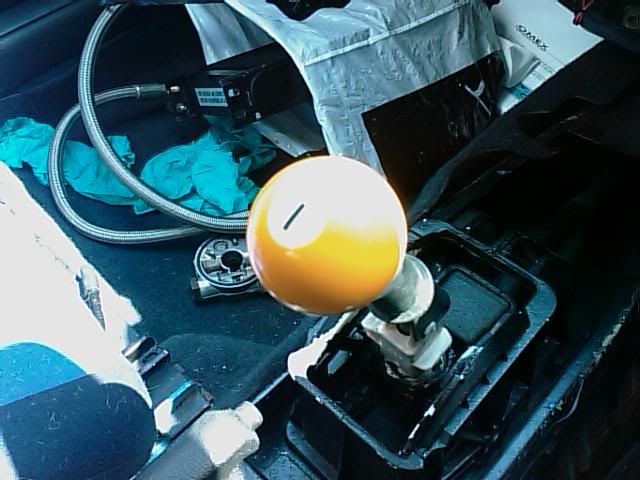
oooh oooh, new gearknob
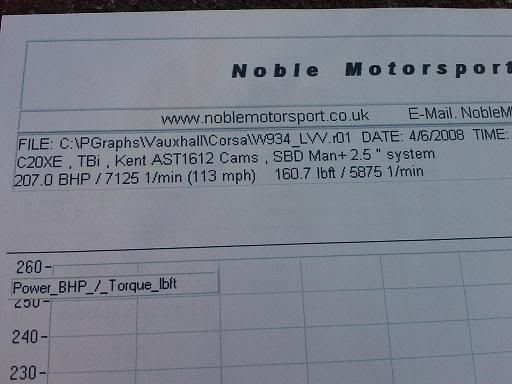
Well, had a nice day out in Chesterfield yesterday. The car was dropped off at Noble Motorsport at 12pm, and collected at 5.45pm. It basically had a full remap. When I bought the car I was told (at the time the engine was rebuilt) that ARPs were fitted. I never checked, so told Noble to stop at 7krpm; this they did. And the car still came back with a cracking power figure. The mapper (apologies, I can't remember his name) said there is easily another 5bhp or so more if I can go another 500rpm or so; not sure whether I will or not. Currently I don't really think another 5bhp'll matter. As the graphs show though, power is still climbing at 7125rpm Well Chuffed. Noble Rock 

Roll on PV
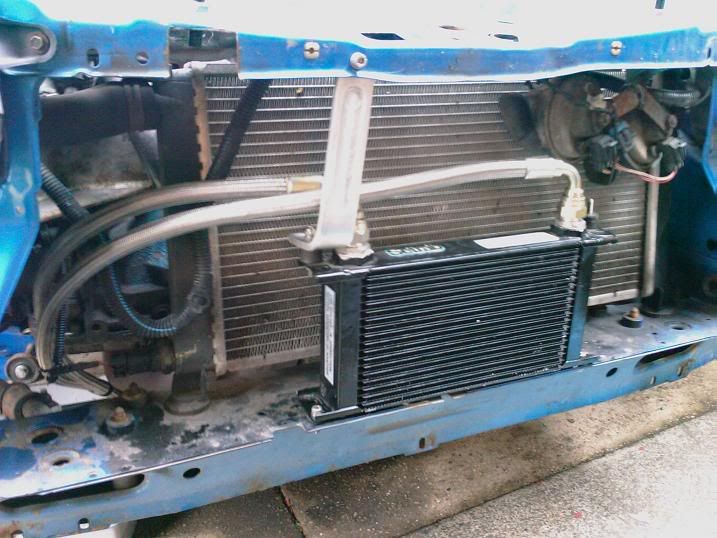
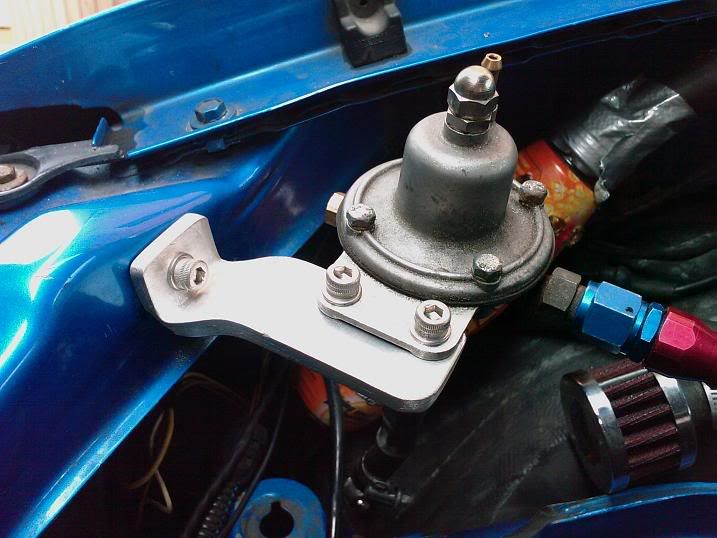
Small update from me. Went back over to FPE to have my oil cooler fitted;
No pictures of the finished brackets I'm afraid as it was too dark and my camera phone is ****e. Also got a bracket made up for my FPR aswell.
The car is going back over to FPE next week for an airbox making as my TBs are too loud for trackdays
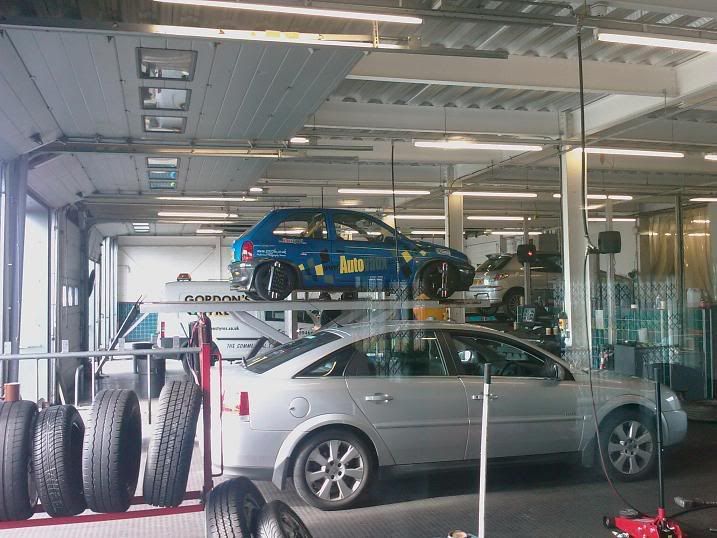
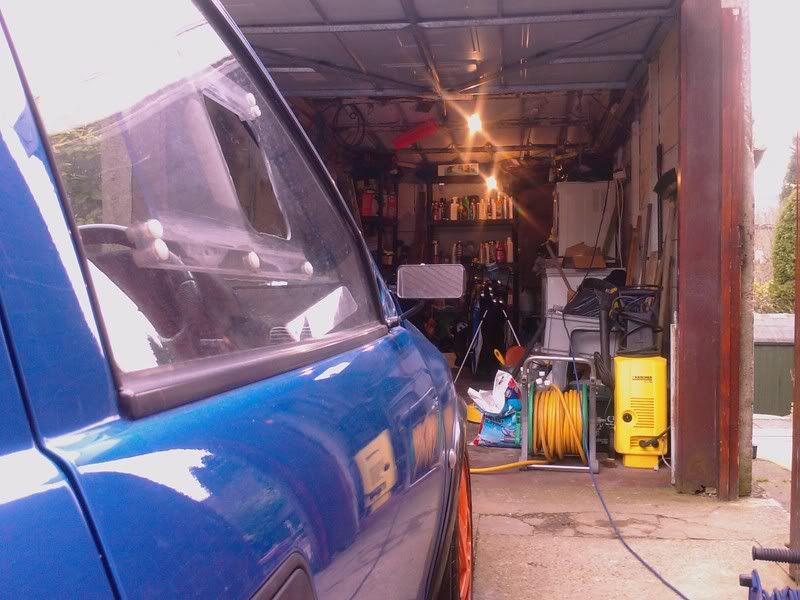
Oh, while at FPE I took afew pics of his van, and a class astra-rally car that was also there
(350bhp LET)
It eats VXRs...
and the rally car:
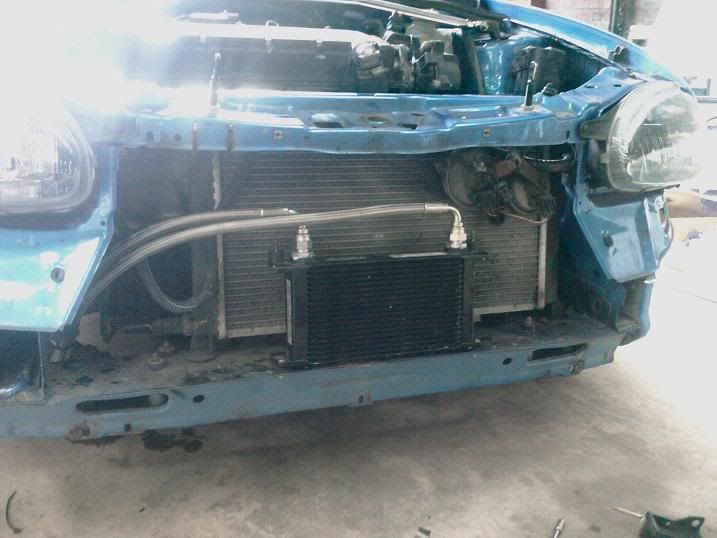
Fitted my oil cooler sandwich plate, oil cooler brackets on saturday:
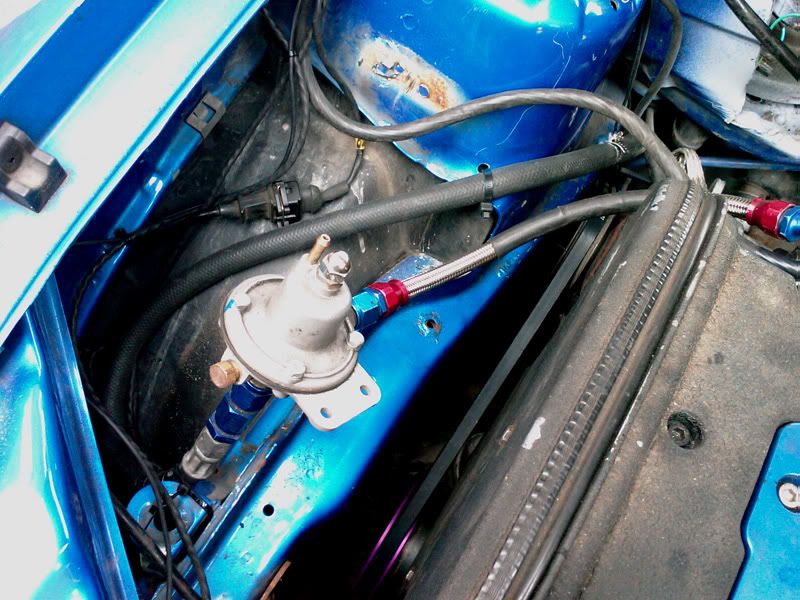
Finished picture of my FPR bracket
...and also checked for ARP rod bolts. Yay me, it has them - need to get it mapped abit higher up the rev range now
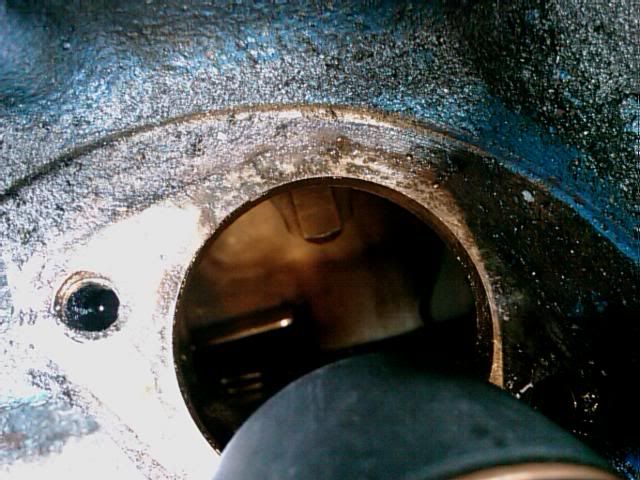
I got a hole saw
Did some stuff to aid cooling


|
DaveB
Member
Registered: 29th Dec 00
Location: Huddersfield
User status: Offline
|
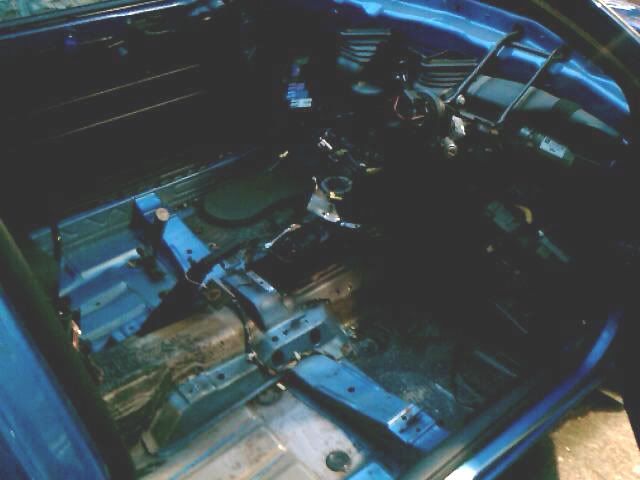
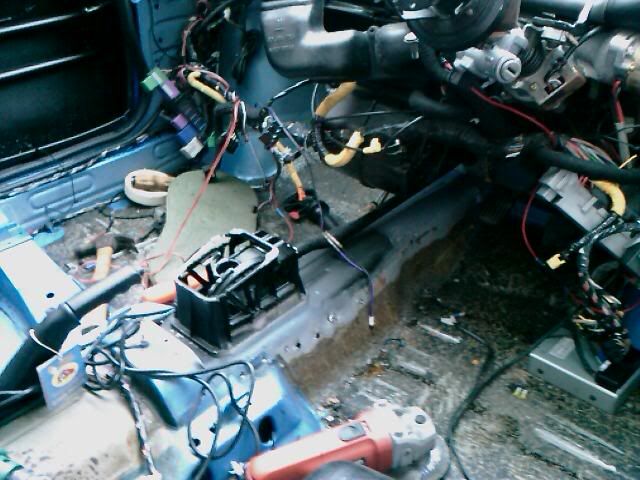
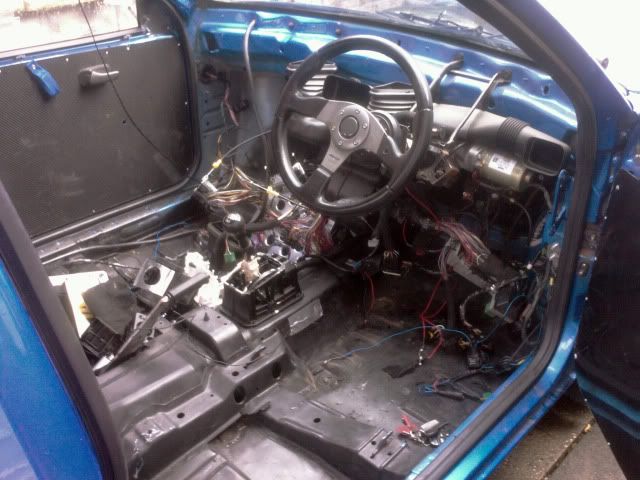
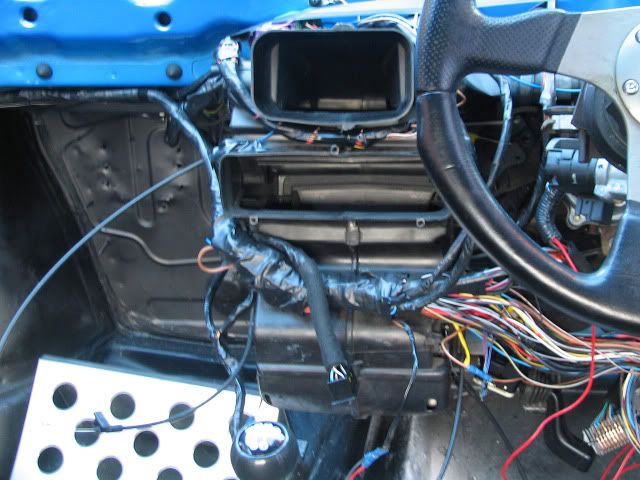
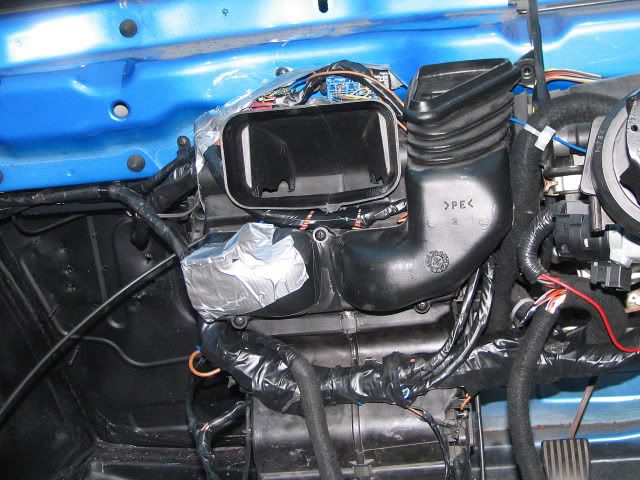
Well I started my strip-down last night (poor pictures as they were from my phone)
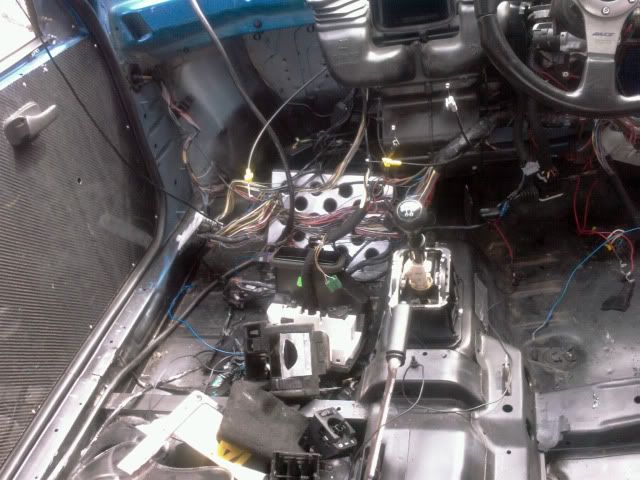
Dash out:
Then started to cut away the un-needed metal from around the gearstick:
Thursday night will see me finish cutting the metal away, and then start to trim down my loom
Mark; it's summer at the moment
Not decided on the dash yet, but my toolbox of bits needed to sort out my wiring came today
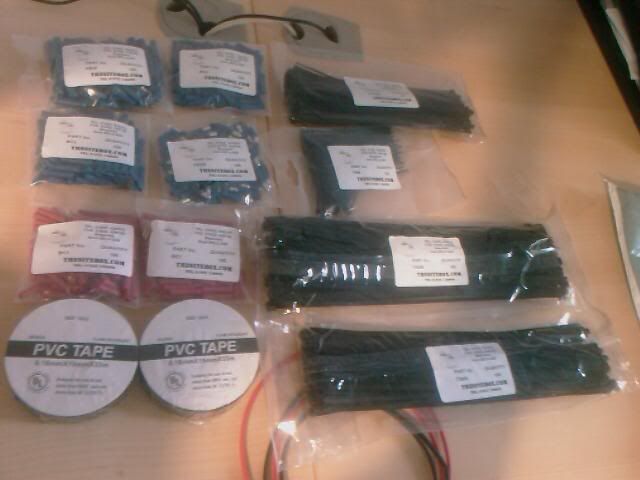
Top service from www.thesitebox.com :beer:
Didn't go to Billing as I'm not one for static shows really
So spent Saturday putting my car back together
Pile of stuff that I removed (Weighed 2.2kg)
Dash half fitted
Complete:
Decided to fit the 'full' dash as I've still got too many wires (alarm etc) behind to make it look neat, plus I don't want to loose the heaters. Still chuffed with how it looks though, and I've saved a fair bit of weight with the metal supports being removed from the dash, the metal from around the gearstick and all the wires
List of things to do:
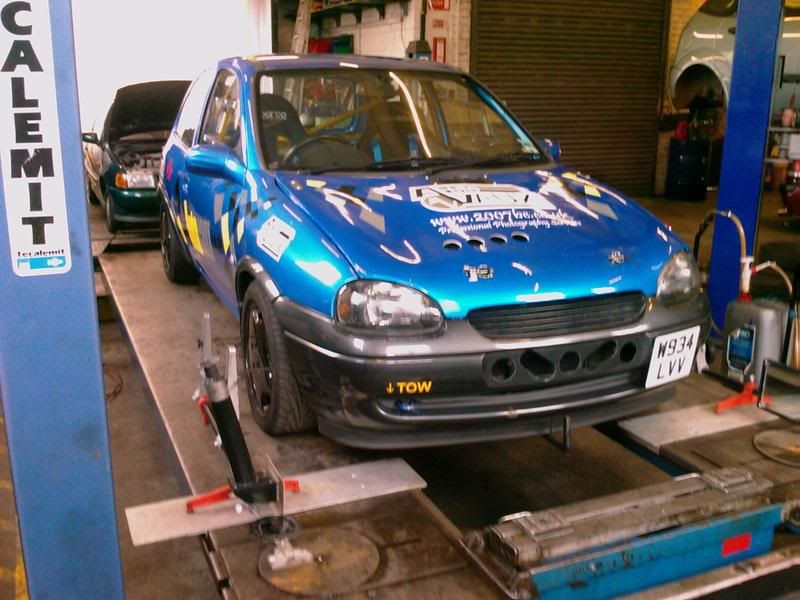
Fit Square Front numberplate to give air holes a chance
Fit Nylon Gearbushes that have just arrived from LMF
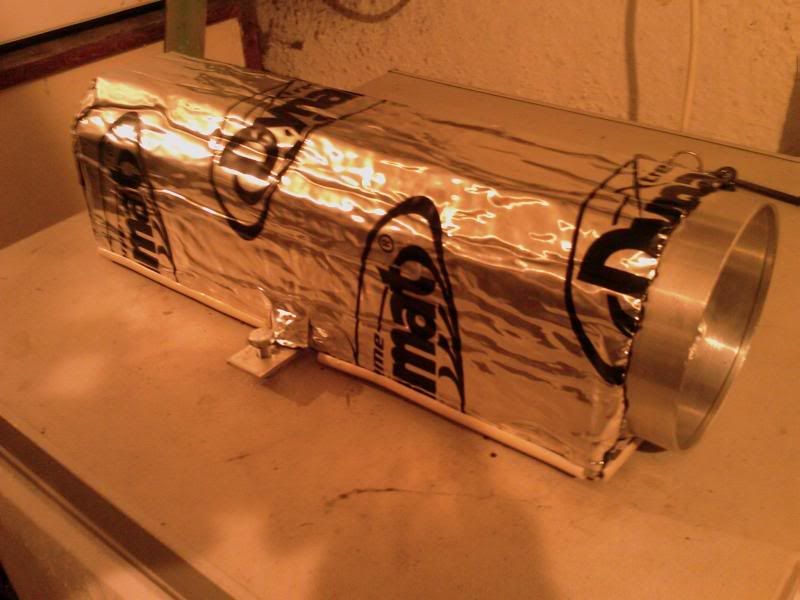
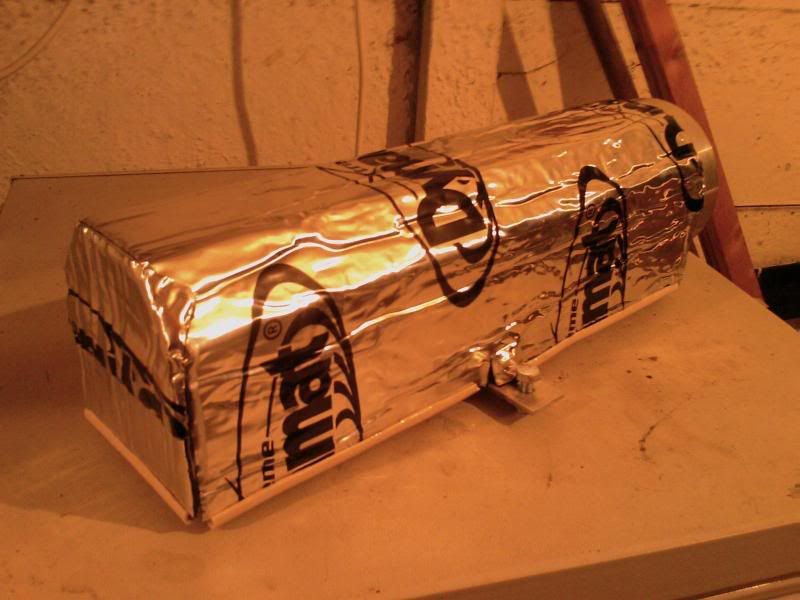
Get airbox for TBs finished (for track use)
Book in at Noble for Final Mapping
More holes in bodywork
.....LSD
Went to get camber/tracking done as the camber was way way off after replacing my springs some 7months ago
More Weight Saving:
Oh, weight saved by removing the aerial stump aswell and then filling it with a lightweight but adhesive material
PS. Anyone else still got their PV race numbers on?
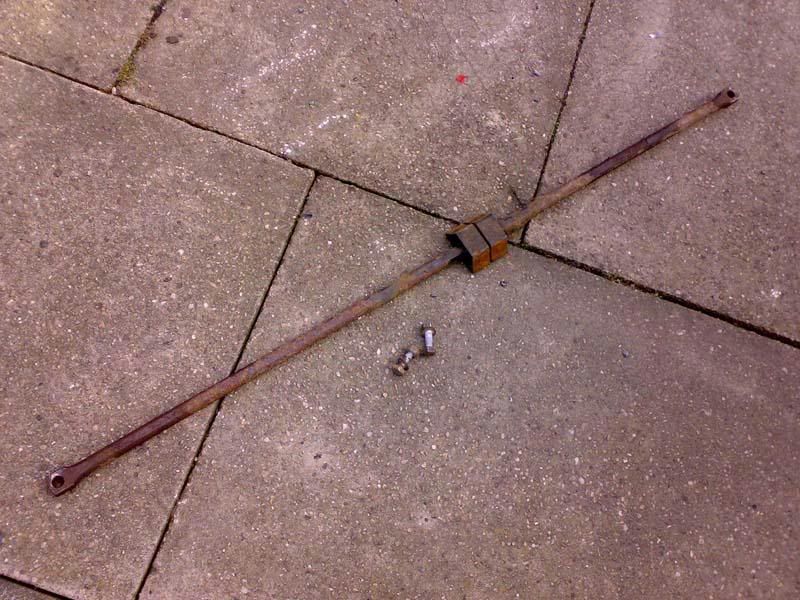
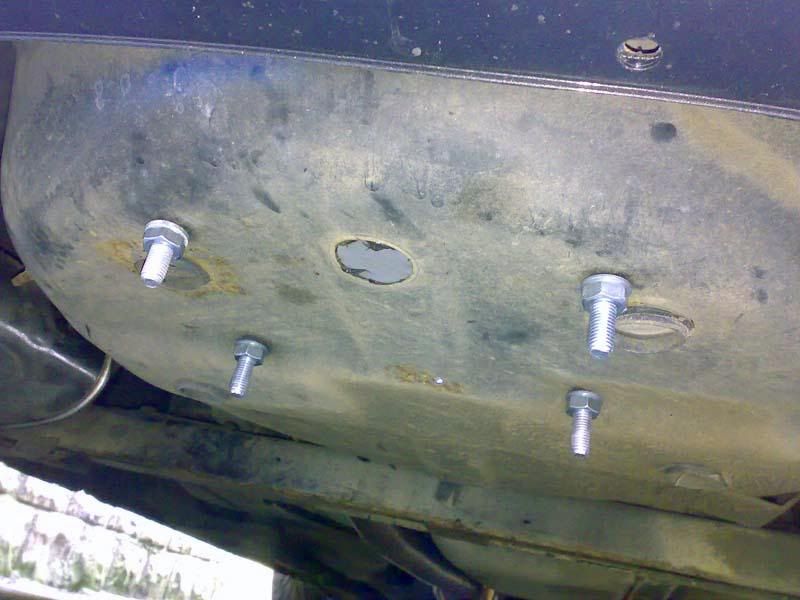
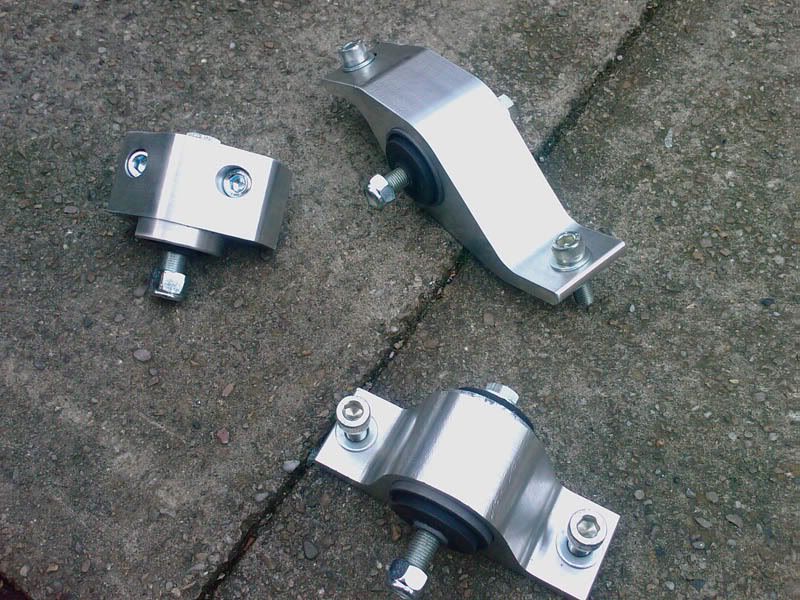
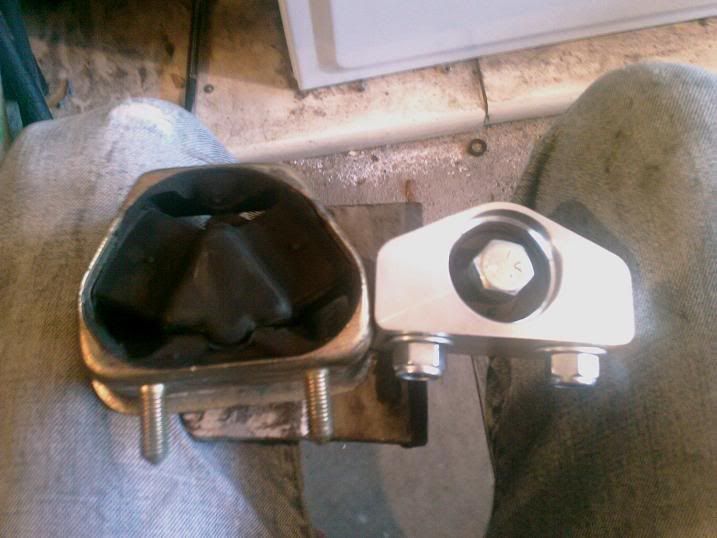
Right, as spanishfly has already said. Fitting solid mounts sucks arse. I planned on doing all 3, I managed 1 lmao
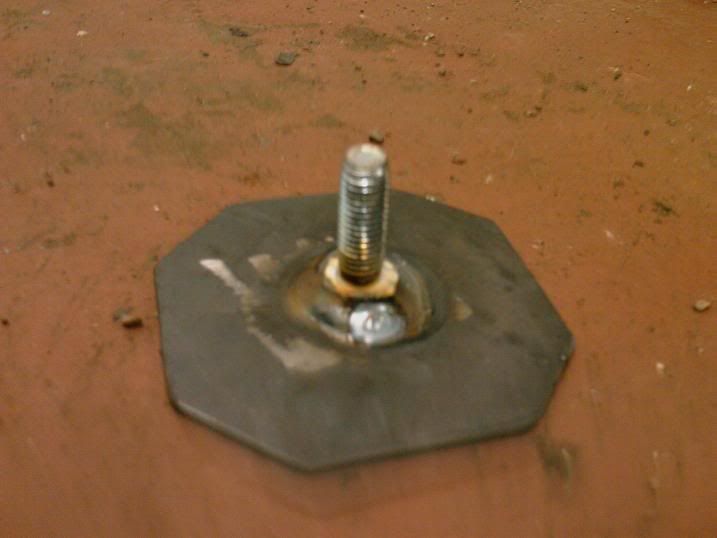
Mounts all laid out and setup with bolts in place
Got the mofo up in the air(hmm, stiffy...)

Then tried to get the rear mount off, I didn't have enough room, so down it came and I went for the passenger side gearbox mount instead.
The old and new mount side by side
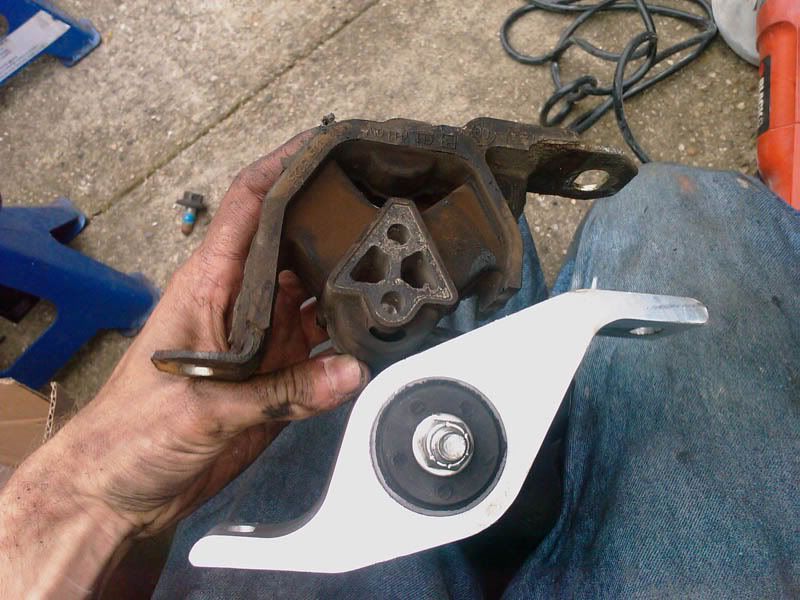
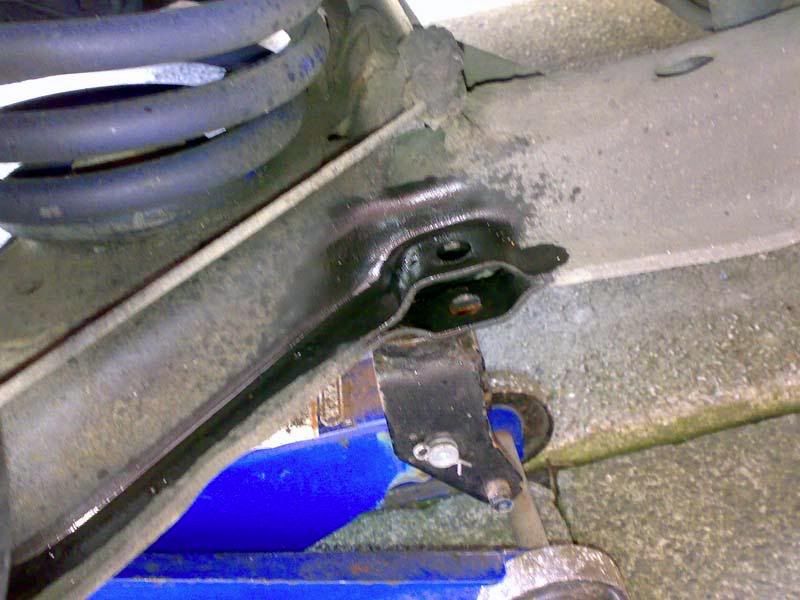
Mounted onto the F20 gearbox mount
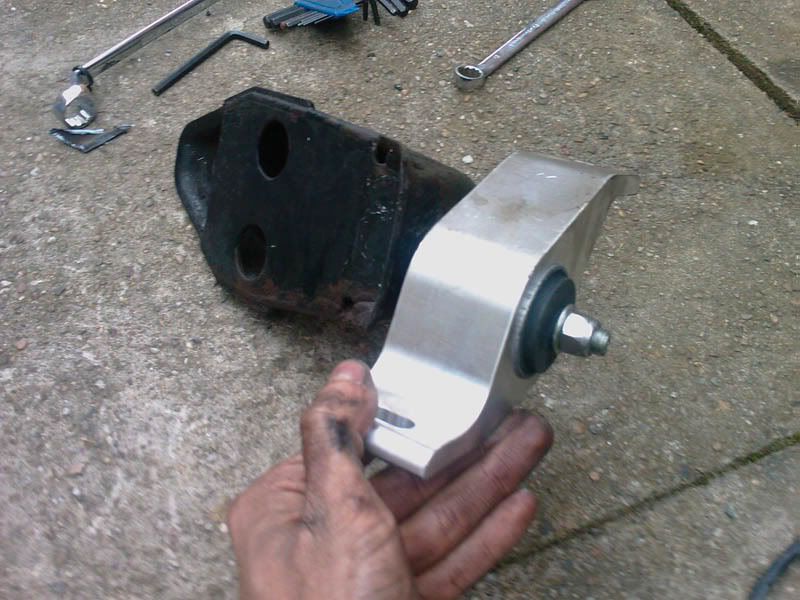
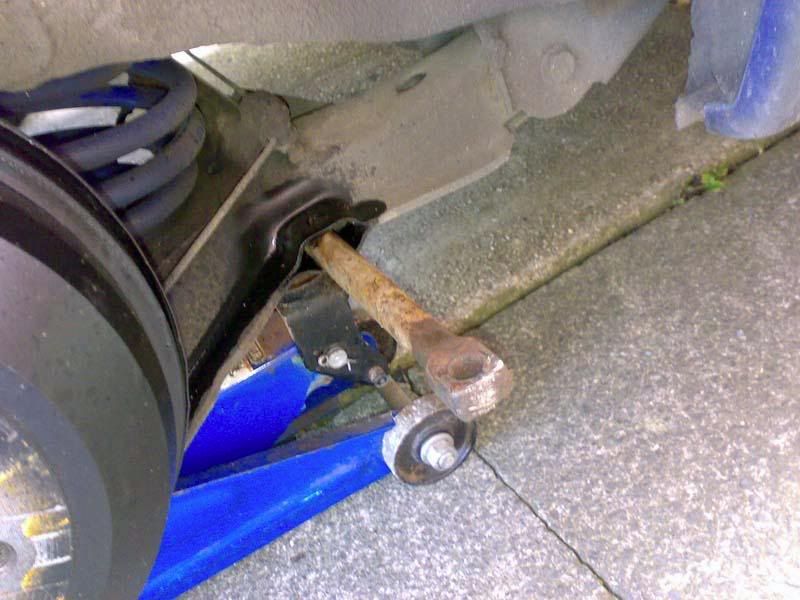
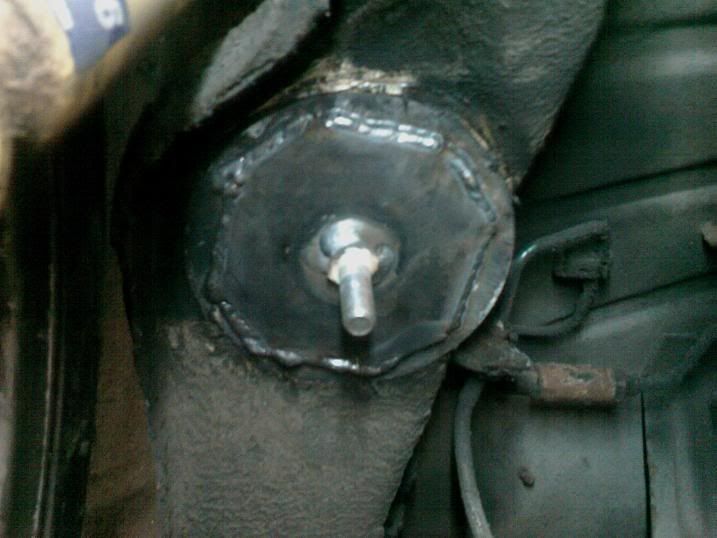
Ooooh, then guess what; problems. The bolt that the F20 mount bolts onto through the mount fouls the chassis leg; so out came the grinder
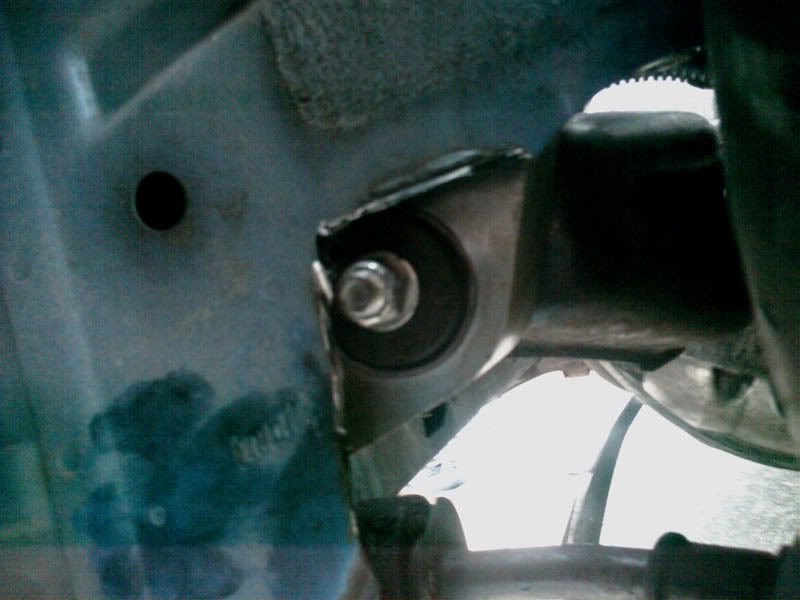
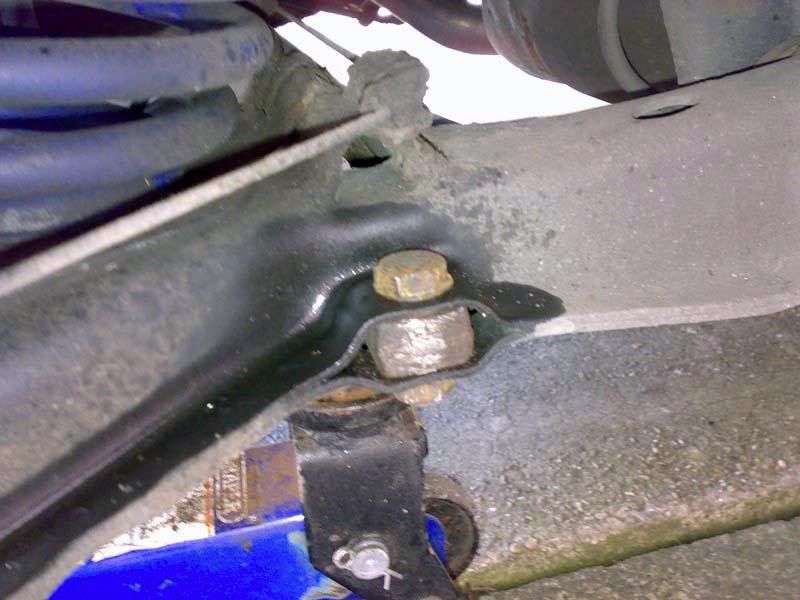
All fitted and finished:
I gave up then lmao It took me 90mins and I didn't fancy attempting the other 2 without a 4 poster. Took the car for a quick blast to make sure it's OK, and I can already tell that there is less engine movement. Full verdict when the other 2 are fitted
Airbox done. Induction noise massively reduced

How is it upside down :confused: Pic to explain? In my picture the mount is held up against the old one in EXACTLY the same position as it came off :confused: There's no way I'd have got the bolts lined up if that mount had been fully tightened up before fitting on the car.
Chris; if it really matters that much; put some instructions in the box
Fitted my 2nd solid engine mount last night. My old mount was snapped!
You can't really see, but it's the bottom rubber mount that was knacked.
There are only 3 words to describe how good solid mounts are; JESUS ****ING CHRIST! They are awesome! The car feels sooo more poised, precise and stuck to the road. I actually scared myself in the car for the first time tonight It's ****ing awesome!
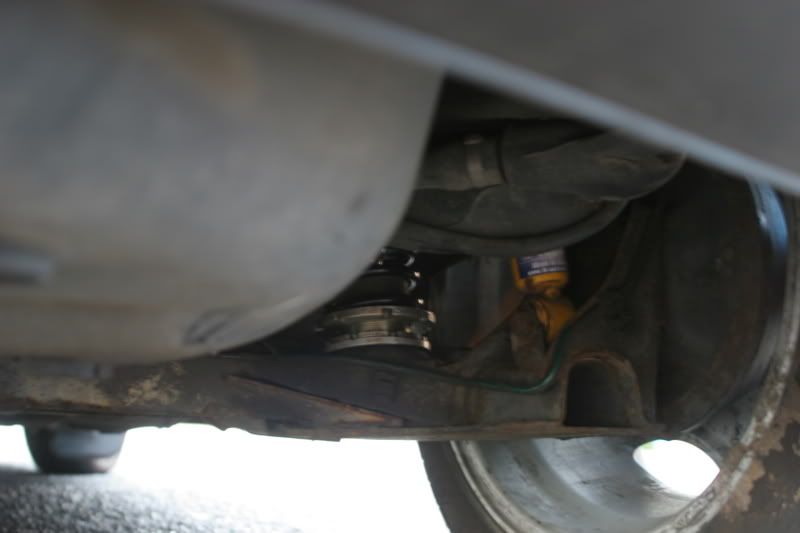
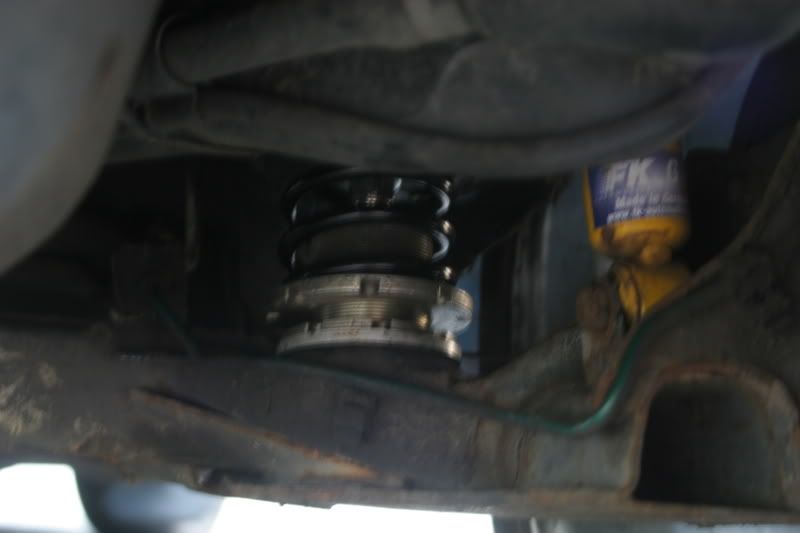
My new rear springs arrived last night. I'm blatantly copying Olly '2 wheel' Hewitt's rear suspension setup; which is to custom mount some short, stiff, coilover springs in place of the rear pig-tail springs.
Fitting pictures tonight, so if you haven't seen this setup before, all will become clear
Lee; the springs are nowhere near becoming coilbound - the 150lb ones I had on there before weren't compressed that much; and my new springs are 300lb ones!
Old and new
Bits removed
Nipple cut off
Grinding to make something nice to weld to
Mounting bracket for new coil spring made
Mounting bracket welded in place
Pics end there because my phone is crap and doesn't have a flash on it's camera. sorry
Here are a couple of pictures of the rear spring setup when the car is sat as normal. No coilbound in sight
A few random pictures of the car:
Ghetto Security
Now, before the car went off for corner-weighting I needed to know why it felt arse-end happy under braking. I've found the problem- the rear wheels are locking up as can be seen in this picture. So that's something that needs looking at
..and just for fun
|
DaveB
Member
Registered: 29th Dec 00
Location: Huddersfield
User status: Offline
|
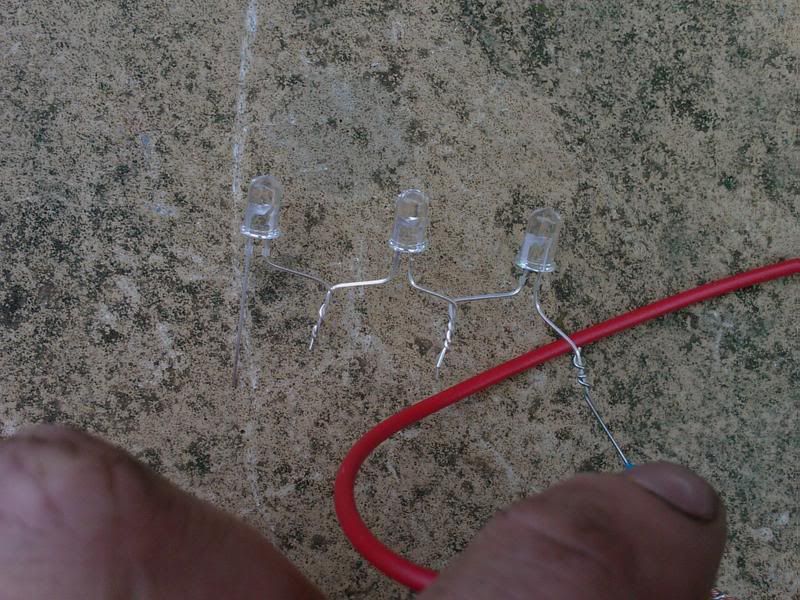
Fitted my shift lights tonight. The drill slipped when doing one of them so it's not inline with the others lmao but hey ho. I'm not going to get hung up over that. They're so fkin bright lmao
LEDs and resistors twisted together to check
All soldered and heat-shrunk
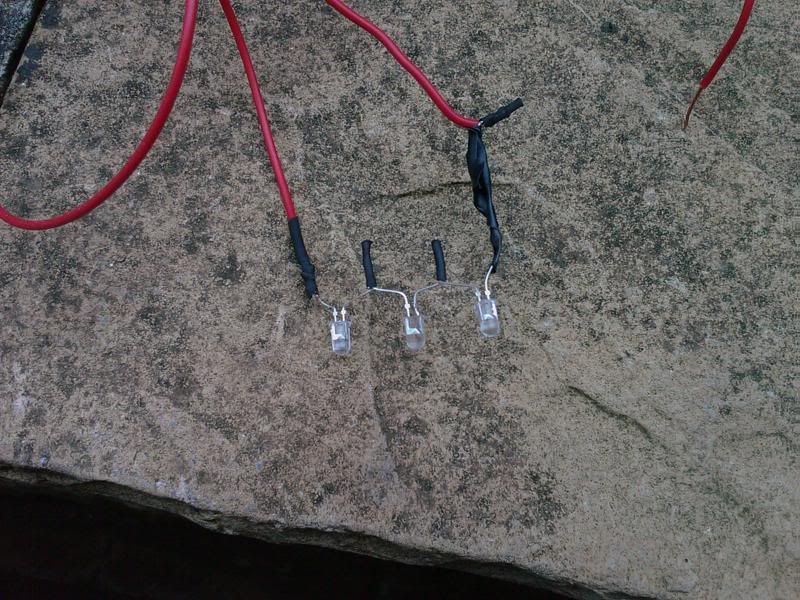
Fitted
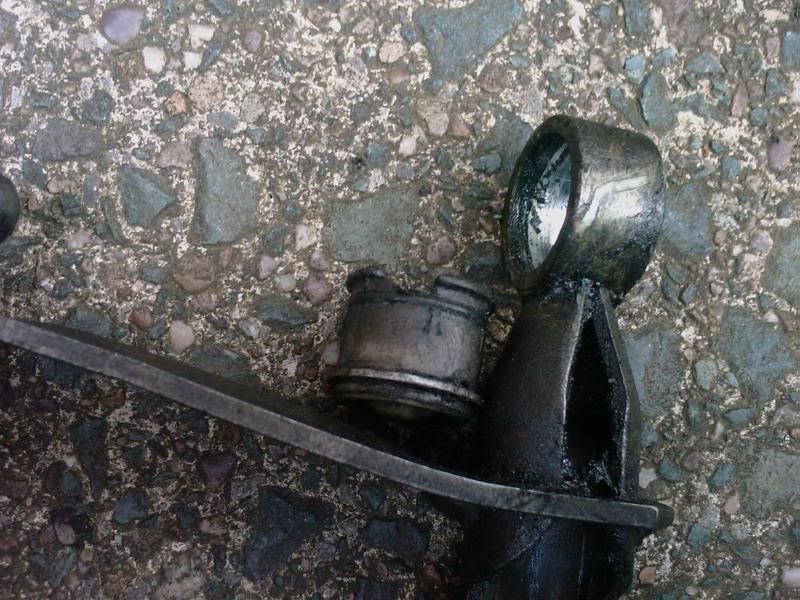
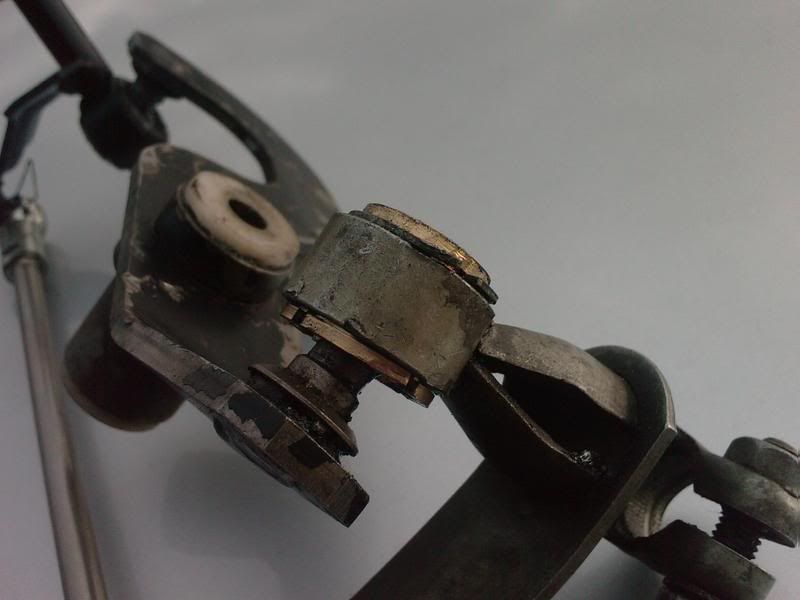
On Friday night I managed to damage something while showing off at some traffic lights to a scooby owner lmao After said incident I was only able to get 3rd 4th and 5th gear I re-alligned the linkage and it was the same; infact I had to put the gearstick in the reverse position to get 1st lmao
So off with the linkage to find some damaged and snapped bushes. That'll be the problem then I'll get some replacements tomorrow:beer:
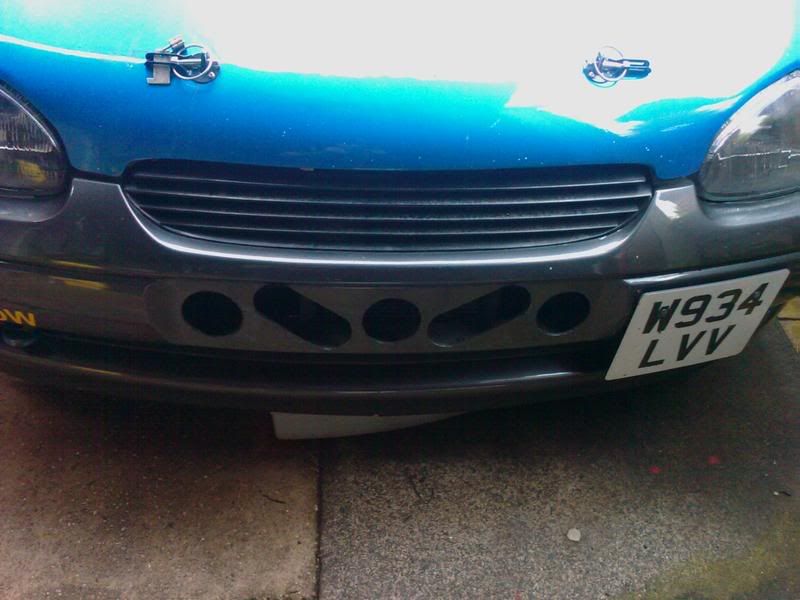
Seeing as I couldn't actually drive the car tonight, I decided to get the grinder out I fixed the mess I made of the front bumper and it looks loads better IMO
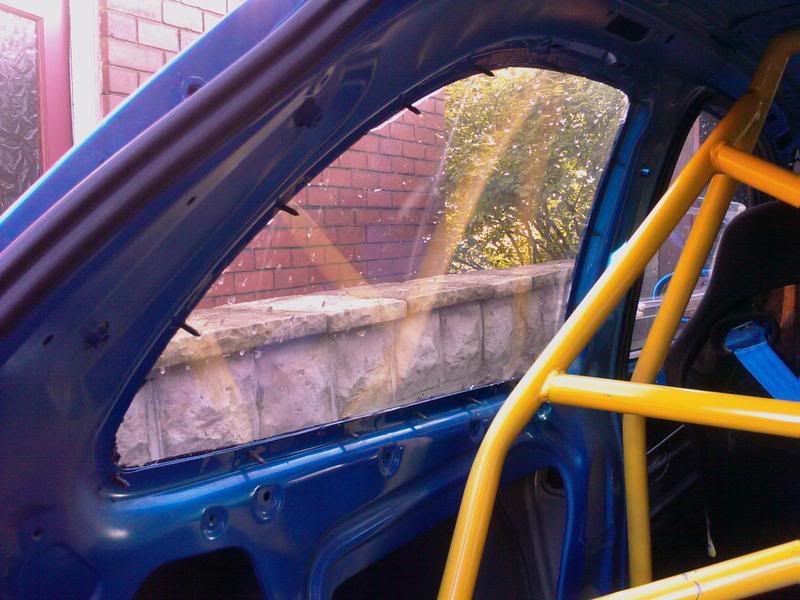
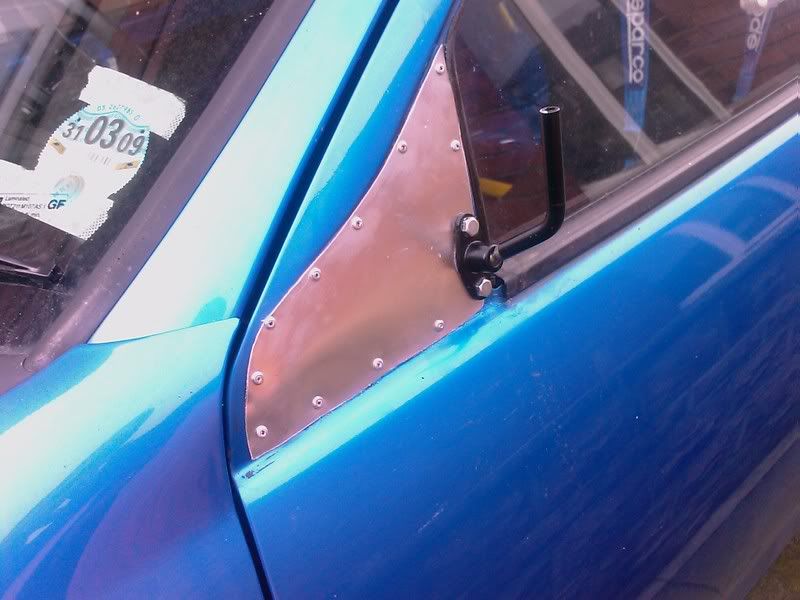
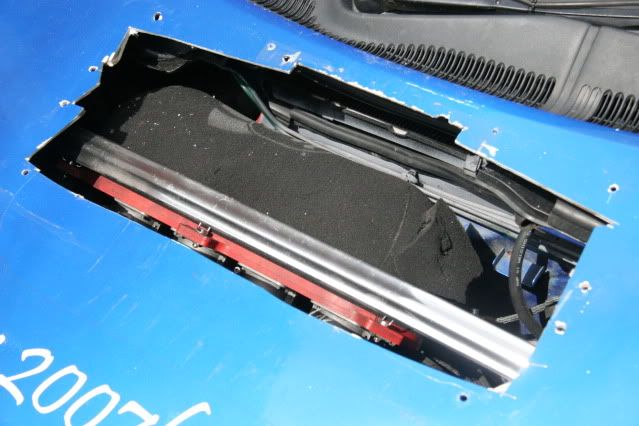
Decided to make the air holes in my window actually DO something and let some cool air in.
Before:
After:
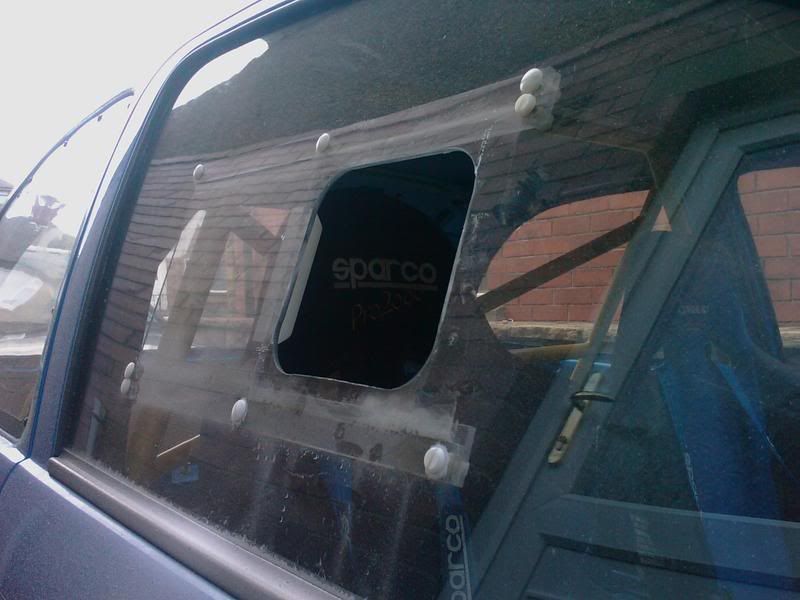
As you'd expect, I carefully covered up the car to stop it getting dirty before cutting lmao
Quite a productive evening for me
Well, after this:
I called my good mates at http://www.autovaux.com and ordered a couple of new bushes for the linkage. I refitted, and then lined up the linkage. Went out for a drive around the block to make sure everything was OK, and I lost R, 1st and 2nd again :confused:
Poddled back home and removed the linkage; again it had spat out the bottom bush (the new one) I refitted it, AGAIN and went out for a further drive. I really slammed the car through the gears to try and get it to pop out again; low and behold it did lmao
I can only assume that because the engine is now solid mounted, and the gear linkage has nylon bushes in the mounting that that bush is taking all the force of me changing gear? :confused:
Anyway, I considered the rose-jointed options, but after visiting my favourite retired engineer I was presented with a replacement brass! gear linkage bush in place of the OEM plastic one - with a lip on each side there is no way this will ever be popping out!
I'll refit the linkage tonight and see how I get on. Hopefully the last of these sort of problems for a while
Time to tick the final few things off my list
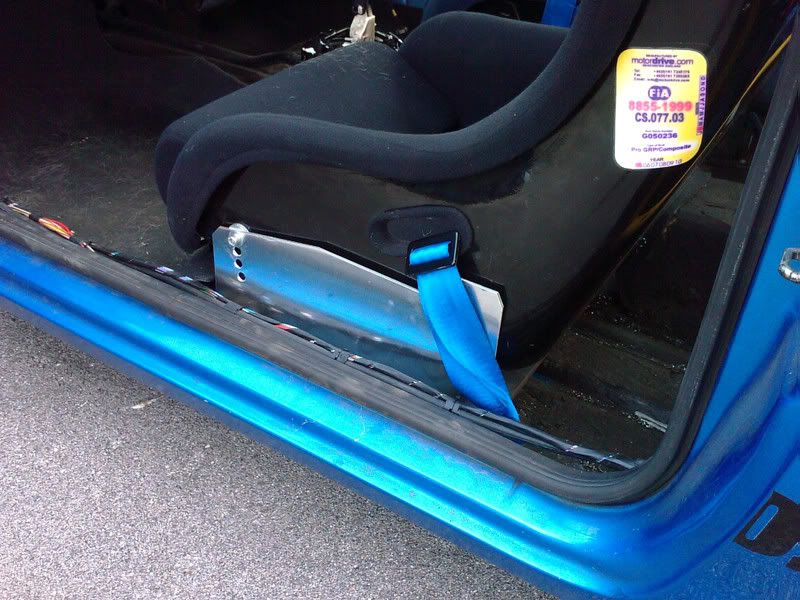
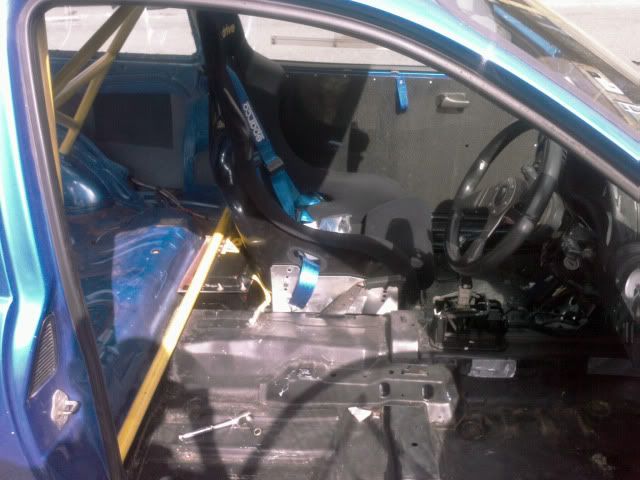
New seat mounted on welded in rails and managed to bin the standard ****ty mounts. No Rick Draper expense here :beer: Welded in home-made rails FTW :beer:
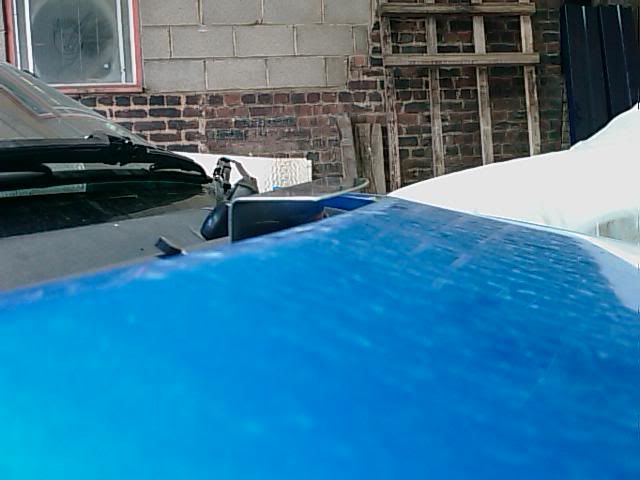
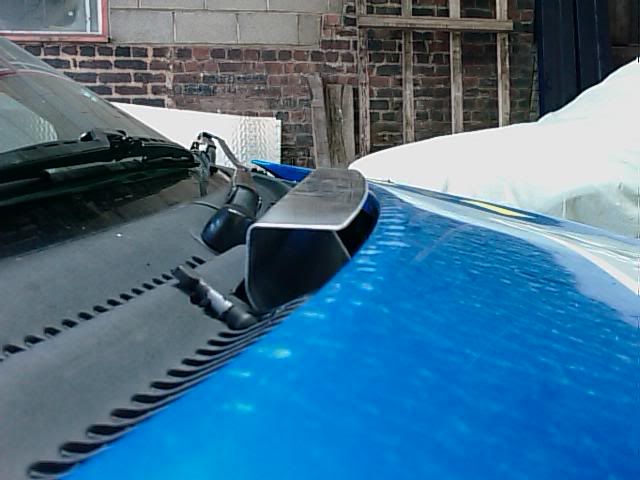
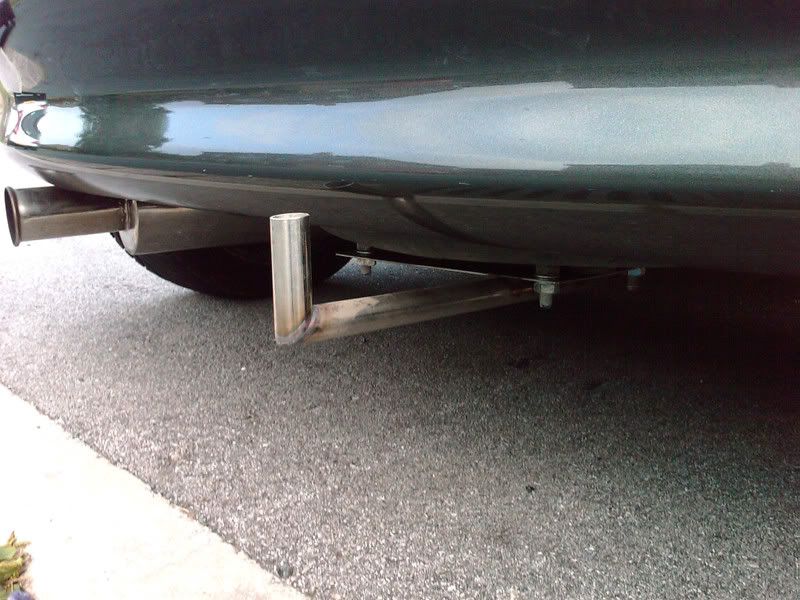
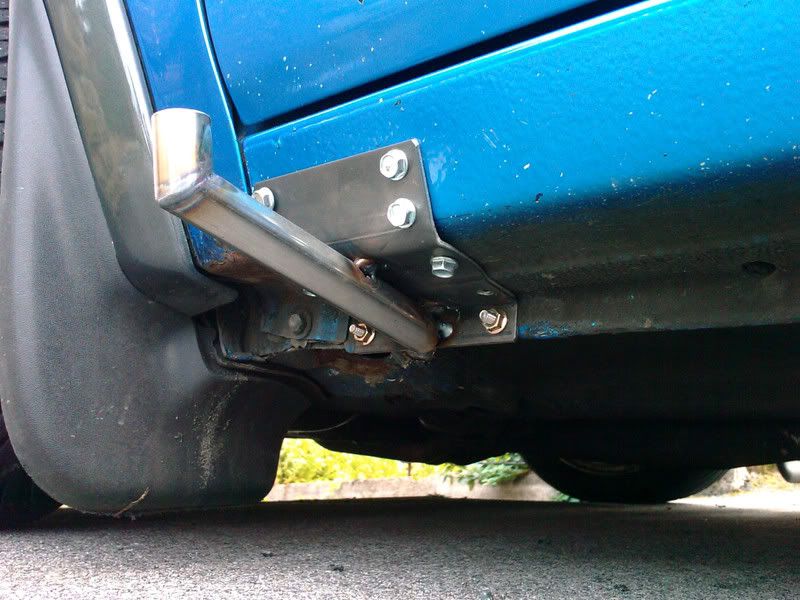
As a few may have read I bought a GoProMotorsport Hero digital camera some months ago. The suction and stuck-on mounts are crap, so I wanted some bolt on ones making for the car. I went for one down by the near-side wheel, one on the rear, and one on the front (no pictures of the front as it's quite low down for road driving)
Rear
Side
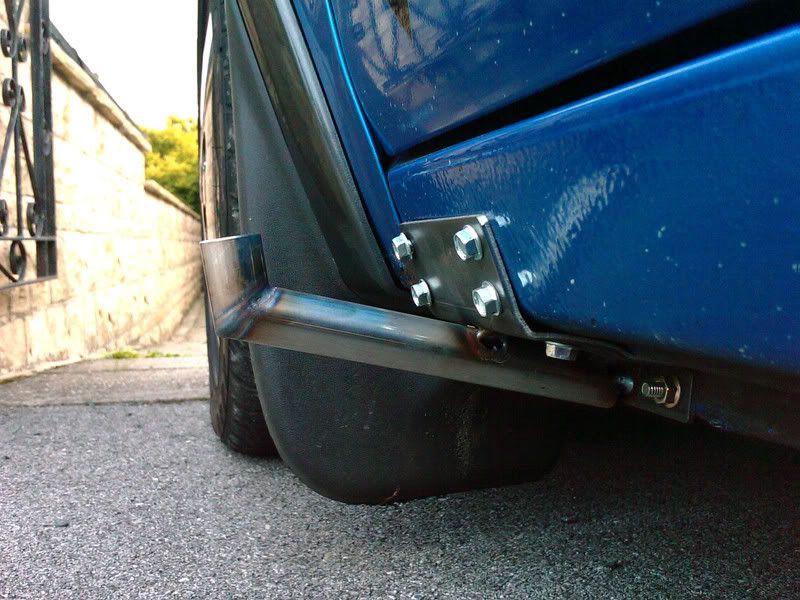
They look class IMO :beer: Can't wait to get the camera mounted on the car and get some videos done
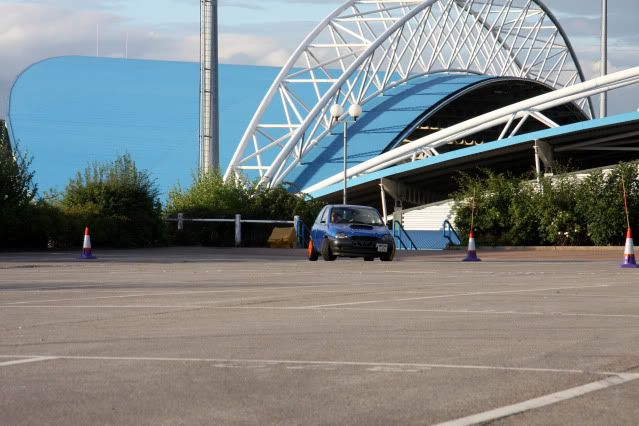
Went to Trax on Sunday.
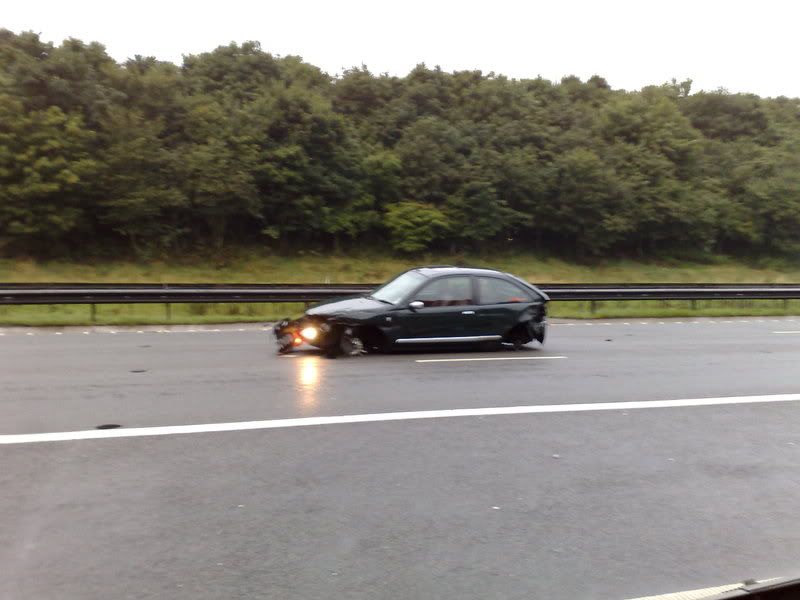
Witnessed a BRM rover smash itself twice into the central reservation, pulled up on the hard shoulder to witness a second rover copy him and also kiss the armco right opposite where I was parked Decided it best to leave.
Passed a bent 200sx and CTR next to J15a services, and then further down the A43 saw 2 Calibras had had arse sex before a roundabout lmao The joys of trax
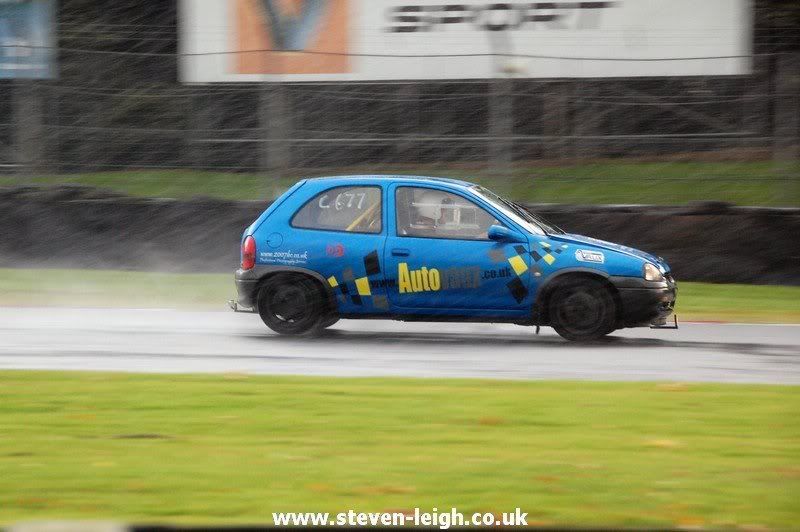
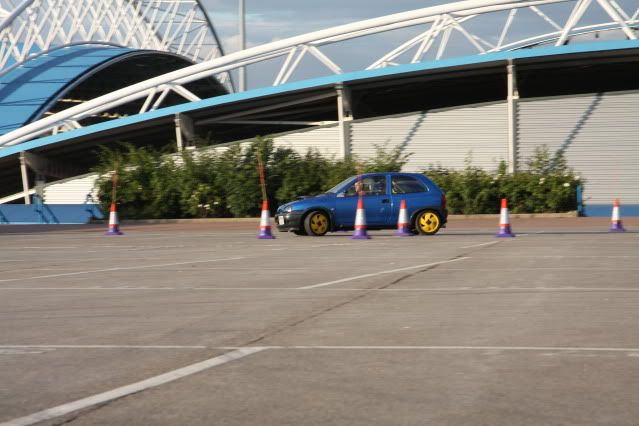
Only did one Track session throughout the whole day, and I probably chose the worst weather possible! Poured down with rain and standing water anyway. I can honestly say I've never driven on any surface like it - it was like driving in snow. My fear was probably hightened by the severe crash I'd witnessed earlier in the day, as I was still quite shook up about it.
A video is below anyway, and it makes me look like a girl, and the car look ****e. If I wanted to save face then I wouldn't have posted it; but unless you were on the track you couldn't explain how bad it was I was amazed at how fast some of the other cars were going (white nova, CTR) to name just a few.
Enjoyed the day, but the weather really put a damper on things. At least I've learnt that Toyo T1S tyres REALLY don't like standing water

Just found a picture that the owner posted of his Rover after the crash
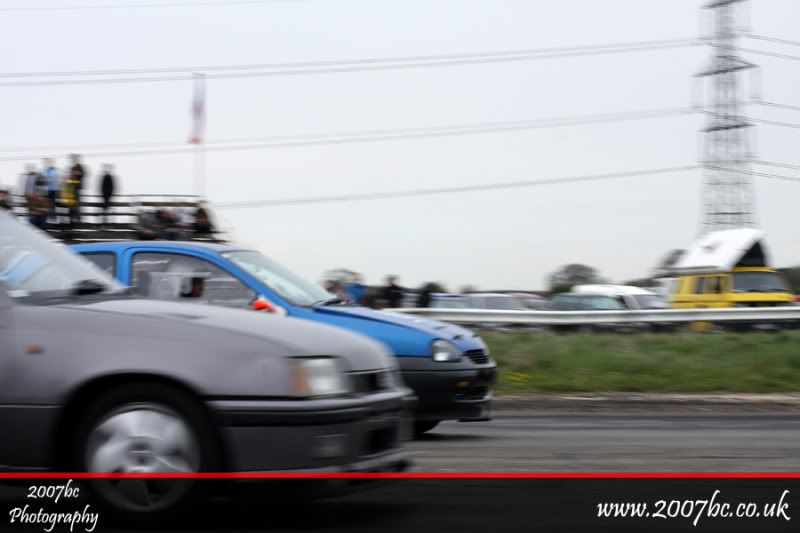
Had a good day out at York Dragway yesterday and managed to get a new PB of 13.73secs A full run down of my times are:
14.09
14.09
13.73
13.85
13.97
13.93
So pretty consistent I also won a trophy for being fastest in class Woop woop lmao
A video of some of my runs are below :beer:

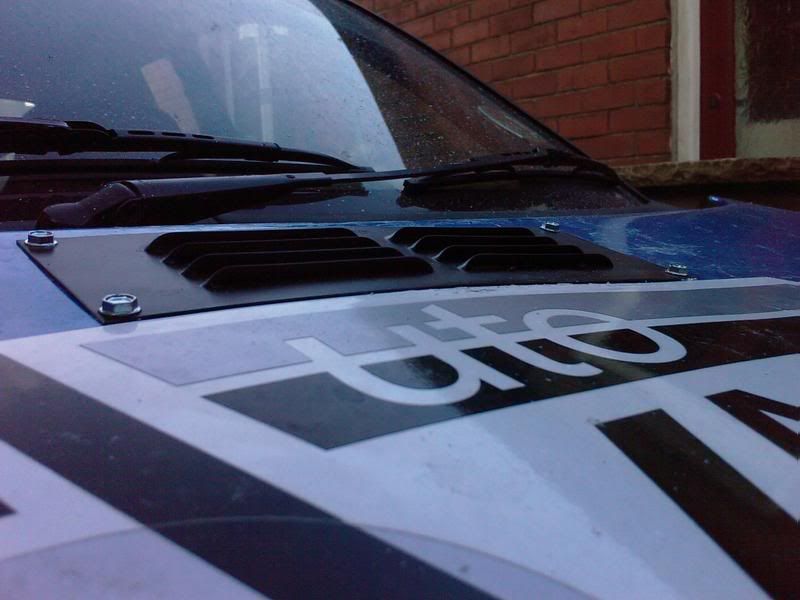
Trackday induction system fitted. Along with a new bonnet vent lmao

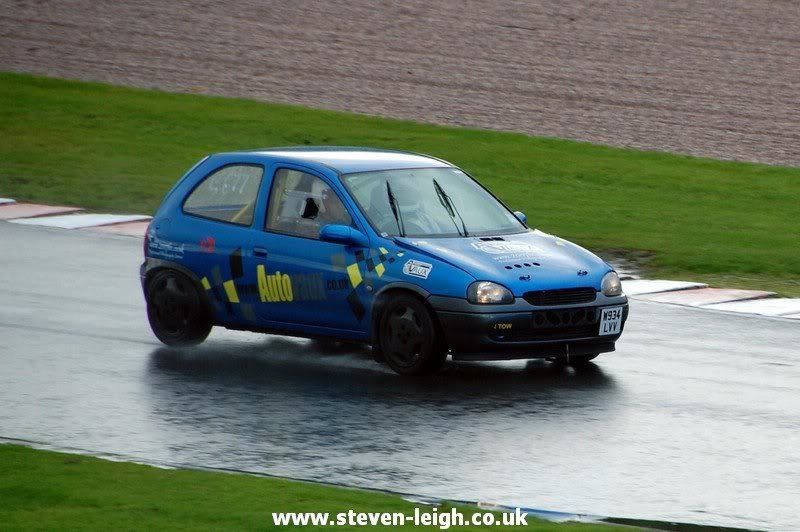
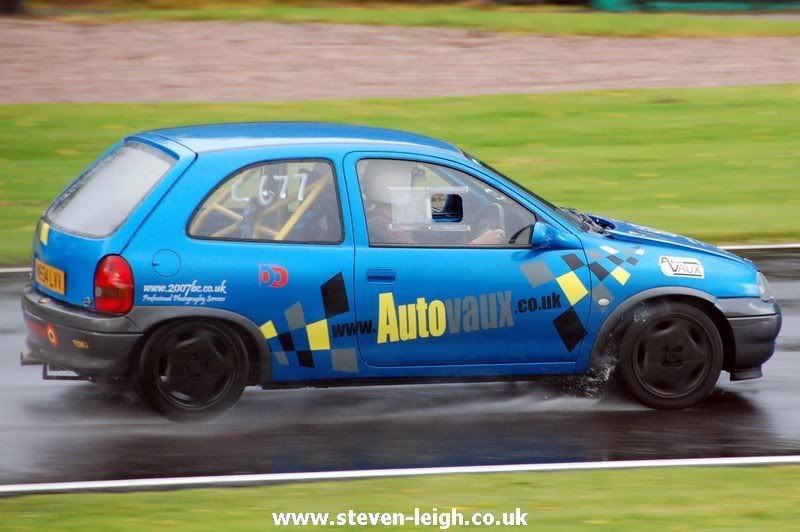
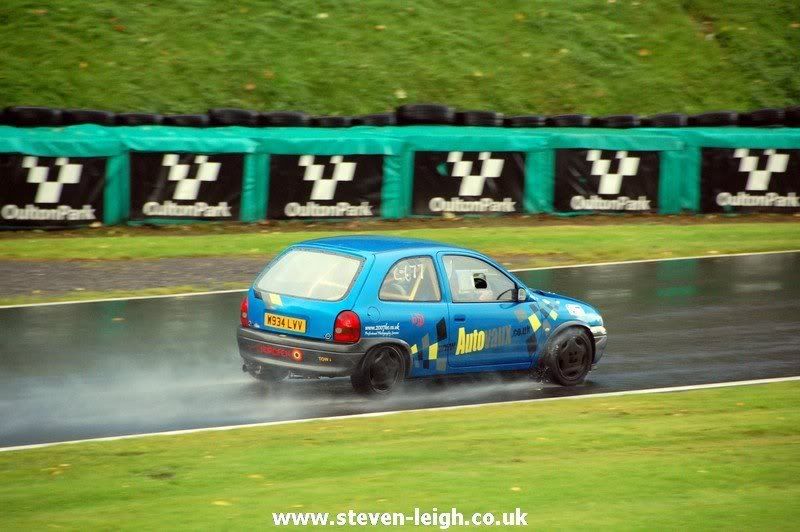
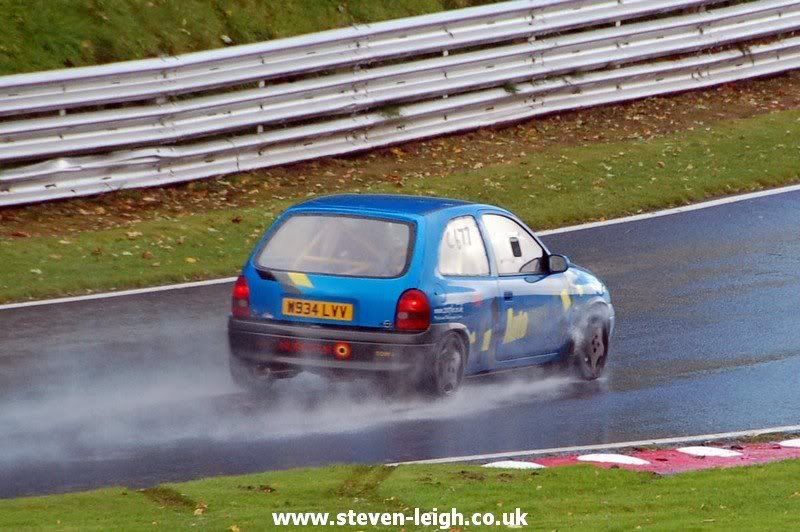
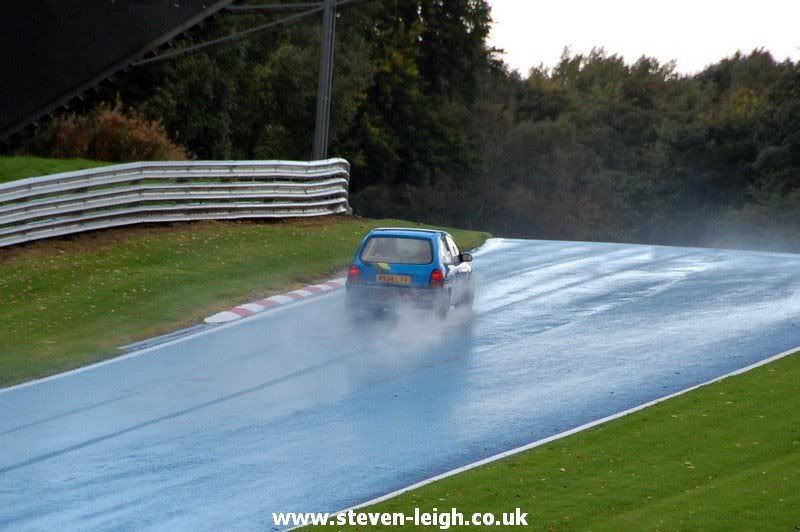
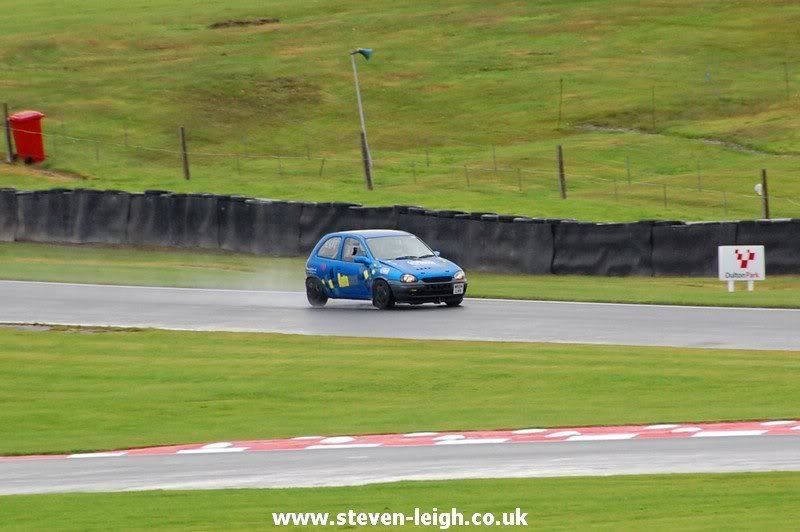
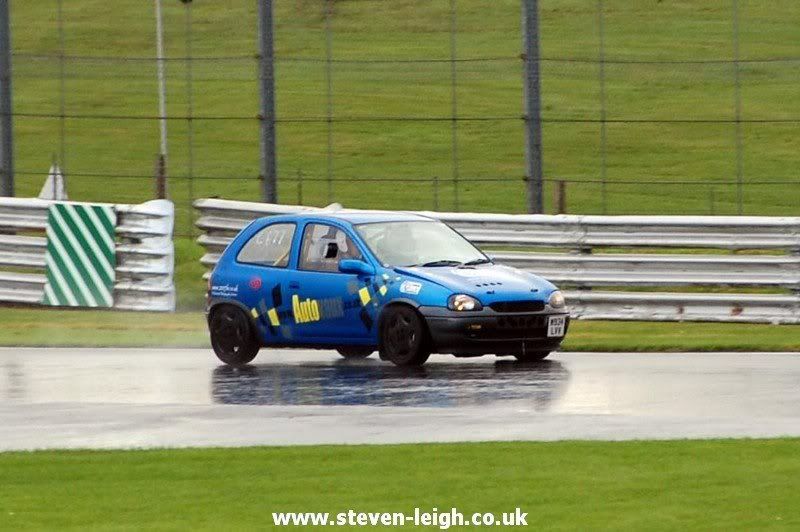
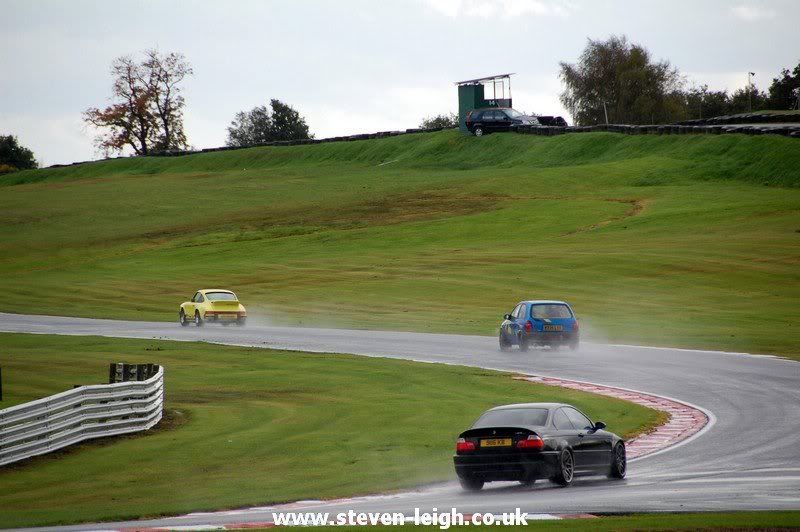
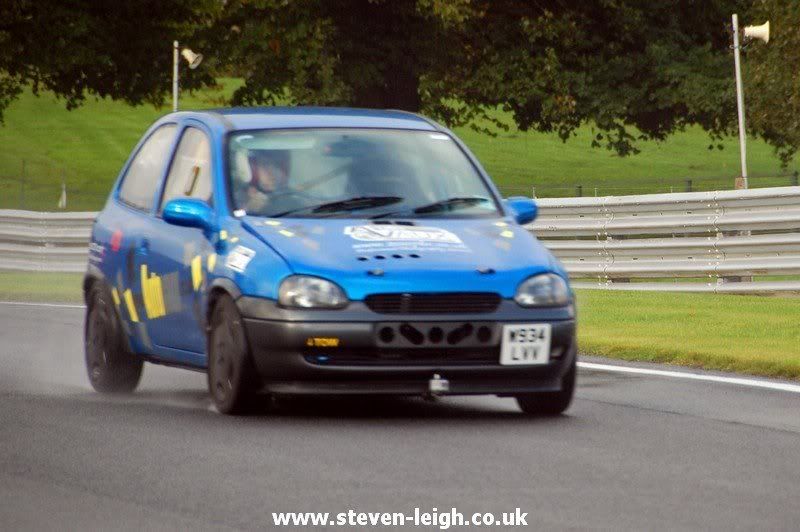
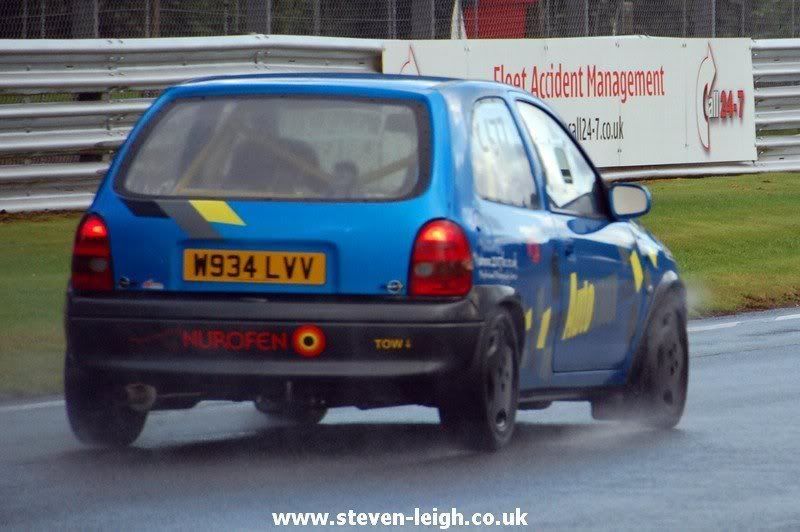
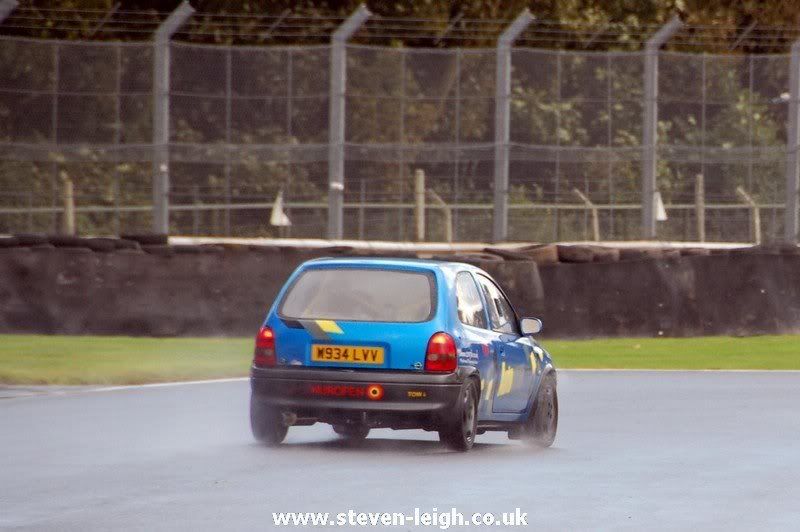
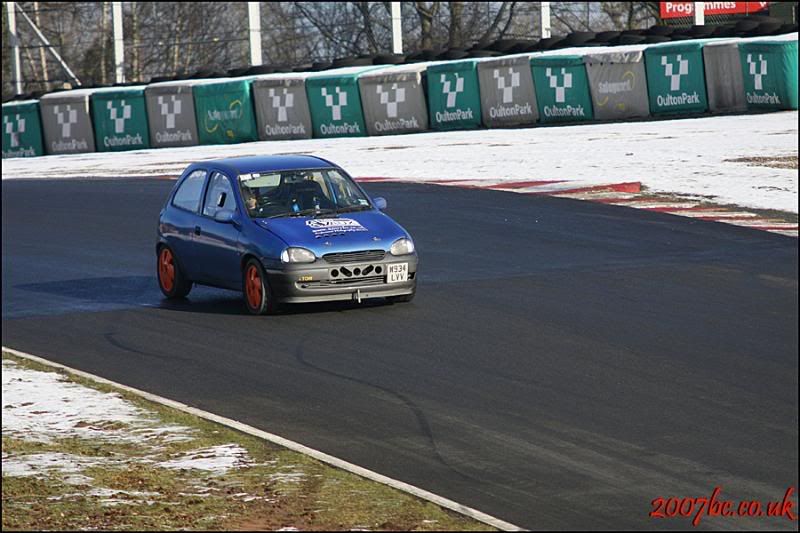
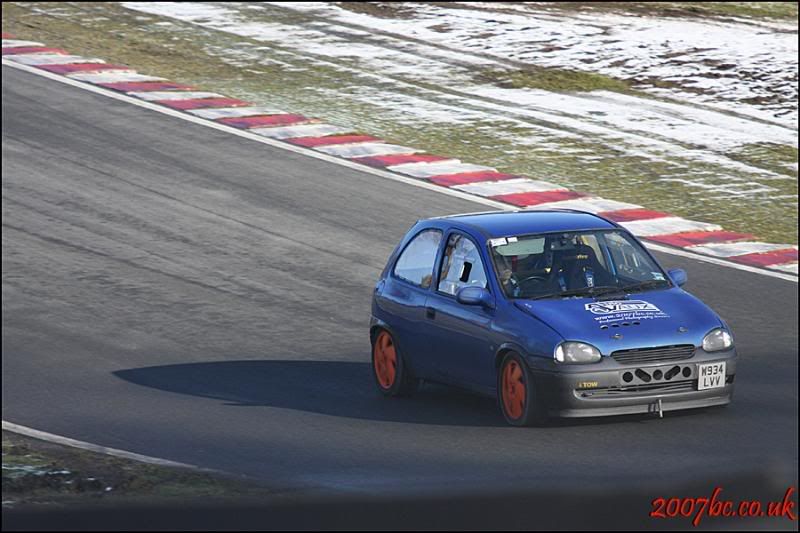
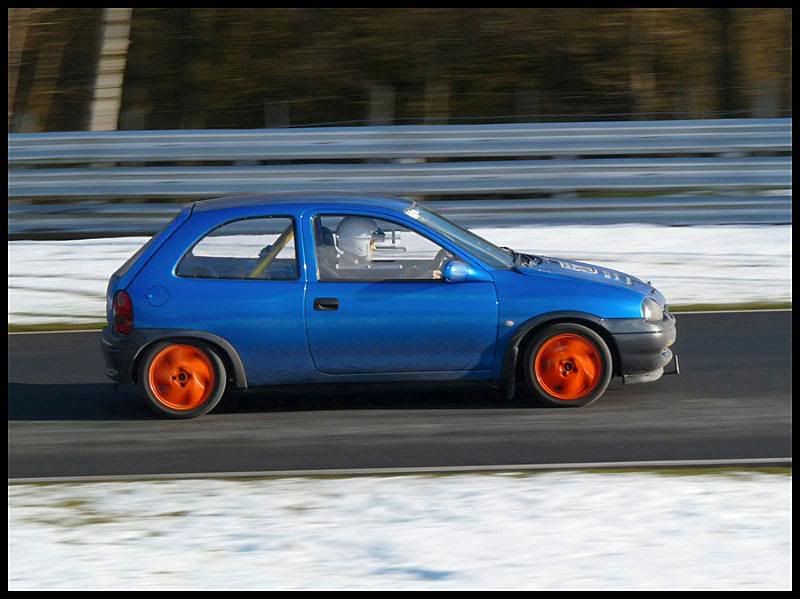
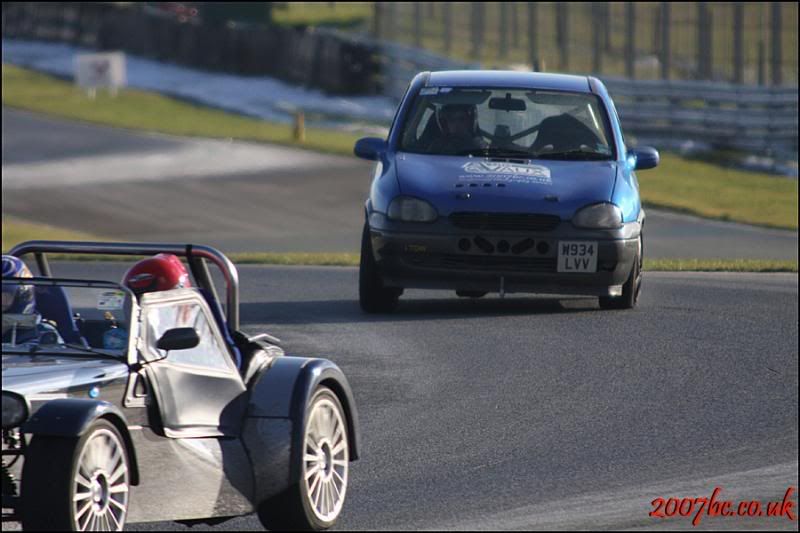
Went to Oulton Park yesterday for a PM session. I booked with http://www.easytrack.co.uk
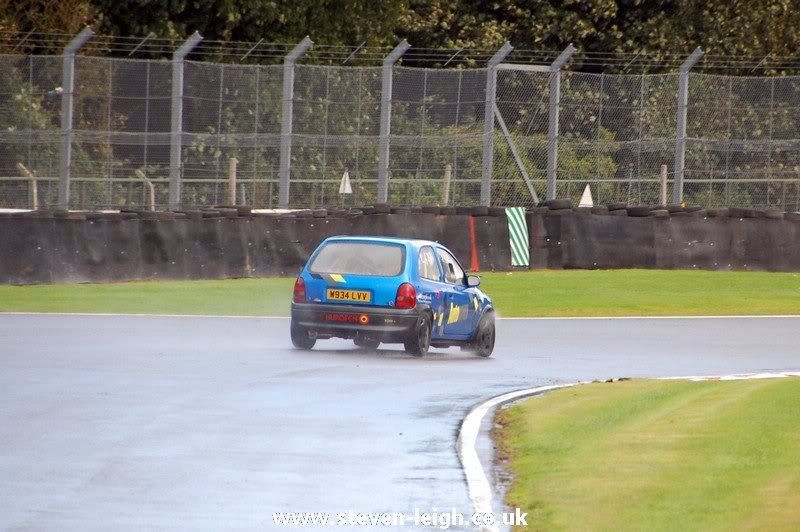
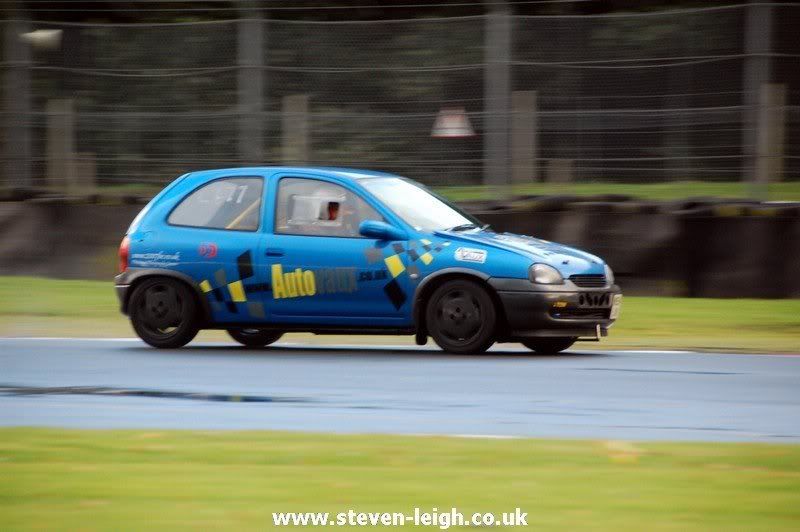
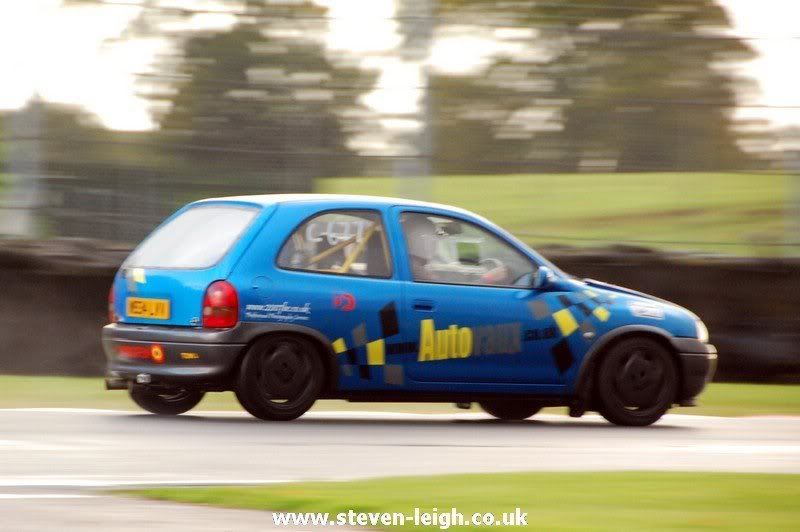
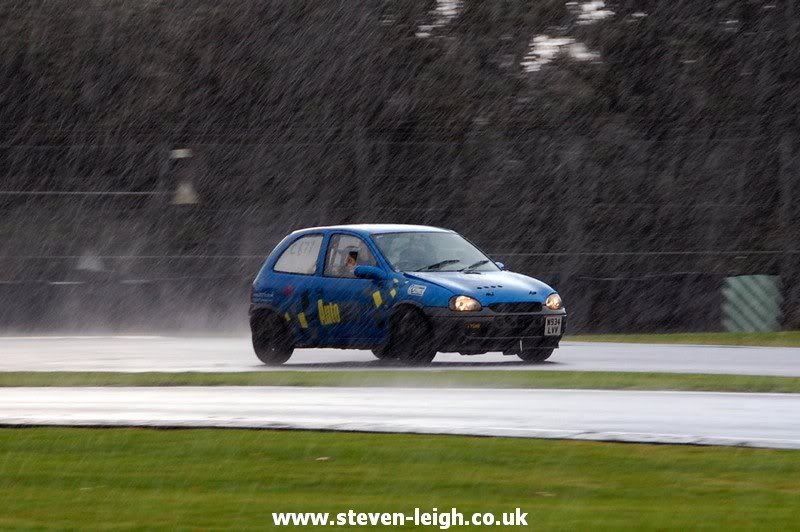
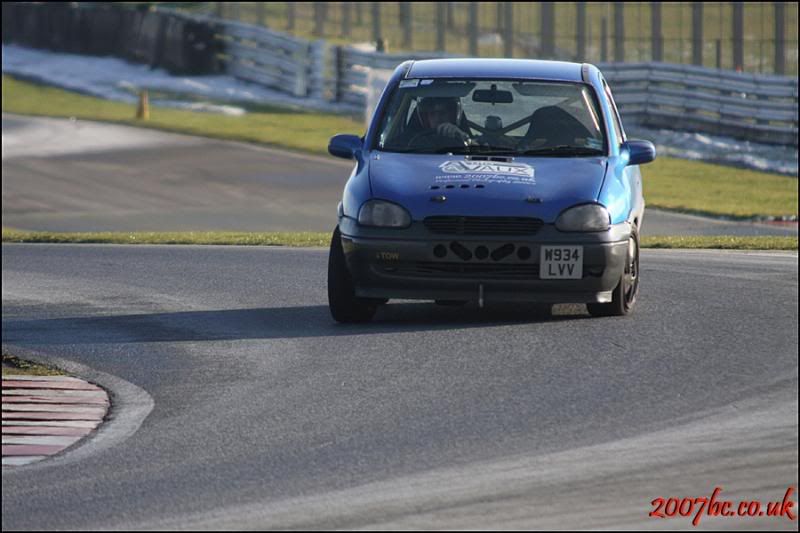
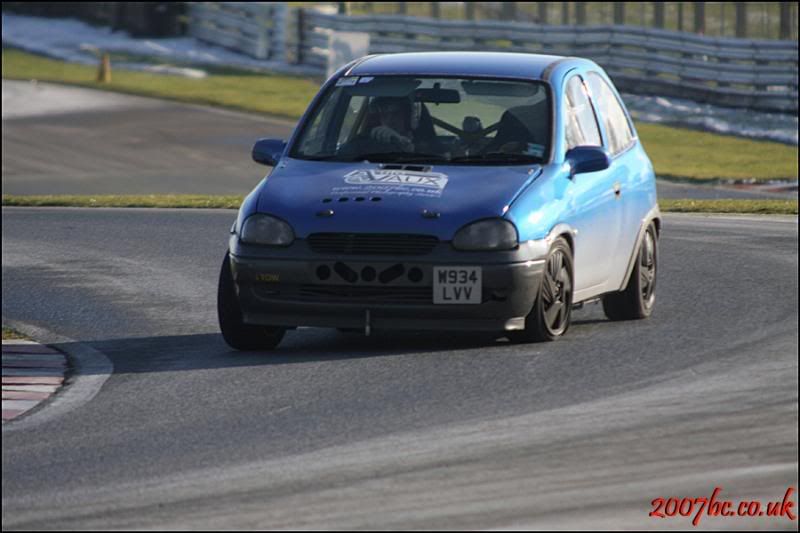
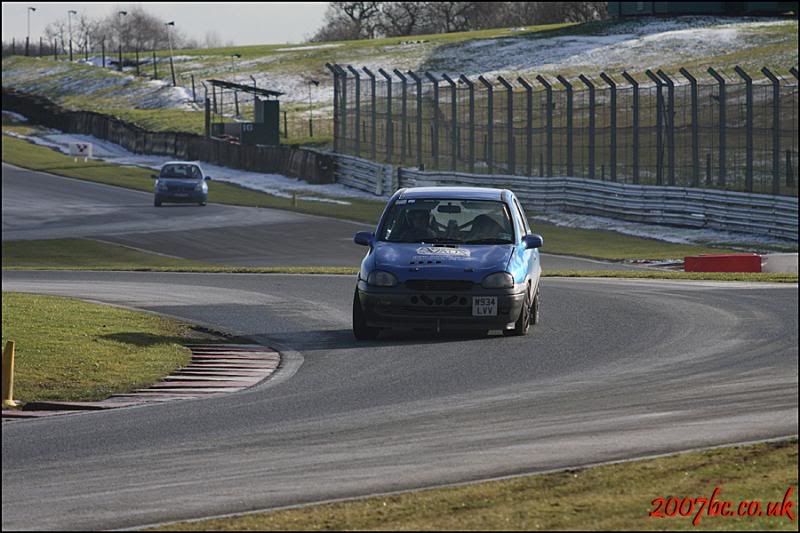
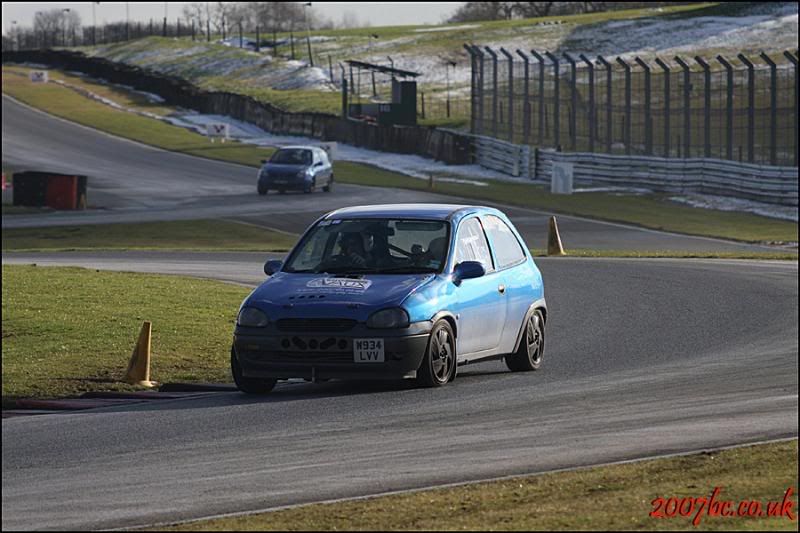
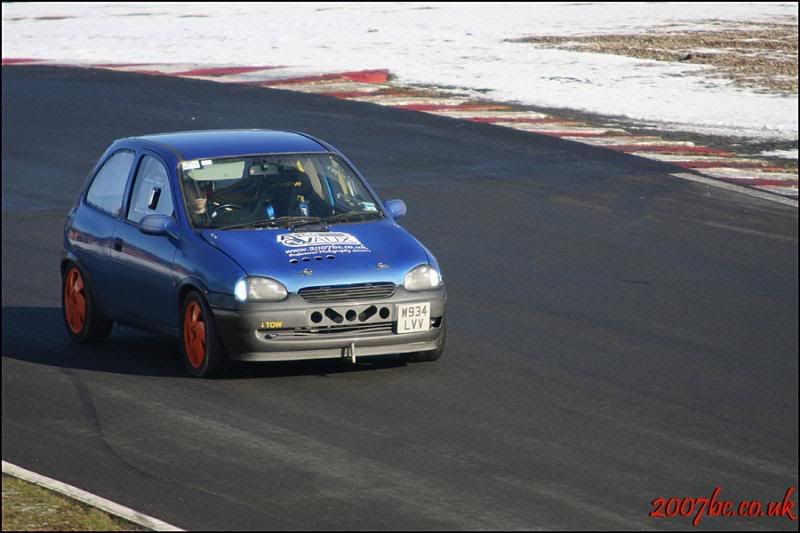
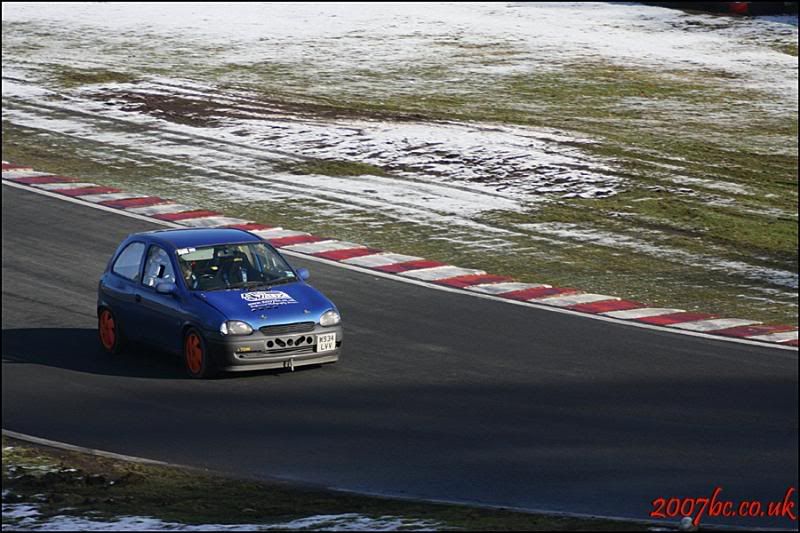
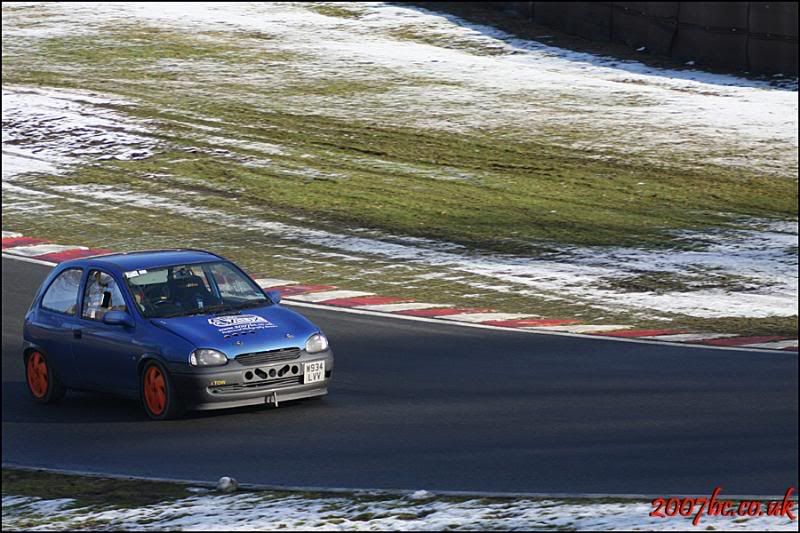
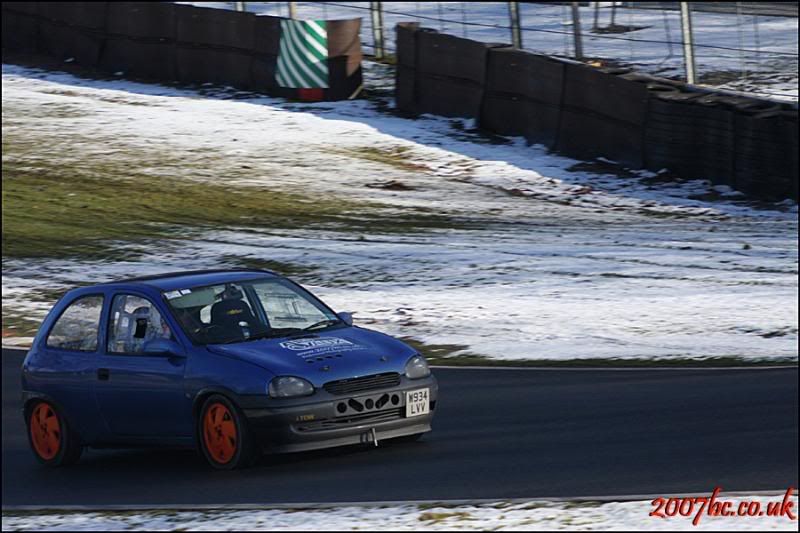
I got 2 good, clean and dry sessions. Then had a break to get a brew and warm up. The heavens opened and the weather got progressively worse (as you will see from the pictures). Oh how I love track days in the rain lmao The track conditions were massively better than at Silverstone though.
First lot of pictures are the official trackside photographers, and the second lot are taken by SteL:beer: thanks mate.
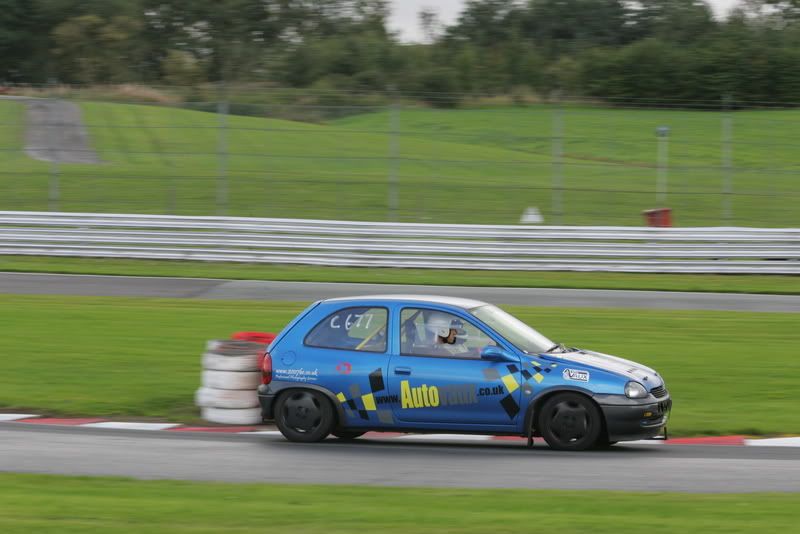

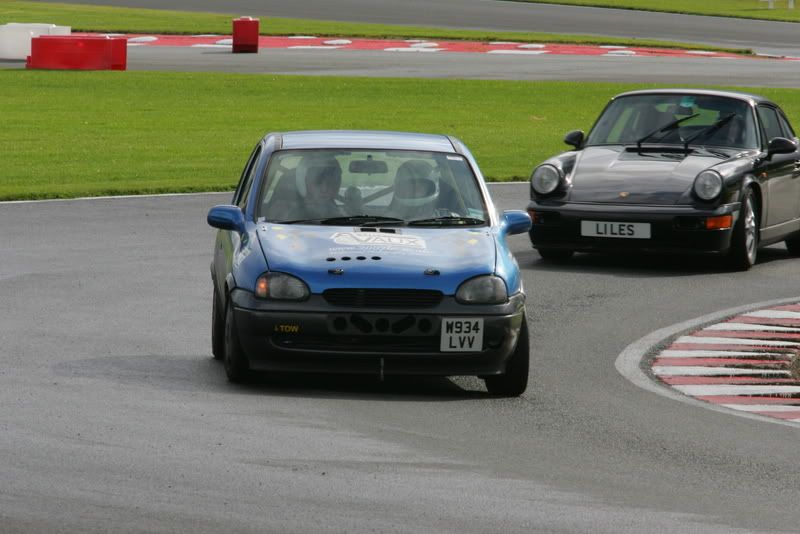
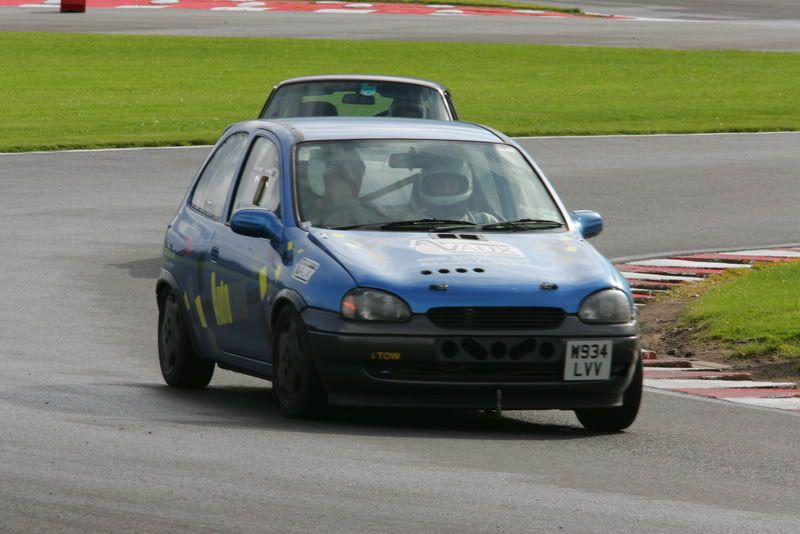
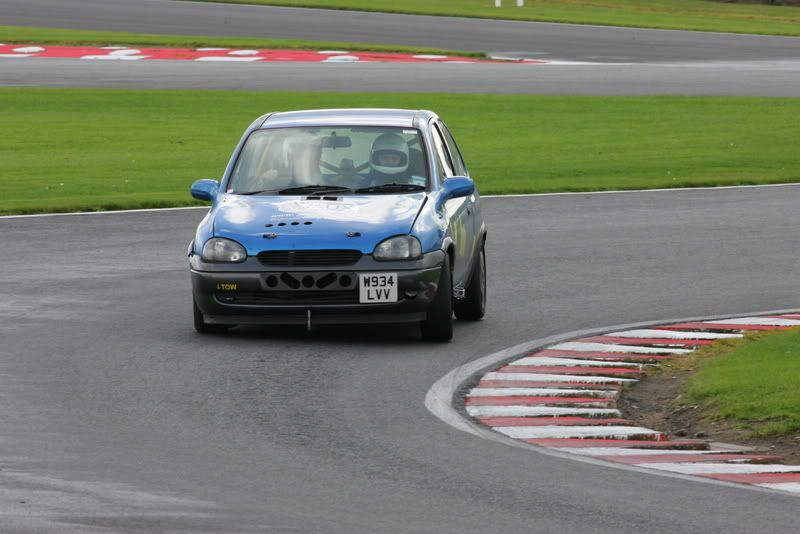


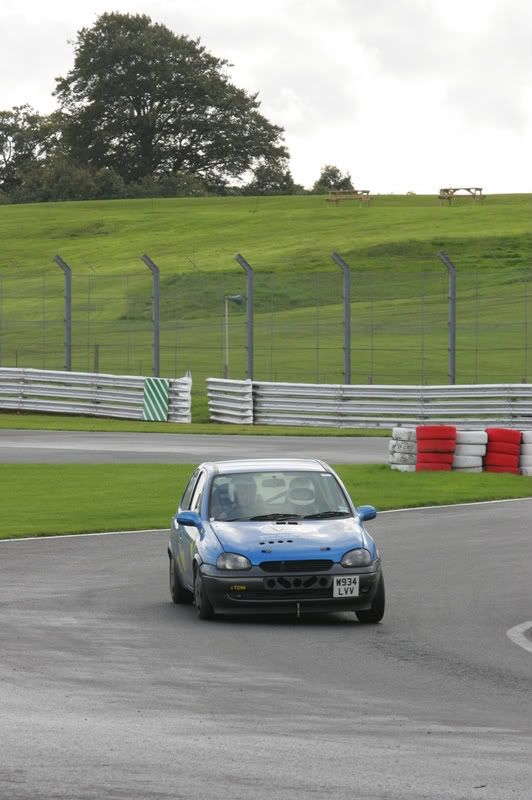 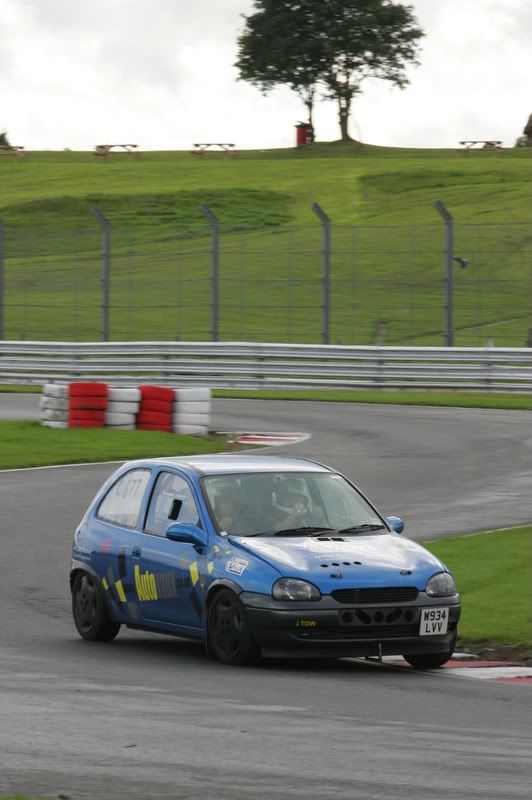
SteLs Photos
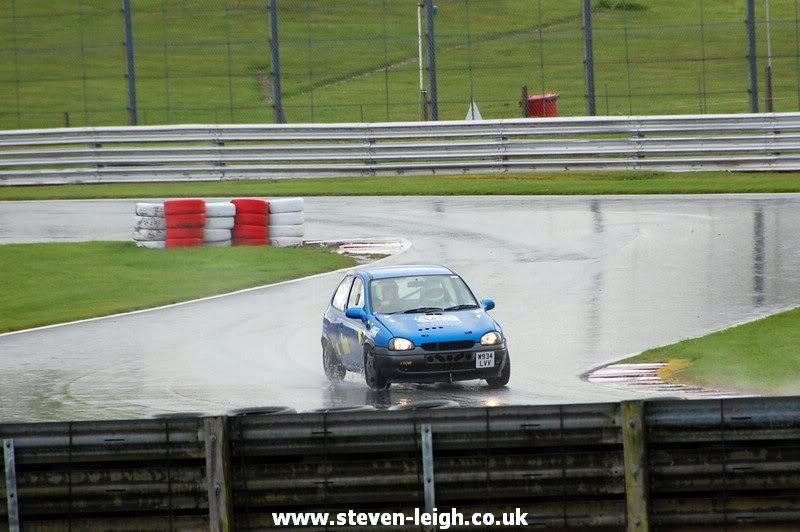

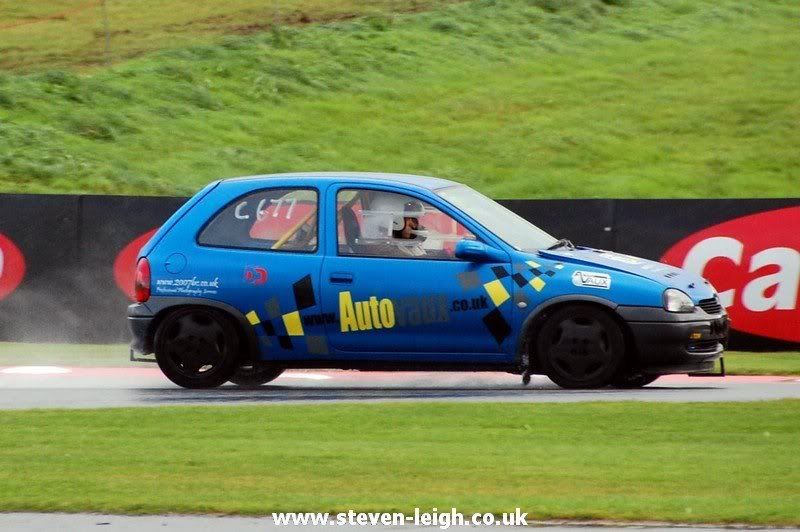
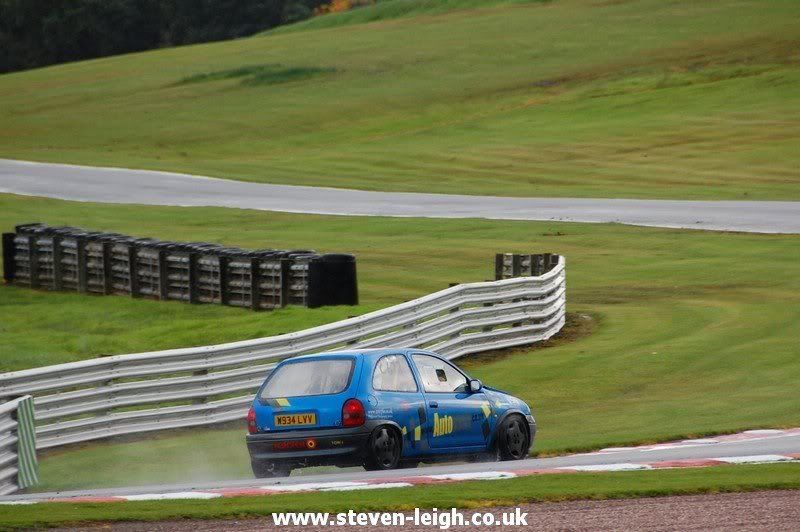
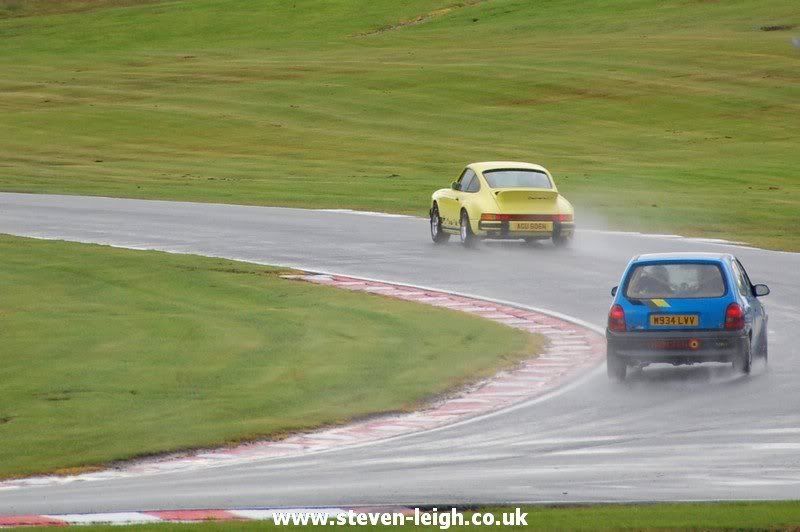

Only 2 issues came out of the day:
1. I get some serious fuel starvation coming out of the long banked corners, meaning I was short-shifting for most of the day. I need a swirl pot setup asap
2. I got 105db on the static test from my exhaust. So I also need to see if I can find a removeable bung (just to put in for the noise test ) lmao
Hope you enjoy the pictures. I have got some videos, but since fitting my 3rd solid engine mount most of the camera mounts vibrate so I need to do quite abit of editting to get the videos to a watchable level. I'll post them sometime over the next week :beer:
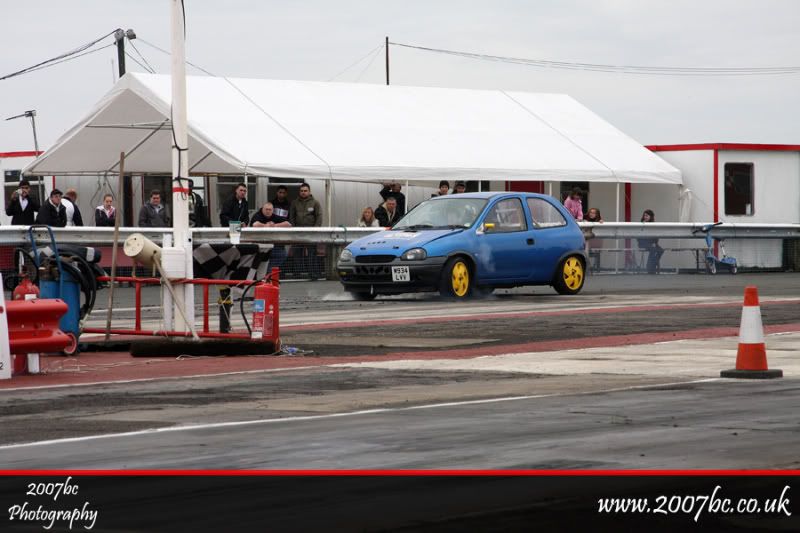
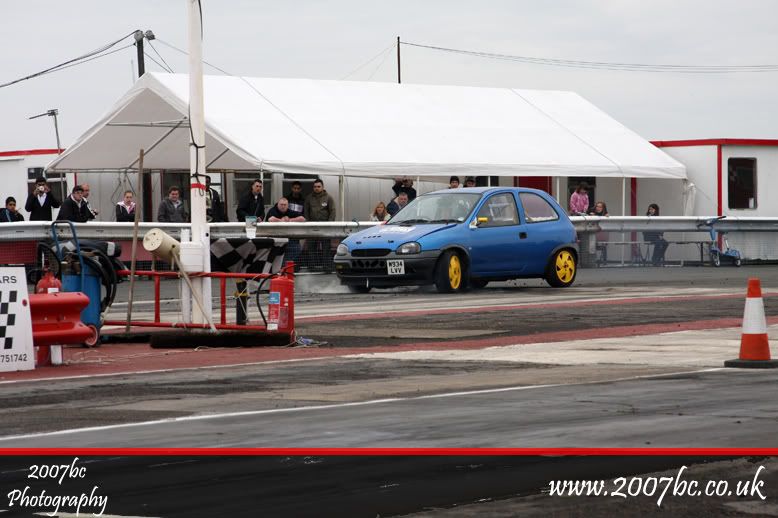
Went to York Dragway yesterday. Managed to get a 13.78, so slightly slower than last time but I wasted the majority of my runs with huge fuelling issues. I found the problem out - the spade connector on my 'directly wired' fuel pump had fallen off pretty much so the fuel pump had about 5volts :eek: I'm surprised the car was performing as bad as it did.
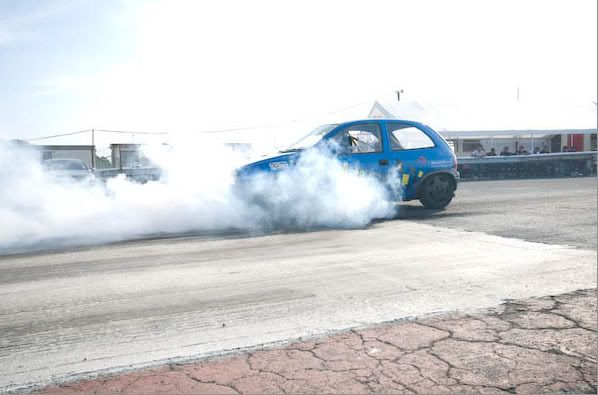
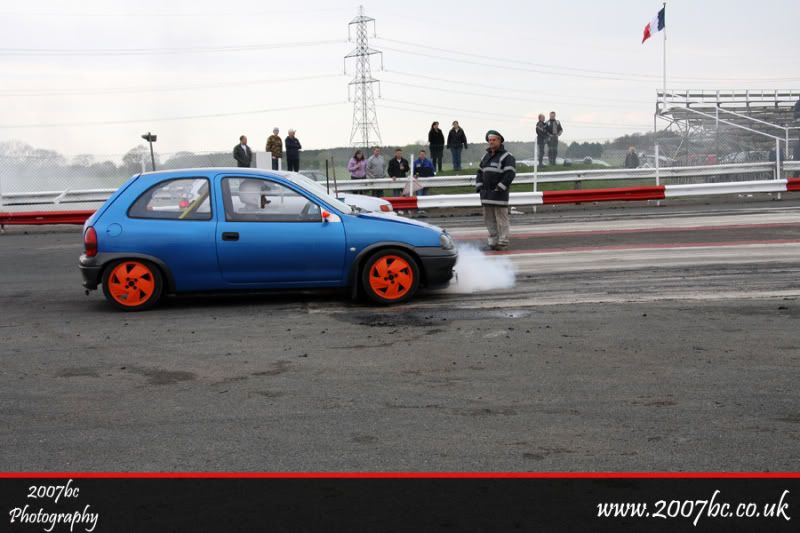
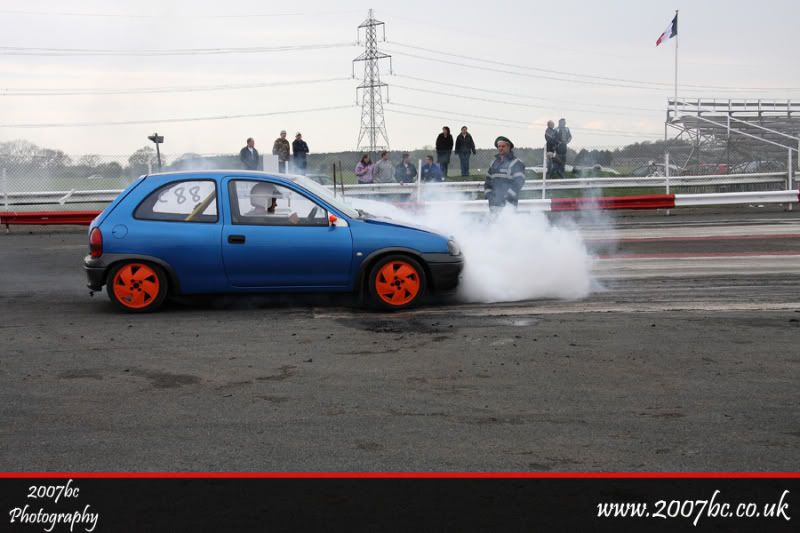
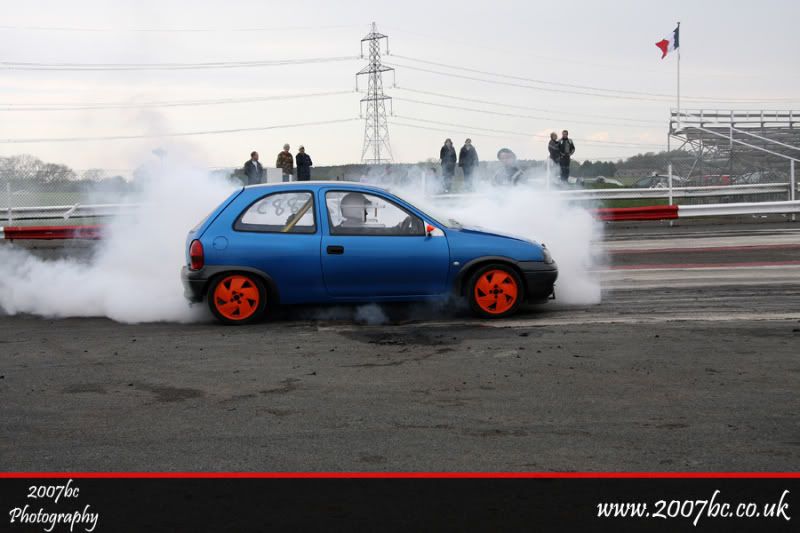
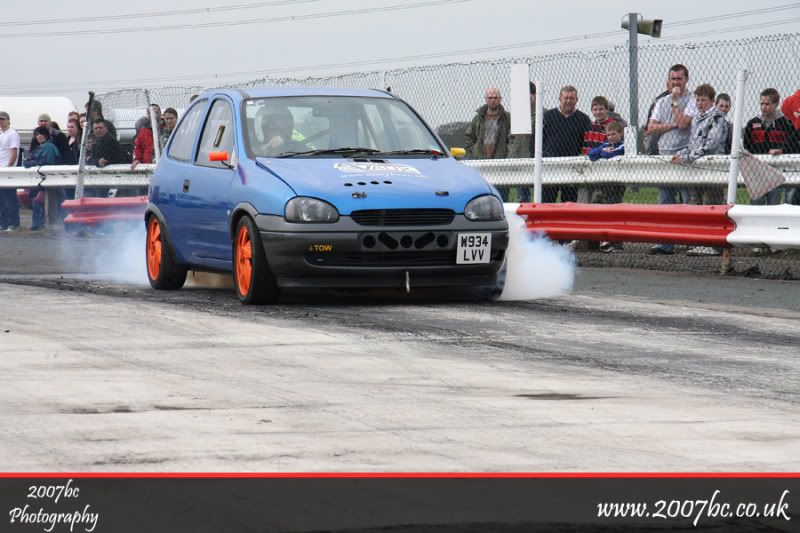
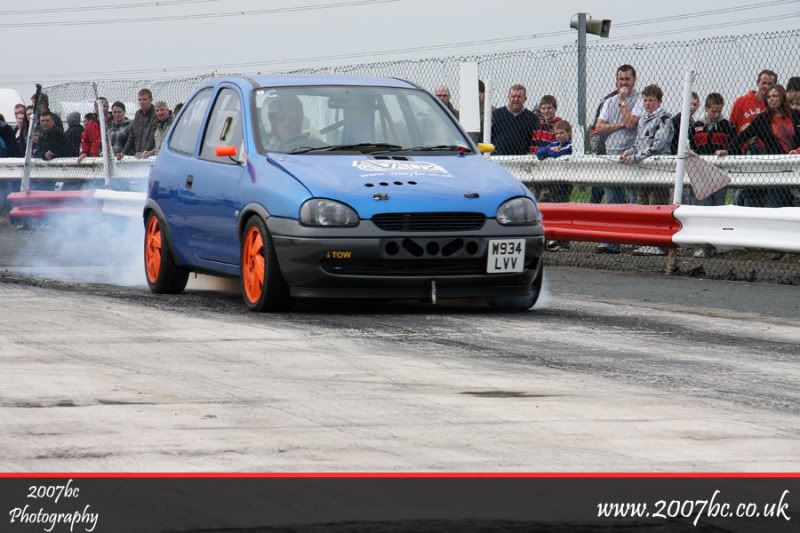
Loving being able to do burnouts, LOL. It's taken me 8years to get it but now I can, wahey
Oh, had 0-60s timed aswell and I got 5.5. Very chuffed with that

Video

Haven't posted for a while, shocking lmao
So, went to JMA Autmotive in Oldham today to have the car corner weighted. I was massively nervous about what my current setup was like on the scales as it was all done by counting threads, cutting bits out and luck
Car on the ramps
So, results with no driver:
NSF - 279
OSF - 296
NSR - 140
OSR - 142
Total Weight: 856kg
So pretty damn close Well impressed
After some adjustments, and with ME in the driver seat, and half a tank of fuel they ended up at:
NSF - 279
OSF - 336
NSR - 161
OSR - 157
Total Weight: 932kg
This is a shot of the 'scales' summary with the front-back, side-side ratios etc

More than happy with that. It poured down on the weigh home, so I can't really say I've noticed a difference, but it's good to know everything is as good as it can be.
Oh, he is a video of me being hooligan in the rain while stuck in traffic lmao

Pic of half dash. Needs tidying up and will have some more work done to make it tidier in the new year
Random pics:
In a further effort to reduce noise I Dynamatted my airbox yesterday. The difference is huge, the car now doesn't even sound like it has TBs, or an induction kit, it's just "noise". Really impressed with this stuff.
Oh, also removed the trackday backbox while the car was running and it does make a MASSIVE difference to the noise of the exhaust
Some random pictures
Video I did of back to back airbox tests You can really hear the difference in the middle 2 videos

|
DaveB
Member
Registered: 29th Dec 00
Location: Huddersfield
User status: Offline
|
Got bored with the rest of the stickers so pulled them off. Unfortunately some paint came off on the drivers wing, so I thought it a good time to see how good am I with the rattle cans lmao
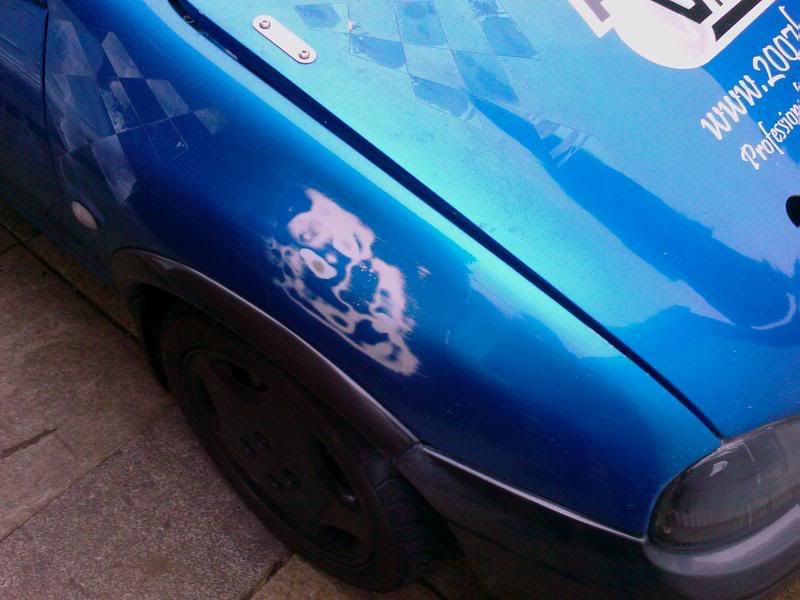

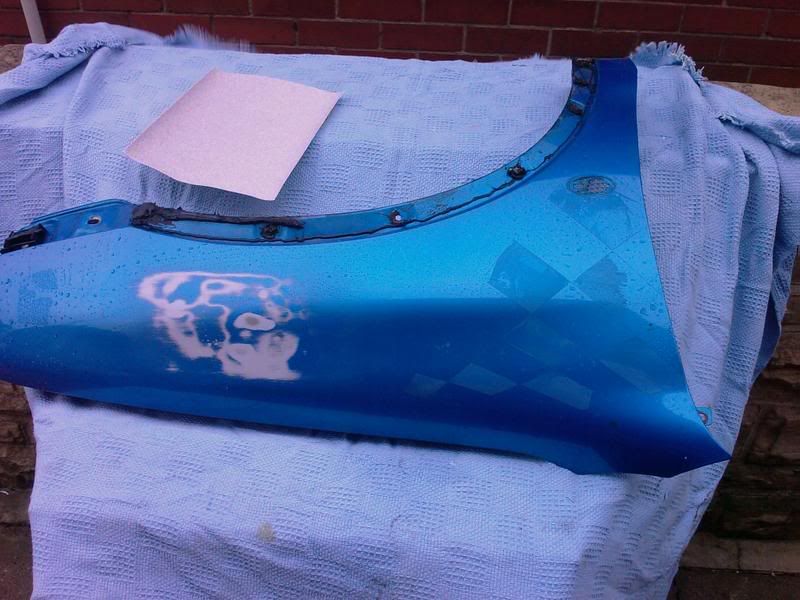
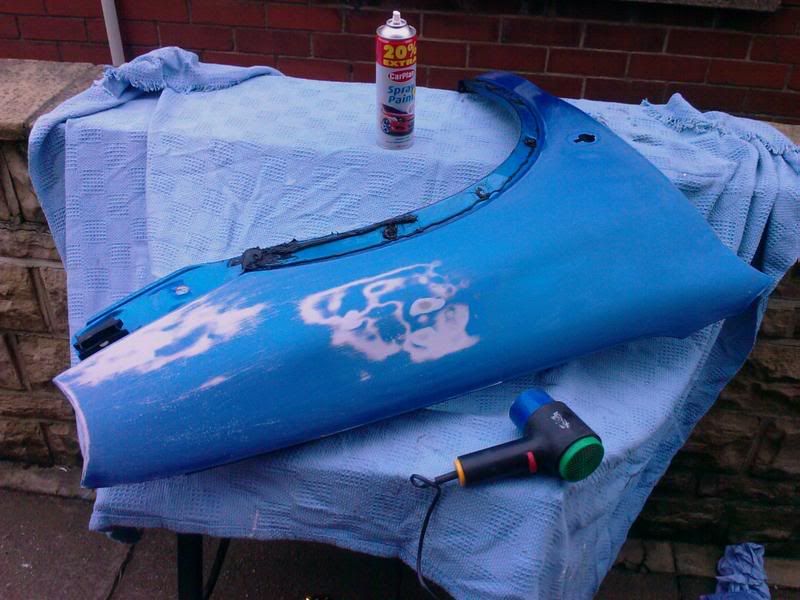
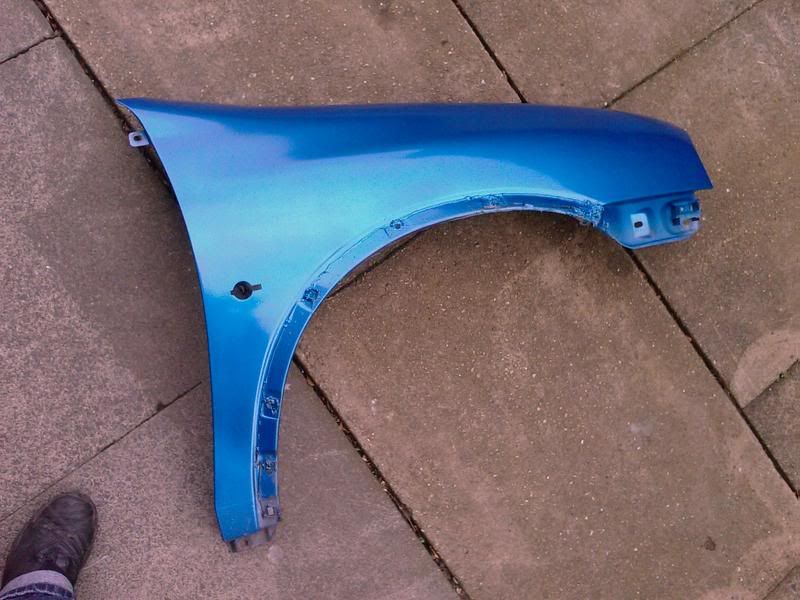
It needs flattening down, but the colour match is spot on. I'm well chuffed
On re-assembling the car after removing the front bumper I wanted to attach the arches properly, so they're now bolted on with caphead bolts
Also always been annoyed that my coilpack has been held on with cable ties. I knocked something up myself, proper ghetto modding lmao
Then went over to Leigh to sell my front Whiteline ARB, and get another GSi rear one. Plan is to fit 2 rear ones, and hopefully stiffen up the rear beam abit for not much money
On the way back I had a race /on a private road/ with a 2.5 V6 alfa. Got the thumbs up after pulling away from him at silly speeds, which was nice :beer:
Then pulled over on the road to do a video of my MBE launch control lmao lmao I love it (and the smoke is fuel btw )
No whiteline ARB benn, I can't justify that sort of cash for a bar of metal tbh
Fitted the 2nd rear ARB yesterday;
before
after
The car is now alot stiffer driving about. Unsure whether cornering is improved, as the last time I drove it was over a week ago, and it was raining. The cav rear ARB from Drizz should be coming from Drizz early this week. I'll get that fitted and then not doing anything else to it.
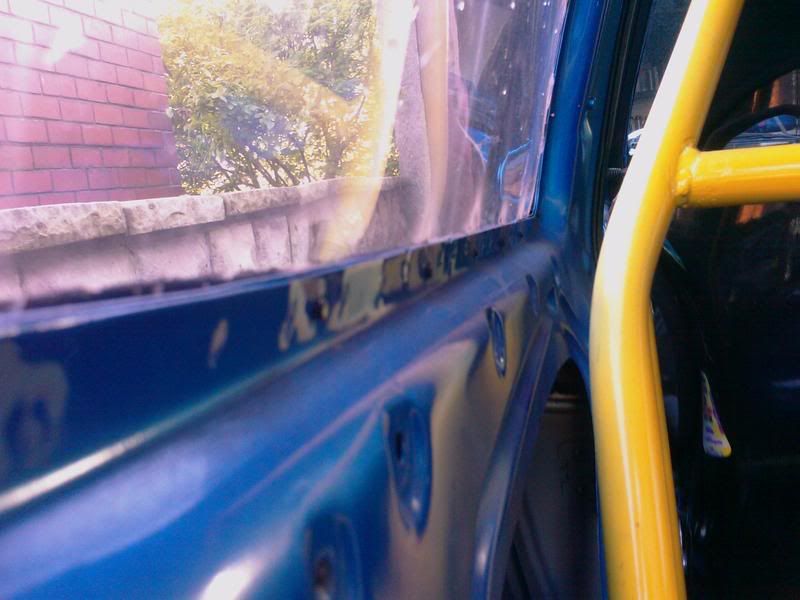
Also, after reviewing the MSA bluebook there's a few things I need to do before applying for any hillclimbs/sprints. The first being remove all 'sharp' objects or edges from the inside. I have a few, the most noticeable being all the jagged self-tappers holding my windows in, so all those were chopped off:
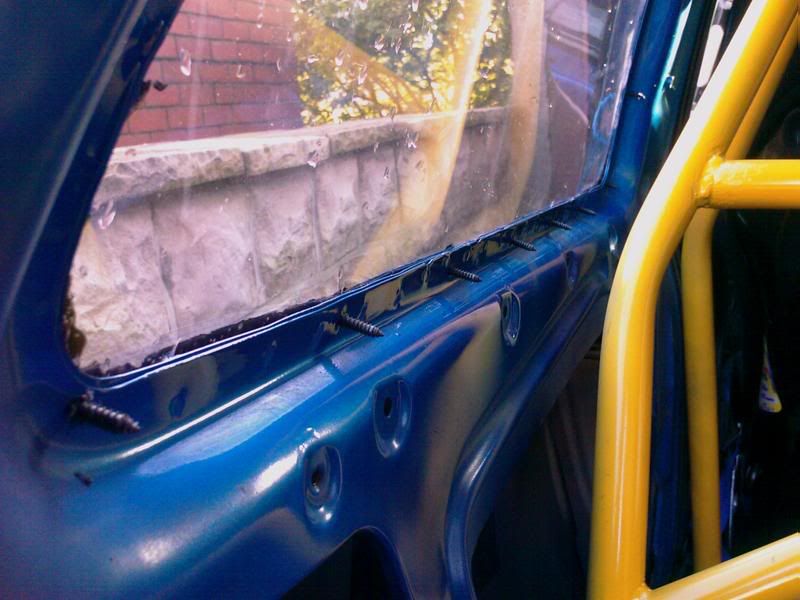
after

Arrived on Thursday Drizz, you'd sent it to my parents house. nevermind, got it in the end
So, todays mission should I decide to accept it; get a Cavalier mk3 rear ARB to fit to a corsa.
Off we go then:

My cavalier ARB was from a 2.0 sri cavalier. You can also use(I believe) one from a v6 cavalier, which is actually thicker.
Then, measure up the up the distance between the holes on the base of the corsa rear beam (116cm) and compare that with the total length of the ARB (120cm)
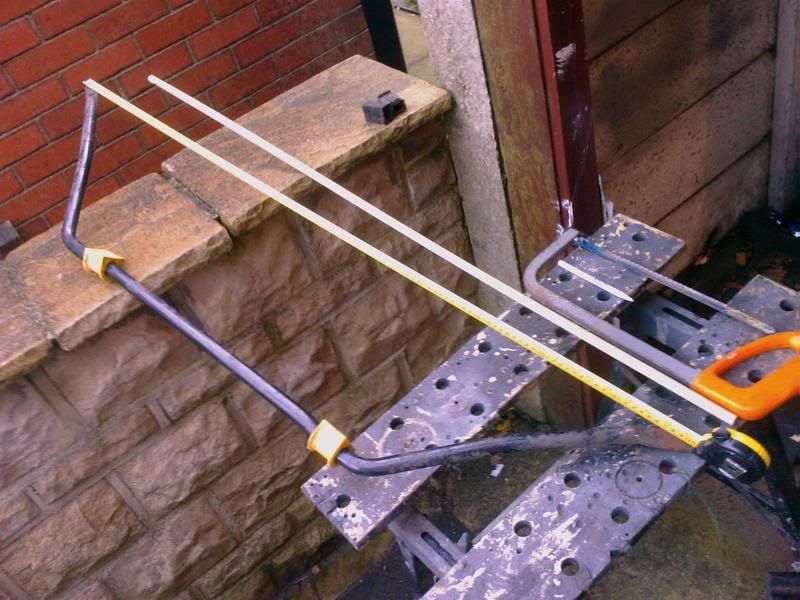
After measuring 116cm apart on the beam, drill a hole in each end that will fit the relevant bolt size (M10).
<This bit was an absolute twat, and unless you have a pillar drill and some very good drill bits. A normal 'hand' drill might struggle>
After offering this up and bolting it up loosely, I moved the standard (although in this case powerflex) cavalier arb mounting bushes nerear into the middle of the beam.
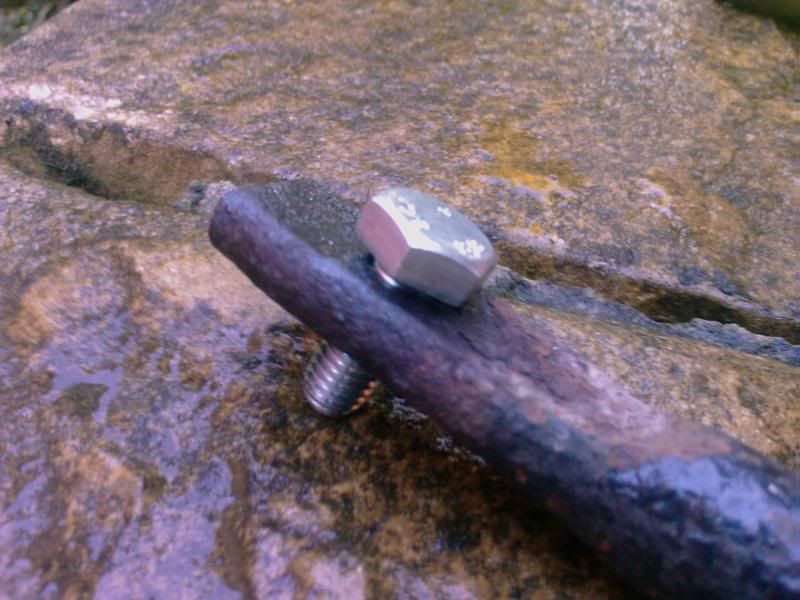
A trip to the local motorfactors for 2nr 92mm exhaust clamps. Bolt it all up, and WALAH!

An (almost) whiteline rear ARB for a corsa, for just £13.98 (tenner for the arb, 3.98 for the two exhaust clamps!)
First impression, in wet weather, is a BIG improvement. The rear of the car is much stiffer. VERY impressed :beer:
:beer: :beer: for Rick who gave me the idea in the first place, and Drizz for offering me the arb
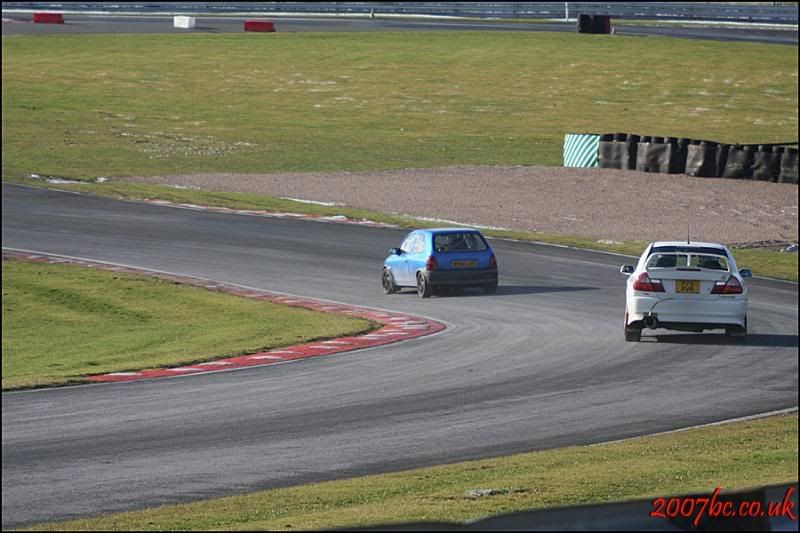
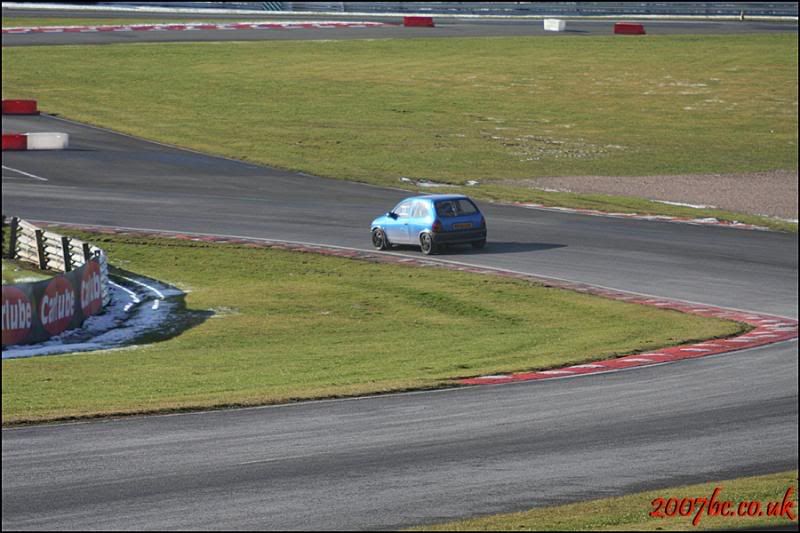
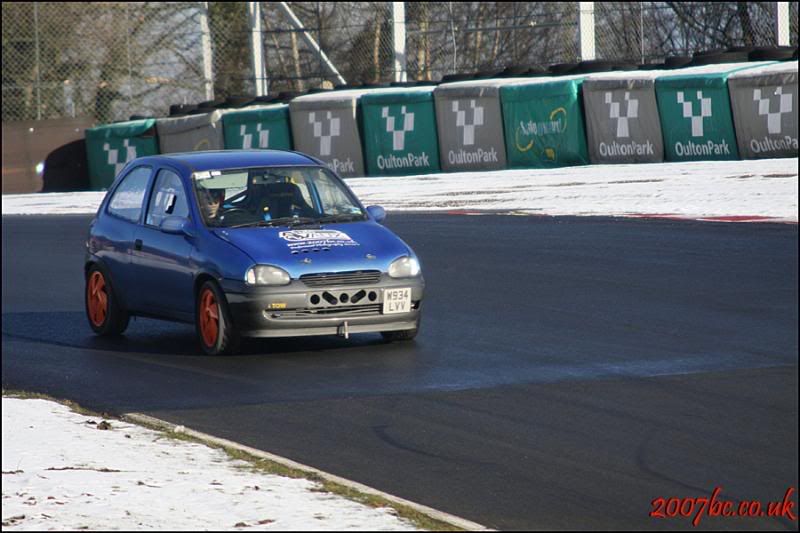
Report on my Focused Events Trackday at Oulton Park
Arrived there nice and early, and got signed on. The track temperature was -2deg! and it had been gritted. The morning sessions were a joke really, generally there were a red flag every 15-20minutes! My car was ****e in the morning, I just couldn't get traction coming out of the corners. diff dif diff needed!
After dinner though, the track dried up and it was game on, much happier with the car and really pushing it to its limits. (as a few of the pictures show). It's so stable through corners, and with abit of lift of oversteer really lets the back end out, but oh so controlled


Quick video courtesy of namkeaps :beer:
Evo moved after the bridge lmao
Damn they're small

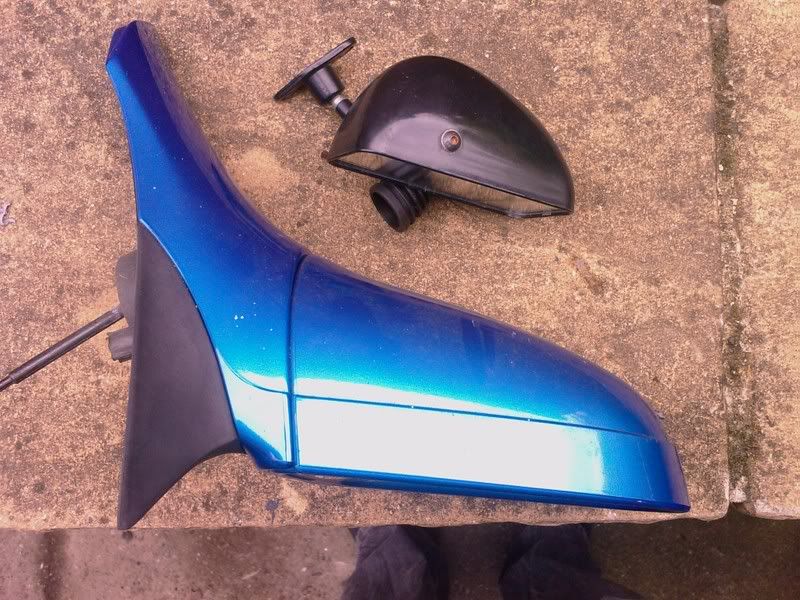
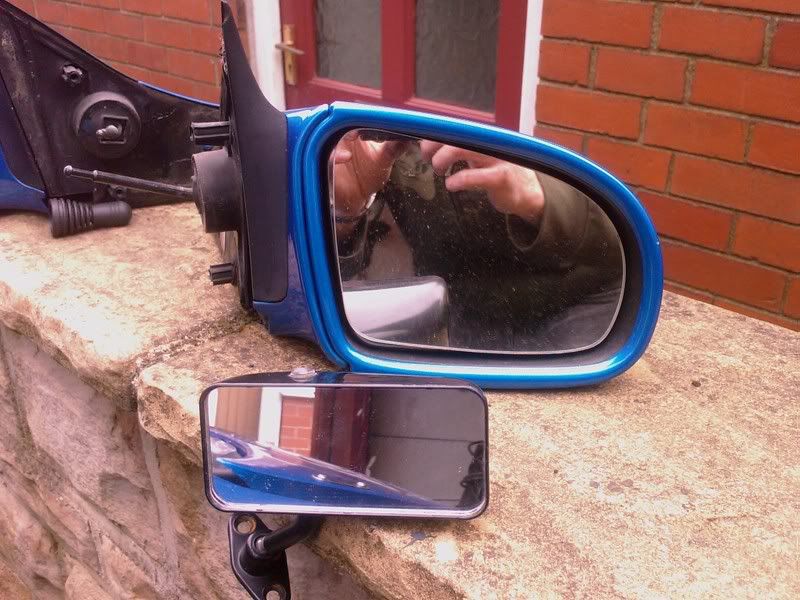
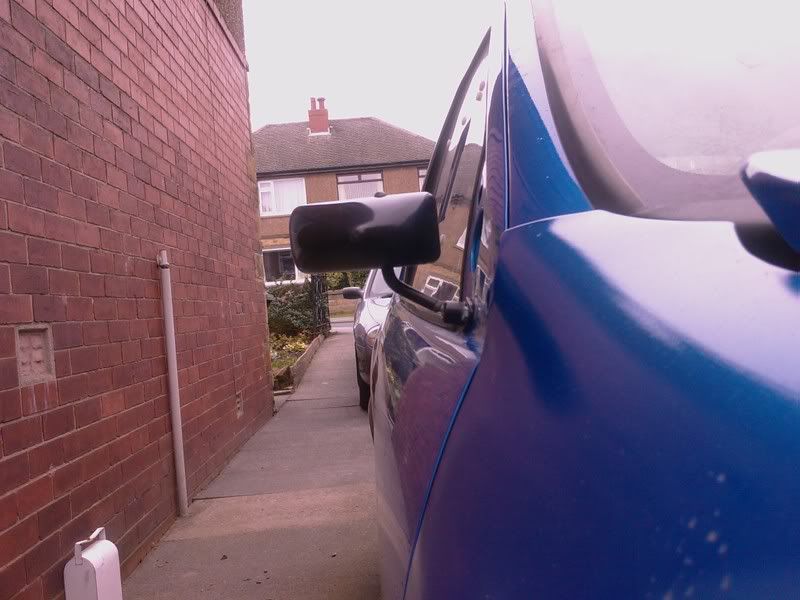
Dunno if I'll keep em tbh, you can't see owt
Backing plates are made out of thin ally. The job's not finished yet as I need to get some tyres swopped over before I can get my new wheels painted. When that happens the mirrors are being painted to match
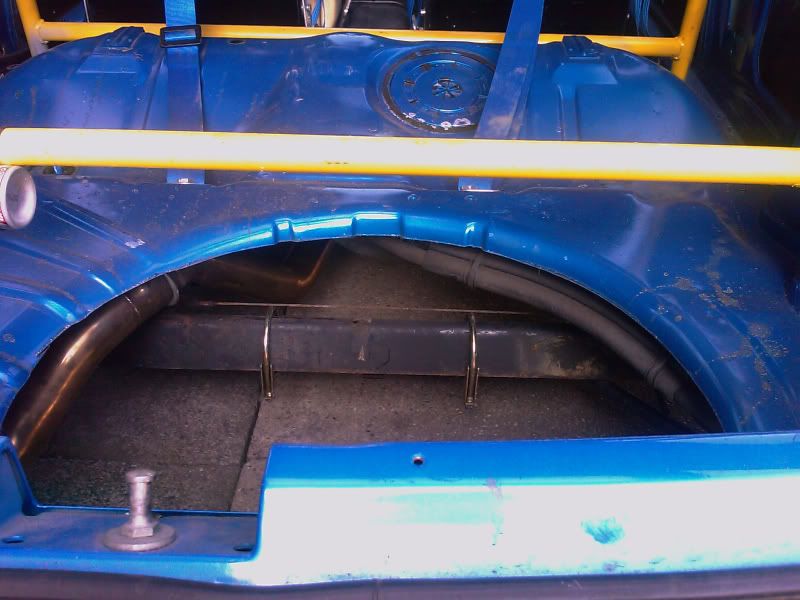
What's the gen on removing your spare wheel well? I want to cut it out and plate over it with ally to save abit more weight. I have a welded in strut brace to the middle/top of the rear struts - will this be sufficient bracing, or would I need to weld a bar in underneath where the well was?
Productive day today.
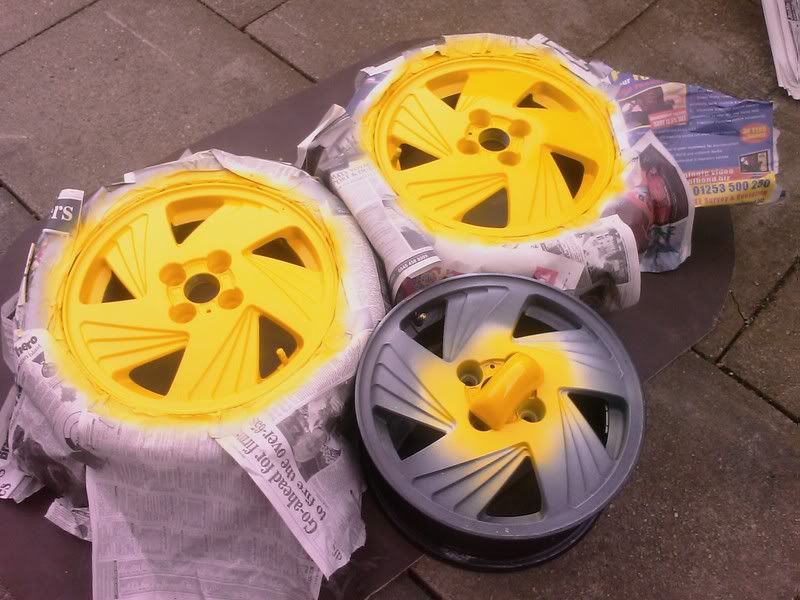
Started off by picking up my wheel from Hi-Q tyres. One of the wheels I got off Wazpaz was bent so I had to find another. big up to Jav786 for helping me out at short notice :beer:
Ready for painting; one black (wazpaz old one), one silver (one from jav) and another black (bent one) for use as my painting table.
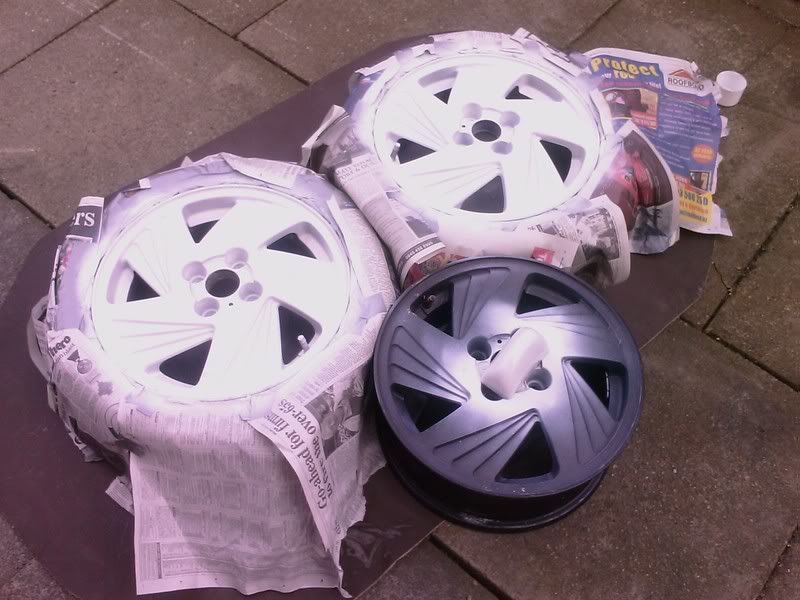
Sanded down;
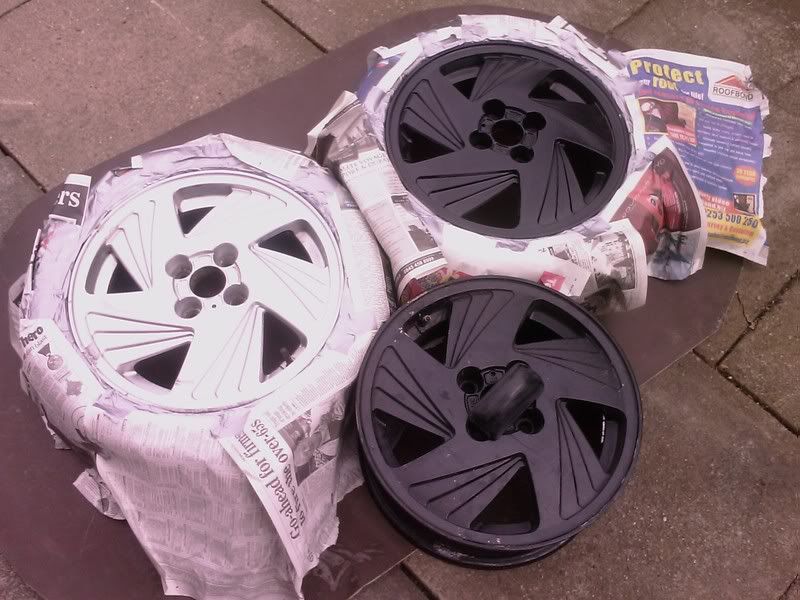
Primered;
While that was drying I finished off my SPA mirror backing plates PROPER happy with how these turned out
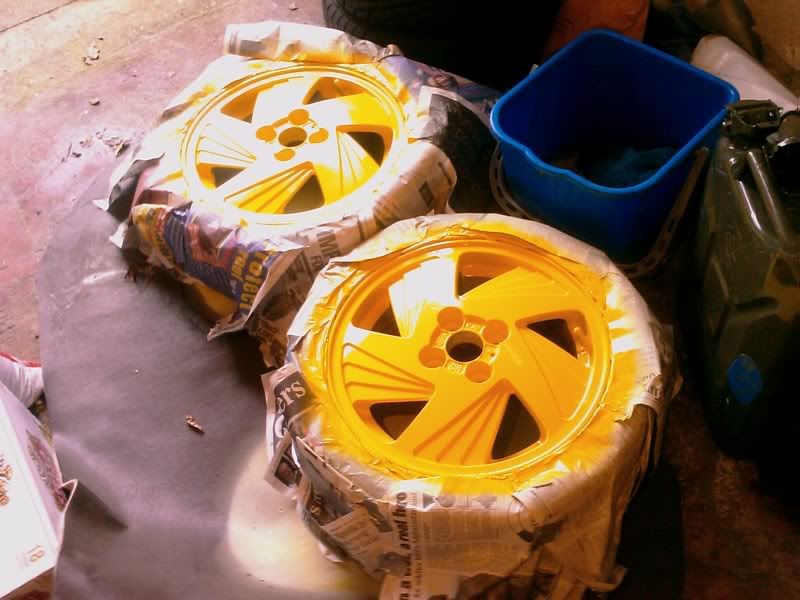
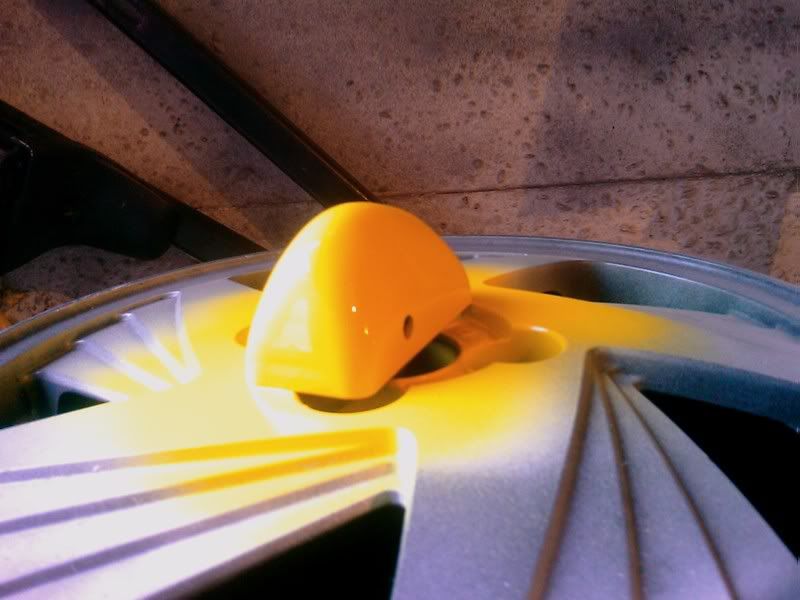
First coat of paint;
Last coat of paint;
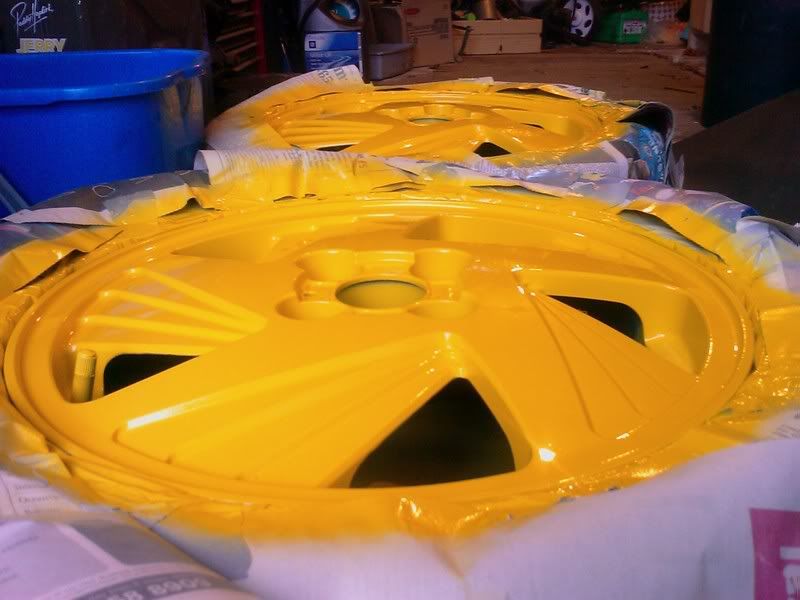
ALL fitted and finished;
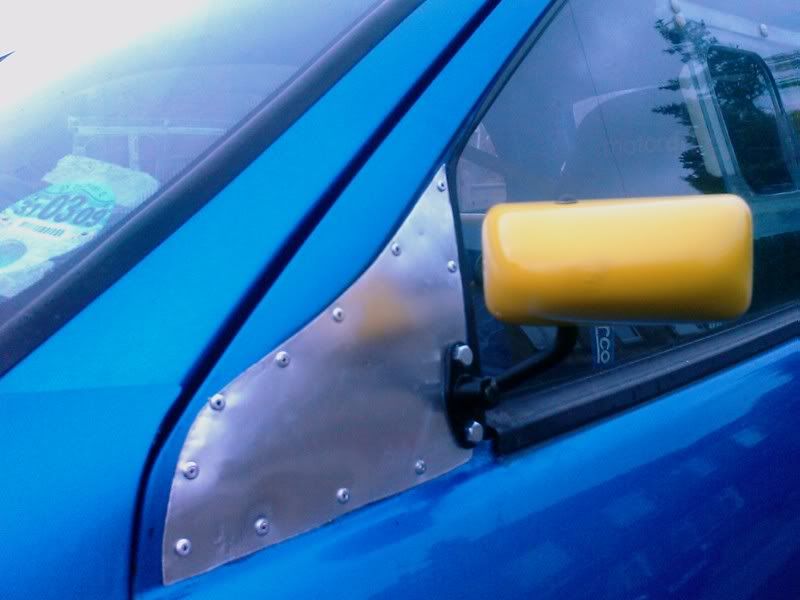
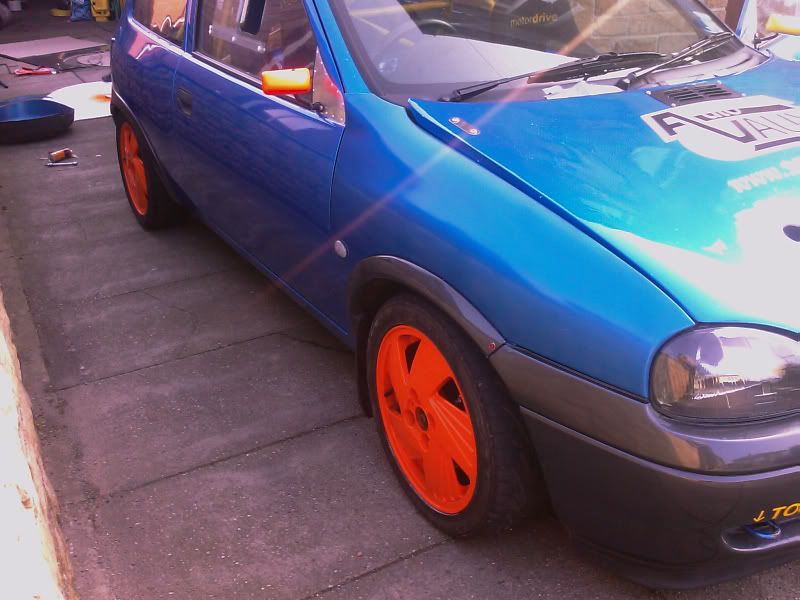
really really please with how it looks. Gotta find some orange paint so that I can do the SPA mirror on the drivers side to match my orange wheels
Busy day for me yesterday; started at 9am and finished at 5pm
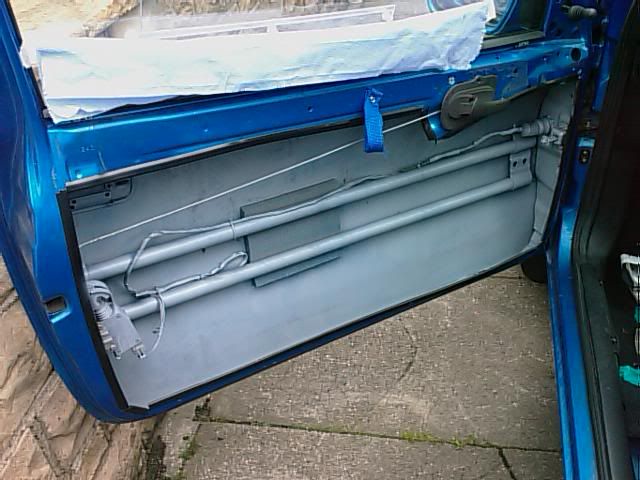
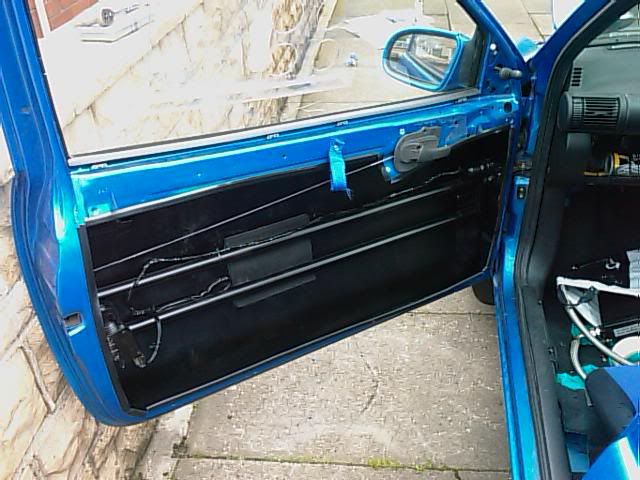
Front passenger door slightly more gutted, and CF doorcard rivetted in place:
Then painted my drivers side wing mirror to match the wheels STFU to all the people that don't like random wheel colours
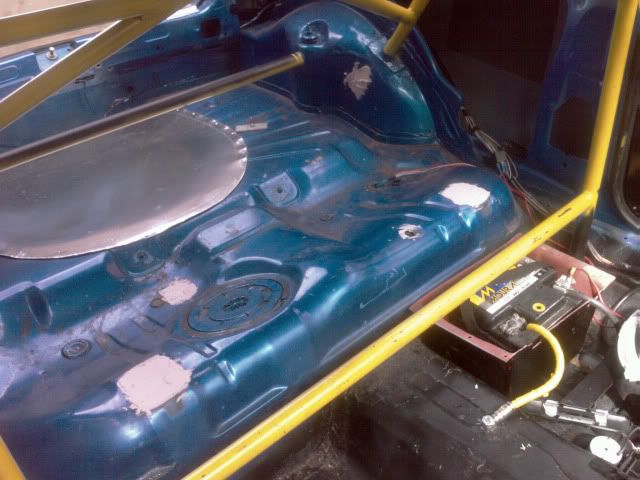
Then moved on to cutting out the spare wheel well:

Battery out

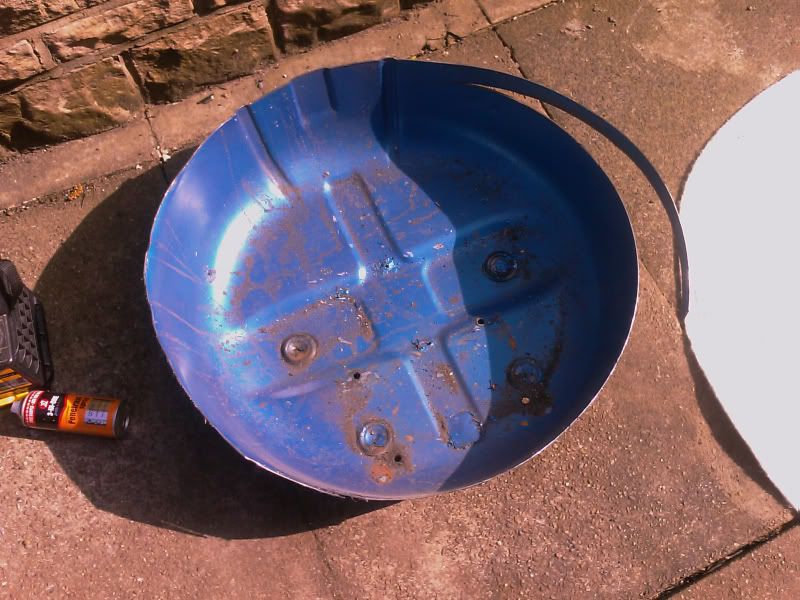
Wheel well gone

1.5mm Ally sheet marked out
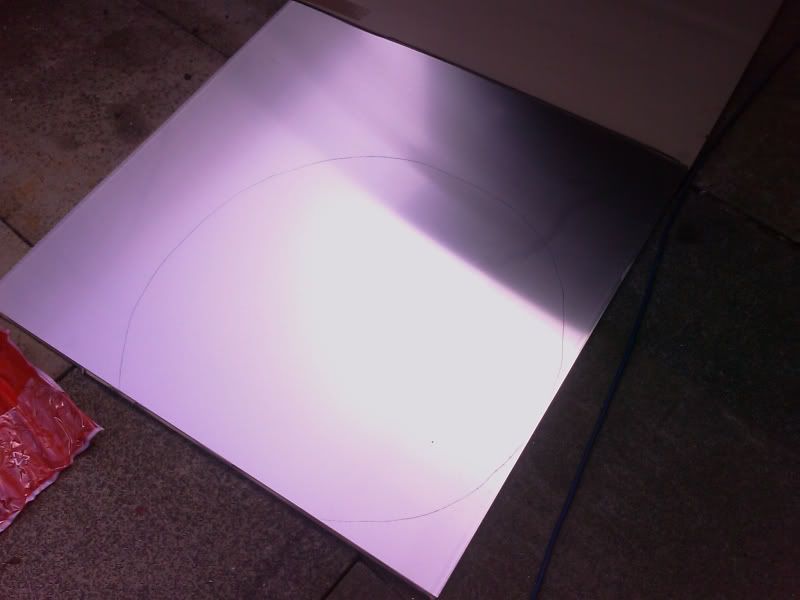
Cover cut out
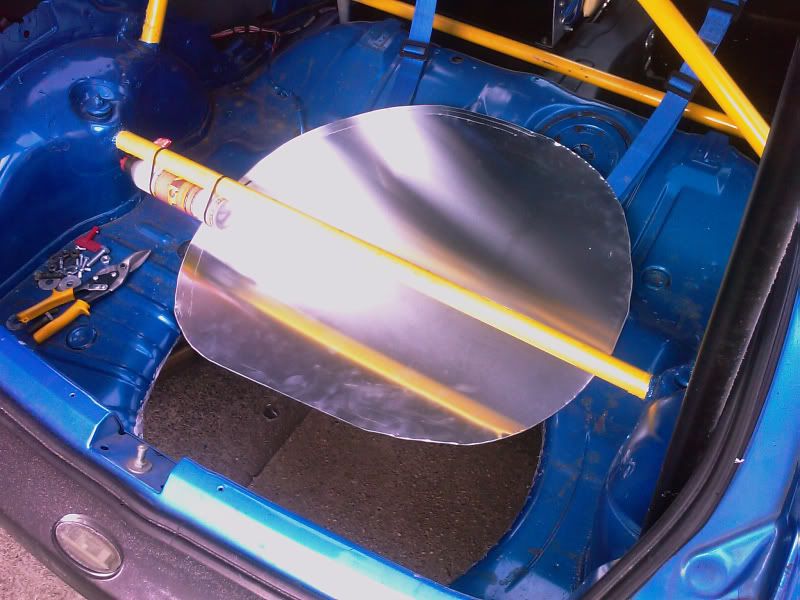
Rivetted in place
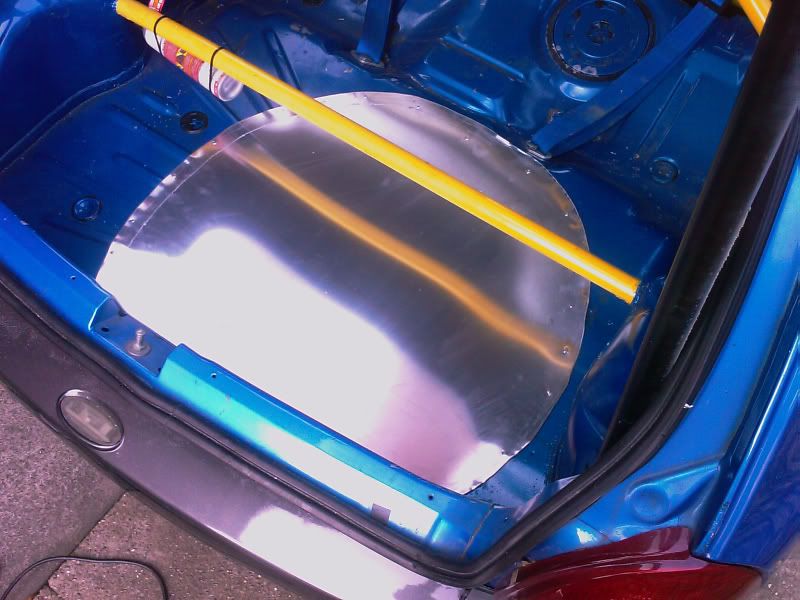
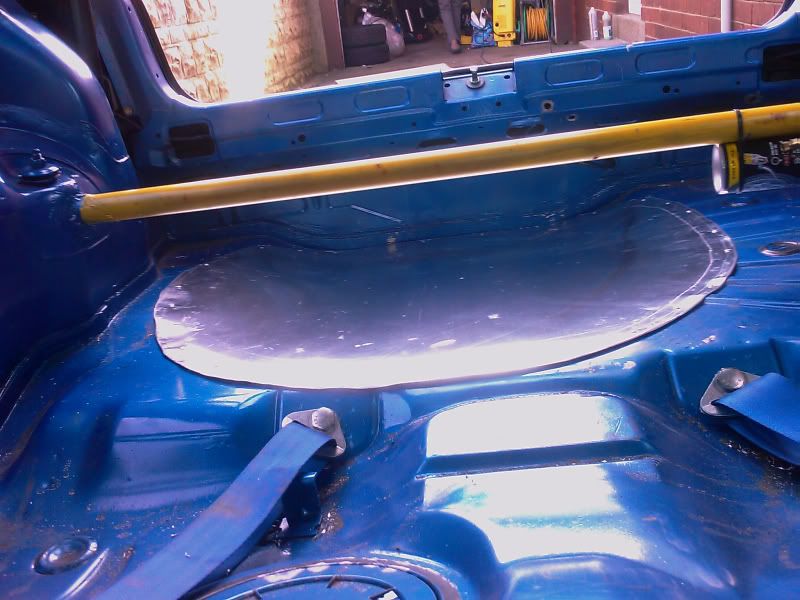
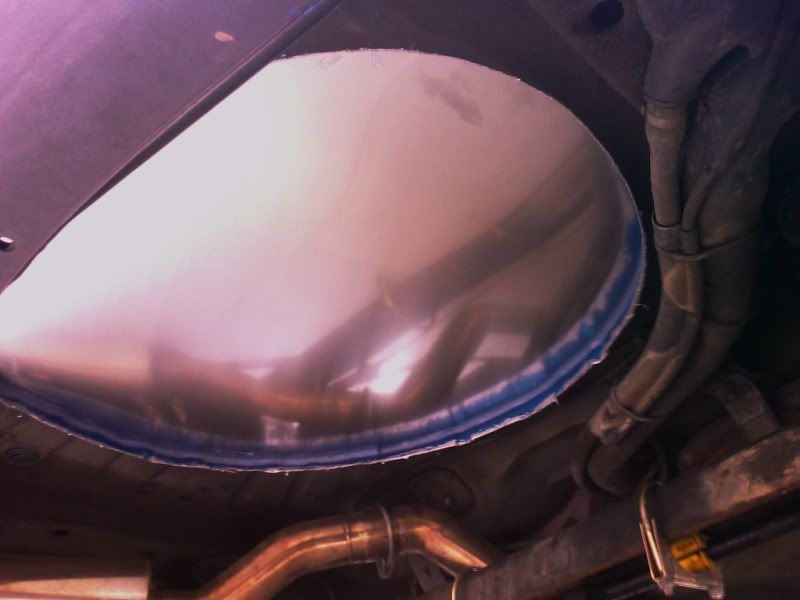
and sealed underneath along with the edges painted over
As the battery WAS in the boot, I needed to move it. Went for behind the passenger seat. This means I save weight by shortening the power lines by about 4ft, and by ballasting the pass side to counter-weight myself while driving.
Seat out and holes drilled
Battery in and mounted
Wiring mostly complete
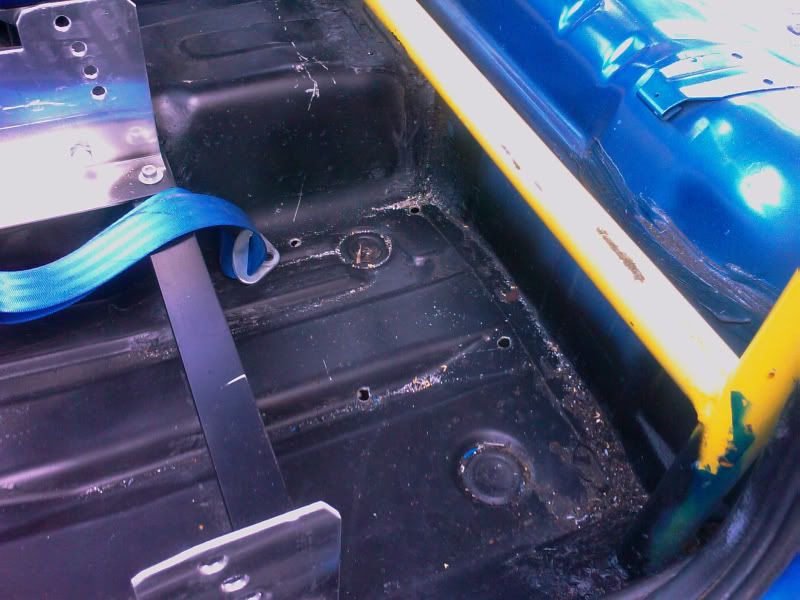
It was then at this point I noticed a damp patch under the car... yes thats right
maybe I should be more careful in future? lmao I did finish the rest of the battery install out, and move my cut-off switch to the scuttle panel but my toys had already been thrown out of the pram by then :beer:
|
DaveB
Member
Registered: 29th Dec 00
Location: Huddersfield
User status: Offline
|
Unexciting update warning lmao
My old scuttle panel was a mess, and after moving my battery cut off switch there and making a mess of the hole I needed a new one. A trip from the scrappers later and I was armed with a "more aerodynamic" tigra scuttle panel I also needed some new washer jets, so robbed the ones from a 405 that mount on the wiper

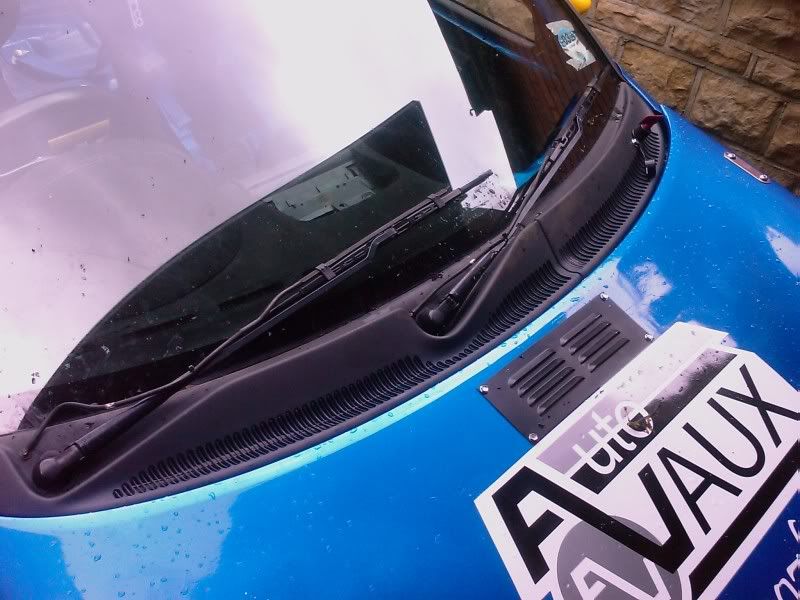
4 water jets per blade..
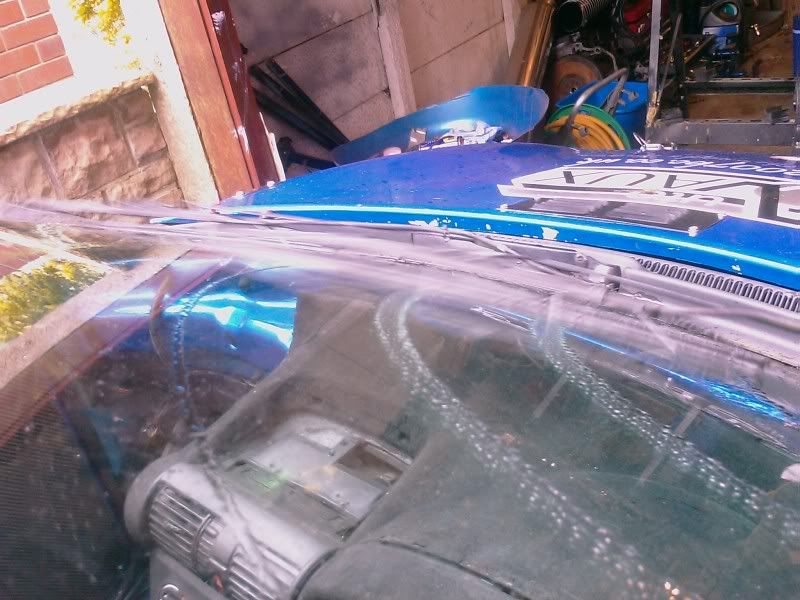
All finished
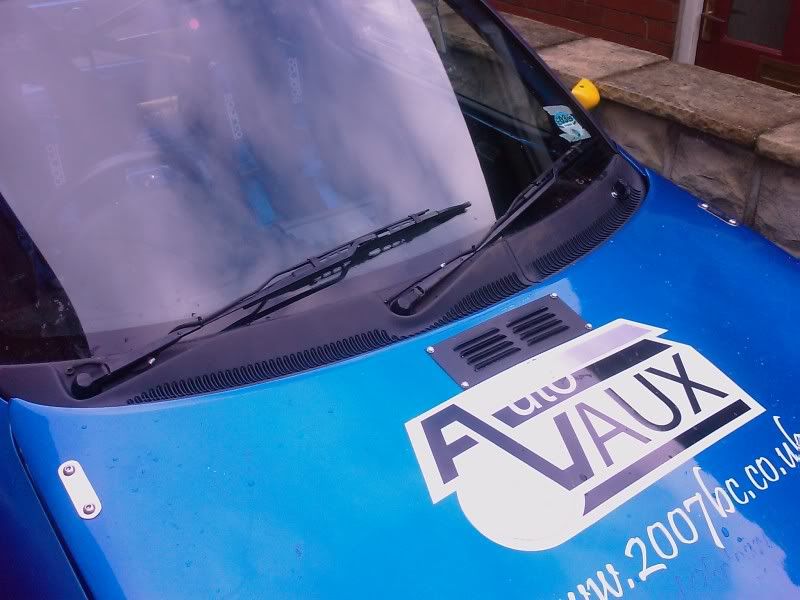
Dunno if it's more aerodynamic or not?
Managed to get to York dragstrip yesterday. Had a thoroughly good day, although didn't beat my previous best of 13.73.. Loads of pictures from the day:


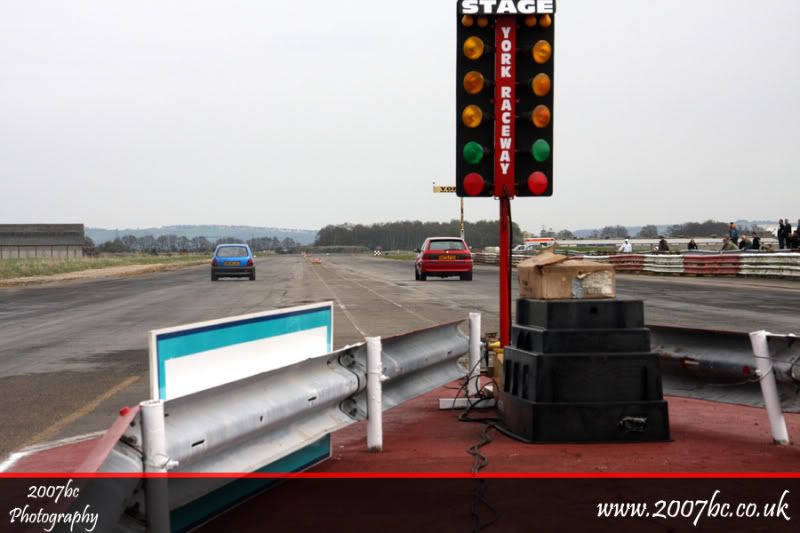
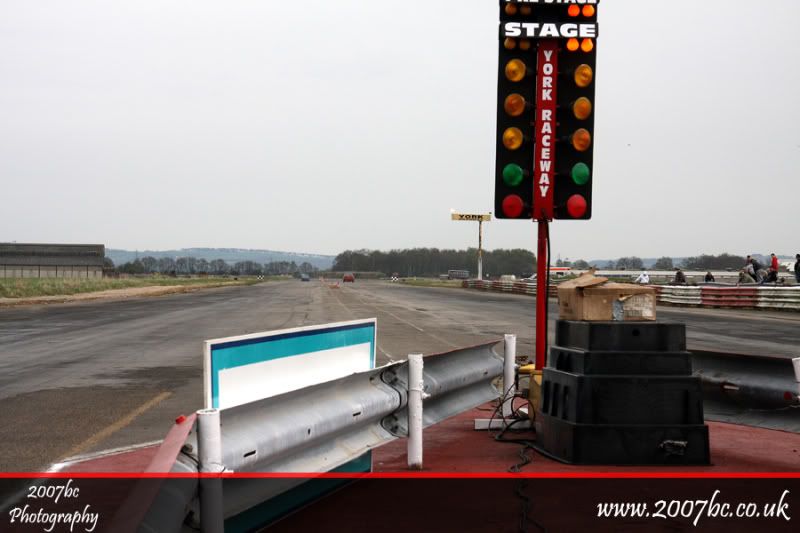
...managed to get 7 runs in throughout the day with my best run being a 13.79. Quite happy with that, although I was hoping to beat my previous time. There was a small rain shower in the afternoon which ruined my chances of achieving a better result
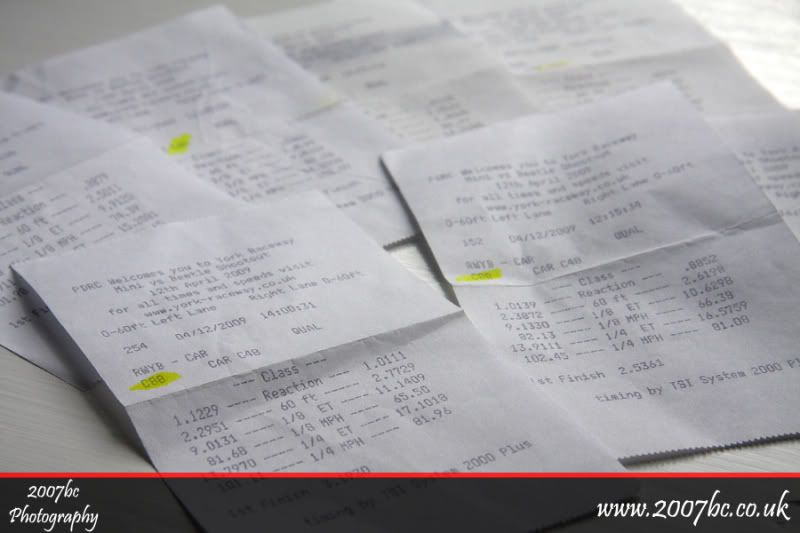
This was my timing slip from my best run of the day:

Coming back from the dragstrip a sunburnt tigra XE that was at York wanted a little play I pushed him up to silly speeds and then backed off for traffic, only to see an m3 squirming all across the carriageway behind me lmao - he was obviously giving chase! I then moved over and had a little shoot against him; we were side by side until I went for 5th, and missed :doh: and missed again, then 5th wasn't there :eek: and then no gears :eek: Then somehow I found 4th, went slowly for 5th to hear a big crunch. The m3 was gone by this point
Things that I need to look at then;
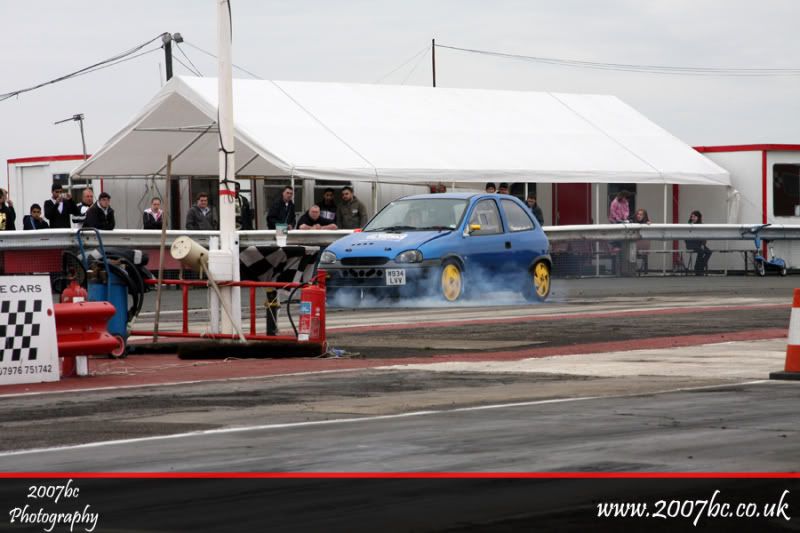
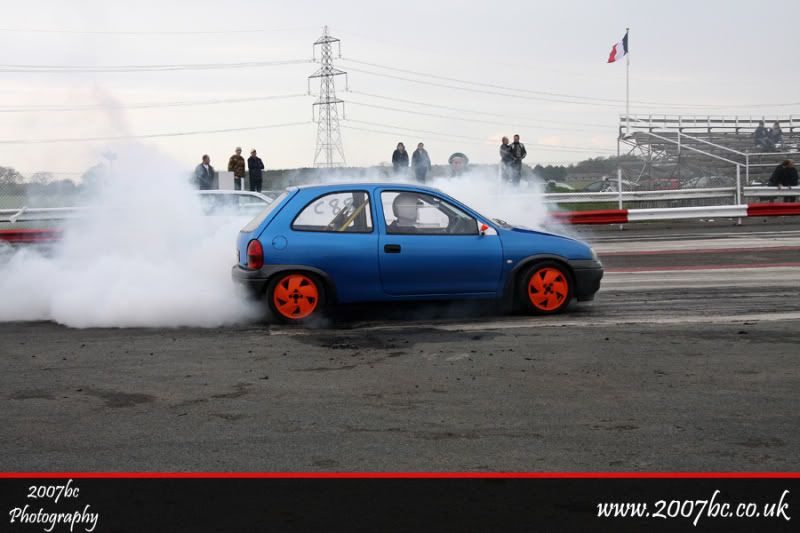
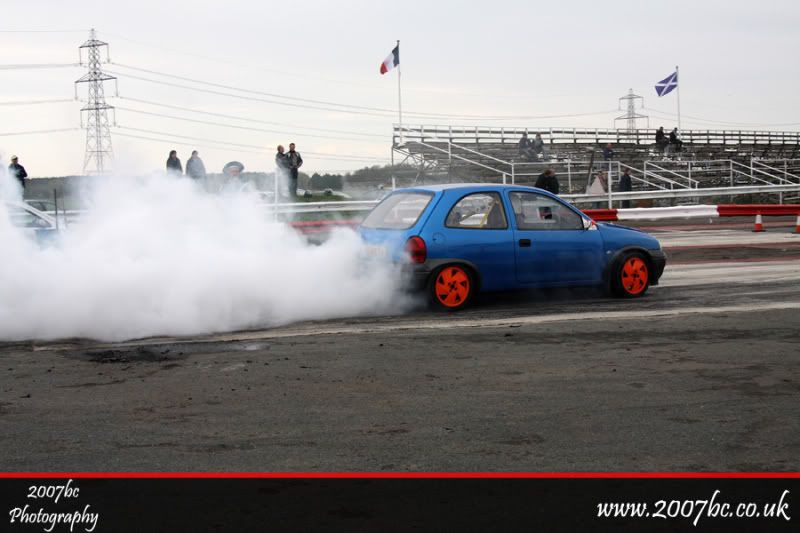
better traction - as you can see from the burnout pictures it's only ever really the nearside wheel that spins. I'm going to look into getting an equal length shaft setup fitted, but I don't know what size hubs or owt I've got.
Can anyone tell me how to check, and what(if anything?) I need to do to fit an equal length setup?
I think I'm gonna need a new F20 anyway after mullering my 5th gear/synchro so might just get it all done at once and throw in a quaiffe at the same time.
(If anyone is interested in seeing more pictures from york dragway they'll be on the 2007bc photography website sometime this week )
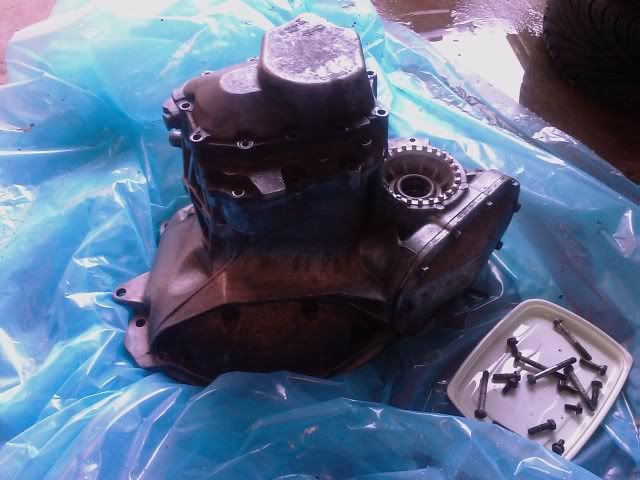
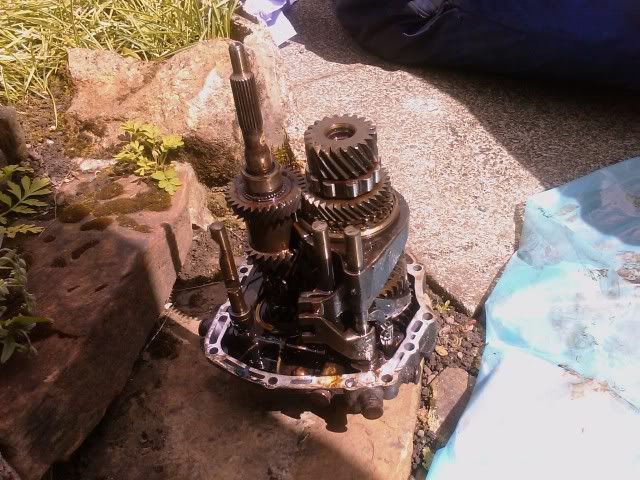
After York dragway last month I fkd 5th gear, so while I knew I'd be replacing the gearbox (or at least some parts of it) I ordered a Quaife LSD from Steveboyslim.
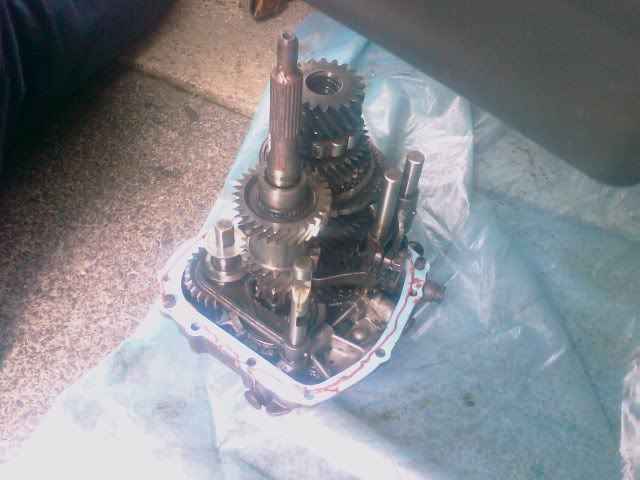
RobertKassner sorted me out with a spare F20 (thanks mate :beer: ) The casing on this f20 was damaged, but the synchros etc are all good.
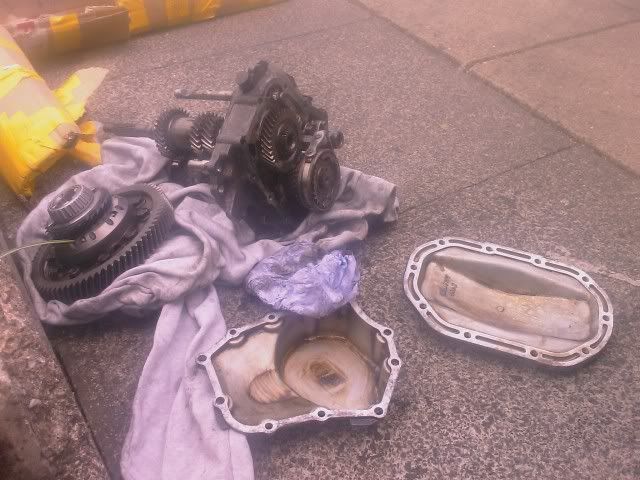
So first job was to dismantle the spare f20:

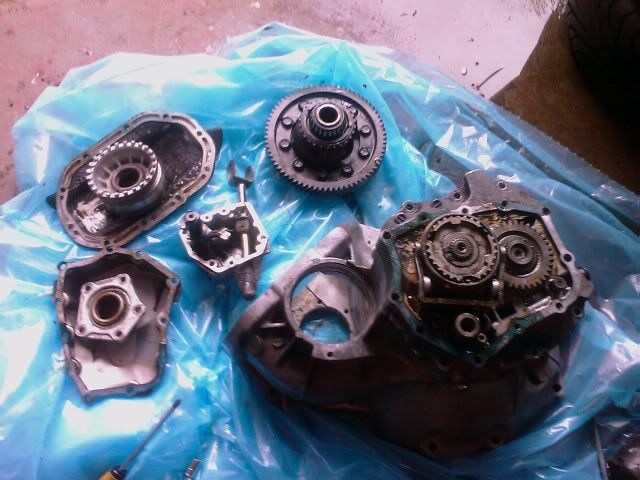
Then I got this
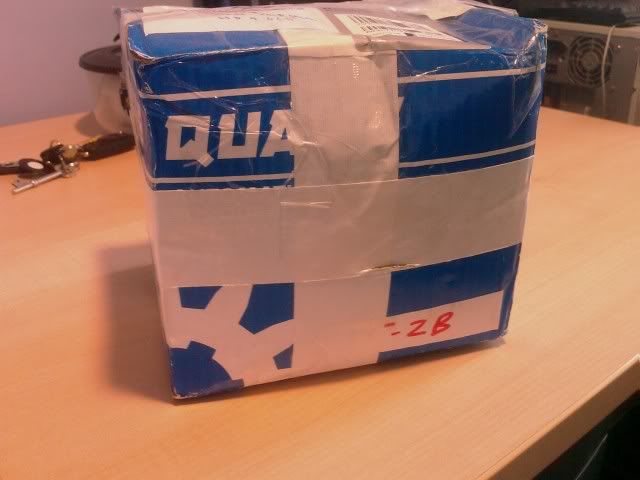
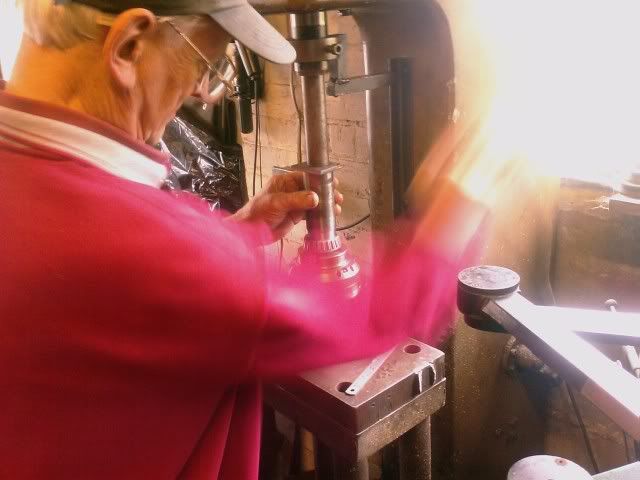
Took this to my mates Grandad (retired engineer) who pressed the bearings in for me:
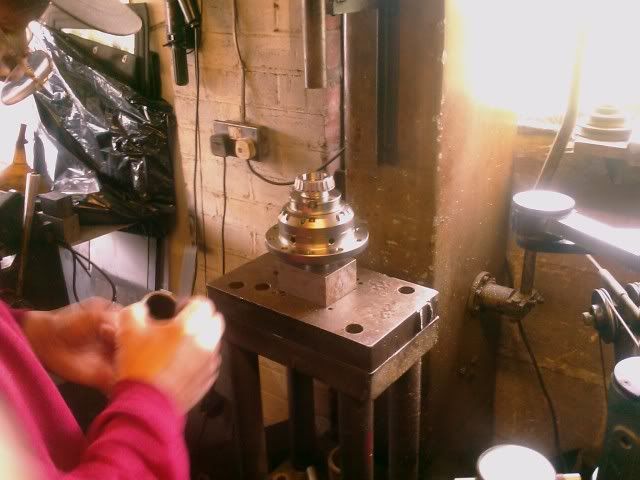
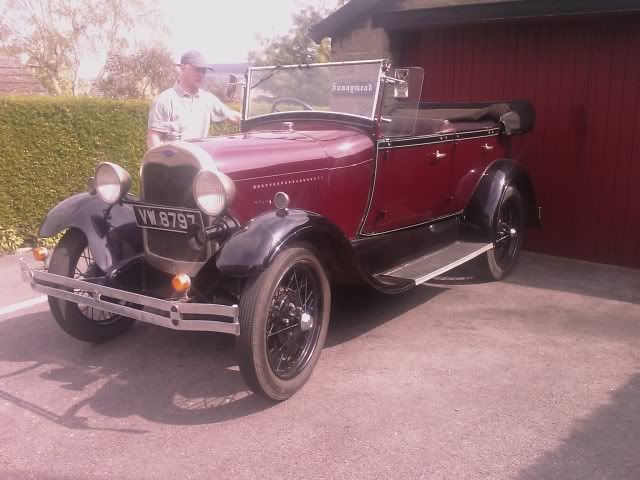
Oh, this is his weekend car
So all the bits are ready and waiting for JamieF, to fit it on Wednesday night :beer:
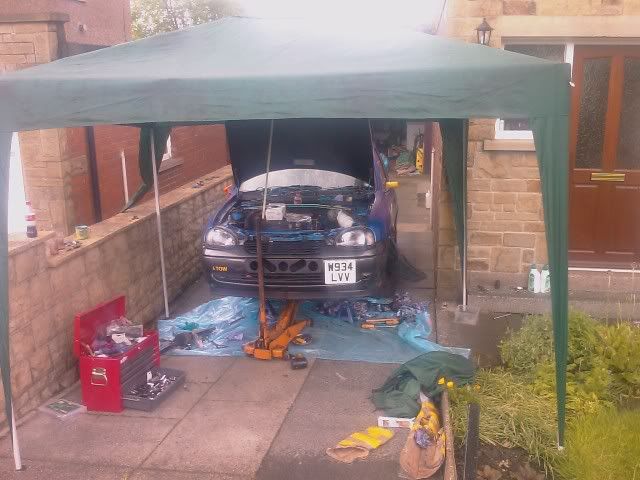
Well, yesterday was Quaiffe day. Massive thanks to JamieF for doing most of the work :beer: and also thanks to Wazpaz for the loan of his Gazebo
It took us most of the day taking it steady really, including swopping my damaged cluster over for a replacement one from Robert Kassner (again thanks mate :beer: )
Not that many pics, I realised that I'm now more bothered getting the job done that mincing about taking pictures lmao
After my test drive Jamie noticed some rattles from my engine bay; we found one of my TB trumpets rattling about inside the filter lmao (one bolt missing) and my coilpack mount was also loose. Jamie also picked up on a loose linkage pin - so I replaced that with a nut and bolt under his advice :beer:


(had to get a new one of these lmao)
Only really been for a short drive; initial impressions are awesome! I never realised how much my wheels were spinning before, it pulls so hard now. Roll on York this weekend
|
DaveB
Member
Registered: 29th Dec 00
Location: Huddersfield
User status: Offline
|
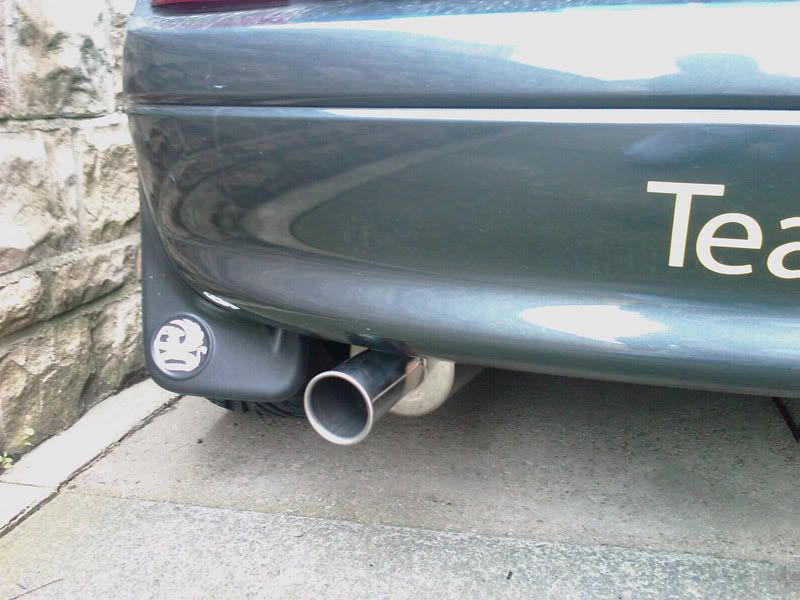
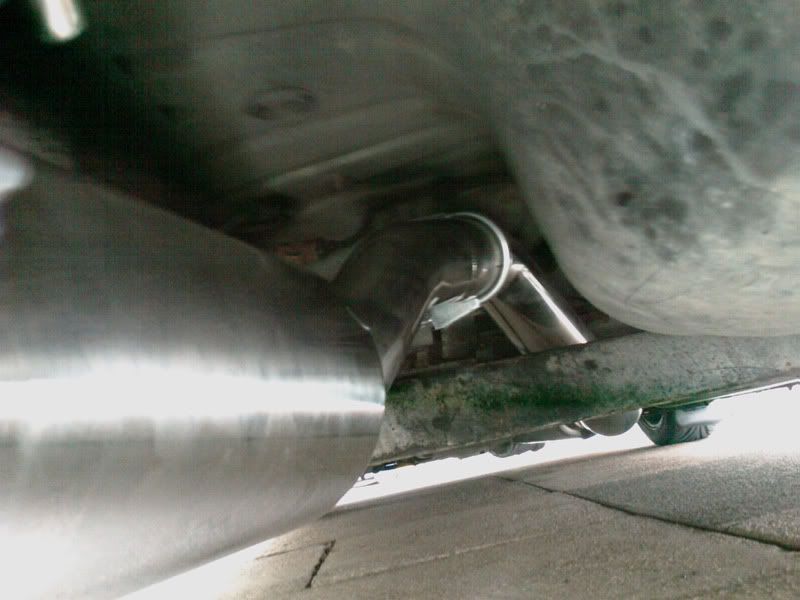
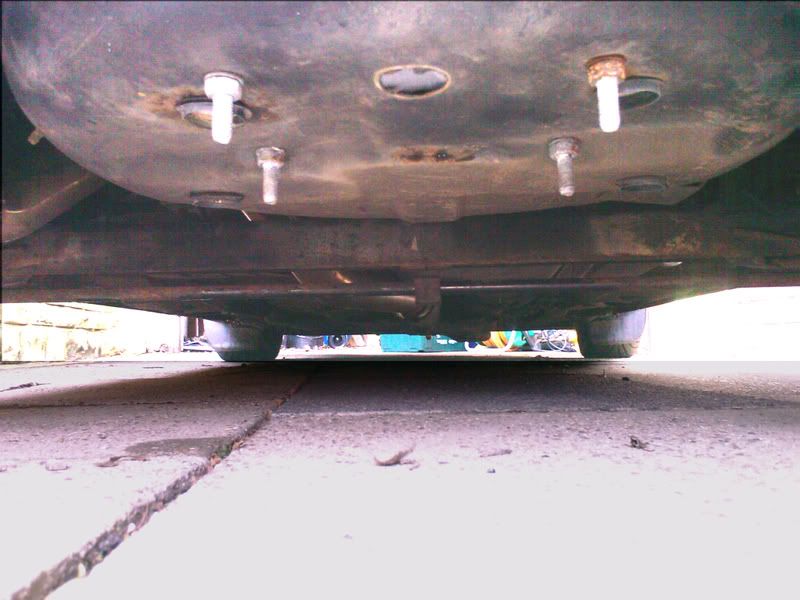
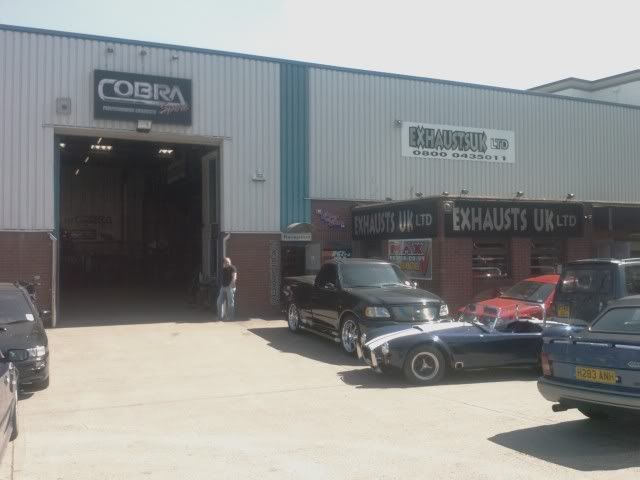
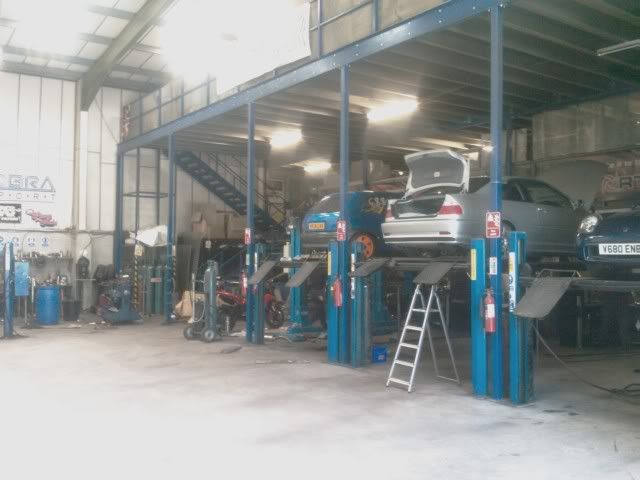
The noise of the old exhaust was really getting to me, so I had the rear box replaced at ExhaustsUK over the weekend Loads quieter, and is a centre exit so the flow should be maybe slightly better as well. Certainly hasn't lost any grunt anyway

Backbox needs raising up an inch which they'll sort for me whenever, that's why the box sits quite low. I'm sure most won't like it but meh, no change there then!
hmmm
http://www.youtube.com/watch?v=WB4VlE8CWJU
djivesp: lmao lmao
tinxy; still manual shifting there!
Voodoo; not really interested in what it can do with gas tbh. Its a track car that now and then visits the strip, as opposed to the opposite way around And gas is an expensive habit to have (been there, done that!)
So, on Sunday it was over to speckys to get him to knock me up a bracket for full-throttle-shift switch:
Finished bracket and switch in place:
I did activate it etc in Easimap before I set off but it didn't work correctly on the way home so I need to take another look at my wiring (I did that bit )
Thanks again Speck :beer:
Speck; I was just cocking about when I set off lmao Tried it
Set about this weekend fitting my new scooop
My inlet temps were around 10deg ABOVE ambient, which is just crazy.. so on with the fitting.
The scoop: a minty fresh, as new Subaru Impreza Scoop from a 2003 WRX.
The cost: £23.53 :beer:
Pics of the fitting:
Rested on:
Not too bad
Lets do abit of measuring and drawing

Then drilling
Then cut and shut the mounting bolts
No going back now
From underneath
All done
(its not 100% mm straight I don't think, but it's close enough)
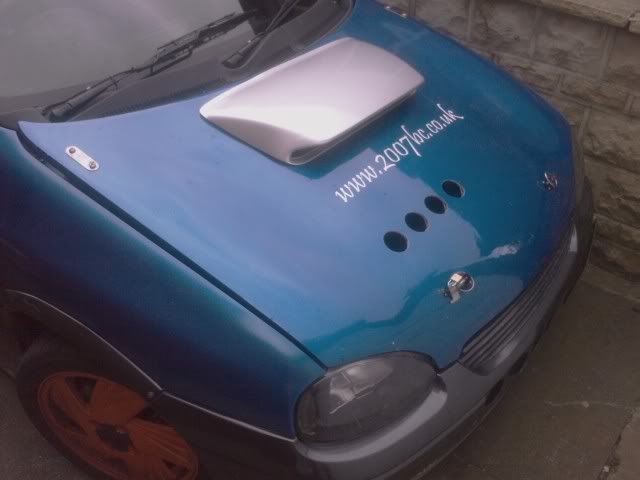
Now I just need to decide what colour to paint it. Arden blue, or the same colour as my bumper?
Let the vent fitting commence:
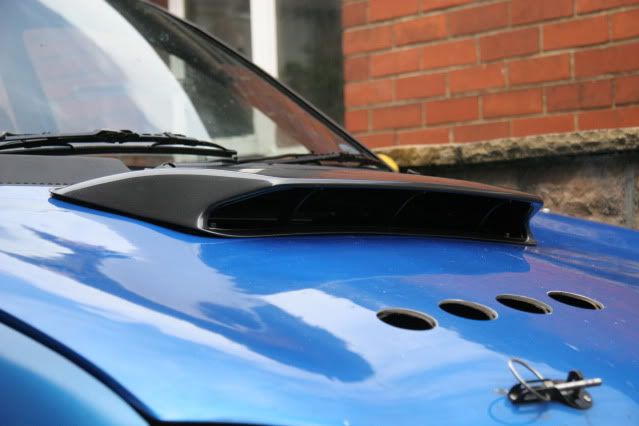
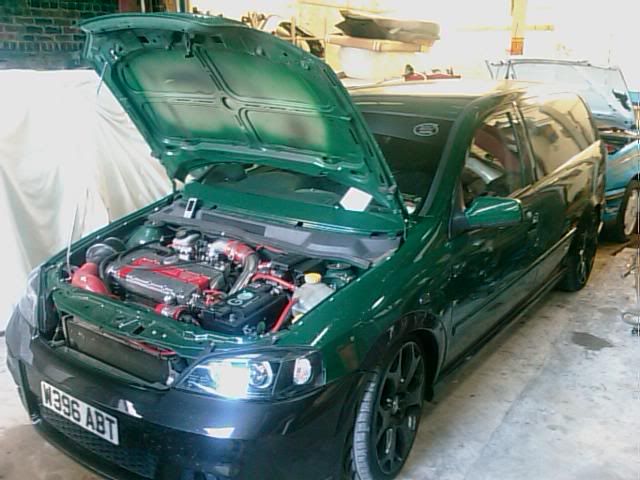
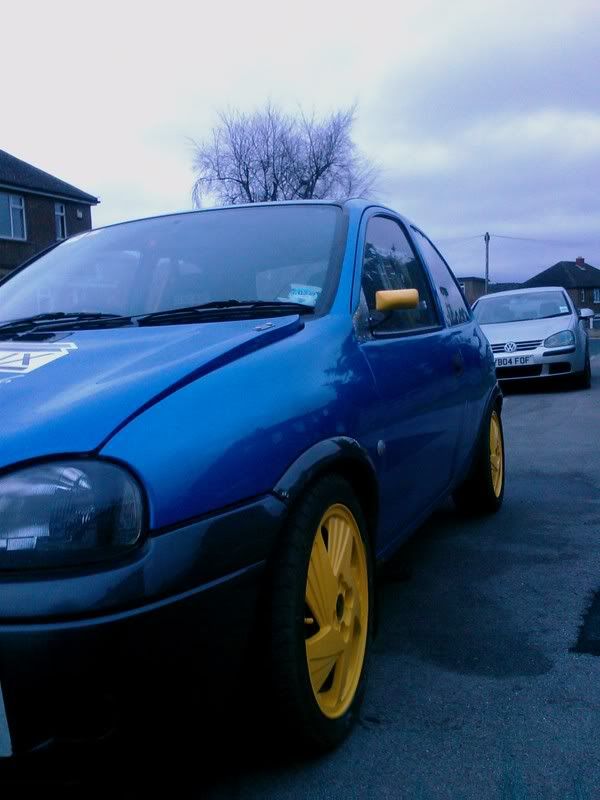
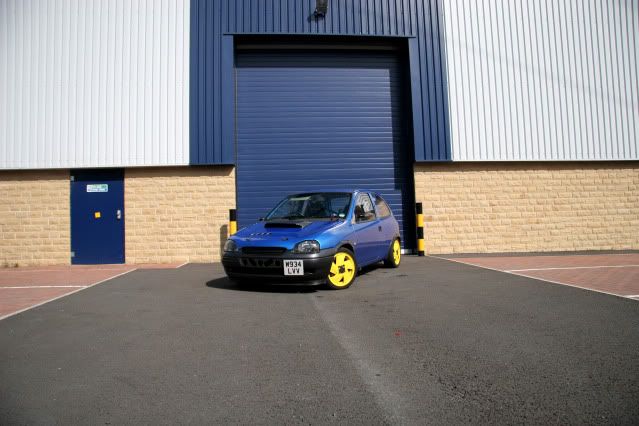
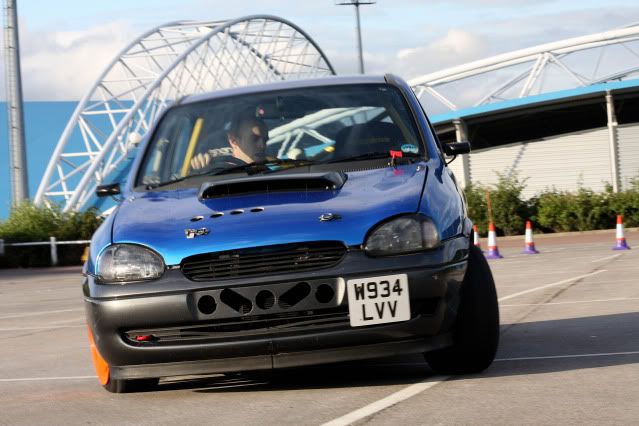
This is the last time the car will look like this as the novelty of random, bright coloured wheels and general paint-pot colours throughout the car has worn off. It's time to tidy things up. Before that though, as it was sunny I gave the car a bath and nipped down to the local industrial estate to get some pictures
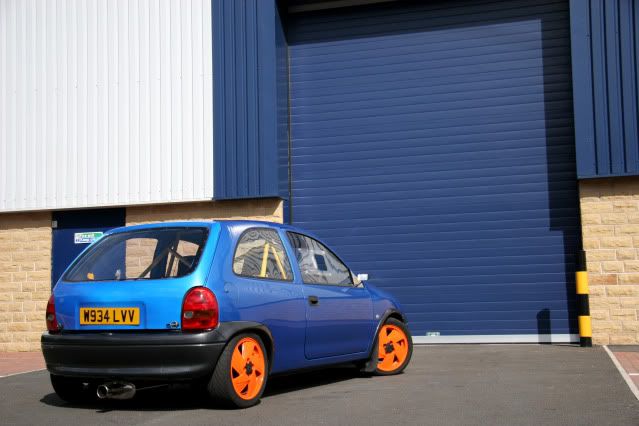
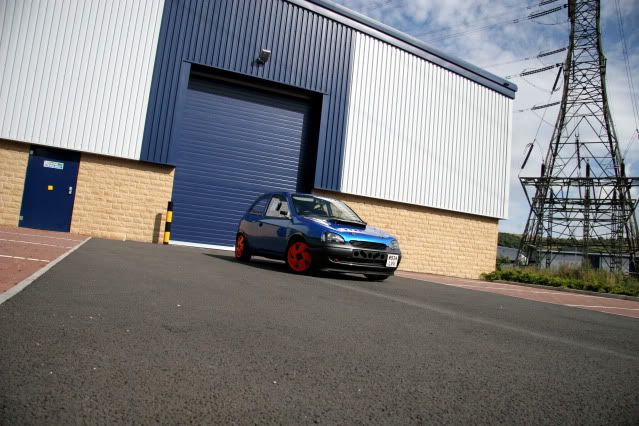
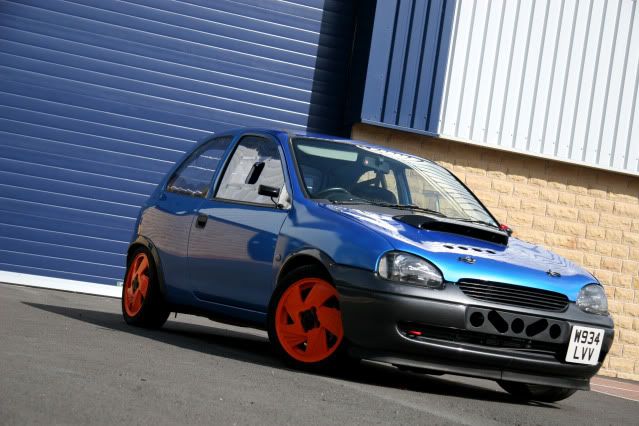
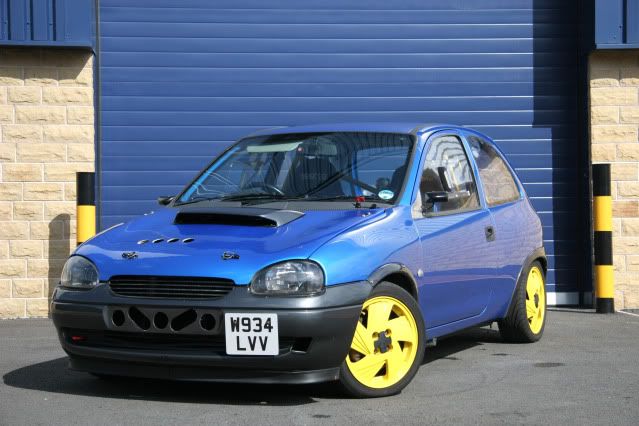
I'm well happy with how the vent looks, it actually looks purposeful (IMO) as opposed to a big gay vent that's just stuck on for chavness lmao Annoyingly, the bonnet itself isn't straight (not on the mounts, the actual fibreglass ) so the vent sags slightly to the nearside wing, but there's nothing I can do about that.
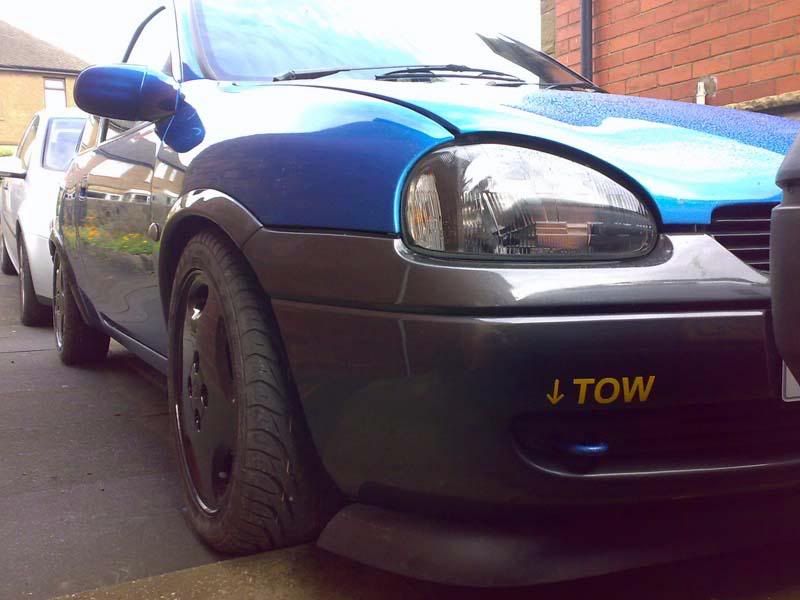
The car's having it's changes over the next few weeks to tidy it up including having the tailgate repainted and backbox raised. The more vigilant among you will notice the black wing mirrors, red tow eye, removed yellow tow stickers... more to come.
A few pictures from last night. Glad to finally see evidence of 'tripodding'
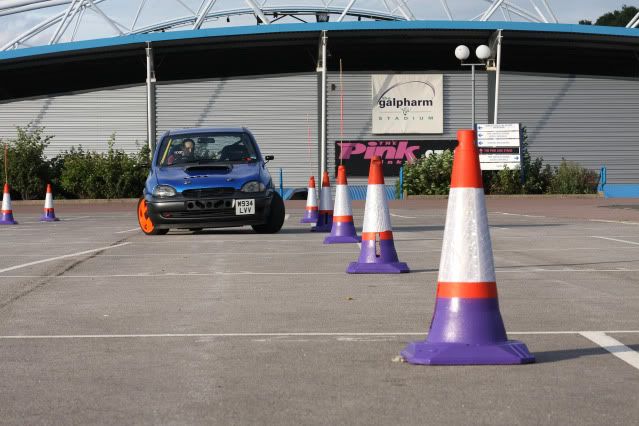
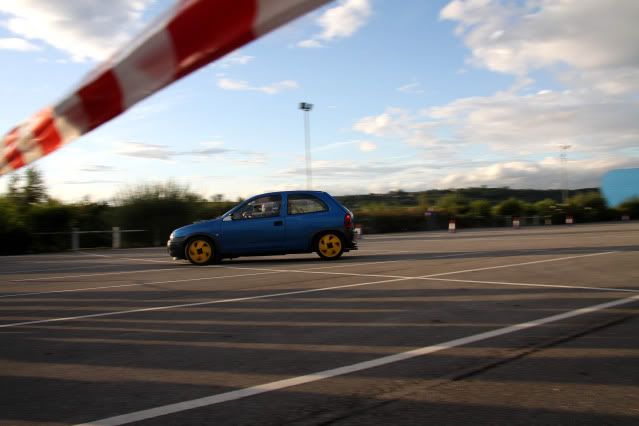
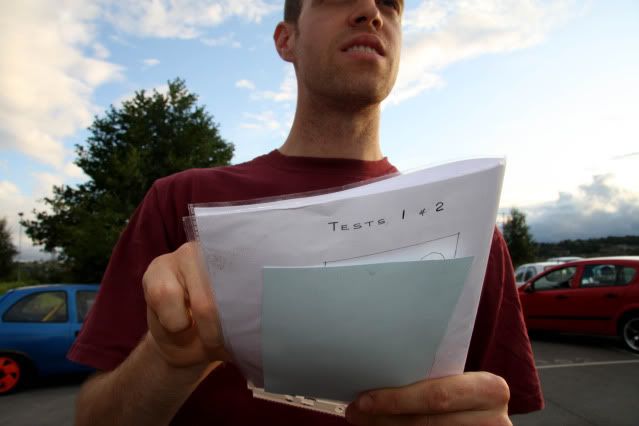
Check me out trying to work out the route lmao
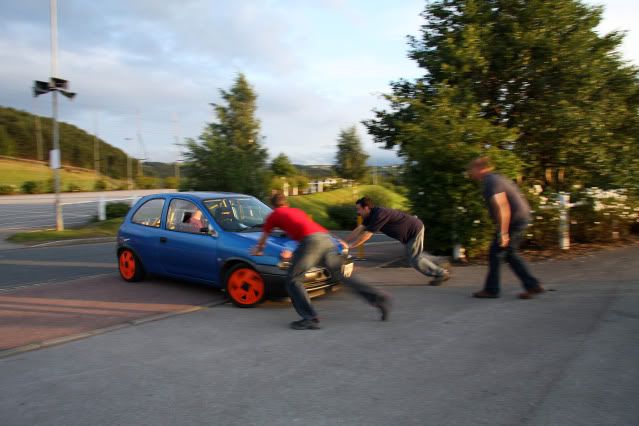
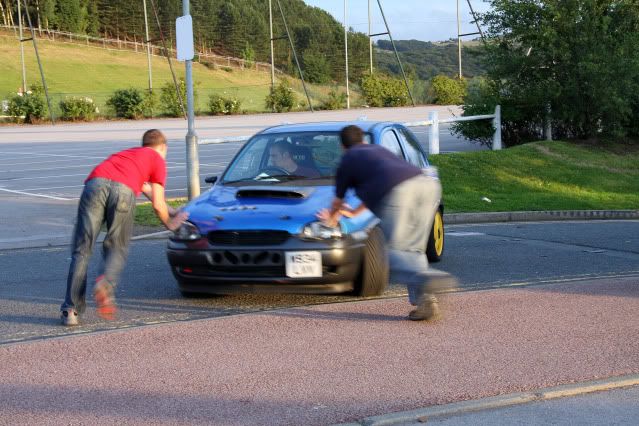
...and the push down the hill to get home
The more eagle-eyed amongst you will notice that the backbox has now been raised to an acceptable level
This weekends jobs; replace my broken starter motor, and re-seal the sump/tighten up the bolts
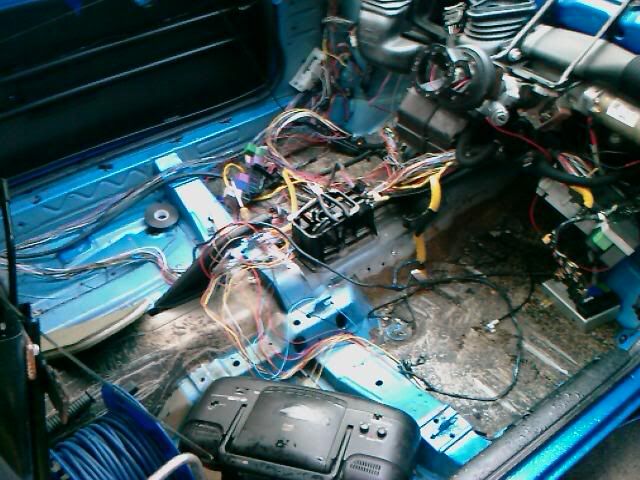
Started the interior clean-up today. Really sick of how rough it looked:
Before:
Stripping:
Dismantling the loom, again
Stuck a bit of filler on some 'spot-weld' scars
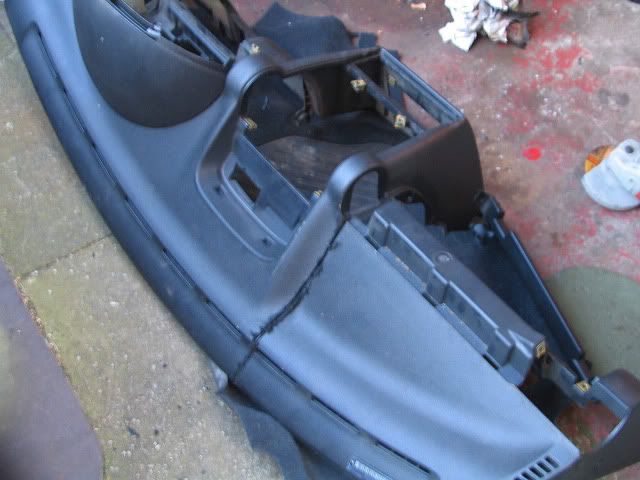
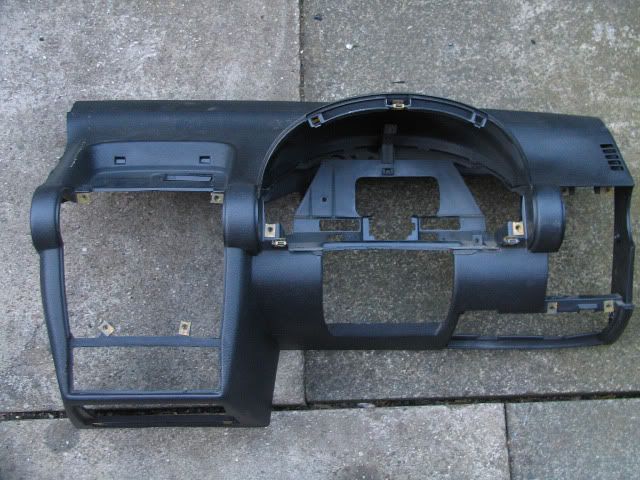
Left it there till I can attack it again on Monday :beer: Bought a new dashboard as well
|
DaveB
Member
Registered: 29th Dec 00
Location: Huddersfield
User status: Offline
|
A few pictures from my progress over the last couple of days:
How it started on Monday:
Abit of a clean, and then some paint:

Abit more paint:
..while that was drying. it was back onto slimming the loom out;
First lot
Second Lot
Slow progress:
Starting to get abit tidier;
Battery and rear light loom screwed/clipped in place;
Rear loom/Front Light loom in place;
Me
Getting there:
oops, still all this lot
How the passenger side was left;
..and one of my faithful guard dog

Will be finished on saturday and the dash all back in :beer:
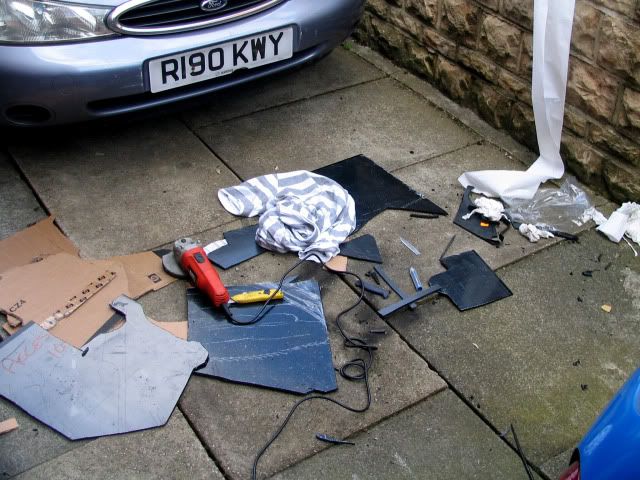
Did quite abit last night. Sorted all the relays etc out and hid them where the MFD used to be. Cut the dash up, and taped all the main wiring loom up

Painted all the visible floor aswell and removed the linkage to tidy that up

Need to find some foamex board to use as the 'end' of the dashboard, make a template up this Saturday and get it all re-fitted
Rebuild today; was hoping to get it done in time for a coastal blast over to Scarborough, but I wanted a takeaway for tea so didn't have time lmao
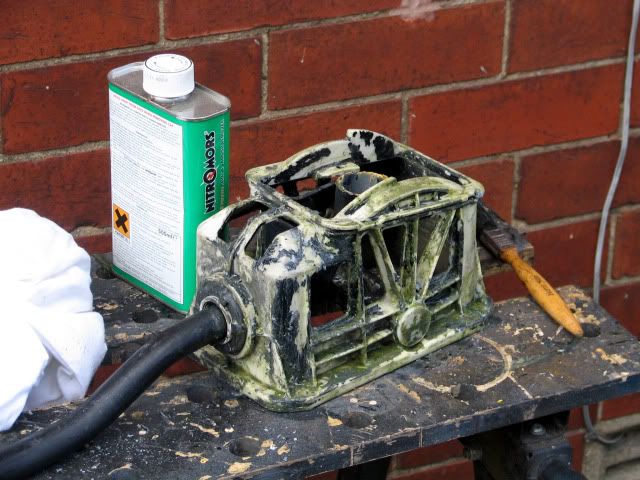
Gearstick out, and nitromors applied to get rid of the flakey paint
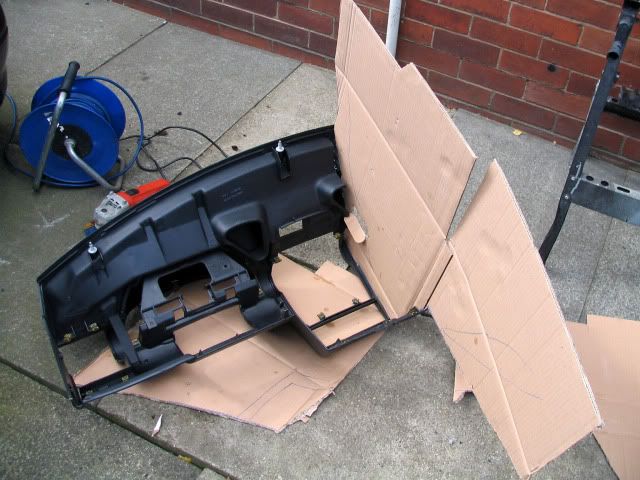
With the dashboard cut in half it was time to make a cardboard template for the dash 'end'
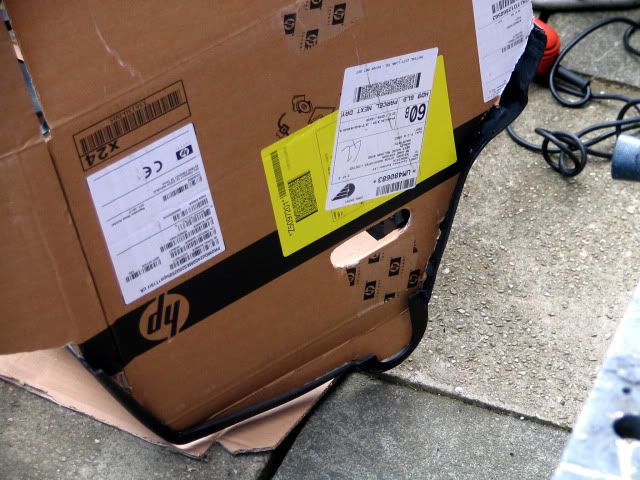
Aftermath; lmao
Battery Back in withshiney new terminals
Dashboard in
Finished pictures;
(oh, ignore the 'floating' wire on this picture, its for my alarm and I forgot to clip it to the apillar, doh.
Just needs abit of snagging and we're totally done
Also painted my shiney front strut brace in red; matt black and red is the way forward
When it was finished I had a few issues; no indicators at the rear, and no petrol gauge Did some fault finding and rectified that. Took it for a blast, and fk me it's faster than I remember it to be. Fkin animal !! love it love it so much sorry. lol
Thought it was time to take a look at the car as it hasn't had much love for the past 12 months, and hopefully find the cause of this random problem.
How I came to the car:
Then used JamieFFs synchrometer to check the balancing on the throttle bodies;
1 - 3.5kg
2 - 4.5kg
3 - 5kg
4 - 5kg
An clear issue there then - number 1 cylinder was getting feck loads less air than the other 3, LOL :doh:
So, then onto the compression test. Results were:
1 - 190psi
2 - 200psi
3 - 195psi
4 - 195psi
Again, no issues there then.
Spark plugs;
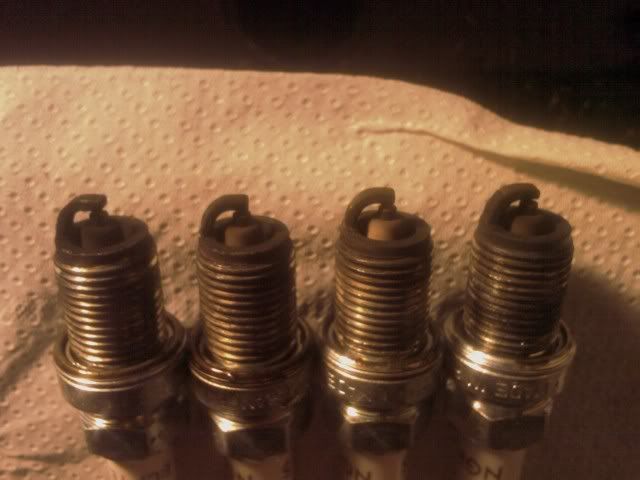
Don't look too bad; nr1 is oily as you'd expect not getting enough air all look about worse for wear though, so they'll be getting replaced.
I did also notice this on lead nr1;
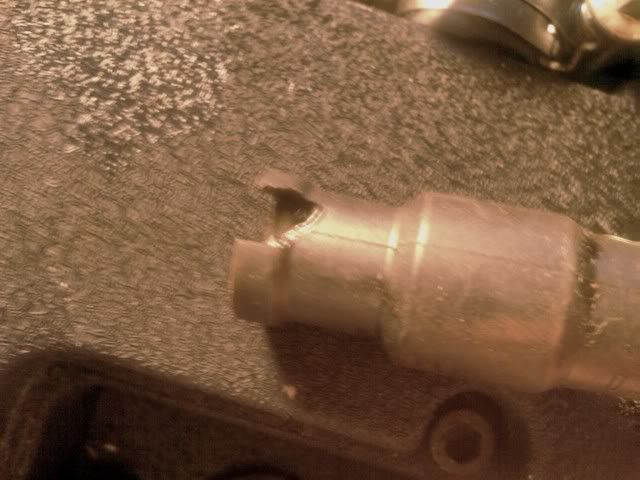
which I'm sure can't be a good thing?
Wazpaz has donated a set of leads to me :beer: Thanks mate so I'll get those swopped across.
Decided if I was going to have to adjust the balancing and give the whole thing a clear out that I might as well clean all the TBs and replace the inlet gasket etc at the same time - along with fitting a dizzy blanking plate and my new rocker cover.
How I left it; (everything all removed and the inlet just sat on, waiting for the weekend)
It was called 'crackle paint'; can get it from BnQ etc - some powerder coaters also offer it.
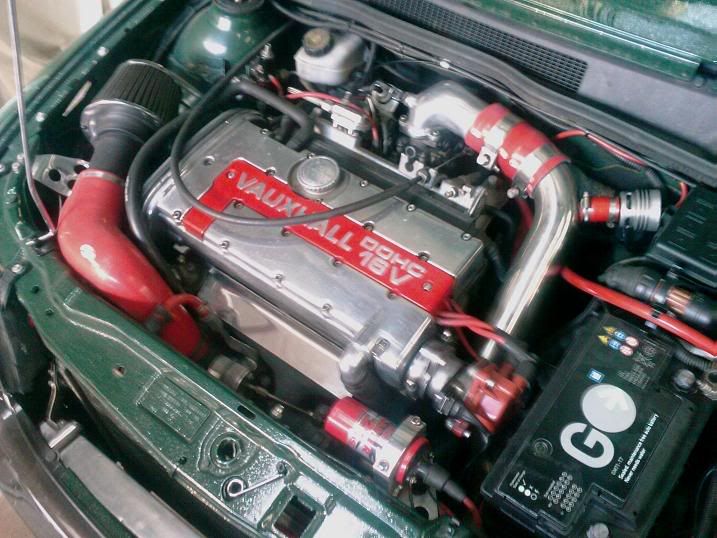
Spent yesterday getting the car back together; took my time and happy with the outcome. Camcover needs a polish and the colour is a bit bright so my phone doesn't seem to like it.
Balancing TBs sucks, took me ages to remember how to do it.
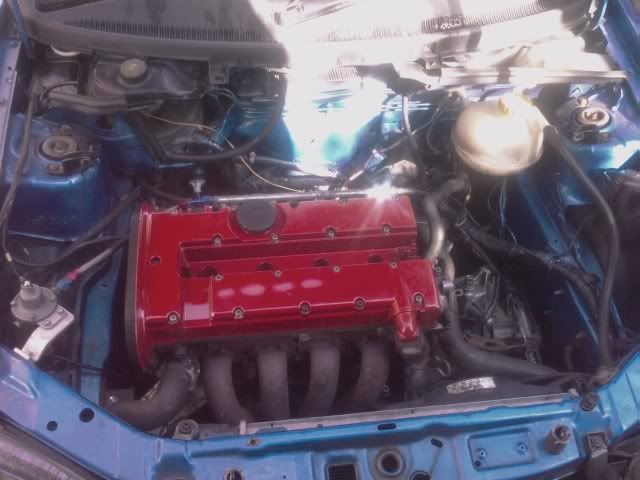
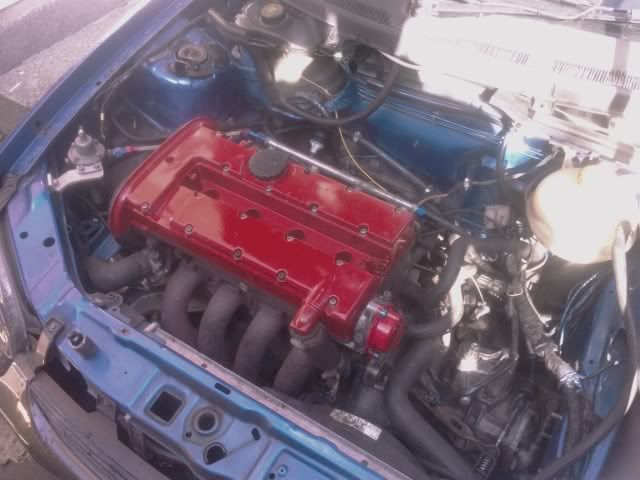
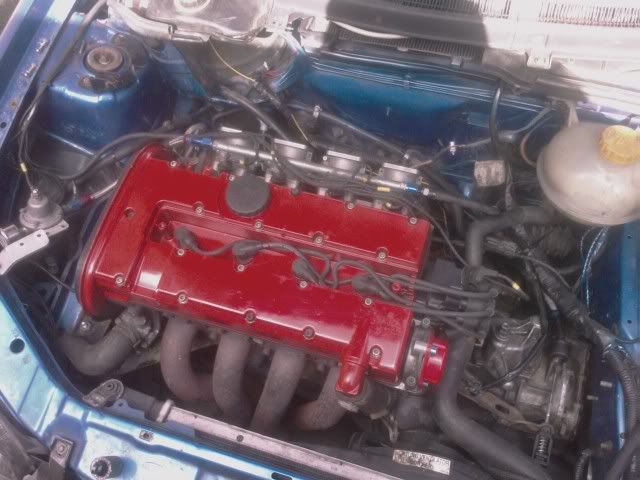


The colour is actually vauxhall flame-red, no idea why it looks cherry
Finally threw together the 'action' bits from when I took the camera out the other day. There's loads of bits missing from it and I intend to do this alot better in the new year, but it kept me entertained for a few hours anyway.
[vbtube]mMqRil4gfmc[/vbtube]
Direct Link to the video:
YouTube - 'Weekend Blast' - DaveB Corsa 2.0 16v XE Throttle Bodies
..and a decent quality pic of how the engine bay is:
Just ordered some new bits:
3.5kg flywheel and helix paddle clutch
Mr Kassner :beer: will be helping me fit it sometime next month. Wheels and boot getting painted December hopefully

Helix Paddle clutch landed this morning (thanks vxlgsi :beer: )
Can now get the new clutch and lighter flywheel fitted this Saturday. So excited
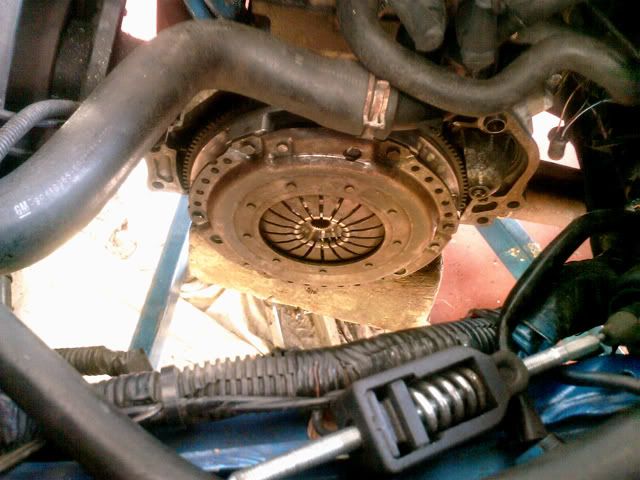
Well yesterday brought about superlight (3.5kg) flywheel fitting and helix paddle clutch
Firstly a huge huge thankyou to Robert Kassner :beer: and his parents :beer: :beer:
I turned up nice and early and was directed to the 'entertainment' room lol
Car jacked up and bits whipped off
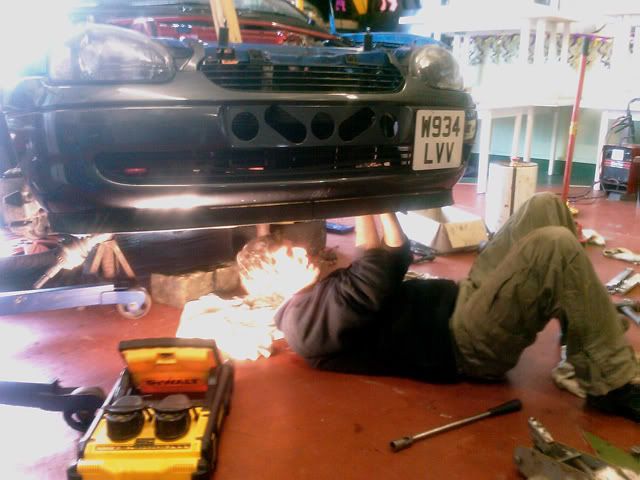
Gearbox (and Robs dad)
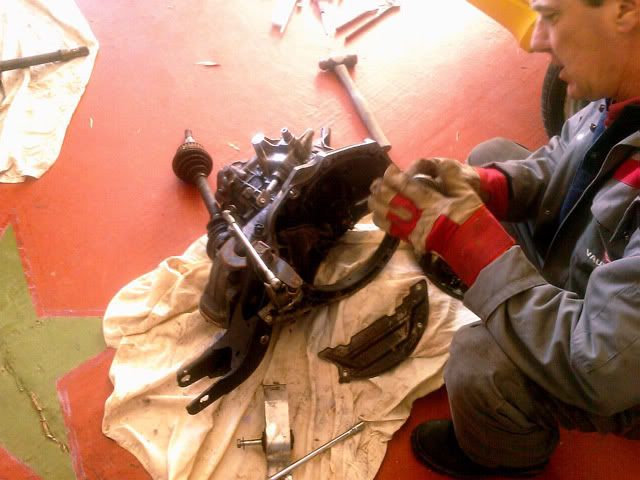
Old clutch
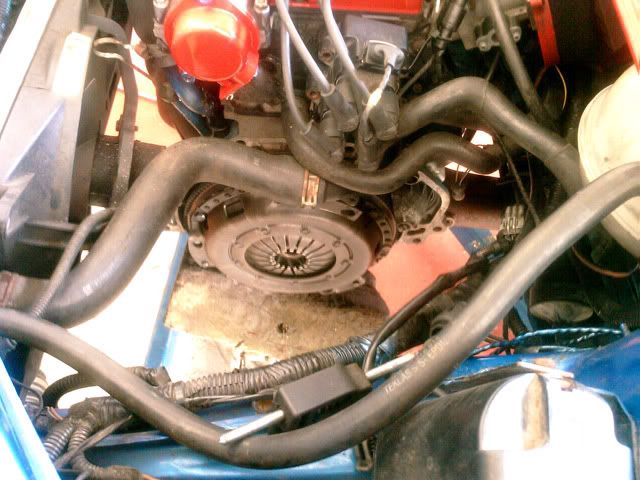
new flywheel on
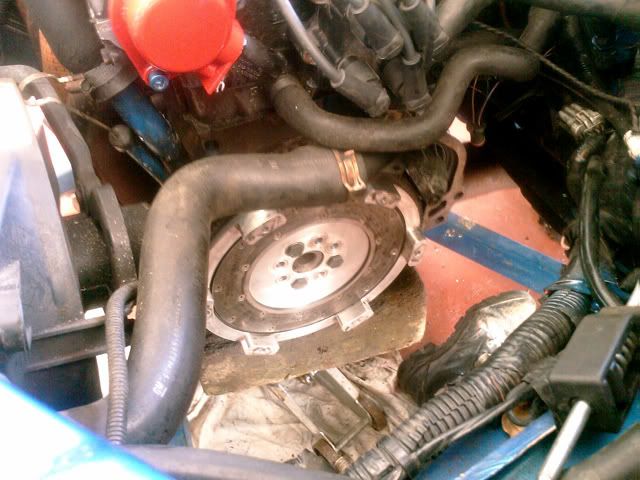
new clutch on
This is Robert Kassner getting his hands dirty :beer:
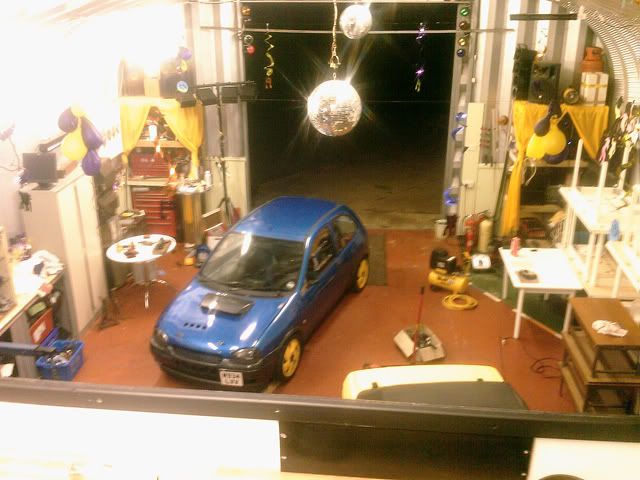
The corsa in the 'entertainment suite'
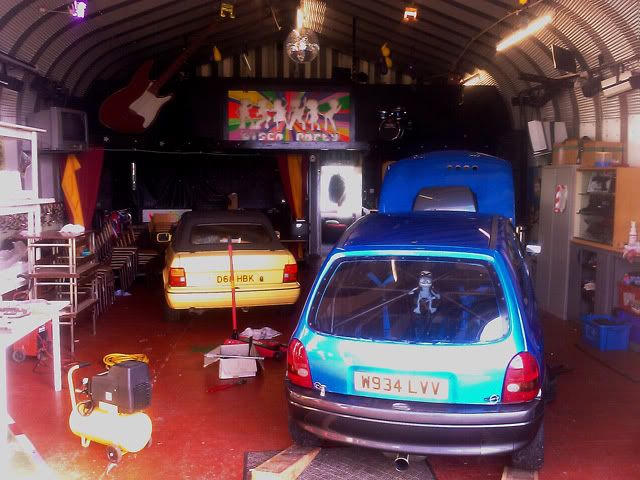
The view from the 'DJ booth'
..and then we were done
Had a few minor issues; 1 - not being able to find any clutch pressure plate bolts, the end result meant Rob had to dismantle an old engine/box setup in the back of his dads shed, and the other being that the bolts on the flywheel for the removable steel plate were catching on the flywheel plate. After Rob attacked it with a grinder, it was all good
I drove home steady away to make sure everything was OK and it feels really nice. The paddle clutch will take a fair bit of getting used to I think lol When I was nearing home there was a squeak and the pedal dropped abit; the biting point is now right on the floor, so I think the clutch cable needs adjusting as it's something we never did when we fitted it. Either that or something is wrong, we will see.
Thanks once again Tosh :beer:
AND we're up to present day. LOL
|
FAZ
Premium Member
 Registered: 24th Nov 07
Location: Coventry
User status: Offline
|
wow, very very impressive
id only change a few things if it was me, but there only comsetic
looks awesome project all the same mate
|
Ingham
Banned
Registered: 9th May 08
Location: Burnley, Lancashire
User status: Offline
|
This is one of those threads that makes me arrive several times in my pants.
The work gone into it is unreal. As said by FAZ, there are only a couple of cosmetic things that I'd change - but it's your car.
Fantastic.
|
Ste L
Member
Registered: 3rd Jul 06
Location: Manchester Drives: 106 16v Rallye
User status: Offline
|
experienced a passenger ride in this round Oulton Park - proper little beast
|
Dan295
Member
Registered: 9th Oct 06
Location: London
User status: Offline
|
this is epic function over form, its just quality, no pics of that controversial rear suspension that im looking into at the moment though dave cheers for taking the time to put it on cs
|
Ste L
Member
Registered: 3rd Jul 06
Location: Manchester Drives: 106 16v Rallye
User status: Offline
|
quote:
Originally posted by Dan295
this is epic function over form, its just quality, no pics of that controversial rear suspension that im looking into at the moment though dave cheers for taking the time to put it on cs
if you read the thread properly there is pic's of it
quote:
Originally posted by DaveB
My new rear springs arrived last night. I'm blatantly copying Olly '2 wheel' Hewitt's rear suspension setup; which is to custom mount some short, stiff, coilover springs in place of the rear pig-tail springs.
Fitting pictures tonight, so if you haven't seen this setup before, all will become clear
Lee; the springs are nowhere near becoming coilbound - the 150lb ones I had on there before weren't compressed that much; and my new springs are 300lb ones!
Old and new
Bits removed
Nipple cut off
Grinding to make something nice to weld to
Mounting bracket for new coil spring made
Mounting bracket welded in place
Pics end there because my phone is crap and doesn't have a flash on it's camera. sorry
Here are a couple of pictures of the rear spring setup when the car is sat as normal. No coilbound in sight
|
Dan295
Member
Registered: 9th Oct 06
Location: London
User status: Offline
|
quote:
Originally posted by Ste L
quote:
Originally posted by Dan295
this is epic function over form, its just quality, no pics of that controversial rear suspension that im looking into at the moment though dave cheers for taking the time to put it on cs
if you read the thread properly there is pic's of it
alright keep your hair on, didnt know i was back in school
|
Griffiths1991
Member
Registered: 28th Jul 08
Location: Cheshire
User status: Offline
|
Love this
|
Ste L
Member
Registered: 3rd Jul 06
Location: Manchester Drives: 106 16v Rallye
User status: Offline
|
quote:
Originally posted by Dan295
quote:
Originally posted by Ste L
quote:
Originally posted by Dan295
this is epic function over form, its just quality, no pics of that controversial rear suspension that im looking into at the moment though dave cheers for taking the time to put it on cs
if you read the thread properly there is pic's of it
alright keep your hair on, didnt know i was back in school
you are at school - the CS School of Corsa's
[Edited on 14-12-2009 by Ste L]
|
*JonnyG*
Member
Registered: 2nd Jun 08
Location: Lincolnshire
User status: Offline
|
Wow! What a read.. Looks fucking awesome. Really like the exhaust in middle too.
|
Mieran
Member
Registered: 28th Jan 08
Location: Newcastle upon Tyne
User status: Offline
|
Epic progress thread.
|
jr
Member
Registered: 20th May 02
Location: Kent
User status: Offline
|
great way of crashing my laptop dave
|
flybikeslee
Member
Registered: 2nd Jan 07
Location: Liverpool
User status: Offline
|
nice little read
|
jo1945
Member
Registered: 15th May 09
Location: Stourbridge, West Midlands
User status: Offline
|
wow. Amazing build thread! I'm all inspired to get going on mine again now!
|
DaveB
Member
Registered: 29th Dec 00
Location: Huddersfield
User status: Offline
|
Thanks for the nice comments, really makes things worth while :-)
What 'looks' things are you on about? The wheels and tailgate ?
The wheels are getting painted in the new year, as they look a twat in their current colours.
The tailgate is also being painted properly, and the rough 'pins' being replaced with aero-catches
|
|


