ash87
Member
Registered: 26th Mar 05
Location: West Wiltshire Drives: Clio 172
User status: Offline
|
 will watch this project, cheap white 8v's are the future will watch this project, cheap white 8v's are the future 
|
SteveoBC
Premium Member
 Registered: 22nd Feb 07
Location: Bucks
User status: Offline
|
quote:
Originally posted by STEvieXE
looks great, if u dont mind me askin after u welded up the wiper hole, is that a f/glass filler u used (the green stuff)
why did u do this??
yeh that is f/glass filler paste from a company called "plastic padding" ther filler is available at any local halfords, works just like normal filler, add hardener and away you go
i used it because due to me using a mig welder on the tailgate panel, to tack the backing plate in place it will warp metal with the heat, plus using f/glass paste gives a stronger base for the top layer of normal filler as this reduces sinkage, instead of whacking loads of normal filler which would sink easier
|
SteveoBC
Premium Member
Registered: 22nd Feb 07
Location: Bucks
User status: Offline
|
right im off into work, got a couple of things to do to get my C sorted for PVS if i get time i'll do some work on the wasp and post em up
laters!
|
STEvieXE
Member
Registered: 21st Jan 03
Location: Ballymena N.I.
User status: Offline
|
quote:
Originally posted by SteveoBC
quote:
Originally posted by STEvieXE
looks great, if u dont mind me askin after u welded up the wiper hole, is that a f/glass filler u used (the green stuff)
why did u do this??
yeh that is f/glass filler paste from a company called "plastic padding" ther filler is available at any local halfords, works just like normal filler, add hardener and away you go
i used it because due to me using a mig welder on the tailgate panel, to tack the backing plate in place it will warp metal with the heat, plus using f/glass paste gives a stronger base for the top layer of normal filler as this reduces sinkage, instead of whacking loads of normal filler which would sink easier
i knew i had saw green f/glass filler before, remember now using the plastic padding stuff. why would it sink if its welded solid?? when i do things like this i just take my time welding it and never used f/glass and havent had anything sink yet. hate that stuff unless its to be used on f/glass which its supposed to.
i mean if say for instance (i take it your a metal worker) ur welding a 1/4 panel on, u dont use f/glass over the joints before filler and ive yet to see one came back sunk..
i dont like using it unless its necessary. warm day i always think about the filler expandin/contracting at different rates and poss crackin. no proof of this, just a theory. ah well suppose different people do things different ways. gd luck man. looks like a gd job ur doin
|
SteveoBC
Premium Member
Registered: 22nd Feb 07
Location: Bucks
User status: Offline
|
yeh ur right standard filler over 1/4 panel welds are fine
but i only tacked the backing plate behind the hole, this wil hold it in place fine and keeps the heat down instead of doing a continous weld, and used the f/glass to fill the recess and it is fine for a base of filler then a small skim of top-stop to finish it off
i dont do continous welds on 1/4's either to stop panles warping, you do little sections at a time and blow air onto the joins between welds to keep heat down, make life lot easier when applying finish skim of filler
|
SteveoBC
Premium Member
Registered: 22nd Feb 07
Location: Bucks
User status: Offline
|
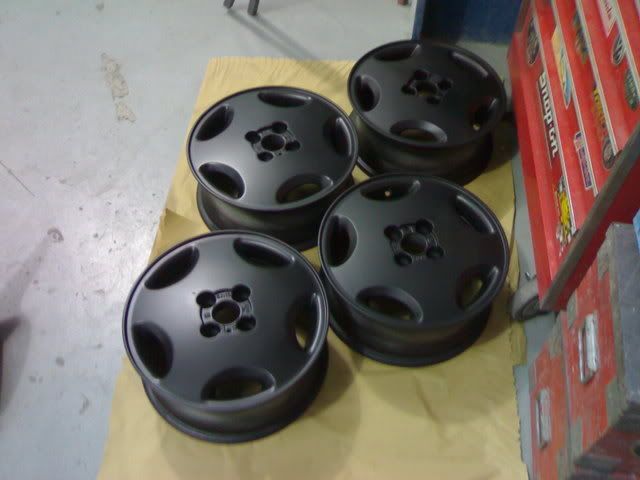
ok another update got the cav rims painted
just before final prep and degrease
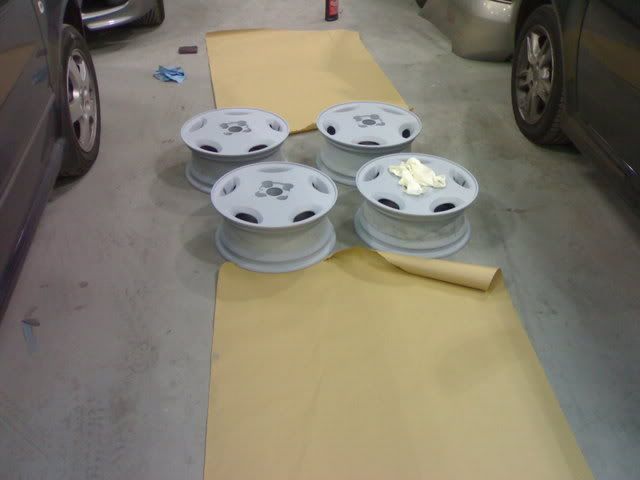
rubbed with 3M grey scotch, blown off dust, degreased and place face down for the inside to be painted first
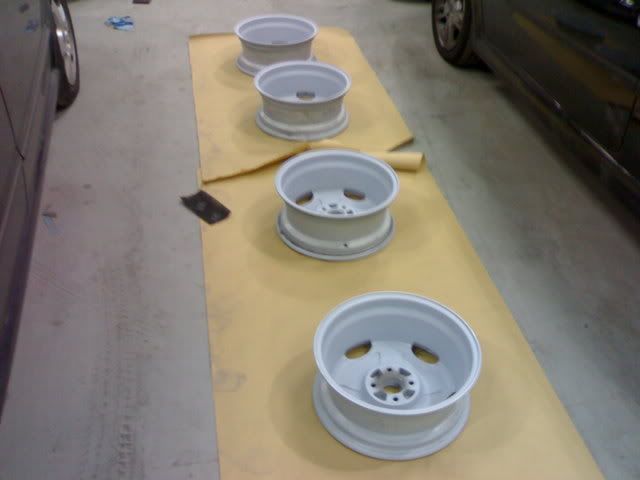
inside finished
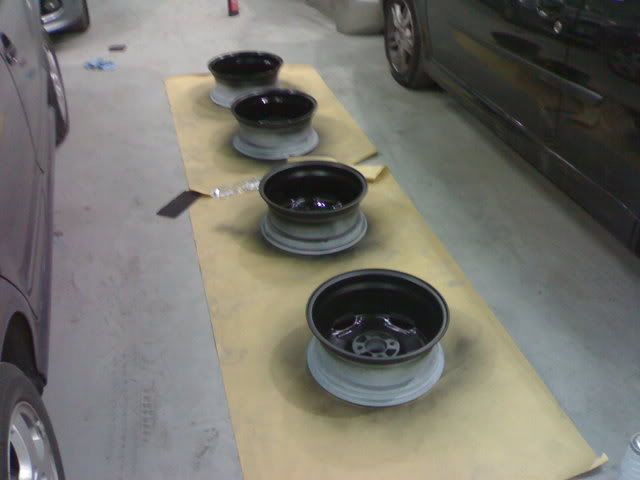
flipped over when dry and did the fronts (first pic when wet)

died with a nice matt black finish
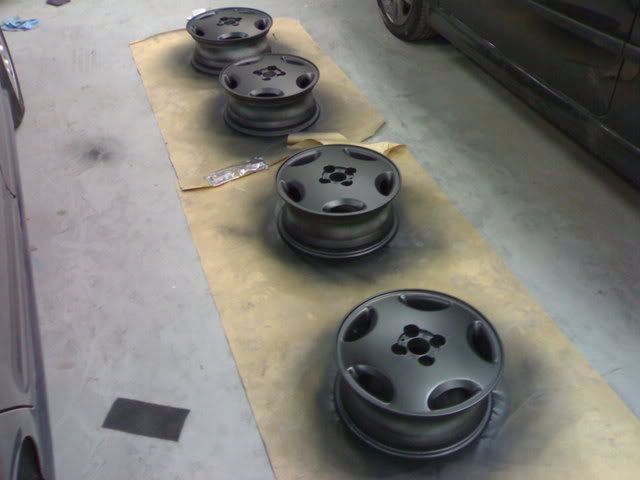
close up

job done

now its a case of do i leave em matt, or apply some lacquer to em later??
|
STEvieXE
Member
Registered: 21st Jan 03
Location: Ballymena N.I.
User status: Offline
|
thats a very old fashioned way of welding joints. at thatcham now they want u to weld the joints continous. u tack every cm or so with one single tack. then grind all the tacks flush. then start at one side and go the full way accross without stopping.
i didnt like the sound of this when we were told about it but gave it a go and now wouldnt do it any other way. sometimes it does warp yeah but same thing happens with welding small sections at a time.
i have never blown air on them either when doing it the old way, ur heating them up and then cooling quickly with the air will cause it to buckle etc etc
one more thing? if the plate was only tacked on the hole to avoid warping why is the repair so big for the small hole?
|
SteveoBC
Premium Member
Registered: 22nd Feb 07
Location: Bucks
User status: Offline
|
thats only the way i do 1/4's, yeh i do do the tacks across the join grind them and then do the main weld, but just never do it in one go, i just find it easier when applying the finishing filler, each to their own i suppose, just the way i was taught
the repair section of filler is bigger because was sanding the paint off around it and it showed up another dent next to it i missed, so filler both under one skim
|
STEvieXE
Member
Registered: 21st Jan 03
Location: Ballymena N.I.
User status: Offline
|
try it in one go, even try the smaller joints first before u do the big ones.. turn the welder down tho lol. its a real gd job
|
SteveoBC
Premium Member
Registered: 22nd Feb 07
Location: Bucks
User status: Offline
|
dont worry stevie, bigger structural sections yes i defo do continous welds,due to the gauge of the metal being much thicker, just passed my welding standards test for that, doing the overhead and vertical continous welds and what not
[Edited on 26-05-2007 by SteveoBC]
|
STEvieXE
Member
Registered: 21st Jan 03
Location: Ballymena N.I.
User status: Offline
|
yeah i remember doing that also. done it twice, once at college and once in work. was the assessor out with the verniers measuring the defects?? is it 150mm of weld with 5mm of defects allowed or something. lol gd craic
|
SteveoBC
Premium Member
Registered: 22nd Feb 07
Location: Bucks
User status: Offline
|
had to do overhead butt and T weld, 250mm by 50mm plates of metal and vertical down butt and T welds again with 250x50mm pieces of metal
15% of errors allowed plus u had to stop in the middle on all of em and continue again
|
STEvieXE
Member
Registered: 21st Jan 03
Location: Ballymena N.I.
User status: Offline
|
we did
overheads
vertical
horizontal
All butt joints
t fillet and overlap
twice for each of those on different quages of metal, then all the spot welding crap. we didnt have to stop and start again.
sorry for spamming up your topic. car looks gd
|
SteveoBC
Premium Member
Registered: 22nd Feb 07
Location: Bucks
User status: Offline
|
no worries, bloody knackered today got bugger all sleep, had to finish those wheels off, then strip the irmscher airdam off my C to get that repainted cos the prepper who did it first time round did a cack job and some paint has flaked off, so took it apart and re-prep'd it myself
hope i can get it painted and fitted back on before PVS my C has a corsa combo bumper on it for the time being lol
[Edited on 26-05-2007 by SteveoBC]
|
Rich H
Member
Registered: 26th Oct 05
Location: West Sussex Drives: E46 M3
User status: Offline
|
Now I've seen pics of your C, I know who u are now!!
Track project sounds cool. Will be keeping an eye on the progress!!
What yellow you going for?
|
SteveoBC
Premium Member
Registered: 22nd Feb 07
Location: Bucks
User status: Offline
|
dunno its a mix of 5 yellows my painter mate didnt need, so hes giving me em for free, see what we get when i mix all 5 yellows together lol
|
SteveoBC
Premium Member
Registered: 22nd Feb 07
Location: Bucks
User status: Offline
|
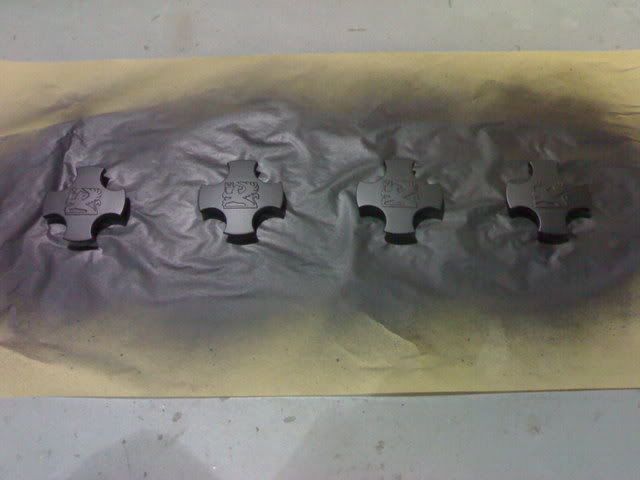
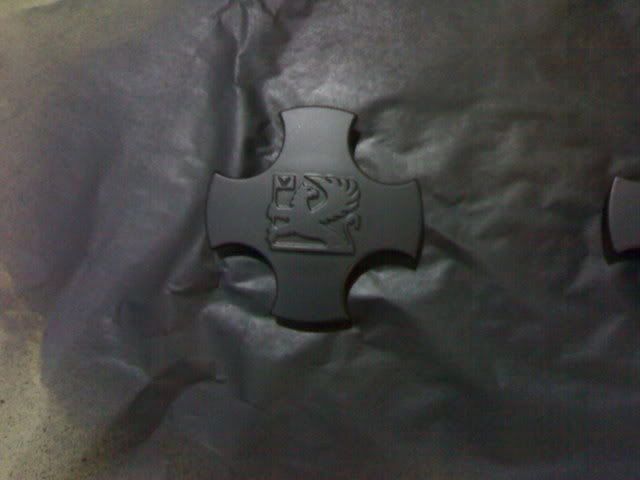
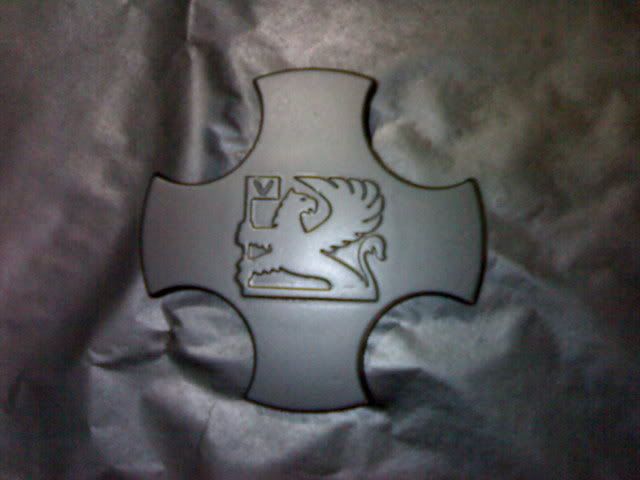
only a quickie update, sprayed my cav gsi wheel centre caps today to match the wheels
scotched, de-greased, sprayed
before
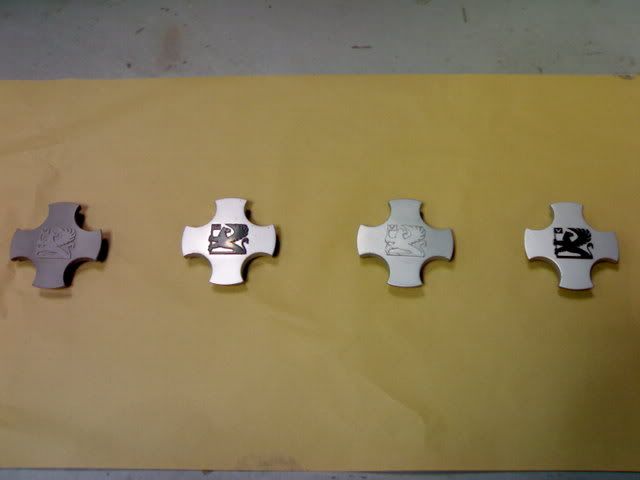
during

after
|
richard_cooper
Member
Registered: 31st Jan 07
Location: Mansfield, Nottingamshire
User status: Offline
|
Looking good
|
sam13
Member
Registered: 30th Dec 06
Location: manchester, sale
User status: Offline
|
great progress keep it up pal
|
SteveoBC
Premium Member
Registered: 22nd Feb 07
Location: Bucks
User status: Offline
|
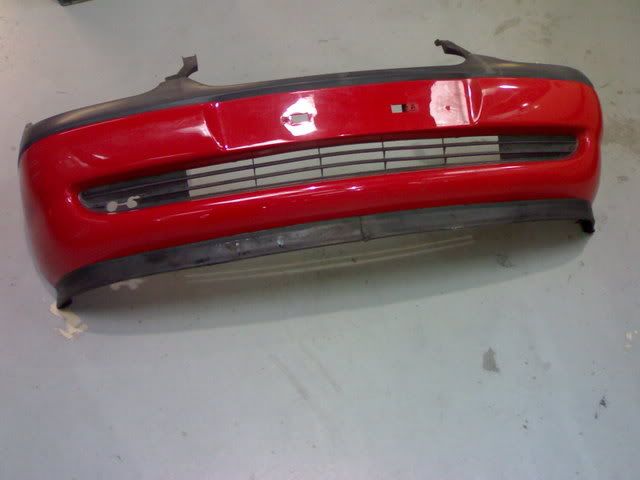
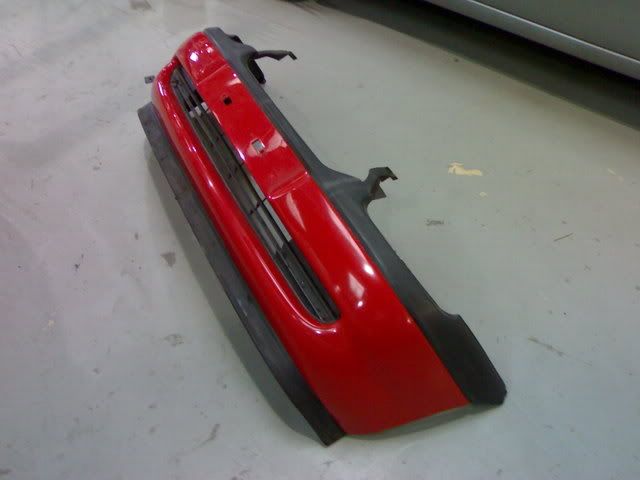
Update again, had a stoke of luck today, had a written off Corsa B Ls come into work,with post 97 front bumper, had a bad knock on the wing and driver door mashed, plus the fron suspension was wasted, but my boss let me swap bumpers with it and got hold of a passenger side mirror i was in need of, RESLUT! saved me a few quid who needs a scrappy where i work lol
....although had to do it out in the rain at lunch, but here it is, its in quite good nick re-texture the o/s of the plastic where it has a scuff, spray that black and spray the bottom half yellow (may even use it as a test subject, we'll see )
oh and it looks really clean cos i just wiped some de-greaser over it to check for any hidden scrapes or scratches under the mud that it was caked in
|
SteveoBC
Premium Member
Registered: 22nd Feb 07
Location: Bucks
User status: Offline
|
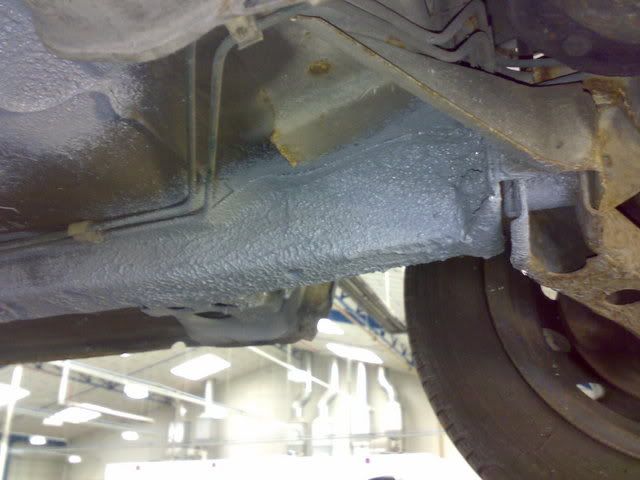
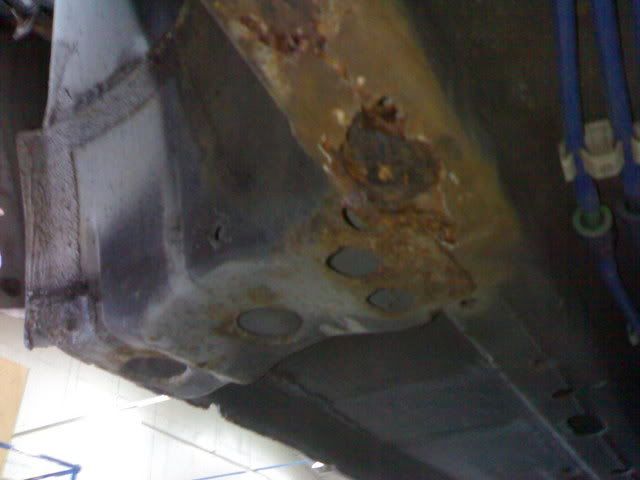
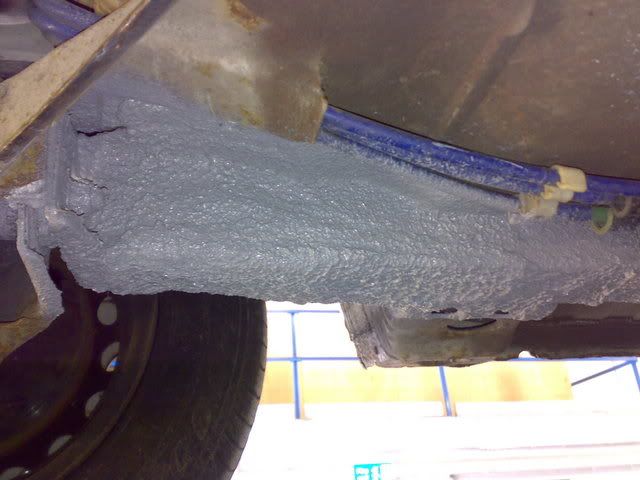
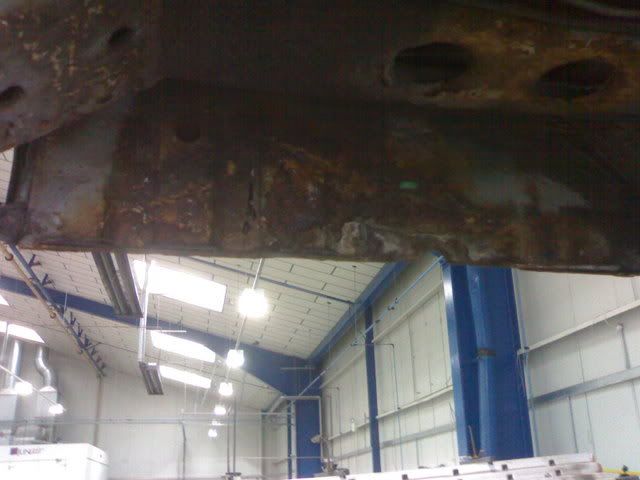
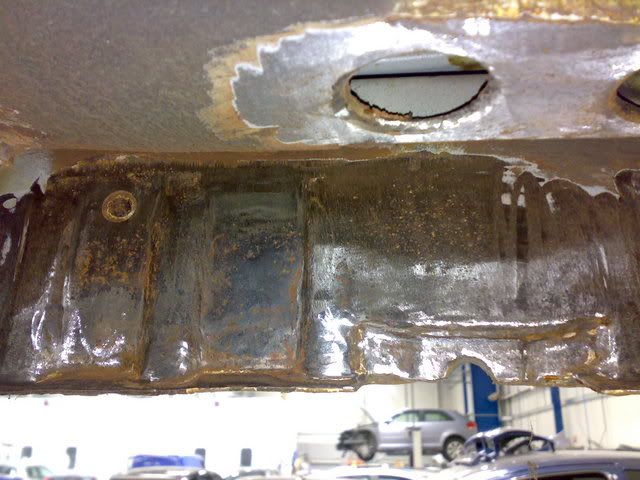
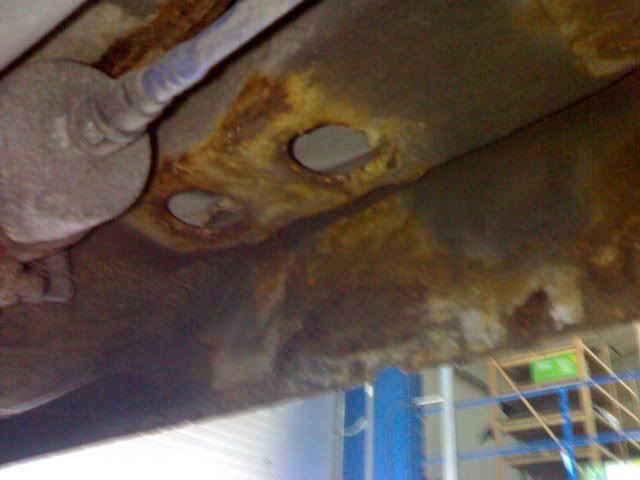
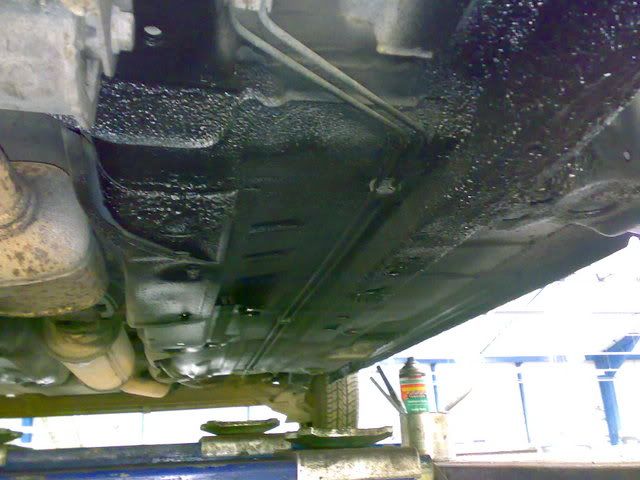
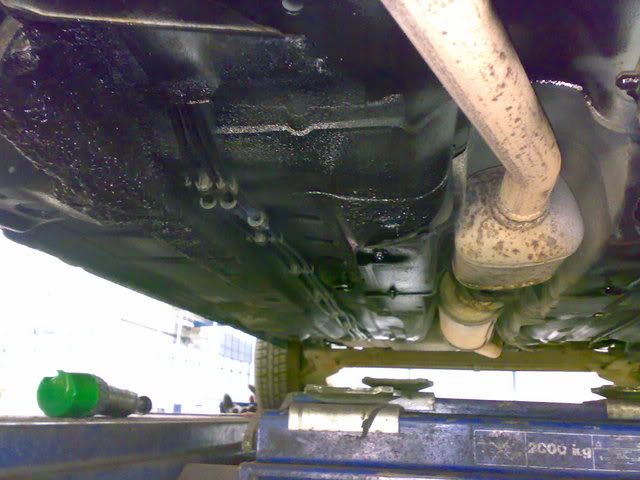
Update time again everybody
spent most of the day at work today and finally tackled the underbody rust that has been on my mind for aaaaaaages
the 2 holes on the chassis rails at the front were my main concern, but they easily wer grinded out, found some spare ford chassis leg parts which were the right gauge metal i wanted, cut out the plating to the right sizes welded on and sealed up, easy!
so near side front chassis rail (note i did spray black stonechip sealer over the lot of these but forgot to take pics DOH!)
before
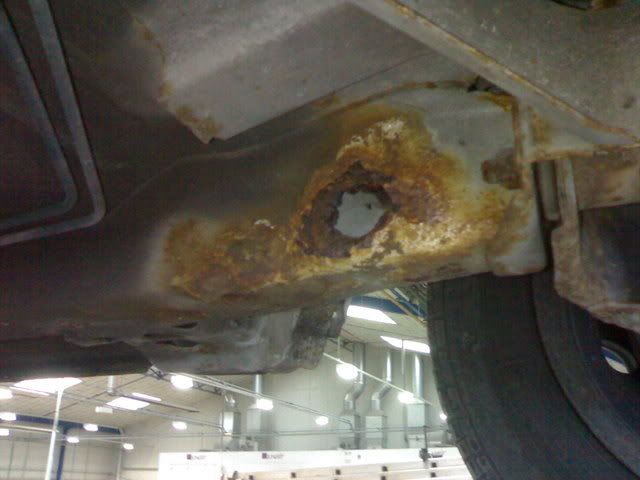
during
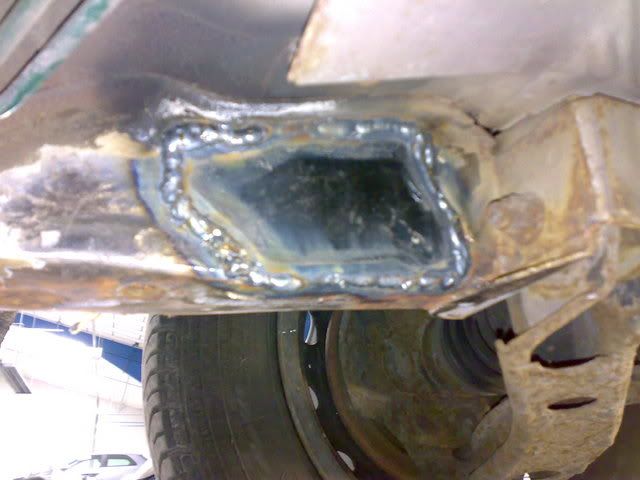
after
offside chassis rail
before
during
(pics of plate welded over missing)
after
n/s rear rust
before
during
after

o/s rear rust
before
during
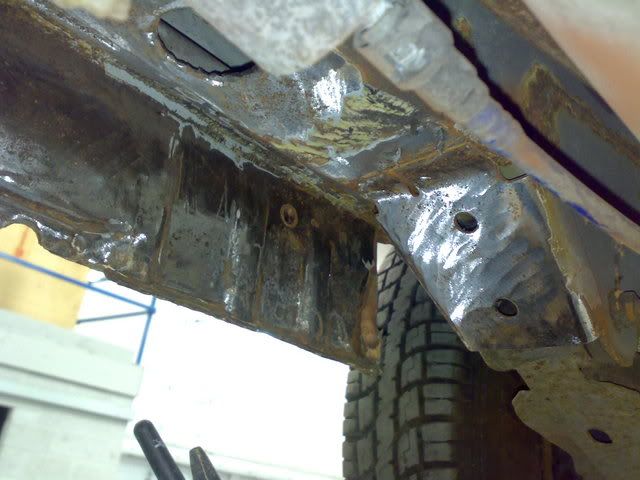
after
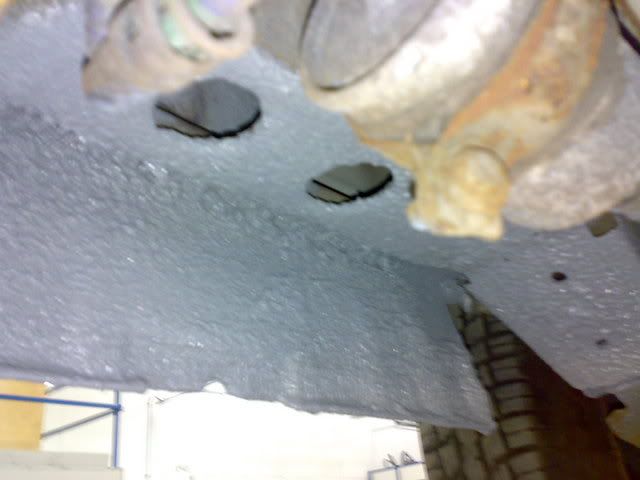
and thought id give the rest the cars original sealer a fighting chance so sprayed the underside in black stone chip aswell as over the rust repairs, makes it look 10x better and fresh
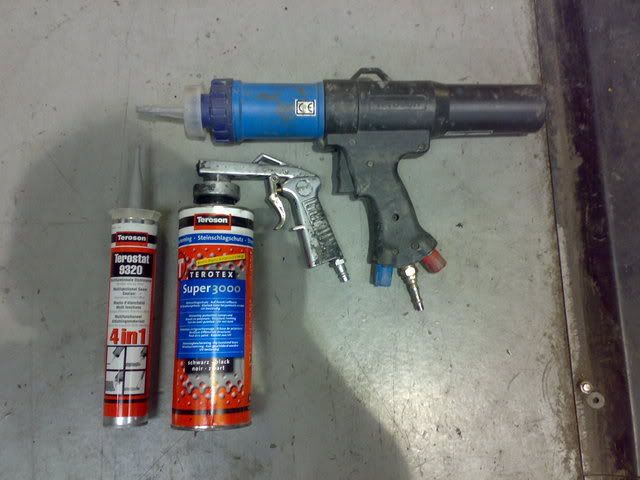
heres the sealer stuff i used for anyone interested
|
SteveoBC
Premium Member
Registered: 22nd Feb 07
Location: Bucks
User status: Offline
|
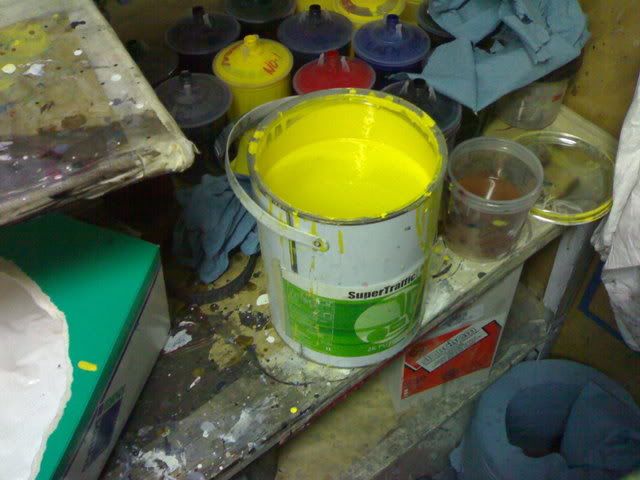
oh for those who want an idea the colour will be like
heres the paint i got for free all mixed together the other day
|
ed
Member
Registered: 10th Sep 03
User status: Offline
|
Is that an air powered caulking gun?
|
SteveoBC
Premium Member
Registered: 22nd Feb 07
Location: Bucks
User status: Offline
|
it is an airpowered sealer gun
|
AndyCorsaSport
Member
Registered: 12th Feb 06
Location: Horsforth, West Yorkshire
User status: Offline
|
Take it your a panel beater?
Im an apprentice panel beater, wish we could do that much at my place, ive done loads, but not as much as id like to.
Sounds like you and other Steve both go, or have been to Thatcham aswell?
I go to Thatcham for my college training.
|


