dale87
Member
Registered: 19th Feb 06
Location: West Mids :)
User status: Offline
|
interior will be standard gsi trim with a few gauges and switches for fan and pas pump. as its only had 2 owners so its too clean to strip out plus i want to keep it family friendly with having a son and all that.
wheels will be 15x6 comp mo's which i bought brand new 4 years ago from compomotive, they are still on the first set of toyos lol but i plan to have r888s fitted all round eventually.
|
pagey
Member
Registered: 30th Nov 04
User status: Offline
|
Cool, has it got any factory fitted extras? Some came with nothing others came with electric windows/ mirrors, sunroof etc... Ive seen its got pas and abs, Looking good anyway bud! Get it undersealed/old oil, done mine every year and it was done before I had it, a lot of these gsi's are rotten so gotta keep the good ones goin lol! 
|
dale87
Member
Registered: 19th Feb 06
Location: West Mids :)
User status: Offline
|
its a 1994 shell with manual mirrors, manual windows, no sunroof, no airbag. basically the only extras are pas and abs which id imagine comes as standard on a gsi so i guess that means its got no extras lol.
i am planning on undersealing it before i use it and i only do 3000 miles a year max so should last a few years before rotting away.
|
pagey
Member
Registered: 30th Nov 04
User status: Offline
|
Good plans bud! Where are u sortin your boost pipes from? I've got the same tophat to go on, just need to sort th pipework out wondered if you've sorted yours yet, I might get sum made up
|
dale87
Member
Registered: 19th Feb 06
Location: West Mids :)
User status: Offline
|
ill be using 51mm pipe from turbo to cooler, 2 90deg elbow i think it is. and a 51mm to 60mm 45degree off the cooler to get round the rad then 60mm to the eds tophat but havn't mocked anything up yet from cooler to tophat.
|
dale87
Member
Registered: 19th Feb 06
Location: West Mids :)
User status: Offline
|
Done a little more work today 
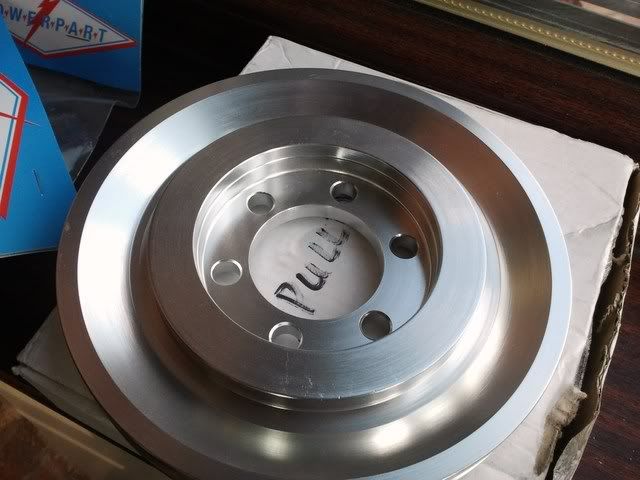
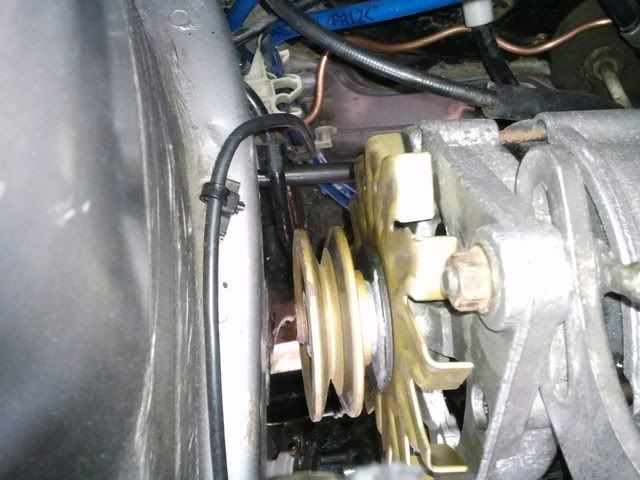
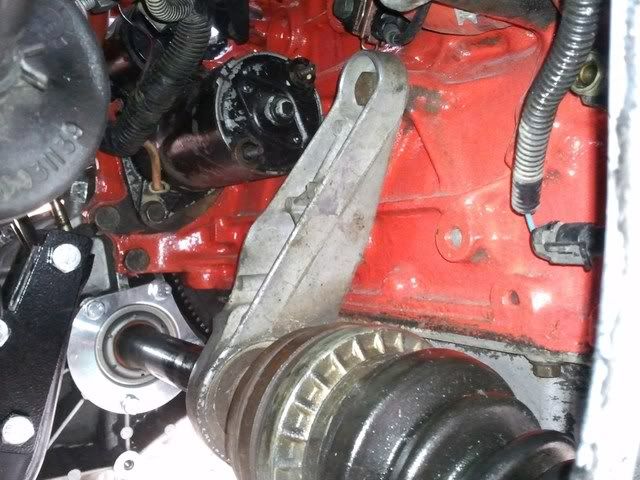
Fitted a new single v alternator, new tx autosport bottom pulley, new GM oil filter and popped the equal length shaft into the box and bolted it to the block.
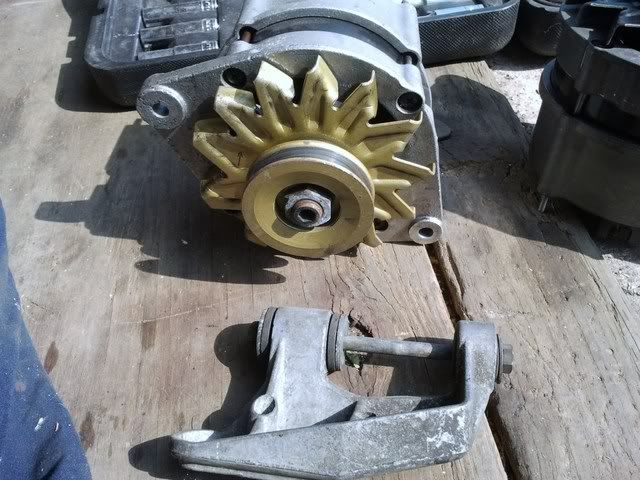


Thanks for looking.
[Edited on 28-04-2011 by dale87]
|
pagey
Member
Registered: 30th Nov 04
User status: Offline
|
Good work dale! Funny this, ive been looking at a shiny new tx autosport bottom pulley today lol!Any problems removing the old one?
|
dale87
Member
Registered: 19th Feb 06
Location: West Mids :)
User status: Offline
|
Had no problem at all mate even reused the old bolts (with loctite like every other bolt on the engine, ocd lol). but I did remove the original pully with the engine out of the car mate.
Ive also fitted some inxx bonnet lifters off my blue xe will take some pics soon
|
dale87
Member
Registered: 19th Feb 06
Location: West Mids :)
User status: Offline
|
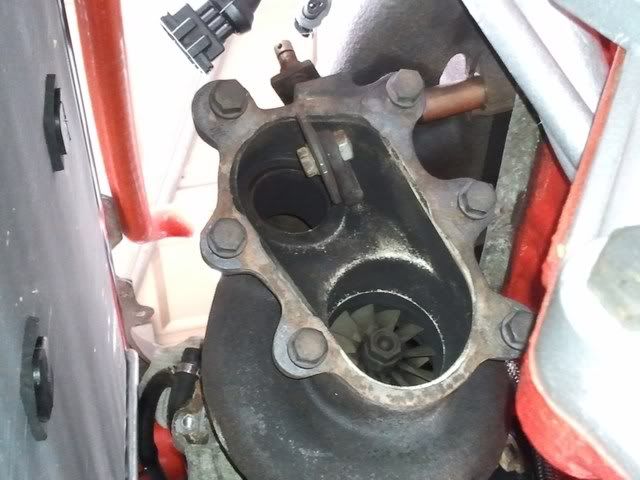
Just been reading up on actuators and it seems that in most pictures the actuator rod attaches differently to mine?
Mine, threaded rod into a threaded sleeve then cir clipped the the wastegate arm.

Then a random image from google, notice the thread goes straight through the wastegate arm with a bolt either side?

why is mine different and will I have any problems fitting an uprated actuator?
Any help appreciated.
|
AlexW
Member
Registered: 25th Oct 08
Location: Essex
User status: Offline
|
Have you got a close up pic of the actuator where it meets the wastegate arm?
|
dale87
Member
Registered: 19th Feb 06
Location: West Mids :)
User status: Offline
|
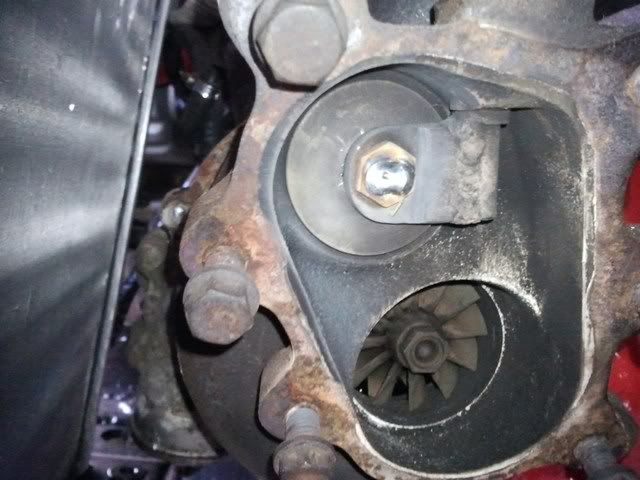
Don't think I have with the actuator fitted mate. Got this one from earlier in the thread.
I'm thinking I might have to drill a hole through the wastegate arm??? Or use the 'sleeve' Im on about??
|
harvey_1066
Member
Registered: 9th May 10
Location: Ludlow Shropshire
User status: Offline
|
oh mate just saying but you might want to dap a bit of weld onto the nut of that bolt that holds the flap on your actuator arm as it might work loose and you dont want that happning other wise you'l end up having to take exhaust off to mend it, just weld the nut onto the bolt then it should be fine.
|
dale87
Member
Registered: 19th Feb 06
Location: West Mids :)
User status: Offline
|
cheers mate was thinking of welding the bolt to the nut.
anyone got any ideas on the actuator problem?
|
dale87
Member
Registered: 19th Feb 06
Location: West Mids :)
User status: Offline
|
Fitted some inxx bonnet lifter from my c20xe corsa i'm breaking.


And a pic of my xe im breaking.

|
AlexW
Member
Registered: 25th Oct 08
Location: Essex
User status: Offline
|
Looking at it like that I'd say drill it, Will be easier for future mods, Its that or have to cut down the actuator rod and thread it to make it fit the sleeve.
Shouldn't be much of a issue IMO.
|
dale87
Member
Registered: 19th Feb 06
Location: West Mids :)
User status: Offline
|
I'm thinking of either tapping the sleeve to the new actuator rod thread or like you say re thread the actuator rod to the sleeve thread, think that will be a bit easier for me than drilling the arm but we'll see. Will know more when I get my actuator anyway, going for a forge one I think.
Put a blob of weld on the penny valve nut today to stop it ever working loose.
|
craig_s
Member
Registered: 5th Mar 06
Location: Birmingham Drives: mk4 astra gsi
User status: Offline
|
glad to see you welded the penny valve on,no way i would of trusted that bolt.did you find where you two plugs went?there should be two in the gearbox, 1 for reverse light and 1 for boost control.
|
dale87
Member
Registered: 19th Feb 06
Location: West Mids :)
User status: Offline
|
the 2 plugs i think are for the cavalier turbo reverse light as theyre the same colour as the reverse plug on the corse loom, don't think ive got to use them in conversion though.
and yeah i would have been paranoid about the penny valve but should be all good now the nut weldes to the bolt
|
dale87
Member
Registered: 19th Feb 06
Location: West Mids :)
User status: Offline
|
Mtech Short shifter and nylon bushes ordered
|
AlexW
Member
Registered: 25th Oct 08
Location: Essex
User status: Offline
|
Tip for ya, Order the two end cup bushes (The ones that are circlipped in the other bits that go onto the main shifter thingy...
I know, I described that well.
|
dale87
Member
Registered: 19th Feb 06
Location: West Mids :)
User status: Offline
|
Already got 2 new cup bushes and clips from autovaux  cheers though matey. cheers though matey.
|
dale87
Member
Registered: 19th Feb 06
Location: West Mids :)
User status: Offline
|
Update time! I've been slacking a bit lately but mainly because I've been collecting bits to finish it off but got a bit of work done over the last few weeks.
Firstly I've sorted the wiring out. I also want an override switch on the cooling fan, switchable power steering and I've fitted a switch for the ecu 'paperclip' test.
Pics.
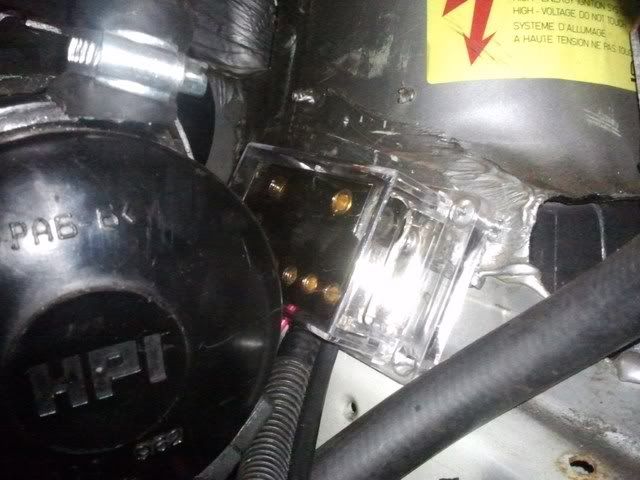
I went to a scrap yard and cut the plug off a corsa engine loom, I had kept the in car plugs from the cavalier turbo I stripped so I could make an adapter loom rather than cutting the corsa and LET loom.
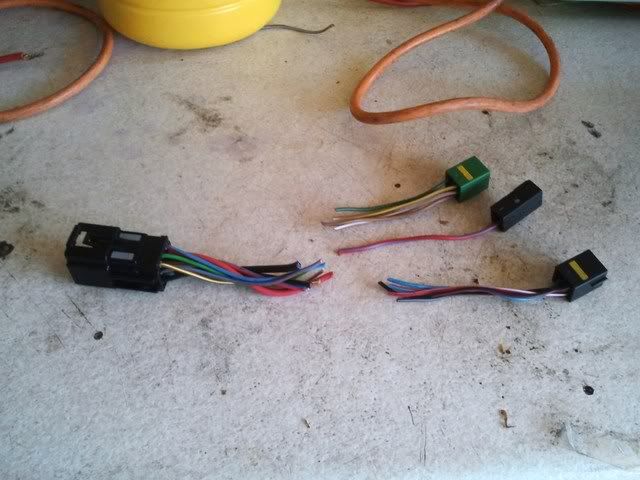

These are on the let loom and don't get used.
These are on the corsa loom. Red one is permanent live for original corsa ecu (not needed as let ecu live is in the engine bay) black is ignition live which I ran into the bay and connected to the black wire on the let loom.
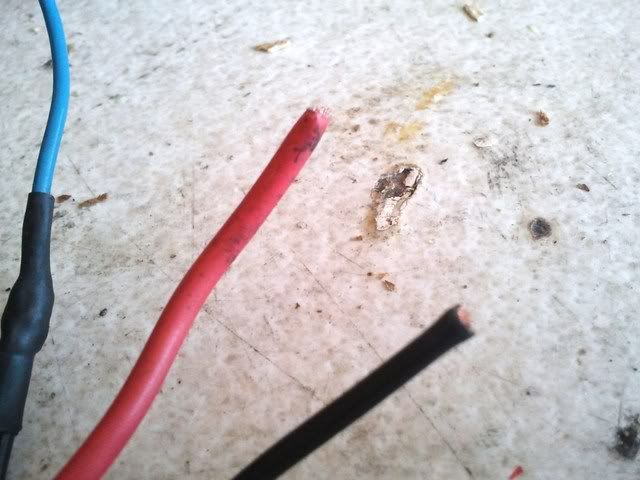
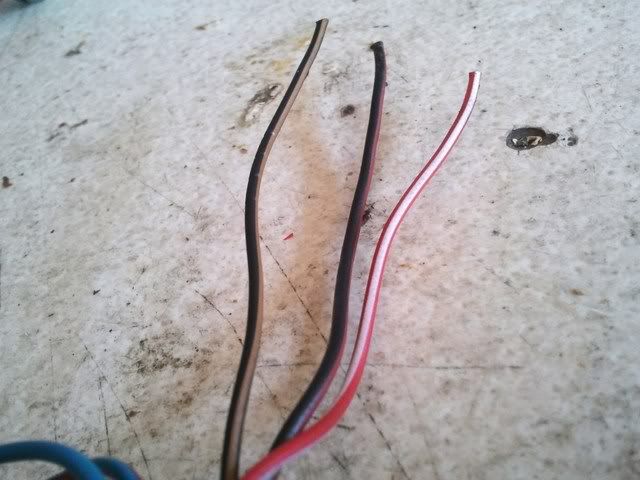
This is how you make a paperclip test switch. You need to splice the the brown and yellow wire and run it to earth. I did this but through a switch so I can run the test at the flick of a switch 

'dale87' adapter loom lol. the green wire is the paperclip test wire and the black is ignition live. I've left the red live sticking out for now incase I need it for anything in the future.

Next I wired the switches for fan, pas and ecu test.
Switches.

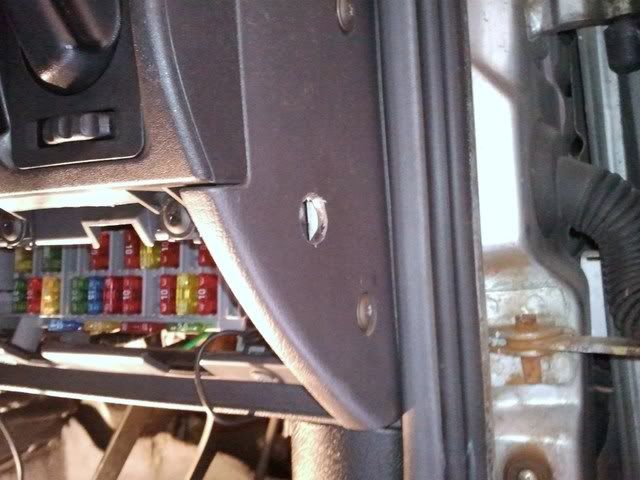
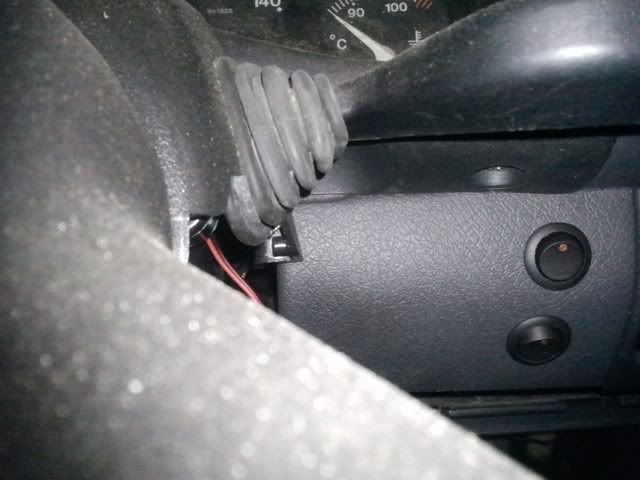
There is a hole in the side of my dash from where the cobra alarm immobilizer was fitted so I decided this was where the paperclip test switch was going. Again very simple to wire up. Brown and yellow wire - switch - good earth. thats it!
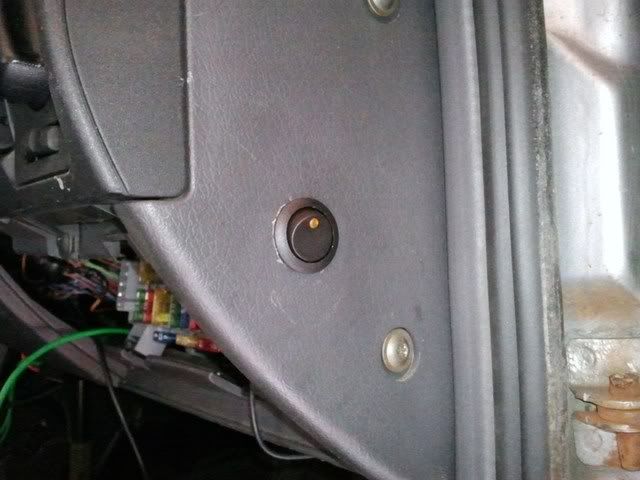
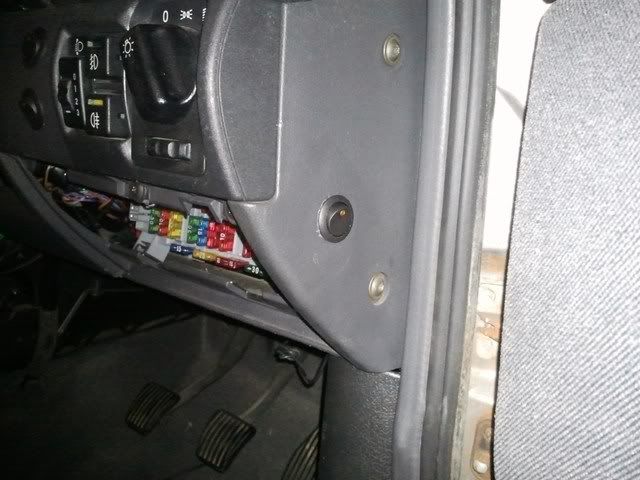

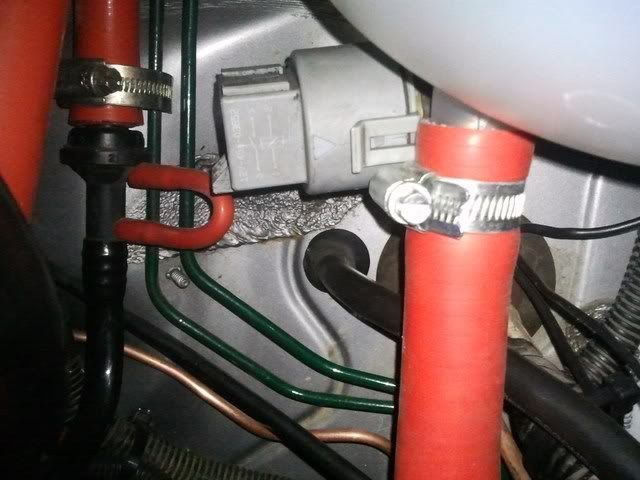
Mounted and wired up the fan and electric pas switches.
For the fan switch I just spliced the brown and white wire (iirc) at the fan switch sensor (botton of rad) and ran this to the switch then to earth. The rad switch is a switch that earths the circuit and switches the fan on so all you are doing is bypassing the route to earth and all wiring is still protected by the cars fuses and relays and the big current is kept out of the cabin. Also this way the switch is only armed when the ignition is turned on.
For the pas pump switch I used the loom and relay from the 106. There are 4 wires to connect. 1 to perm live with a big 40amp fuse. 2 go to earth. The last is the ignition live for the relay to activate, this is the wire you use to make it switchable. I ran it to the switch in the dash then connected up to igniton live so again the switch is only armed when then ignition is on.
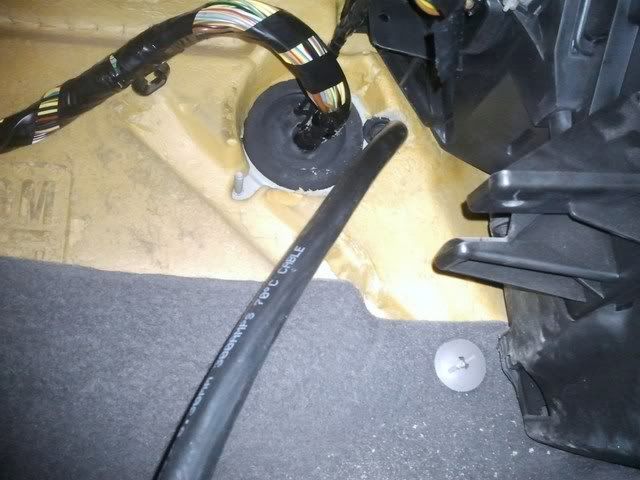
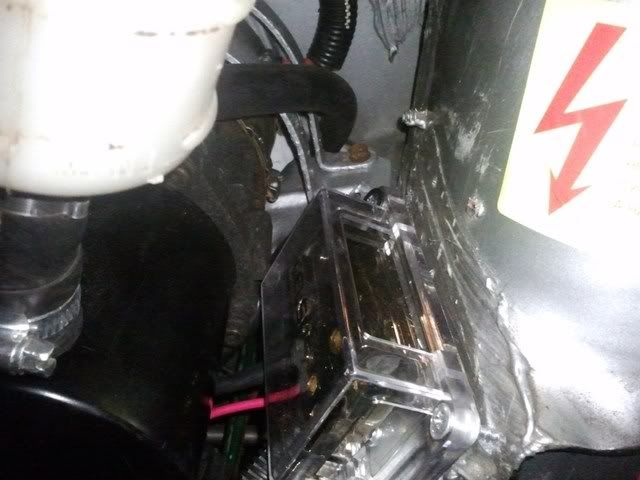
Now ideally I needed to test these and with having no battery in the bay I got onto sorting the battery relocation. I used some 12mm cable capable off 300amps, should be good enough. The weight of it of shocking though, heavier than the battery lol.
I drilled a hole into the cabin and used a rubber bung to stop the cable rubbing. (you can see the relay for the pas pump too)
And a pic to show the size of the cable, (I don't have small hands!)
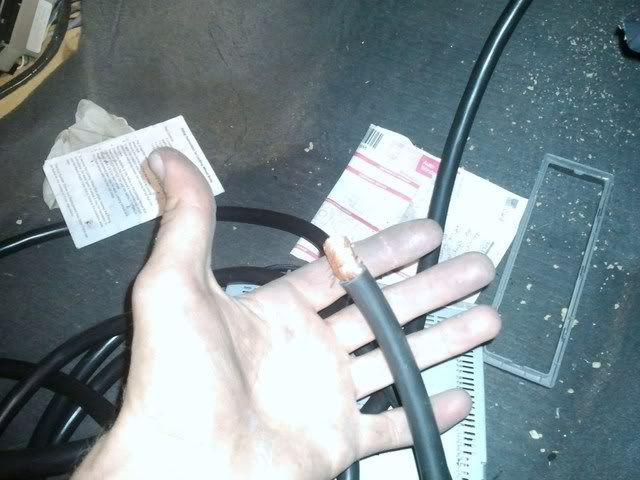
I linked the live wires with a heavy duty distributer block, temporary connected the battery up and hey presto! everything worked first time. Also filled the pas pump up with high quality castrol hydraulic fluid and bled any air out.

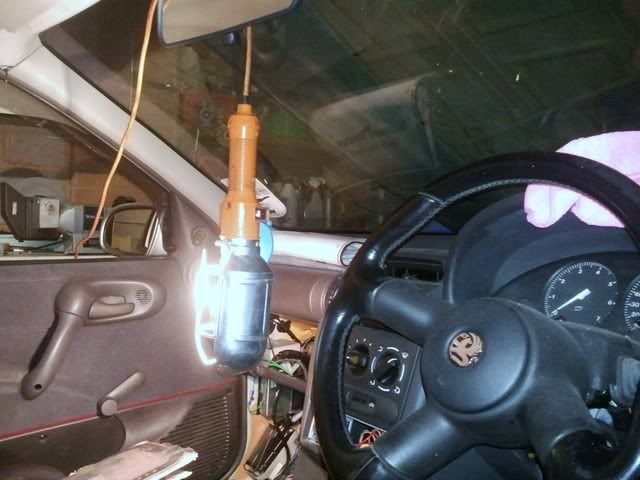
Also fitted a new 60w interior light, it's a bit bright but very good for map reading 
More updates very soon!
[Edited on 16-05-2011 by dale87]
|
K2NY-G
Member
Registered: 6th Feb 08
Location: Fife, Scotland
User status: Offline
|
some cracking ideas with the switches dale! might need to copy some of them lol
|
dale87
Member
Registered: 19th Feb 06
Location: West Mids :)
User status: Offline
|
cheers mate! any questions just drop me a u2u but i'm not giving any info on my interior light mod, that's one off - top secret info lol.
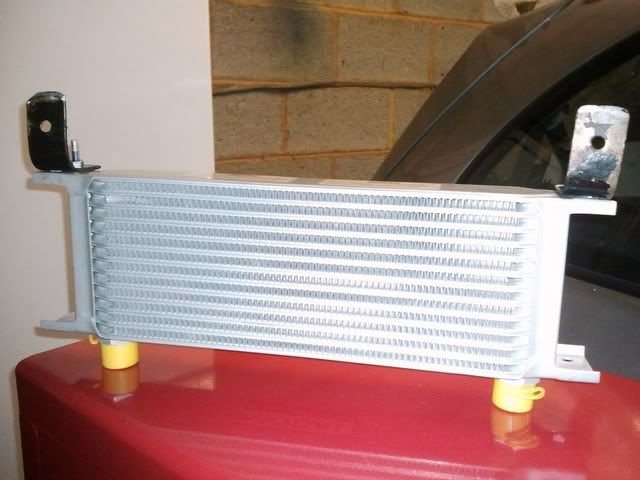
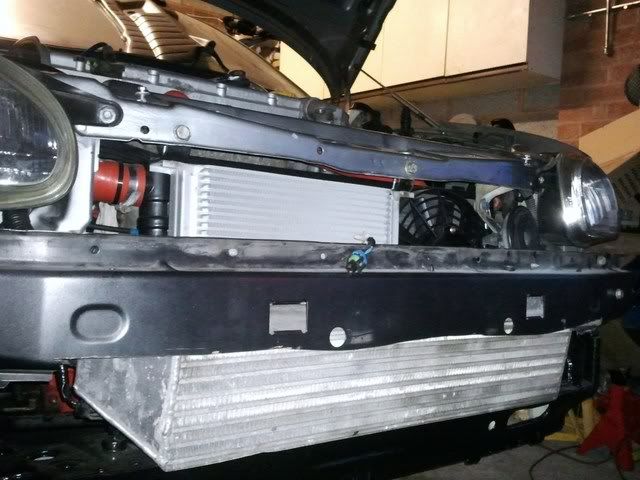
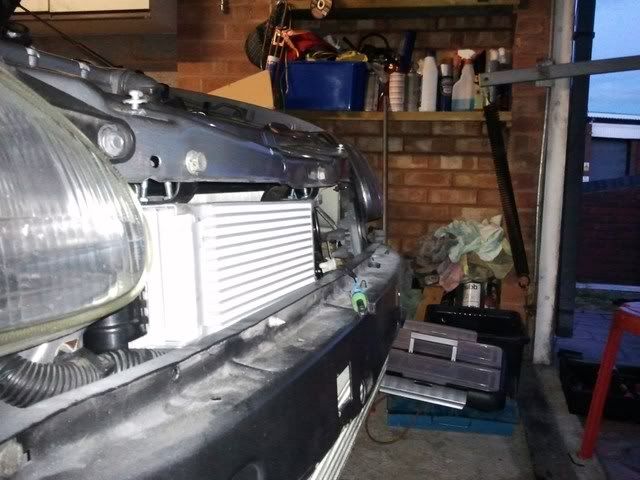
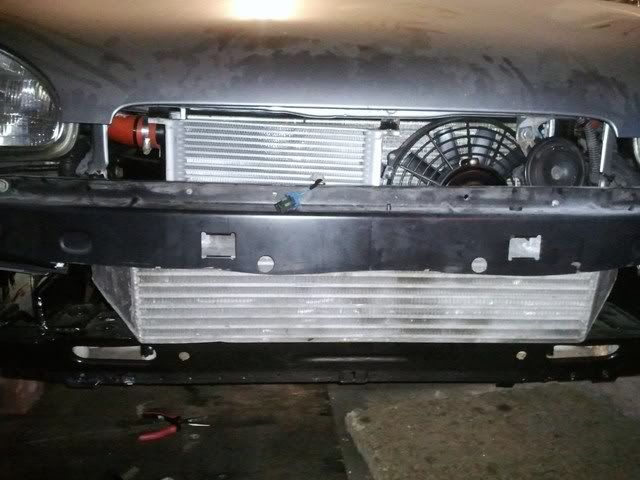
Next up is the oil cooler. I decided on a 13 row, 235mm wide mocal cooler with 1/2bsp fittings. I made some brackets and bolted it under the slam panel behind the grill so it gets as much airflow as possible, only thing is my rad now seems buried lol. Need to lift it up about 20mm though so I can fit the 90 degree fittings on, which are on order but got a few pics of the location.


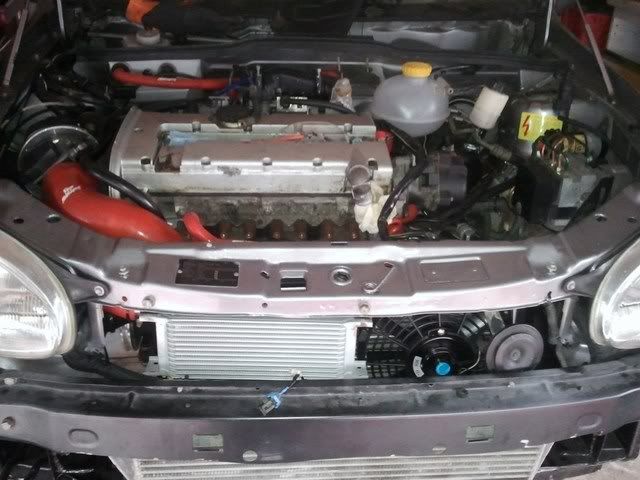
I had planned to use the pipercross filter from my xe seeing as it's only done 4000mile since I bought it new but I never realised the let afm is bigger than the xe one. xe is 70mm and is 80mm wide. So i chopped the neck off the filter to give me the extra 10mm I needed. Then jubilee clipped it to the afm and roose intake pipe and placed in the bay, looks so much more complete with the filter in the bay imo.

And a quick pic of my M-tech f28 linkage and nylon bushes.

Just waiting on my oil cooler pipes and fittings to turn up and £250 worth of gear from autovaux which should be here early this week then I can carry on building.
|
K2NY-G
Member
Registered: 6th Feb 08
Location: Fife, Scotland
User status: Offline
|
ive just ordered one of those mtech shifters too, did it take long to come? i was under the impression it was a full linkage! do you just get part of it?
|


