john_c20xe
Member
Registered: 10th Feb 08
Location: Eastbourne, EastSussex
User status: Offline
|
how did you mount the slim line fan?
|
corsadonk
Premium Member
Registered: 4th Jul 09
Location: Marlborough, Wiltshire
User status: Offline
|
Fan ties.
|
Dale
Member
Registered: 7th Oct 07
Location: Swindon
User status: Offline
|
quote:
Originally posted by Graham88
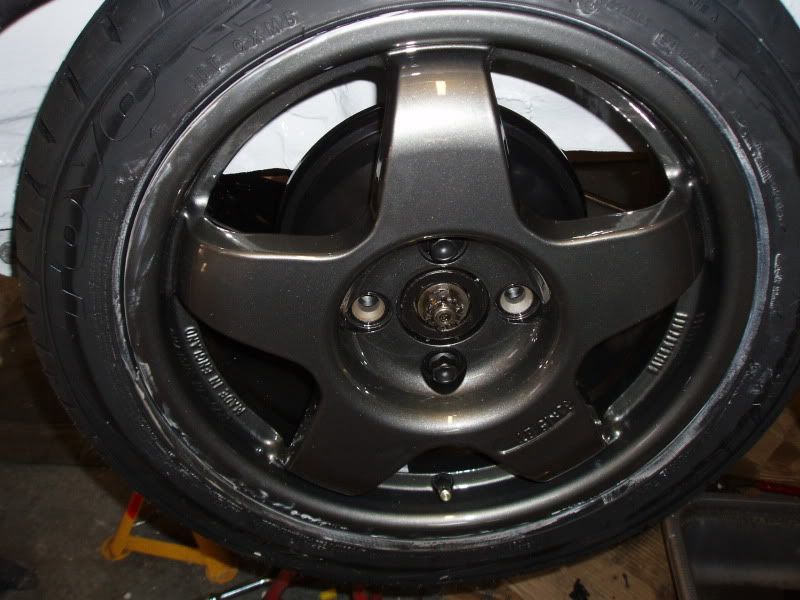
Excellent choice of wheels, I had those on my Fiesta but in 17's 
Cheers, bit bored of the g60's now and i can run some 888's on these
quote:
Originally posted by Rick Draper
Yes i cut and shortened the linkage as per the instructions. I will not be doing mine until mid to late next week.
Will go and check the MIG thread out now.
yer keep me post rick
quote:
Originally posted by broster
wheels look great now!
cheers 
quote:
Originally posted by john_c20xe
how did you mount the slim line fan?
As mike said rad ties 
|
shaunmods
Premium Member
 Registered: 12th Mar 07
Location: Glascote, Staffordshire
User status: Offline
|
That is going to look stunning on those wheels Dale 
|
Dale
Member
Registered: 7th Oct 07
Location: Swindon
User status: Offline
|
quote:
Originally posted by shaunmods
That is going to look stunning on those wheels Dale
cheers shaun
Got more done tonight
picked up a few bits from vauxhall again
new battery (astra size)

with battey bag on


fitted new plugs, NGK BCR8ES gapped to 0.6mm

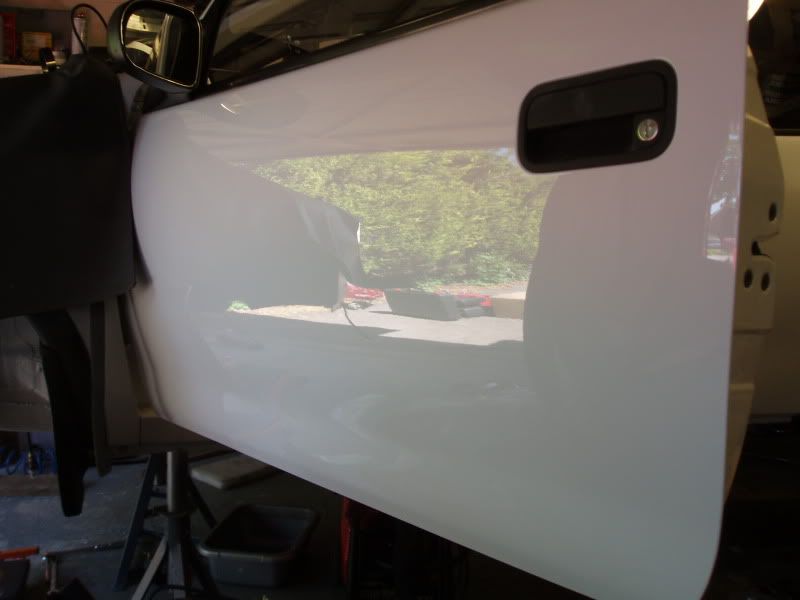
Flatted the boot lid and gave it quick buff


Then i fitted the door back on, still needs flatting and polishing

Then fitted plugs, cap, rotor, battery and battery bag

Pictures of tigra scuttle and new wipers and arms


Fitted boot lock and rear wiper setup inc new arm and wiper

and just a little reminder

Cheers
[Edited on 12-05-2010 by DRS]
|
fillmecca
Member
Registered: 16th Jun 07
User status: Offline
|
just read all 16 pages lol love it mate looking realy good
|
corsadonk
Premium Member
Registered: 4th Jul 09
Location: Marlborough, Wiltshire
User status: Offline
|
Does the battery jack cover the cough cough Do they do them wipers for a B? Had them on the Signum. Do they do them wipers for a B? Had them on the Signum.
|
Dale
Member
Registered: 7th Oct 07
Location: Swindon
User status: Offline
|
quote:
Originally posted by fillmecca
just read all 16 pages lol love it mate looking realy good
Hope you enjoyed the read! Cheers
quote:
Originally posted by corsadonk
Does the battery jack cover the cough cough Do they do them wipers for a B? Had them on the Signum.
Yer it does shhhh they are corsa c/tigra b retrofit, i had a spare set from the C so i fitted them, seem fine to me
|
Dale
Member
Registered: 7th Oct 07
Location: Swindon
User status: Offline
|
got a bit more done tonight, first off i picked up my tx auto downpipe after having the flange machines flat 


Got my Walbro 255 fuel pump

Then cracked on with the door, flatted and buffed


More tomorrow
|
SportBoy
Member
Registered: 5th Oct 01
Location: Retford, Nottinghamshire
User status: Offline
|
ooooo lots of shiney stuff
|
Rick Draper
Member
Registered: 10th Feb 01
Location: Cheshire
User status: Offline
|
Nice, can you get me some pics of fitting the pump. Also where did you get the pump from?
|
Dale
Member
Registered: 7th Oct 07
Location: Swindon
User status: Offline
|
cheers, fitted fuel pump tonight Rick, took loads pictures for you you need to modify part of it will explain all soon and here is the link to where i bought it for http://cgi.ebay.co.uk/ws/eBayISAPI.dll?ViewItem&item=270456768383&ssPageName=STRK:MEWNX:IT
just uploading weekends work
[Edited on 17-05-2010 by DRS]
|
Dale
Member
Registered: 7th Oct 07
Location: Swindon
User status: Offline
|
Got more done once again over the weekend
First off i stated by cutting the bumper for the intercooler (which i am never going to be able to hide)

cut under the number plate to get more air to the cooler

Fitted the boost pipes to intercooler


Fitted the bumper, arches and arch liners


making sure half the cooler isn't wasted

One for Rick cooler and rad clearance roughly 40mm

Fitted Cambelt cover with stainless cap head bolts

Then fitted TX auto Single V pulley

Number plate on, Made me feel a little closer to finishing


On the fuel pump and fuel filter

Then this is mainly for Rick as he asked in previous post (fitting walbro 255 fuel pump)
How it starts

First take off the "top" and disconnect the electric plugs (x2) and both fuel pipes, this is what your left with..

Then press the 3 clips in to remove the inner unit and use long nose pilers to remove the locking top of the fuel pump, it will then look like this....

Whats left in the tank

Remove the filter at the bottom of the fuel pump (just pulls off) and then the pump just pulls out, you will be left with this


Then take the Walbro 255 kit
Fitt the rubber and the bottom of the fuel pump and the foam sleeve around the pump

Then put into housing and fit locking top

Then I Found if you flip it to the underneath you will see this...
As you can see in the picture below that the pump pick up in now in the centre unlike the 16v pump which is offset to the top. The problem with this is that when you try and fit the filter it doesn't fit flat, which you could leave but personally it seem abit of a bodge!

I then filled the edges out so I could fit the filter centrally and straight


Then i Soldiered the wires and heat shrinked,
Red to Red
Blue to black

Then fit the unit back into the holder in the tank, I used the original fuel pipes not the hose supplied in the kit

Then just refit pipes to lid and fit lid!
Hope thats helps and makes sense
Dale
[Edited on 17-05-2010 by DRS]
|
stuartfry
Member
Registered: 10th May 08
Location: Kingston upon Thames, Greater London
User status: Offline
|
i found the pump a bugar to fit but well done just check ya fuel level float as my guage only gose up to 35L when i have put in 45! think its the wires inside but i did rush mine. good job fella
[Edited on 18-05-2010 by stuartfry]
|
p93sco
Member
Registered: 30th Jun 08
Location: Aberdeenshire Drives:silver 1.2 16v
User status: Offline
|
spray the intercooler black to try make it less noticble
|
Dale
Member
Registered: 7th Oct 07
Location: Swindon
User status: Offline
|
Got more done tonight, first off i cleaned the roof rails, rear arches, bumpers and crash bar and fitted them


Then i Fitted rear plate, MHWs, and new areal base

Then cracked on fitting my Oil temp sensor now my adapter turned up M14x1.5(M) x 1/8 NPT (F)

Fitted


Side view showing how low it sits

New front seats, Vectra GSi


As I have 4 new T1R kicking around i decided to fit them to the MO's to use them until I get some 888's

And new centre caps

New GSi Clocks

More tomorrow hopefully
Dale
|
Dale
Member
Registered: 7th Oct 07
Location: Swindon
User status: Offline
|
quote:
Originally posted by p93sco
spray the intercooler black to try make it less noticble
Possible but once it gets stone chips it will look shite
|
cjohnson
Member
Registered: 27th Apr 08
Location: silsden,west yorks.Drive: Astra van
User status: Offline
|
oh emm gee mate! My jaw is on the floor after reading this last page! How f**king sexy is this car?  lol lol
Absolute top work mate! Credit well deserved!
|
stu_c
Member
Registered: 11th Dec 07
Location: Westleigh, Greater Manchester
User status: Offline
|
one word for this dale ANAL and i love it  cant wait to see it in flesh at pvs cant wait to see it in flesh at pvs
|
p93sco
Member
Registered: 30th Jun 08
Location: Aberdeenshire Drives:silver 1.2 16v
User status: Offline
|
quote:
Originally posted by DRS
quote:
Originally posted by p93sco
spray the intercooler black to try make it less noticble
Possible but once it gets stone chips it will look shite
true never really thought on that i just thought more on the sleeper look
|
Dale
Member
Registered: 7th Oct 07
Location: Swindon
User status: Offline
|
quote:
Originally posted by cjohnson
oh emm gee mate! My jaw is on the floor after reading this last page! How f**king sexy is this car? lol
Absolute top work mate! Credit well deserved!
Cheers, I'm glad people like it
quote:
Originally posted by stu_c
one word for this dale ANAL and i love it cant wait to see it in flesh at pvs
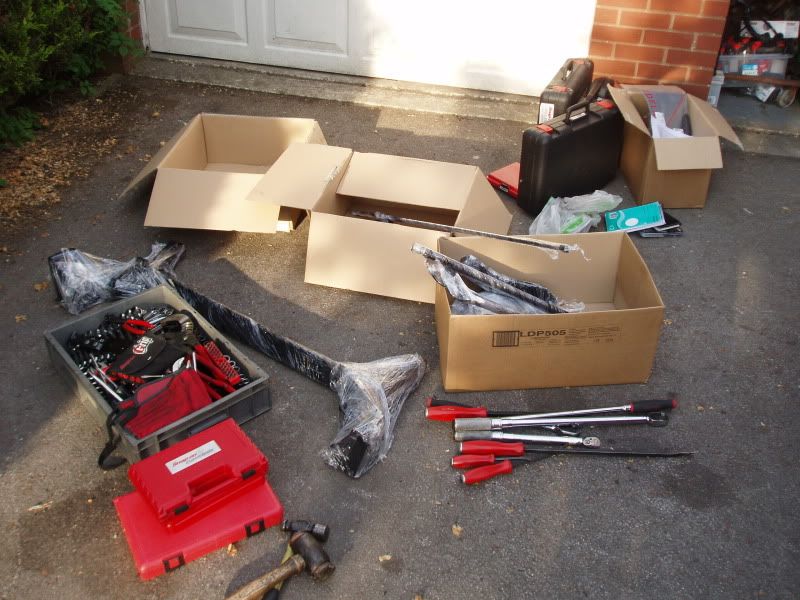
Shhh lol I am really anal with the car loads people say I have OCD but its only ever with the car oh and my tools But thats what makes the difference! Yer I'm looking forward to PVS too 
|
john_c20xe
Member
Registered: 10th Feb 08
Location: Eastbourne, EastSussex
User status: Offline
|
dude your front number plate looks a tad illegal need to sort the spacing out
|
Dale
Member
Registered: 7th Oct 07
Location: Swindon
User status: Offline
|
quote:
Originally posted by john_c20xe
dude your front number plate looks a tad illegal need to sort the spacing out
only missing the space should be DAL 33S
Got more done on monty tonight
First off i started by sorting out my vectra Gsi seats as the subframes were shite tbh, so i used ones i had laying around and made brackets etc to make them fit and work correctly inc drivers height adjustment
this is all that was on the passenger side

Half way through passenger side subframe

Drivers side

All bolted in

Next i cracked on with building the boot up, refitted the loom and washer jet and pipe

Next I cracked on with the top mounts i got from Rally Design as mine were fucked (Highly advise using Rally Design)
Old top mounts

New ones fitted

New rear vibera-technics gearbox mount

New Baileys DV26

More tomorrow hopefully as I'm meant to be picking my arms up
Also entered park and pose at PV this year just have to wait if i'm accepted now!
Dale
|
AlexW
Member
Registered: 25th Oct 08
Location: Essex
User status: Offline
|
Looking perfect as always, Vectra seats hard to make fit? Been umming and aring about it for ages but just havnt got off my arse.
Whats next?
|
Dale
Member
Registered: 7th Oct 07
Location: Swindon
User status: Offline
|
quote:
Originally posted by AW06
Looking perfect as always, Vectra seats hard to make fit? Been umming and aring about it for ages but just havnt got off my arse.
Whats next?
Thanks
As for the seats, yes and no.... i'm sure you could bodge them in there quickly but whats the point! You just need the use larger bolts and shims until the running sit at 15inch apart, so they sit in the correct mounting points takes awhile to get it sorted!
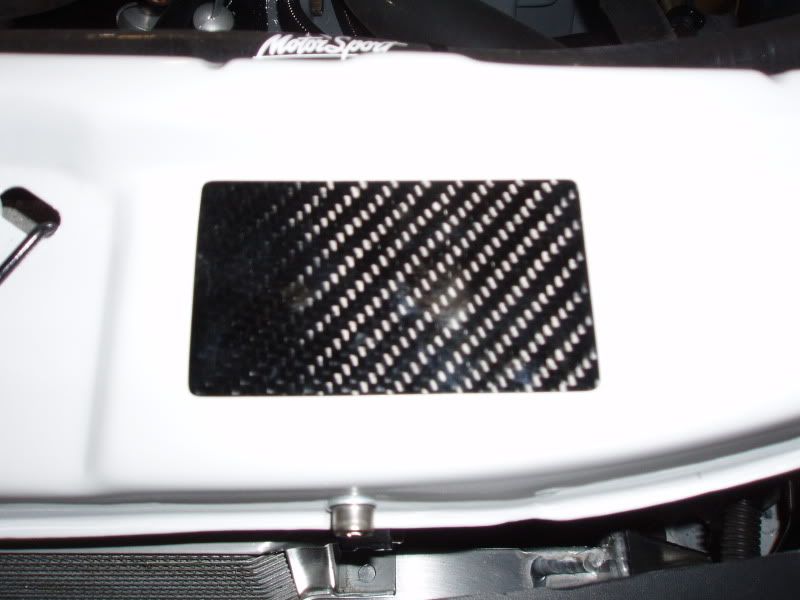
Well I have been/will be flat out as my first show is next weekend and i still got fair bit to do, so heres what i got done
First off i fitted my carbon "plate" just need to make the sticker for it now
Painted my ATE calipers and Tarox G88 discs to give them a fresh look!
Picked my bits up from the powder coaters
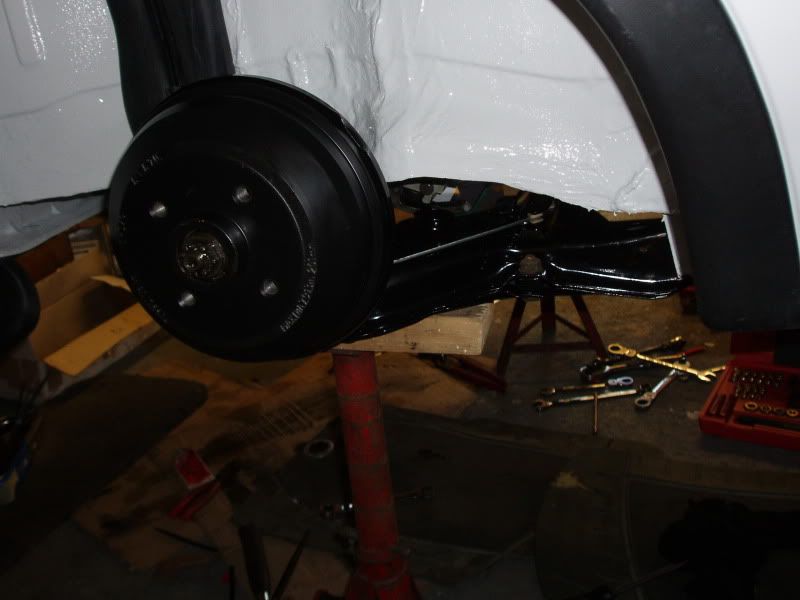
Fitted my powerflex rear beam bushes and got that fitted and started on the rear brakes

Fitted vibera-technics rear mount and new rear gearbox mount
Started to refit turbo to intercooler pipes
Fitted top intercooler pipe + intake side
Next was the M-Tec F28 short shift kit. Here a few details on how I done it
Linkage Set up
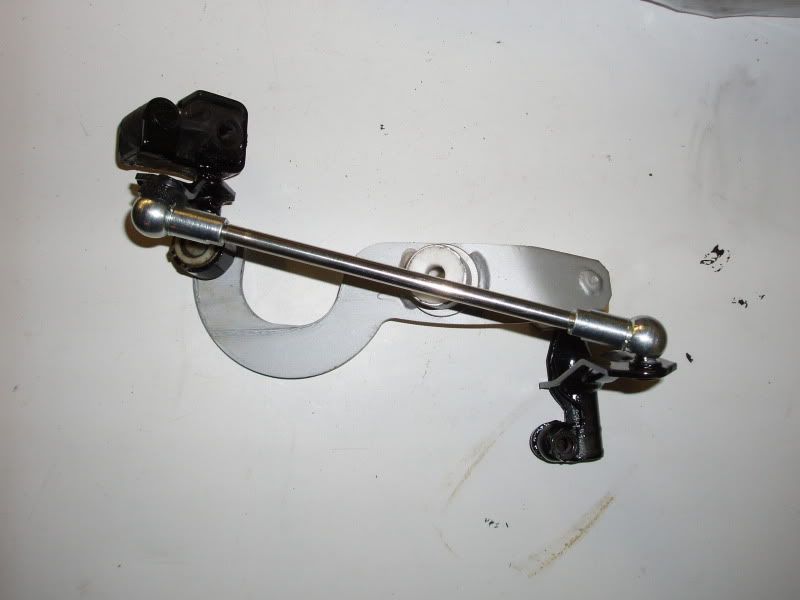
Shortened section
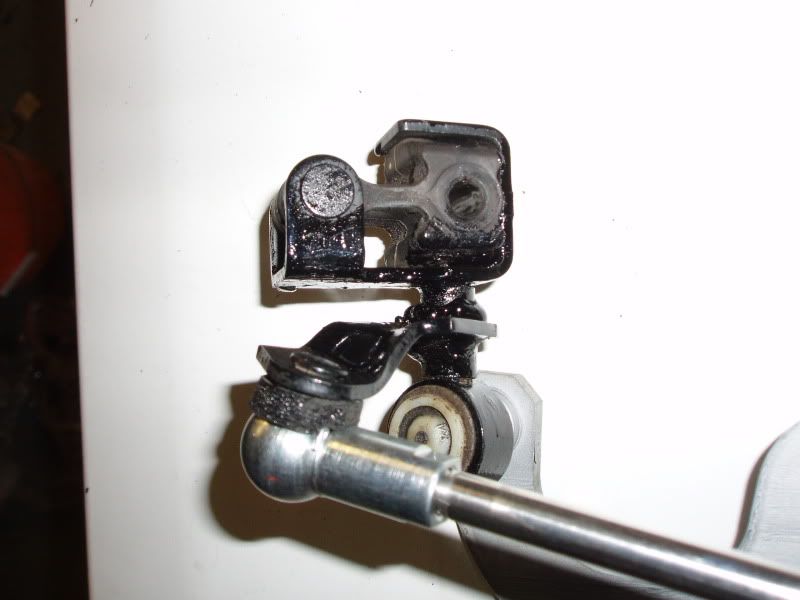
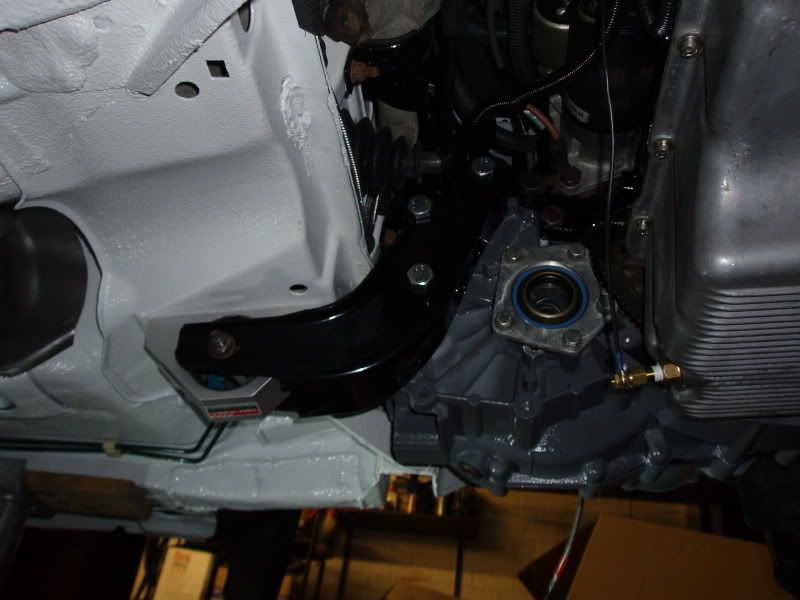
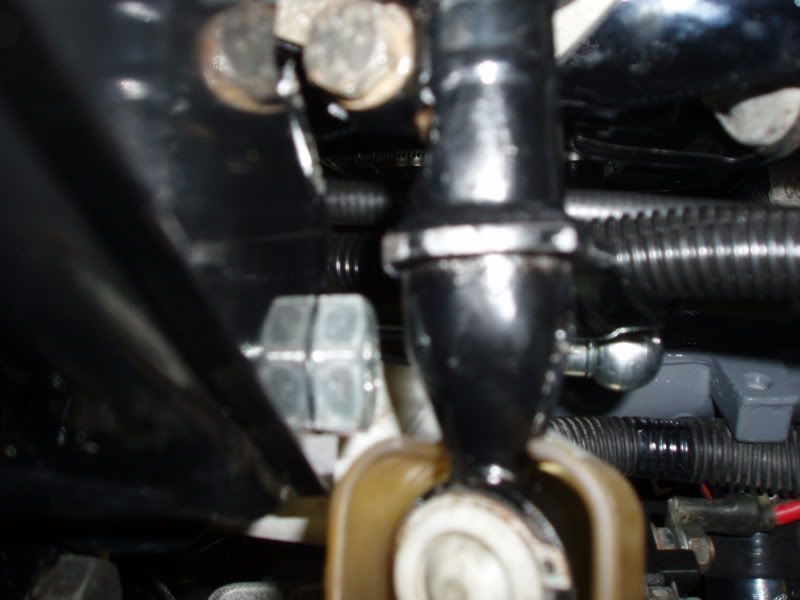
Then I fitted the linkage and found that it rubs on the top bolt of the rear gearbox mount which Nic had warned me about! The only reason I can think is that I'm using a 3 plate spacer kit and the M-tec kit is a single plate kit only on the inside. This means mine sticks out alot closer to the linkage hence the rubbing issue. Here is a picture which it un-modified
See how close the top bolt is....
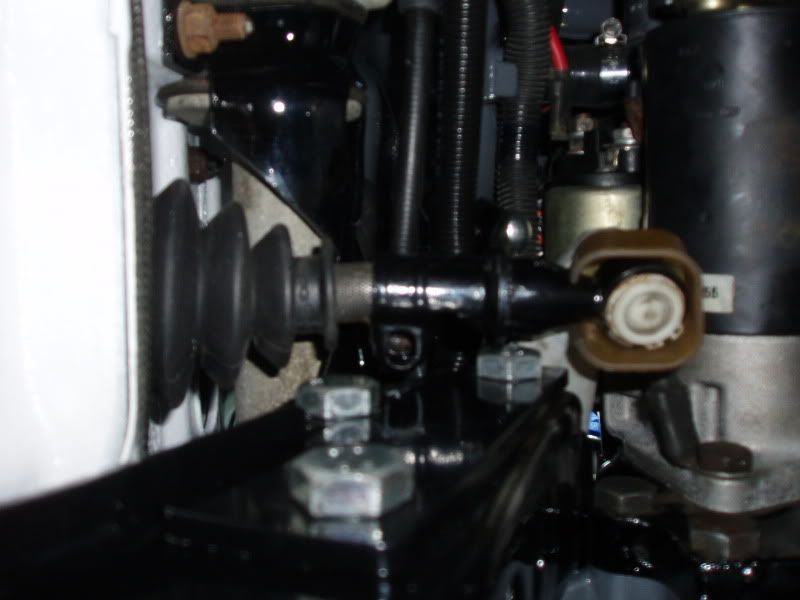
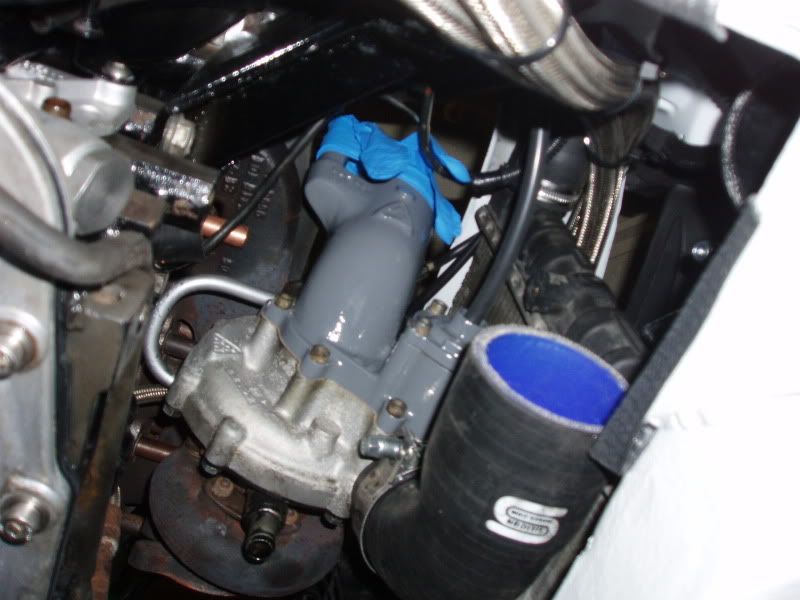
So i simply trimmed the linkage to give me clearance, Modified picture
Then using the holes inside the car and on the gearbox to put the linkage into the plane where 1st and 2nd are, I did the pinch bolt up and all seems to be fine got all 6 and reverse! alothough I haven't driven it to check......
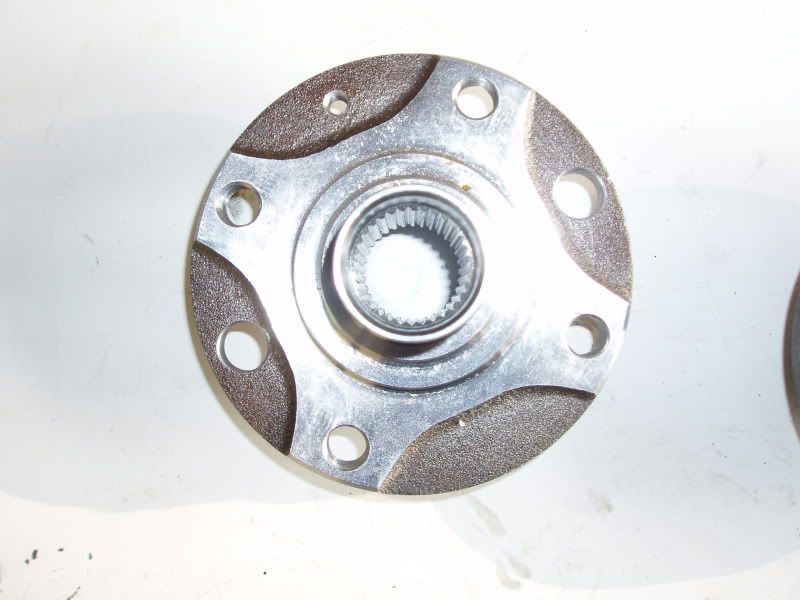
Next was onto sorting my front wheel bearings, I have always used the front carrier setup I bought done! Never thought nothing of it and bought some new bearings for it from vaux (66mm standard corsa) and found they just fall through.... After a bit of searching it turns out the person I bought them off did them proberly and use non machined hub flanges and machined the carrier instead enabling me to use larger bearings(68mm and less chance of cracking the hubs)
Heres conversion hubs or machine down big block hubs
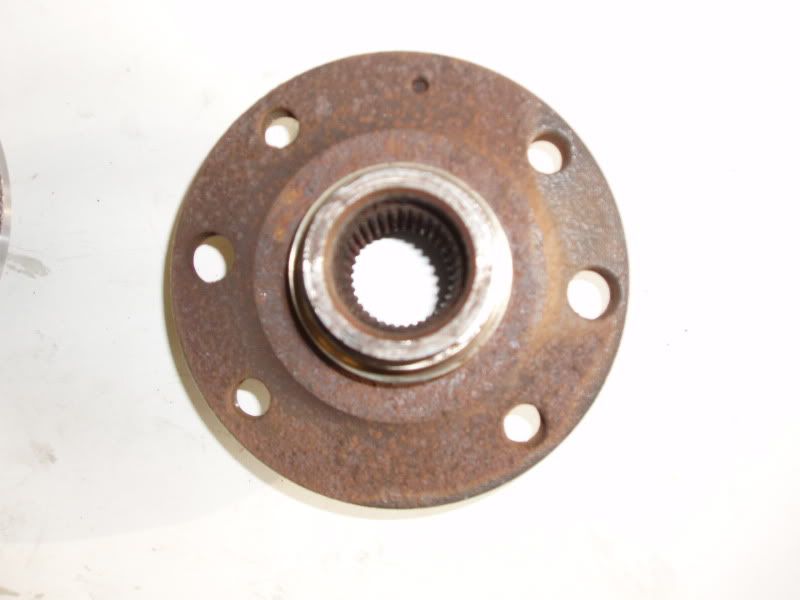
And non machined down, you can see why people snap/crack these! I know what I would rather use...
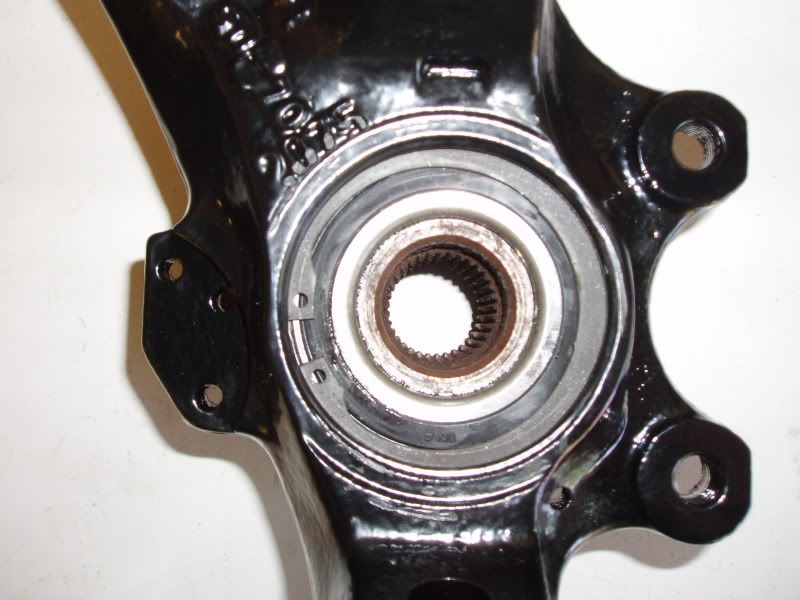
Next was finding bearings, the bearings I used are rear 1988 mk2 golf synchro which are OD 68mm, ID 39mm and W 37mm, they cost me a whole £14 each iirc
So i took them to work and pressed them in

Went to get a drink, only to find the cats have found new beds..... I wonder which one is driving?

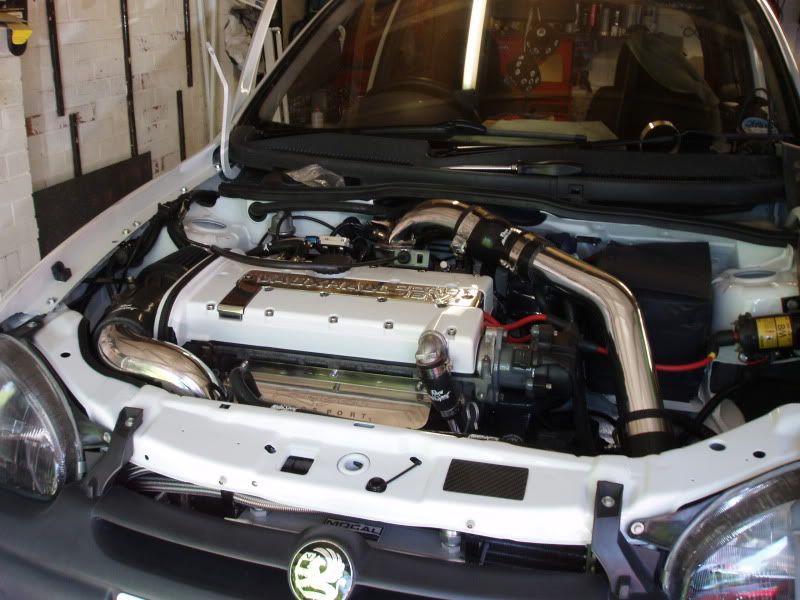
Couldn't help but take a nice reflection picture
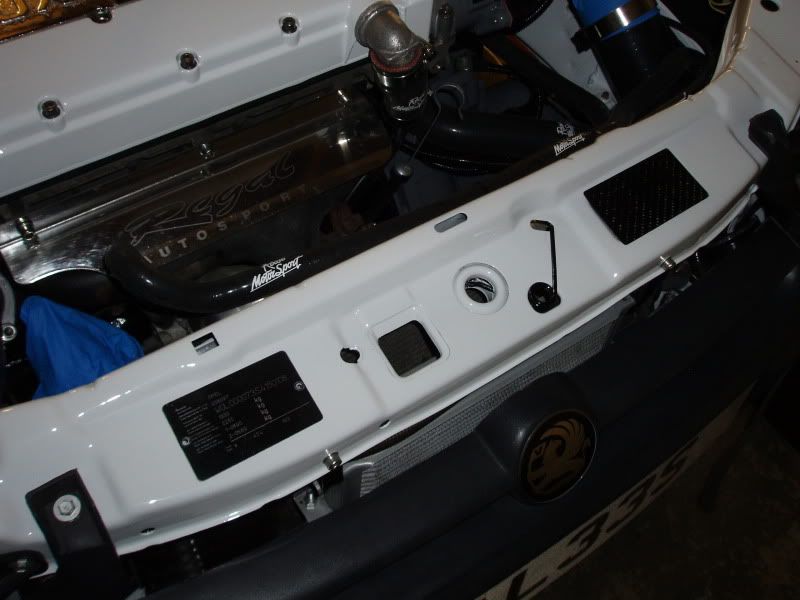
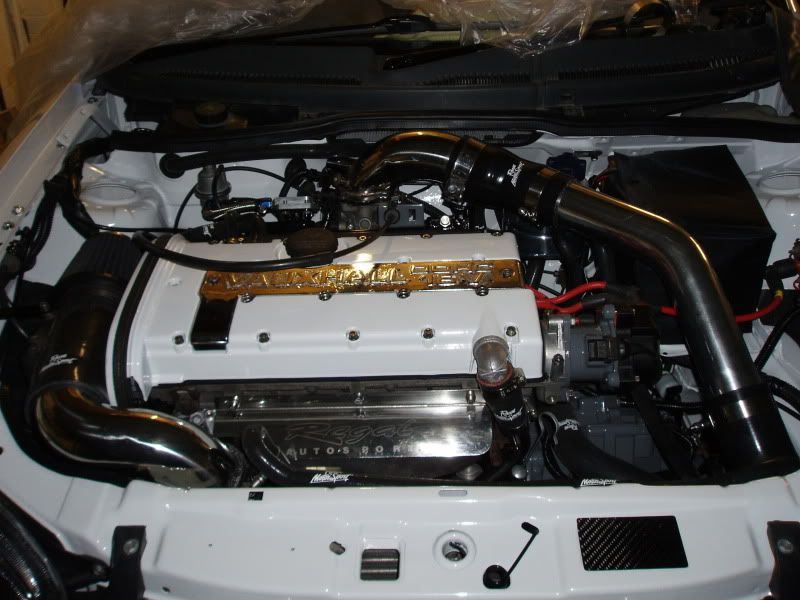
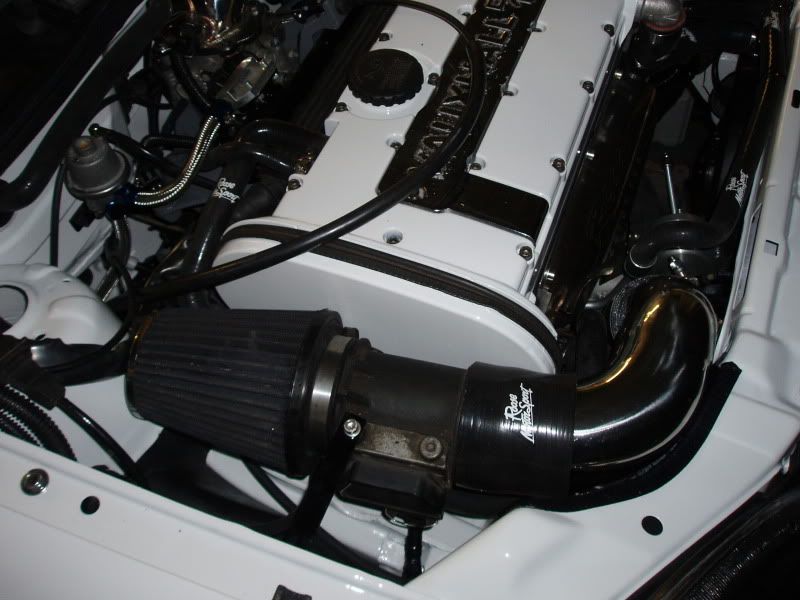
And how the engine bay currently looks
Finished the rear brakes
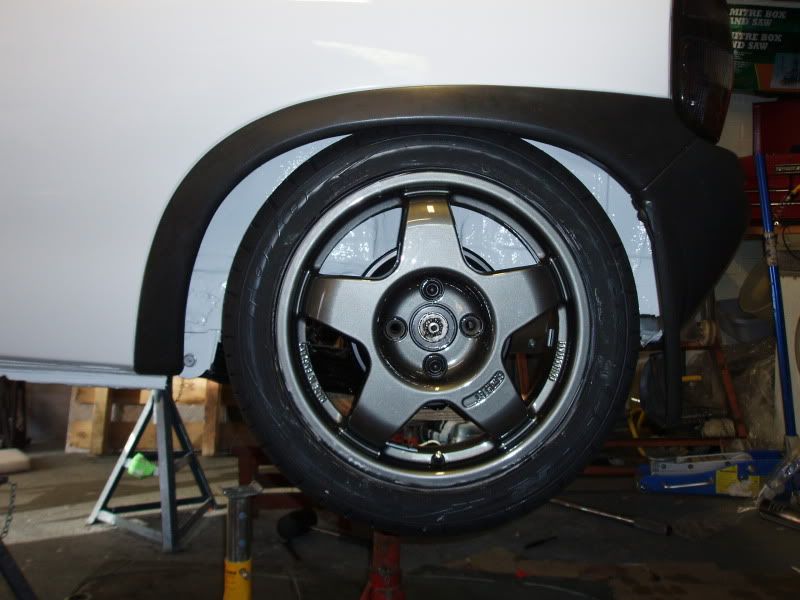
I couldn't wait to see the new wheels on so i fitted a rear (still no shocks)
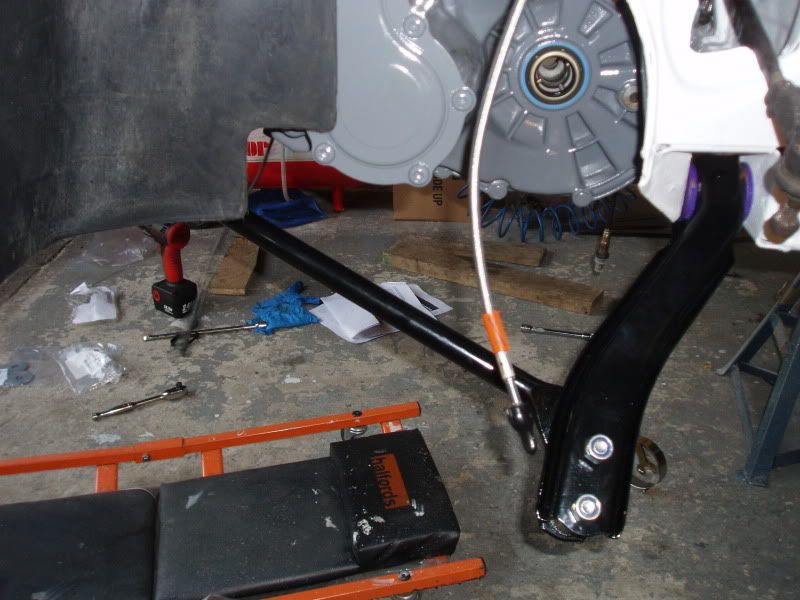
Fitted my tie bar lowering brackets and ball joint spacers (although my new ball joints are the wrong ones....  ) )

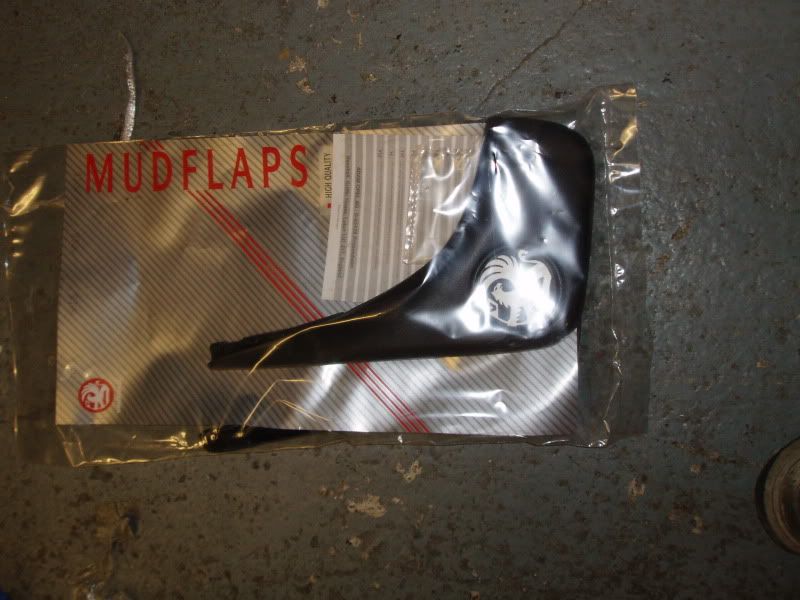
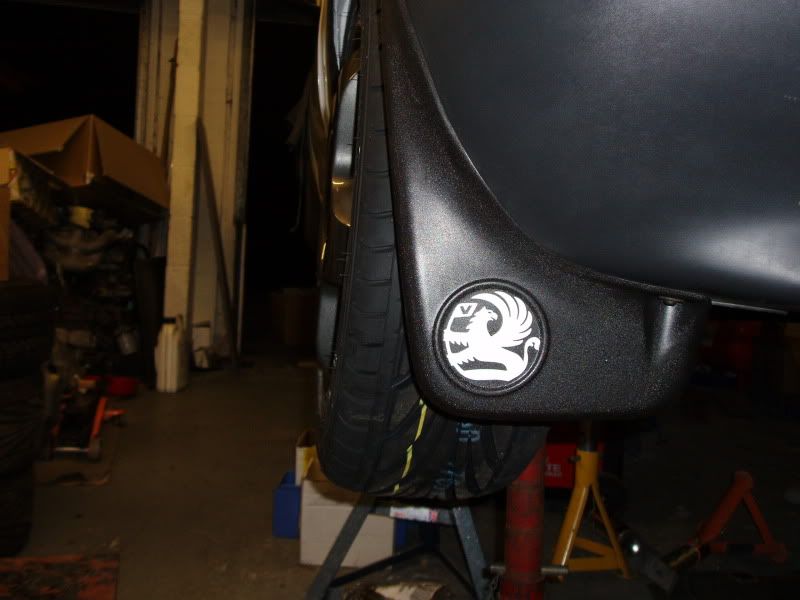
Fitted my new rear mudflaps
By this point the cats had left but a gain another friend.....
Thats all for now, Hopefully more tomorrow!
Dale
[Edited on 23-05-2010 by DRS]
|


