ed
Member
Registered: 10th Sep 03
User status: Offline
|
[What are you trying to achieve?]
What you want is a nice smooth finish, free from flakes, ripples and other rubbish. I would only recomend rattle cans to be used in small areas, like wing mirrors, or maybe something as big as a wheel. I wouldn't recomend you use rattle cans for repairs on larger pannels, as you have to paint a very large area of a car even for a small scrape. The colour match of rattle cans can't be guaranteed either!
[What should I use?]
You need the varous different grades of wet and dry paper described in this tutorial.
You need a sanding block. This is very useful for getting things smooth.
You need paint. Do not use Vinyl based paints. They are total ribbish and mut be avoided at all costs!
You need some panel prep or spirit wipe.
You should also wear gloves. A box of Bodygaurds disposable gloves costs about £5 and they are well worth buying!
A warm garage and some masking tape...
[Where do I start?]
Preperation! This is by far the most important part when doing any painting. It doesn't matter if you are painting a door handle, or the entire car; you must prep everything equally with as much time and effort as possible!
Plastic, metal and painted surfaces need different types of preperation materials. I will details these now.
Plastic
You need to put a good key on the plastic before any painting can be carried out. To do this you must sand the item with some P320 wet and dry paper. Use the paper dry at this stage. Also, take not of any flash material that may be on the plastic item from it being moulding - sand that off with a block and some more P320.
Now you have a key on the part you need to hange the part somehwere, or put it on a table where you want to paint it. Make sure you have some ventilation! You should now wipe the part down with some spirit wipe. This can be bought from Motor Factors. You can either buy a roll of tack rags, or you can buy the spirit wipe in a pot with a roll of wipes in it. Kinda like baby wipes. Spirit wipe removes wax and grease so don't touch the part again, even if you are wearing gloves!
Now it's time for painting. You need to put down about 2 coats of plastic primer. Make sure that the first coat is very light and you hold the rattle can about 20 - 30 cm away from what you are painting. Leave the paint to 'flash off*' for around 5 to 10 mins in between coats. The last coat can be a bit heavier. What you are trying to achieve here is a surface for the primer to sit on and stick to effectively so make sure that you don't put a lot of plastic primer on.
Now you are ready to apply the primer. This comes in a range of colours. Read the lable on your colour rattle can to tell you what colour to use as this is dependant on the opacity of the paint you are using. You need to lay on around 3 coats of primer and allow it to flash off for around 5 - 10 mins in between coats. It's tempting to pour on loads of primer, but all that will happen is the paint will end up being too thick which leads to the paint chipping very easily.
Bare Metal
Bare metal needs to have etch primer applied to it before you can do anything. Etch primer is acid based primer which burns into the metal (etches in) giving the primer something to stick to.
You need to make the metal very smooth, so sand off any rust or surface contamination, then sand with some P320 wet and dry, then some P400. Make sure the metal is very smooth and near mirror like:
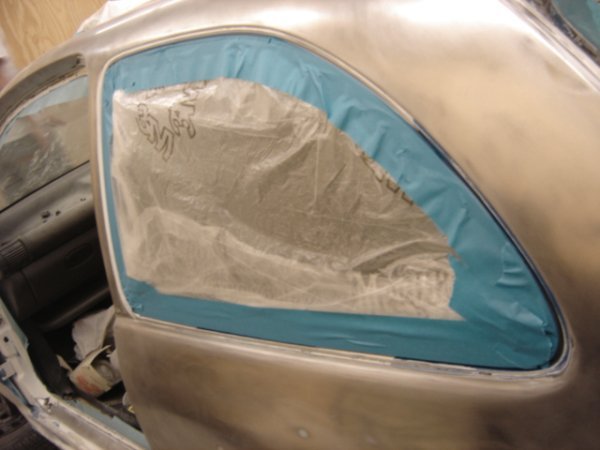
The above is what you are aiming for - very clean and very smooth. There is nothing but metal there!
You should now wipe the part down with some spirit wipe. This can be bought from Motor Factors. You can either buy a roll of tack rags, or you can buy the spirit wipe in a pot with a roll of wipes in it. Kinda like baby wipes. Spirit wipe removes wax and grease so don't touch the part again, even if you are wearing gloves!
Once the metal is smooth apply one light coat of etch primer onto it. If there is any filler try to avoid it, as the filler doesn't need to be etch primered. The etch primer will be flashed off and ready to have primer applied onto it after about 15-20 mins.
Now you are ready to apply the primer. This comes in a range of colours. Read the lable on your colour rattle can to tell you what colour to use as this is dependant on the opacity of the paint you are using. You need to lay on around 3 coats of primer and allow it to flash off for around 5 - 10 mins in between coats. It's tempting to pour on loads of primer, but all that will happen is the paint will end up being too thick which leads to the paint chipping very easily.
Pre Painted Surfaces
Pre painted surfaces with good paint on them only need to be keyed. Colour can be directly applied to a keyed surface. This also applies to pre primed new parts.
To key the surface you want to use some P400 wet and dry paper to sand out any imperfections in the paint and make a key for the colour to stick to. You can use Grey or Red Scotch pads on edges too.
Hints
This sounds like hard work, any thing to make it easier?
You can do some sanding on larger items with a DA electric sander, but other than that you have to use your hands!
What about if I am painting my arch trims or other textured parts?
Don't worry about the texture, you just need to primer as stated. The next section will cover how to get rid of the texture.
I have an item with a lot of filler on it, does it noeed differeint primer?
Yes, you should use high build, or filler primer which is like sprayable filler. It will cover and slight imperfections. Also, after you have primered the item leave it a week and check for sinkage in the filler or primer and skim a little bit more filler into any imperfections and re-primer.
[After Primer]
You need to leave the primer to dry for several hours before you can touch it. Your best bet is to leave it over night without touching it.
Once you are satisfied that the primer is dry you can flat it. What you need to do is get a bucket of water and some P800 wet and dry. You ware now going to wet sand your item smooth. If you run your fingers over the dry part you will feel the paint feels quite rough and dry. Try sanding a small area with a piece of wet P800. Now feel it. It should feel very smooth. You are trying to get this effect all over so take your time and sand carefully. If you burn through the primer you will need to finish off flatting the paint out and re-primer the spots you have burt through. Sand out any runs in the primer and be more careful next time!
[Colour]
You are now ready for colour! The colour is no good on it's own so make sure you have some clear laquer too!
You should wipe the item with some spirit wipe in the same way as you did before. Make sure you are using spirit wipe or panel prep. White spirit will wipe the dried paint off you applied earlier on, as will anything else like gun wash or paint thinners!
You want to apply about 2 coats of colour very ligtly. You must be able to see the primer still though the paint for the first two coats and you need to hold the can around 20 to 30 cm away from the item you are painitng. The next 2 to 3 coats need to be applied more heavily. Don't pour on lots and lots of coats or you will just make runs and the paint will be too thick. Allow the paint to flash off for around 15 to 20 mins.
You then need to laquer. First off, warm the tin of laquer. You want to apply the laquer in thin and even coats. You have to be very careful though as if you apply the laquer too thinly then it will become dry before it hits the part you are painting therefore leaving the item rough. If you apply the laquer too thick then it will run very easily. You are aming for 3 to 4 thin even coats of the stuff.
Now leave the item to dry for around 5 hours. I would recomend leaving it about 24 hours to be sure though. Take a look at your work and see what you have done. It should be nice and smooth, but if it isn't then don't worry! With some P1500 and P2000 wet and dry, sand out the runs and imperfections, and those things only! Do not sand anything but the runs and imperfections! You will need some compound now. You can either buy some G3 and some fast glaze or you can get away with T-Cut and some hard work. Buff the paint work with the compound to get rid of the sanding marks and any texture in the parts. This is quite hard work, so it might be worth getting somone to machine polish the item for you to get it nice!
There you are. Job done, you should have something that looks like this:
If you aren't happy you can always rub it all back and give it another go. You are likely to get it wrong your first try so have a practice first!
*Flashing off is the time in between coats where you leave the paint to dry. The paint should be 'touch dry'. If you need to test, make sure you touch a piece of masking or paper you have laid down, and not the item you are painting otherwise you will contaminate the paint or mark it!
[Edited on 05-09-2006 by Ian]
|


