Trotty
Member
Registered: 22nd Feb 01
Location: Bristol
User status: Offline
|
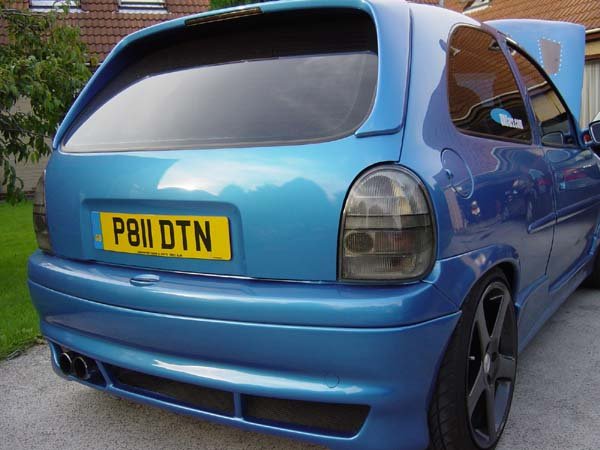
The lock and wiper have been removed, i did not smooth the number plate recess. (did not want to move the no. plate to reiger, or have to move the plate light) so please dont say smooth the plate recess coz am happy the way it is.
This is just a brief guide for people who want to have a go themselves like me. I dont like taking car to bodyshop, if u do the work urself it feels much better at the end of the day. And its not too hard if u take ur time......
Guide:
First of all, the wiper arm and boot lock need to be removed.
The wiper arm is held on by 1 bolt.
Remove this and pull the wiper arm off, then remove the boot lid card on the inside of the boot so you can see the motor.
Undo all the necessary fixings holding the motor and lock in place and remove them.
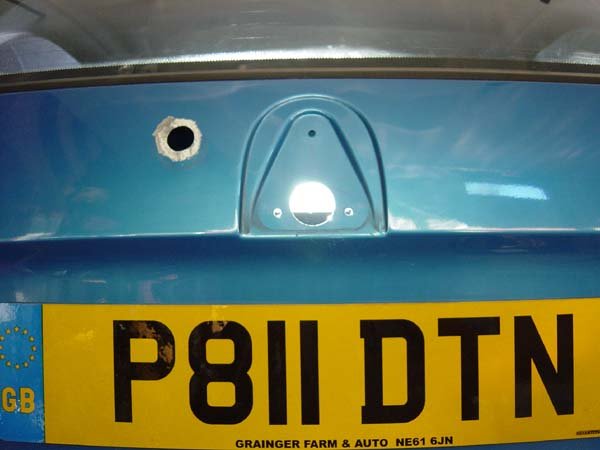
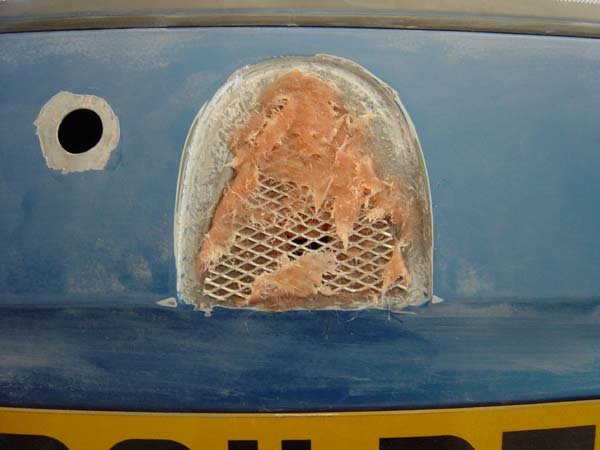
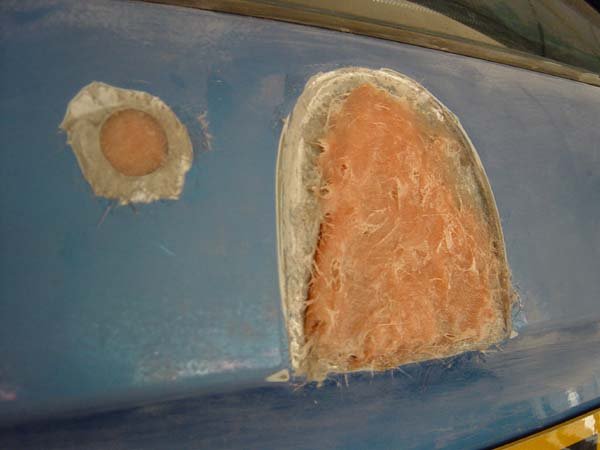
As you can see below there is 1 small hole to be filled and one small recess.
Remove any rust with a dremel, and then key into the metal surrounding recess and small hole as shown.
You should remove all of the paint in the surrounding area and score the surface.
This gives the fibreglass something to grip to.
You will now need some P40 fibreglass, which you can get from Halfords.
Cut a piece of metal mesh to size so it fits into the triangle recess in the centre.
This takes up some of the depth and strengthens the fibreglass. (You can weld a small metal plate into the triangle, but its not necessary)
Apply your P40 / hardener mix to the mesh and surrounding area in generous amounts so it contacts all of the exposed metal.
Add some from the back of the boot lid aswell for strength.
Build p40 as shown and smooth it out right up to the edge of the exposed metal.
Dont build outwards too much or it will mean lots of sanding work later on.
Cut out a small square bit of mesh bigger than the small wiper arm hole and stick this on the other side of the hole (inside the boot lid) with P40. Completely cover it in P40 to ensure it holds.
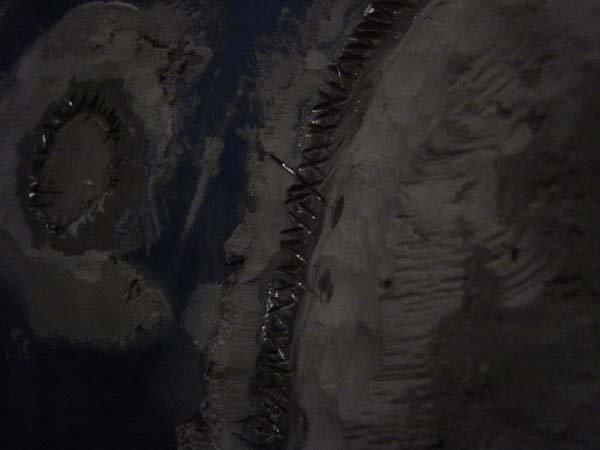
Fill in the small circular recess with P40 as shown and let it harden.

Cut into the metal as shown to make a zig-zag pattern around the recess Do this for the larger one aswell, dont be scared to really cut into the bodywork.
If you leave it smooth the p40 will pop out as a plug.
Score the surface of the P40 aswell so the filler you add next is not griping to a smooth surface.
!This is the most important section, make sure u have rough edges, very important!
Add P38 bodyfiller (Halfords) in reasonably large amounts, pressing it into the boot firmly as it begins to thicken to remove any air bubbles.
Leave to harden
Sanding will take some time so you may want to use an orbital sander / B&D Mouse etc to remove the excess.
Use this until you get to about 2mm of the finishing point.
Now you will need a rubber sanding block (halfords)
You should not use your hand for the final stages or the finish will not be flat.
Use a relatively low grit (400) until the filler is nearly flush with the metal and the paint starts to rub.
Then use a high grit wet and dry (1200)
Rub sideways across the boot.
The edge of the number plate recess is more difficult as it need to be blended in. Rub upwards from the number plate recess to get the edge and then rub sideways along the edge every so often to round it off slightly.
Sight along the edge from one side of the boot and you will see any imperfections in the line.

The whole boot should be rubbed down to remove the laquered finish on the paint and to roughen it up.
Yellow filler primer will fill any small airholes in the filler and most importantly will reveal any imperfection.
Dont be surprised if there are quite a few hollows and bumps.
If not - well done!
Re-sand and re apply primer until your happy with the finish.

Finished result.
Take the car to be sprayed professionally or get the compressor out  (for a later guide) (for a later guide)
The cost was p38 / p40 from halfords, the paint / laquer and lots of elbow grease.
Hope this of some help /interest to people.
Originally Submitted by CRB 553
[Edited on 19-12-2004 by Ian]
|


