Rick Draper
Member
Registered: 10th Feb 01
Location: Cheshire
User status: Offline
|
Now that is a proper cage. Looking great.
|
Bendy
Member
Registered: 7th Jun 06
Location: Yeovil, somewhere down south!
User status: Offline
|
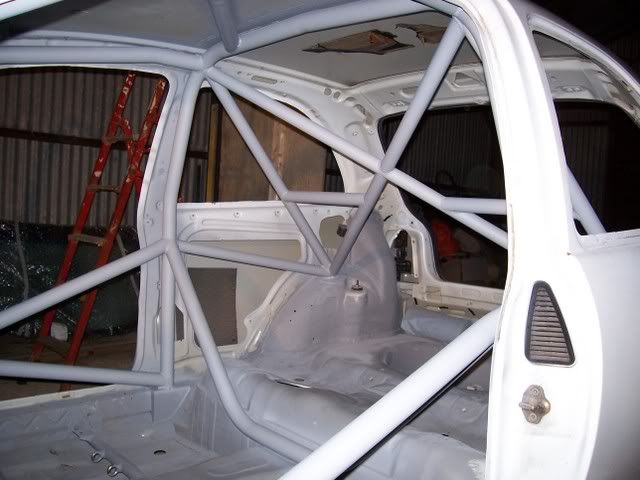
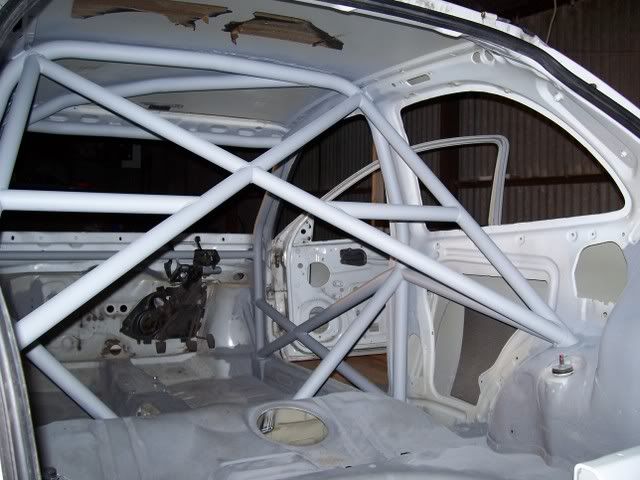
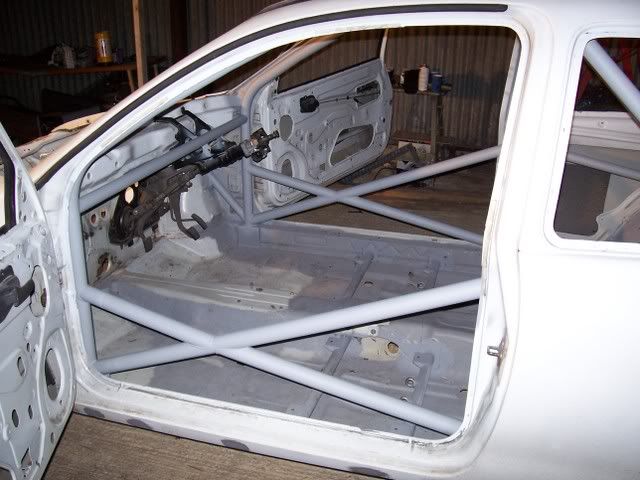
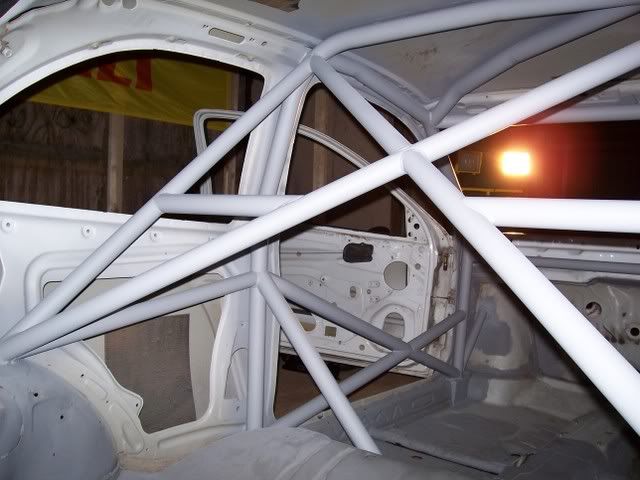
22nd Feb:
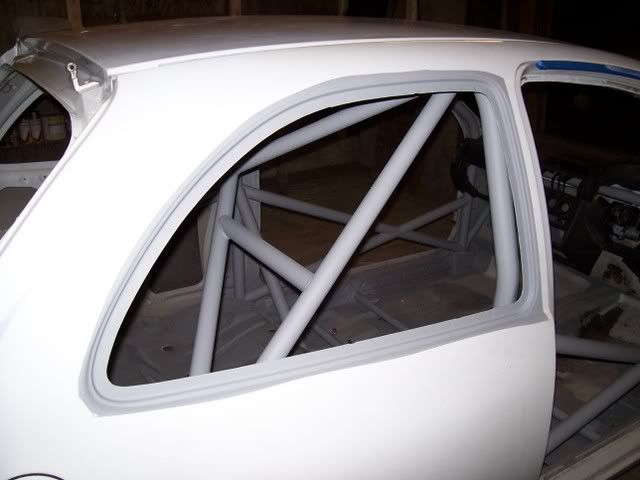
Cage is now covered in etch primer, 2 or 3 coats all over. My god, was it a pain to get the paint into some places. 
The only bit left to do now is the triangulation through to the front struts, which I have a funny feeling will be even harder!
But, he managed to weld in there so I should be able to paint in there!
Heres the pics:
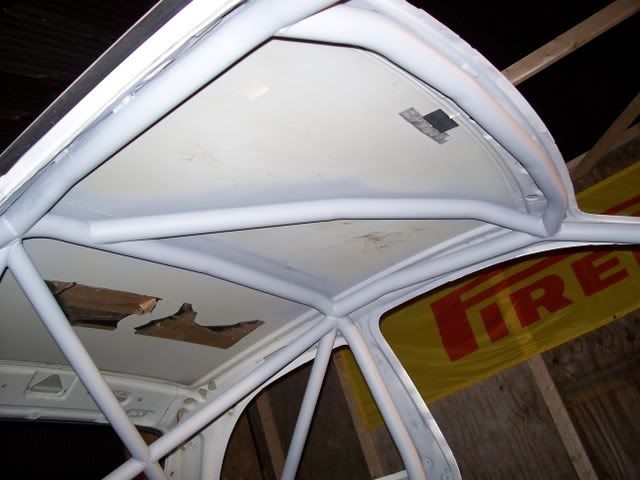
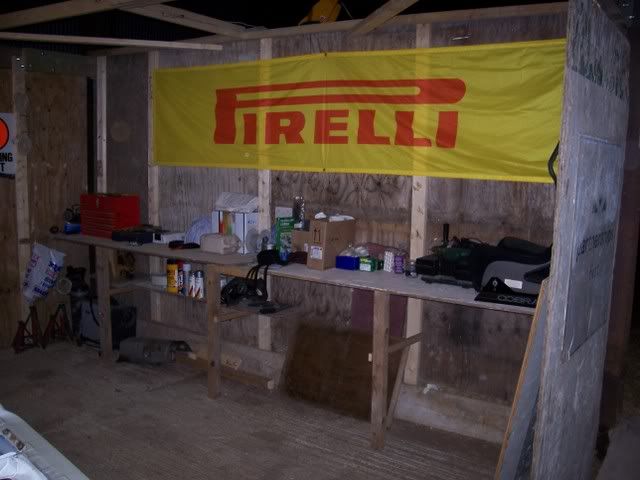
And most importantly, got my Pirelli banner back up!!

Ben
|
SAL
Premium Member
 Registered: 19th Dec 05
Location: Radlett, Hertfordshire
User status: Offline
|
this is a quility thread to read mate  i wish my mates done stuff like this i wish my mates done stuff like this  one word SWEET one word SWEET 
[Edited on 22-02-2007 by stavs]
|
Bendy
Member
Registered: 7th Jun 06
Location: Yeovil, somewhere down south!
User status: Offline
|
26th Feb:
Managed to spend the whole day working on the car today, much to my girlfriends disappointment!!
Got all this done:
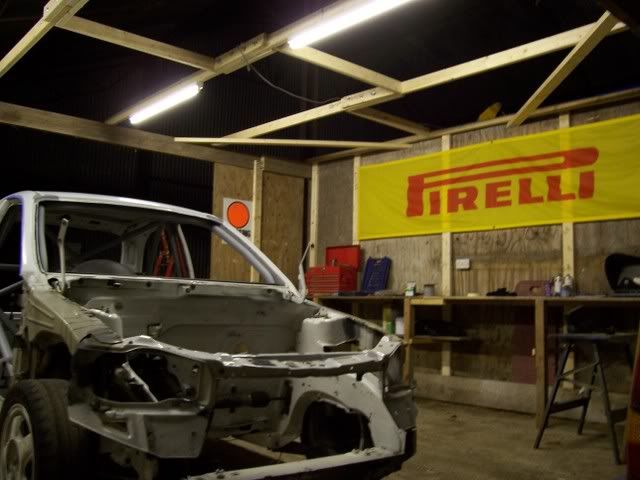
Start of the day, strip the wings and doors off:
Dad seam welding the drivers side rear end:
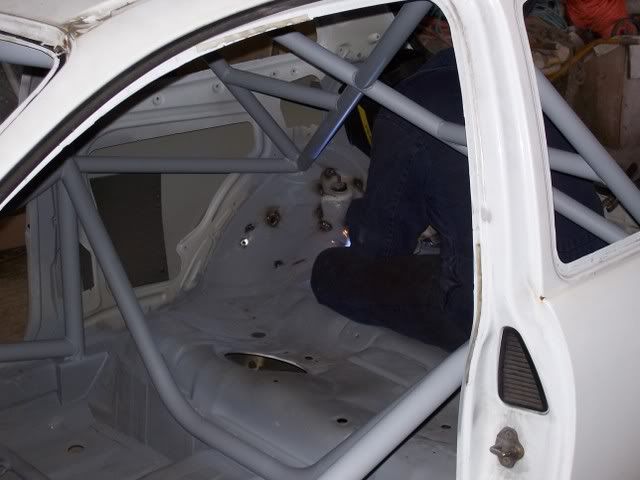
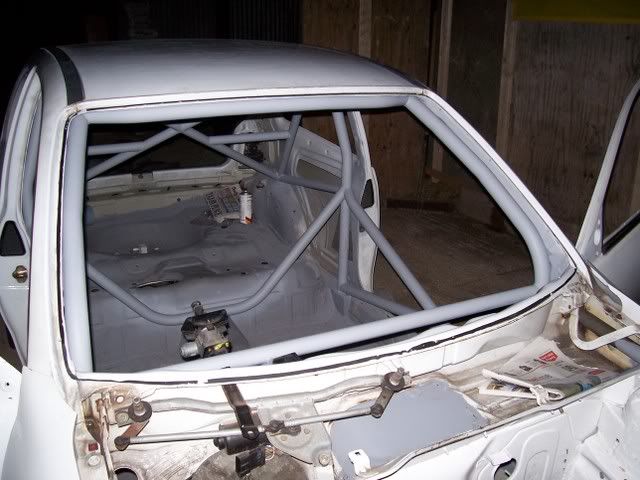
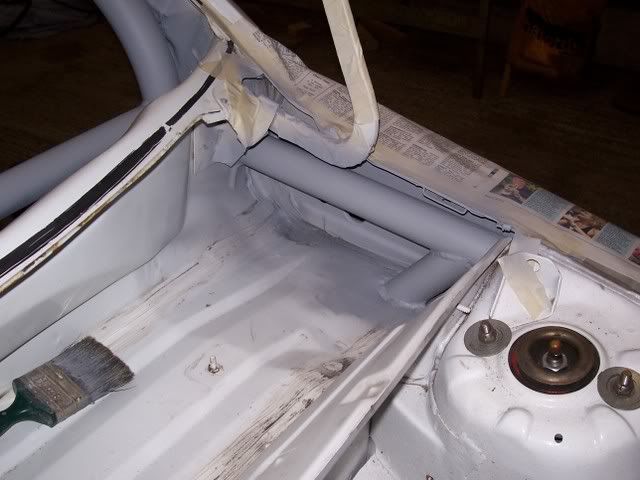
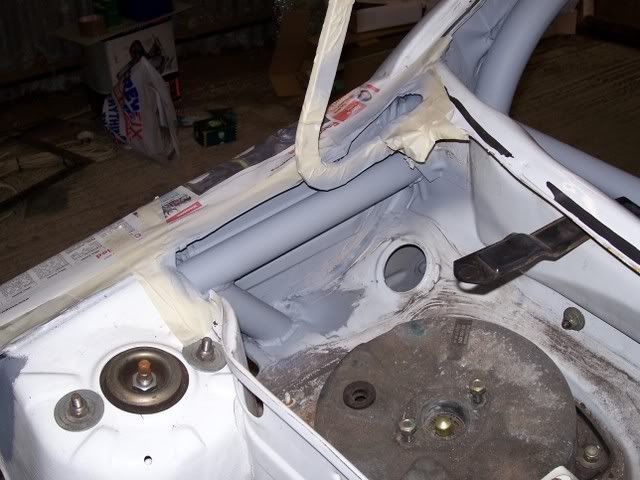
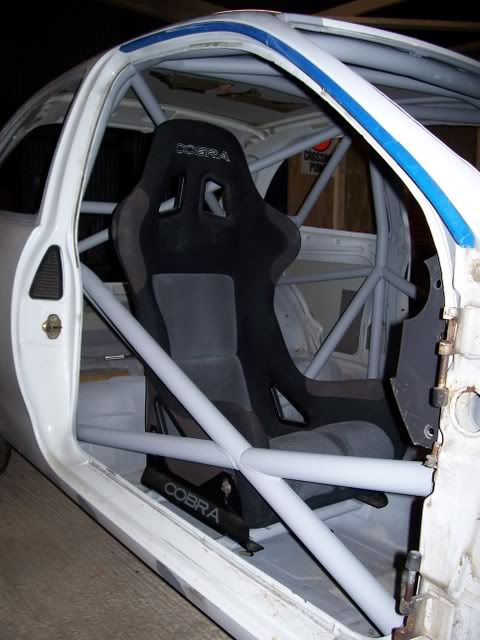
Rollcage in the scuttle panel now sprayed with etch primer:
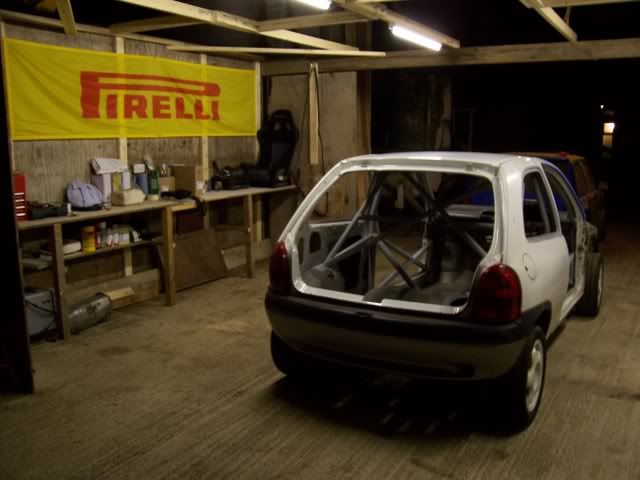
And the rear now sprayed after the welding:
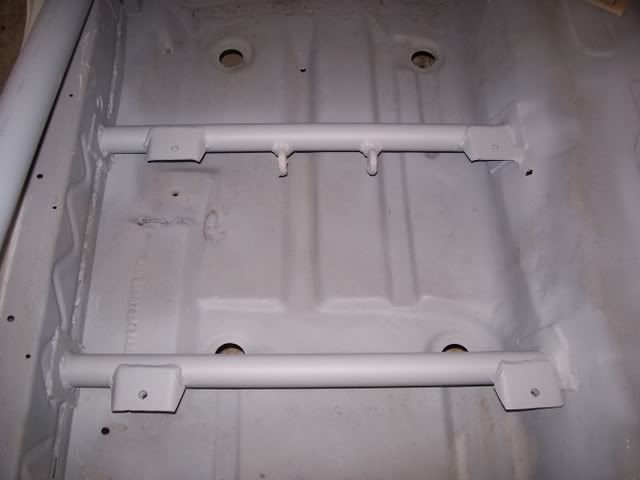
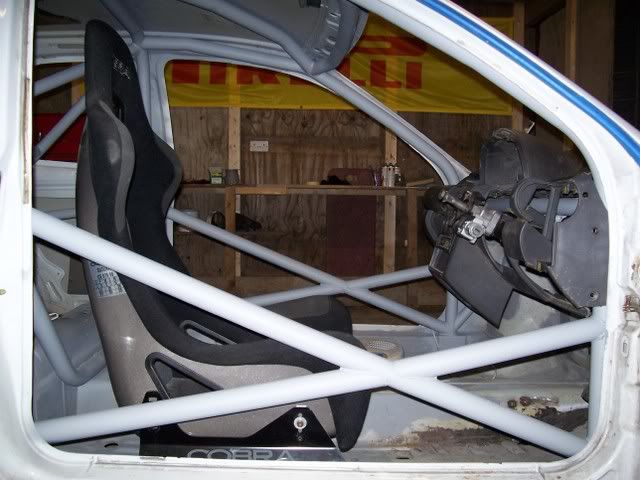
And the seat rails:
And get around the screen rubbed down and primed where some rust started to come through:

Good old etch primer (quite a few cans used now!):

After quite a few attempts of trial fitting the dashboard, then cutting more off to get it to fit around the cage, it finally went in:
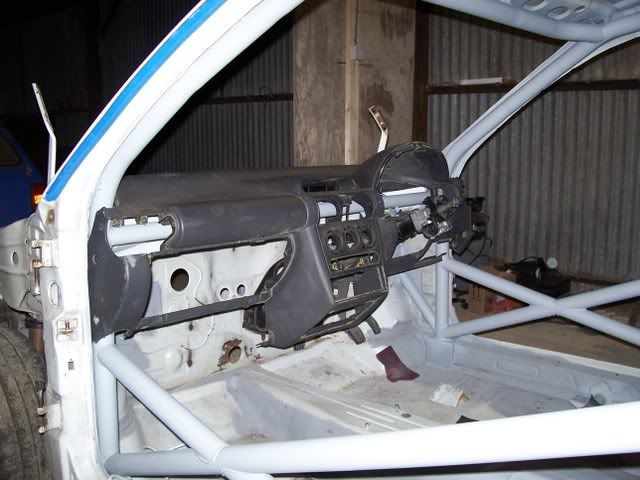
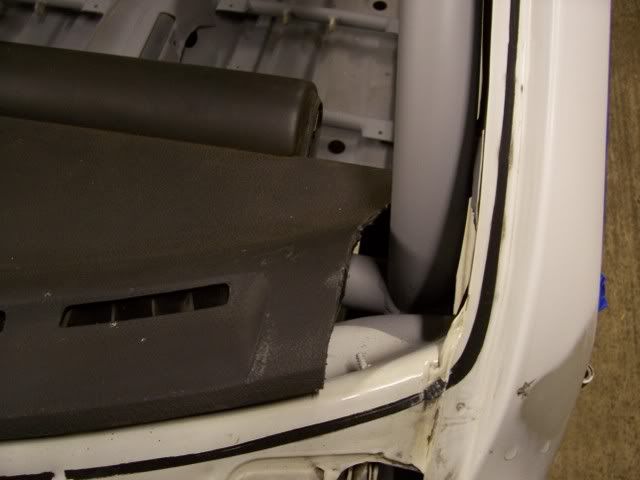

Hmmm, might have to customise my own dials and gauges to fit in there now!!
Primed around the rear window as i butchered it a bit taking the window out!
Trial fitted the drivers seat:
And while I did all this, Dad built me a workbench!!
Hopefully get some paint on her fairly soon, just glad to see its finally getting somewhere now!!
Ben
[Edited on 26-02-2007 by Bendy]
|
k e l
Member
Registered: 10th Dec 06
Location: Sheffield
User status: Offline
|
that cage is sweet. looks fantastic wanting one myself but thats the daddy one
|
BeArDy
Member
Registered: 7th Aug 00
Location: Manchester
User status: Offline
|
I hate painting roll cages 
have to clean ever bar off all suface rust etc, takes forever.
i scotched all mine, covered in a Zinc Based Etch primer to the Zinc will work with any left off rust left so it never comes back......
NIGHTMARE
|
Bendy
Member
Registered: 7th Jun 06
Location: Yeovil, somewhere down south!
User status: Offline
|
quote:
Originally posted by BeArDy
i scotched all mine, covered in a Zinc Based Etch primer to the Zinc will work with any left off rust left so it never comes back......
NIGHTMARE
Pretty much what I spent most of last week doing really!! 
Ben
|
Matt H
Member
Registered: 11th Sep 01
Location: South Yorkshire
User status: Offline
|
Ben, the rollcage. How much did you say it was?
I've been pricing a few up over the past few weeks, that one looks very special though
Also, how are you going to mount your fibreglass boot? I know JR was saying that you have to have external hinges & drill into the roof?
Cheers
|
loo_goblin
Member
Registered: 14th Jul 04
Location: Horsham, West Sussex
User status: Offline
|
quote:
Originally posted by BeArDy
I hate painting roll cages
have to clean ever bar off all suface rust etc, takes forever.
i scotched all mine, covered in a Zinc Based Etch primer to the Zinc will work with any left off rust left so it never comes back......
NIGHTMARE
is that the Wurth etch primer, really good stuff that, used it on sum fabrication i did at work
|
jr
Member
Registered: 20th May 02
Location: Kent
User status: Offline
|
quote:
Originally posted by Matt H
Ben, the rollcage. How much did you say it was?
I've been pricing a few up over the past few weeks, that one looks very special though
Also, how are you going to mount your fibreglass boot? I know JR was saying that you have to have external hinges & drill into the roof?
Cheers
no i didnt 
you use the mtal inges off your tailgate and drill the spot welds out, then bolt through them onto the fibreglass tailgate into the captive nuts
its keeping it shut i was talking about 
|
SAL
Premium Member
Registered: 19th Dec 05
Location: Radlett, Hertfordshire
User status: Offline
|
could this be the most solid corsa ever ? great work
|
Haynesy
Member
Registered: 30th Aug 06
Location: middle of nowhere, Dorset
User status: Offline
|
car is coming along nicely there! loving the workshop 2, all u need now is a pit or some ramps 4 working underneath, lol!
|
Bendy
Member
Registered: 7th Jun 06
Location: Yeovil, somewhere down south!
User status: Offline
|
It'll be up on axle stands before long!!
Ben
|
Bendy
Member
Registered: 7th Jun 06
Location: Yeovil, somewhere down south!
User status: Offline
|
Wow, its been a while since I put an update on here!
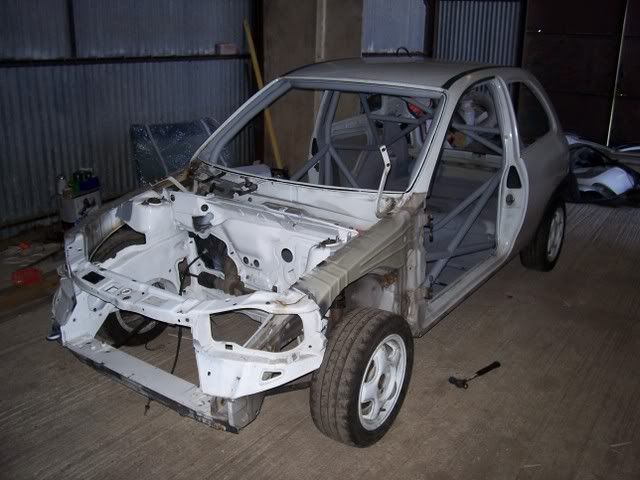
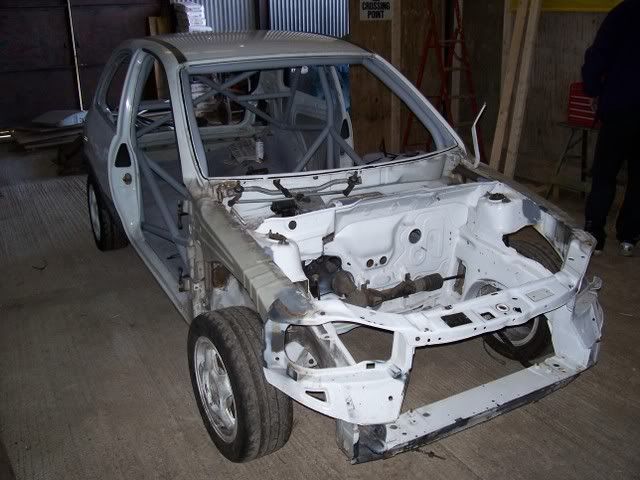
Haven't done much lately, but this is what I have done:
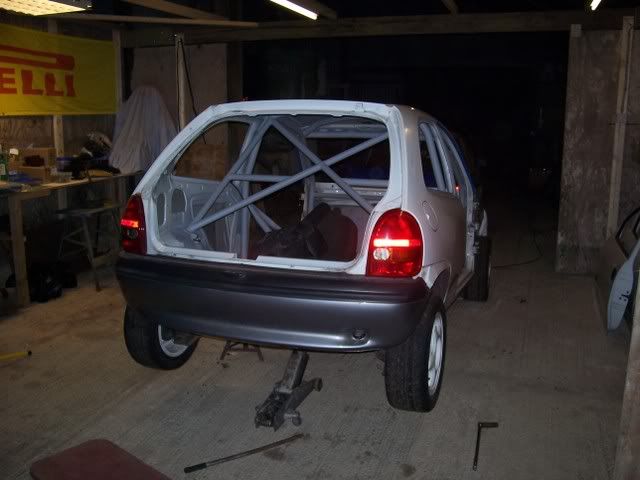
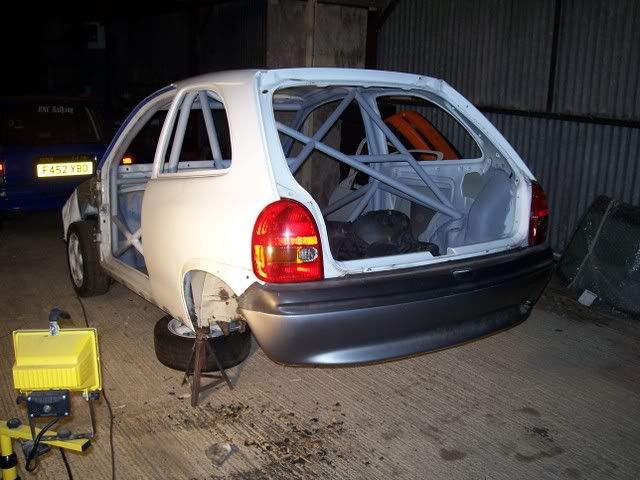
This is the colour the car will be (just test sprayed the bumper to see the colour):

And the bumper on the car (looks rather odd without wings etc.):

Finished cleaning the drivers footwell, and etch primed all that needed priming:
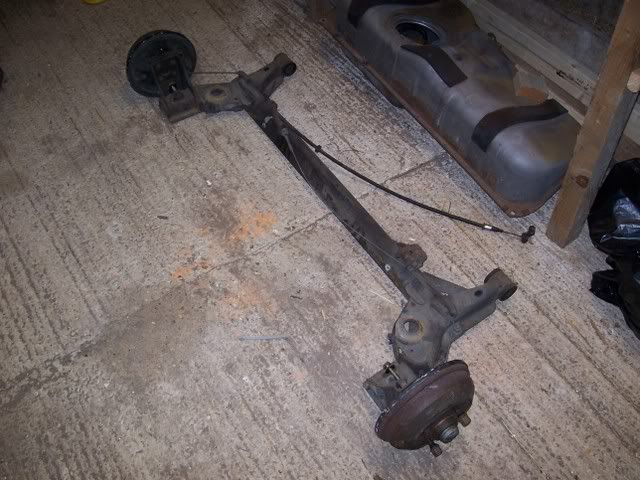
And tonight, I got the back end up:
Removed the suspension:
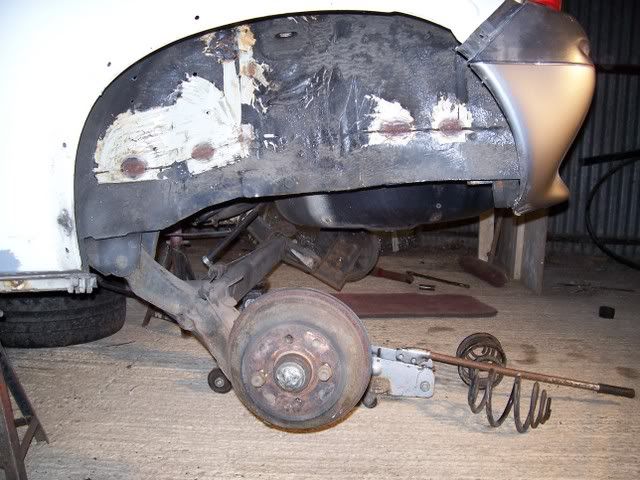
Removed the rear Beam:
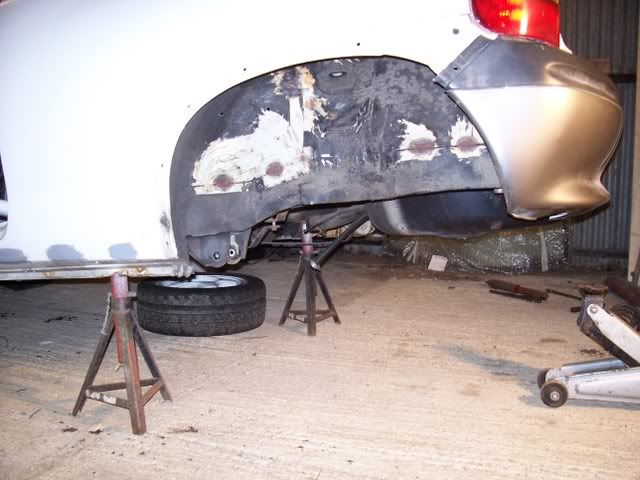
Then had the really, really tedious job of taking the arch from this:
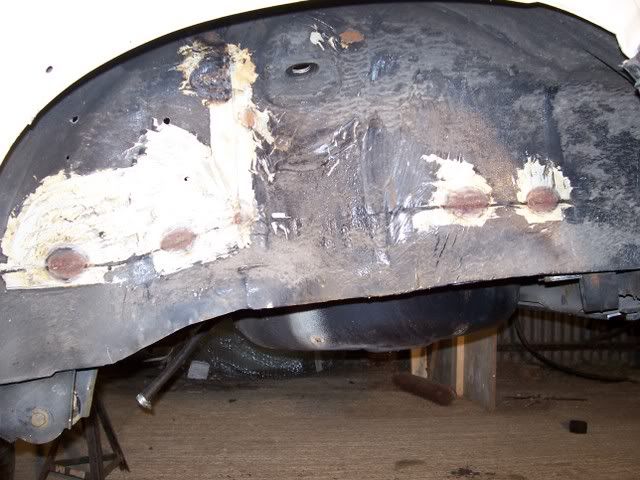
To this:
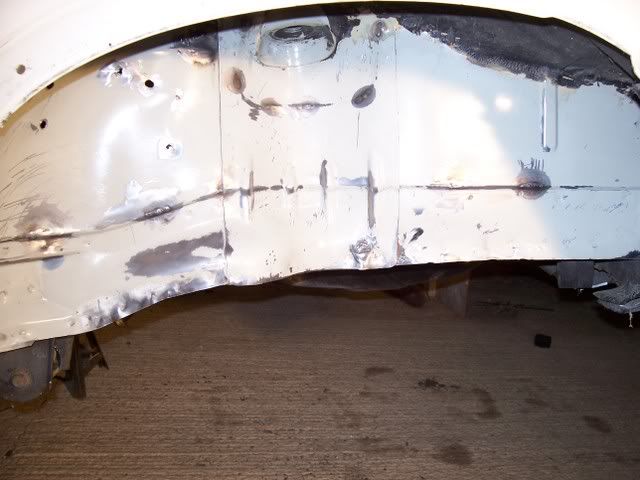
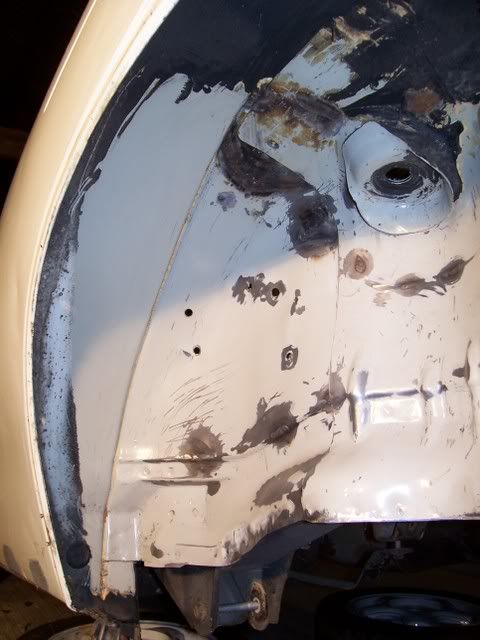
It took me just over 2 hours of scraping and grinding just to remove what I have so far removed, and as you can see, I haven't finished yet!!
Work will resume on Monday with some more updates!
Ben
|
Matt H
Member
Registered: 11th Sep 01
Location: South Yorkshire
User status: Offline
|
Am I missing something or have you welded up the hole where the gear stick goes? Flicked through the thread & the hole seems to just disappear
|
jr
Member
Registered: 20th May 02
Location: Kent
User status: Offline
|
no, that looks like the skin that goes round the yellow park of the gear linkage has been removed matt
|
Matt H
Member
Registered: 11th Sep 01
Location: South Yorkshire
User status: Offline
|
Any reason why its been removed?
I can't imagine that its purely cosmetic considering what its going to be used for!
|
Matt H
Member
Registered: 11th Sep 01
Location: South Yorkshire
User status: Offline
|
In comparison to - http://www.corsasport.co.uk/carimages/5047/100_1029.jpg
(Excuse the mess )
|
broster
Premium Member
 Registered: 6th Dec 02
Location: Drives: E39
User status: Offline
|
weight saving id say matt, unless he spend millions on a quaife gear lever kit
|
Matt H
Member
Registered: 11th Sep 01
Location: South Yorkshire
User status: Offline
|
It looks so much better for having it removed. Plus the added benefit of easy access to the linkage
|
broster
Premium Member
Registered: 6th Dec 02
Location: Drives: E39
User status: Offline
|
i thought of doing it to mine, it dos tidy the interior up
|
Robin
Premium Member
 Registered: 7th Jan 04
Location: Northants Drives: Clio 182 Cup
User status: Offline
|
do it.
|
broster
Premium Member
Registered: 6th Dec 02
Location: Drives: E39
User status: Offline
|
thats tomorrows plan then!
|
Bendy
Member
Registered: 7th Jun 06
Location: Yeovil, somewhere down south!
User status: Offline
|
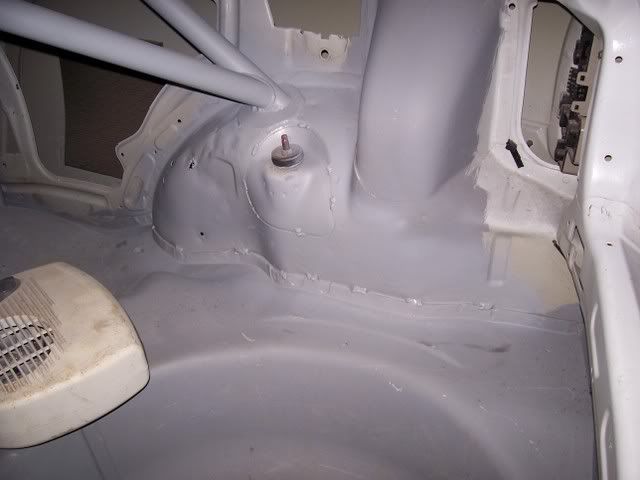
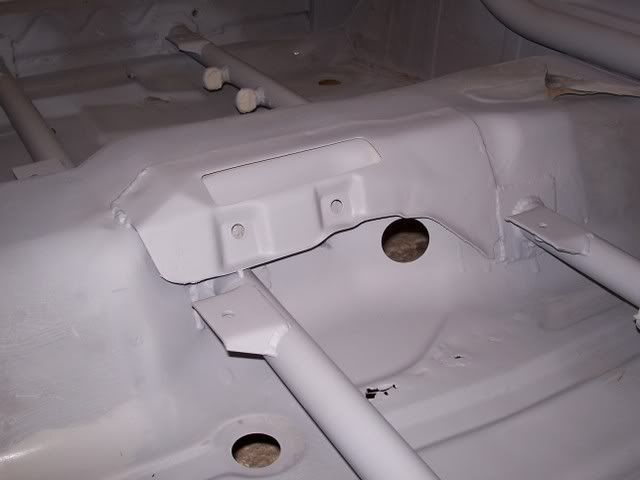
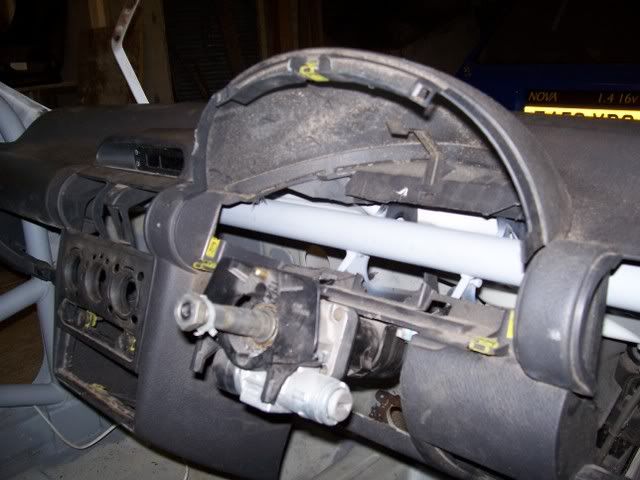
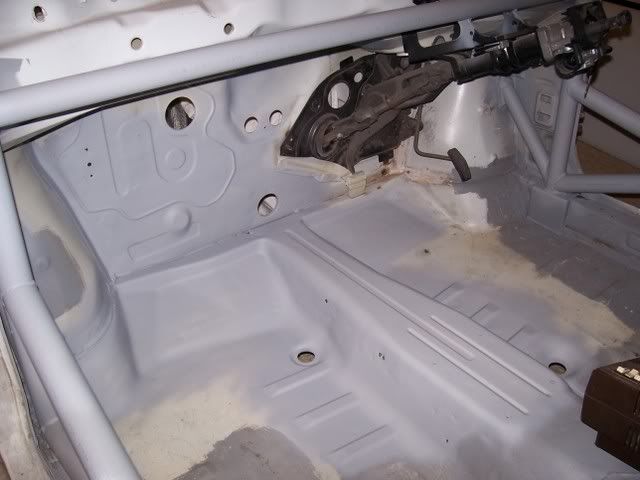
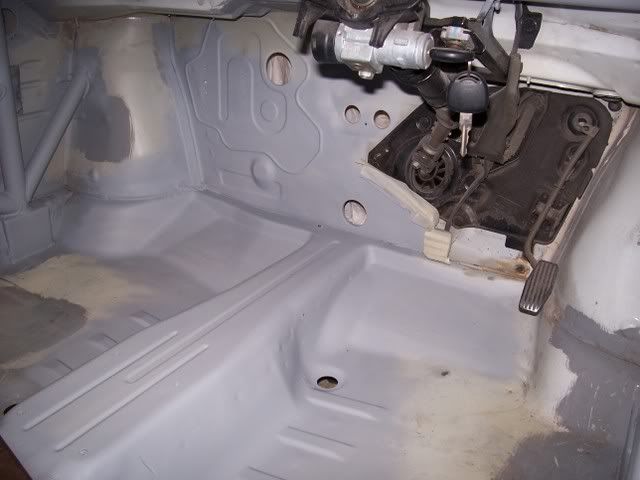
I don't know what you're on about when you're asking where the hole has gone for the gearstick, as it is blatantly still there! All i've done is removed the cover that goes over the gear linkage which acts as a carpet support if it was having carpet in. All explained below!!
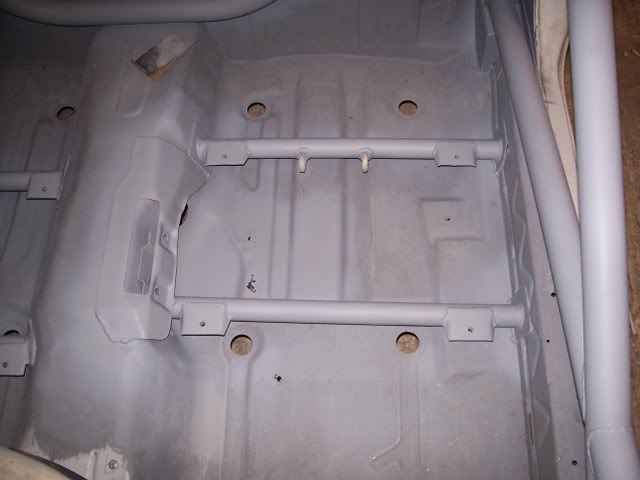
All I have removed is the section of metal that covers the gear linkage (which is marked in red) and also all the metalwork that the seats would usually attach to!!
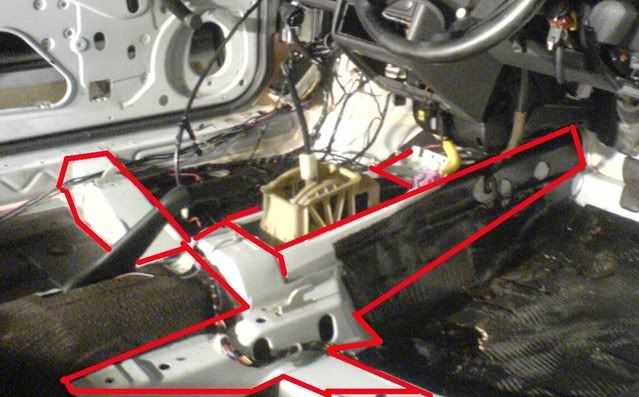
This then leaves the following picture with the hole for the gear linkage to go through. Removing that section of metal is just a bit of additional weight saved and, in a rally car, really isn't needed as its just a carpet support and holds the airbag ECU!
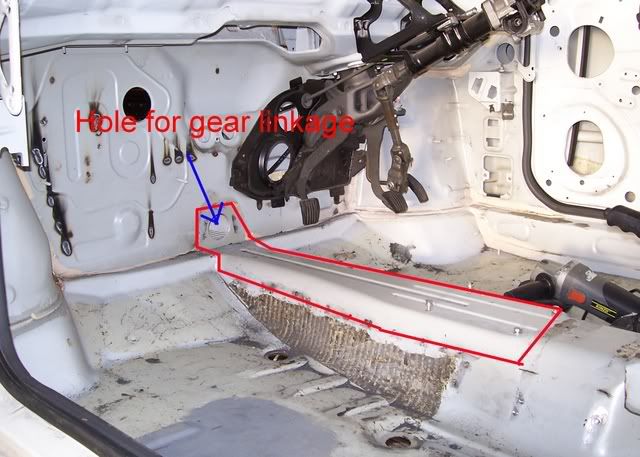
Hope all is clear now!!
Ben
|
Matt H
Member
Registered: 11th Sep 01
Location: South Yorkshire
User status: Offline
|
Thats brilliant
So remove the seat mounts & weld in ones for the bucket seat. Seems like a good idea to me
|


